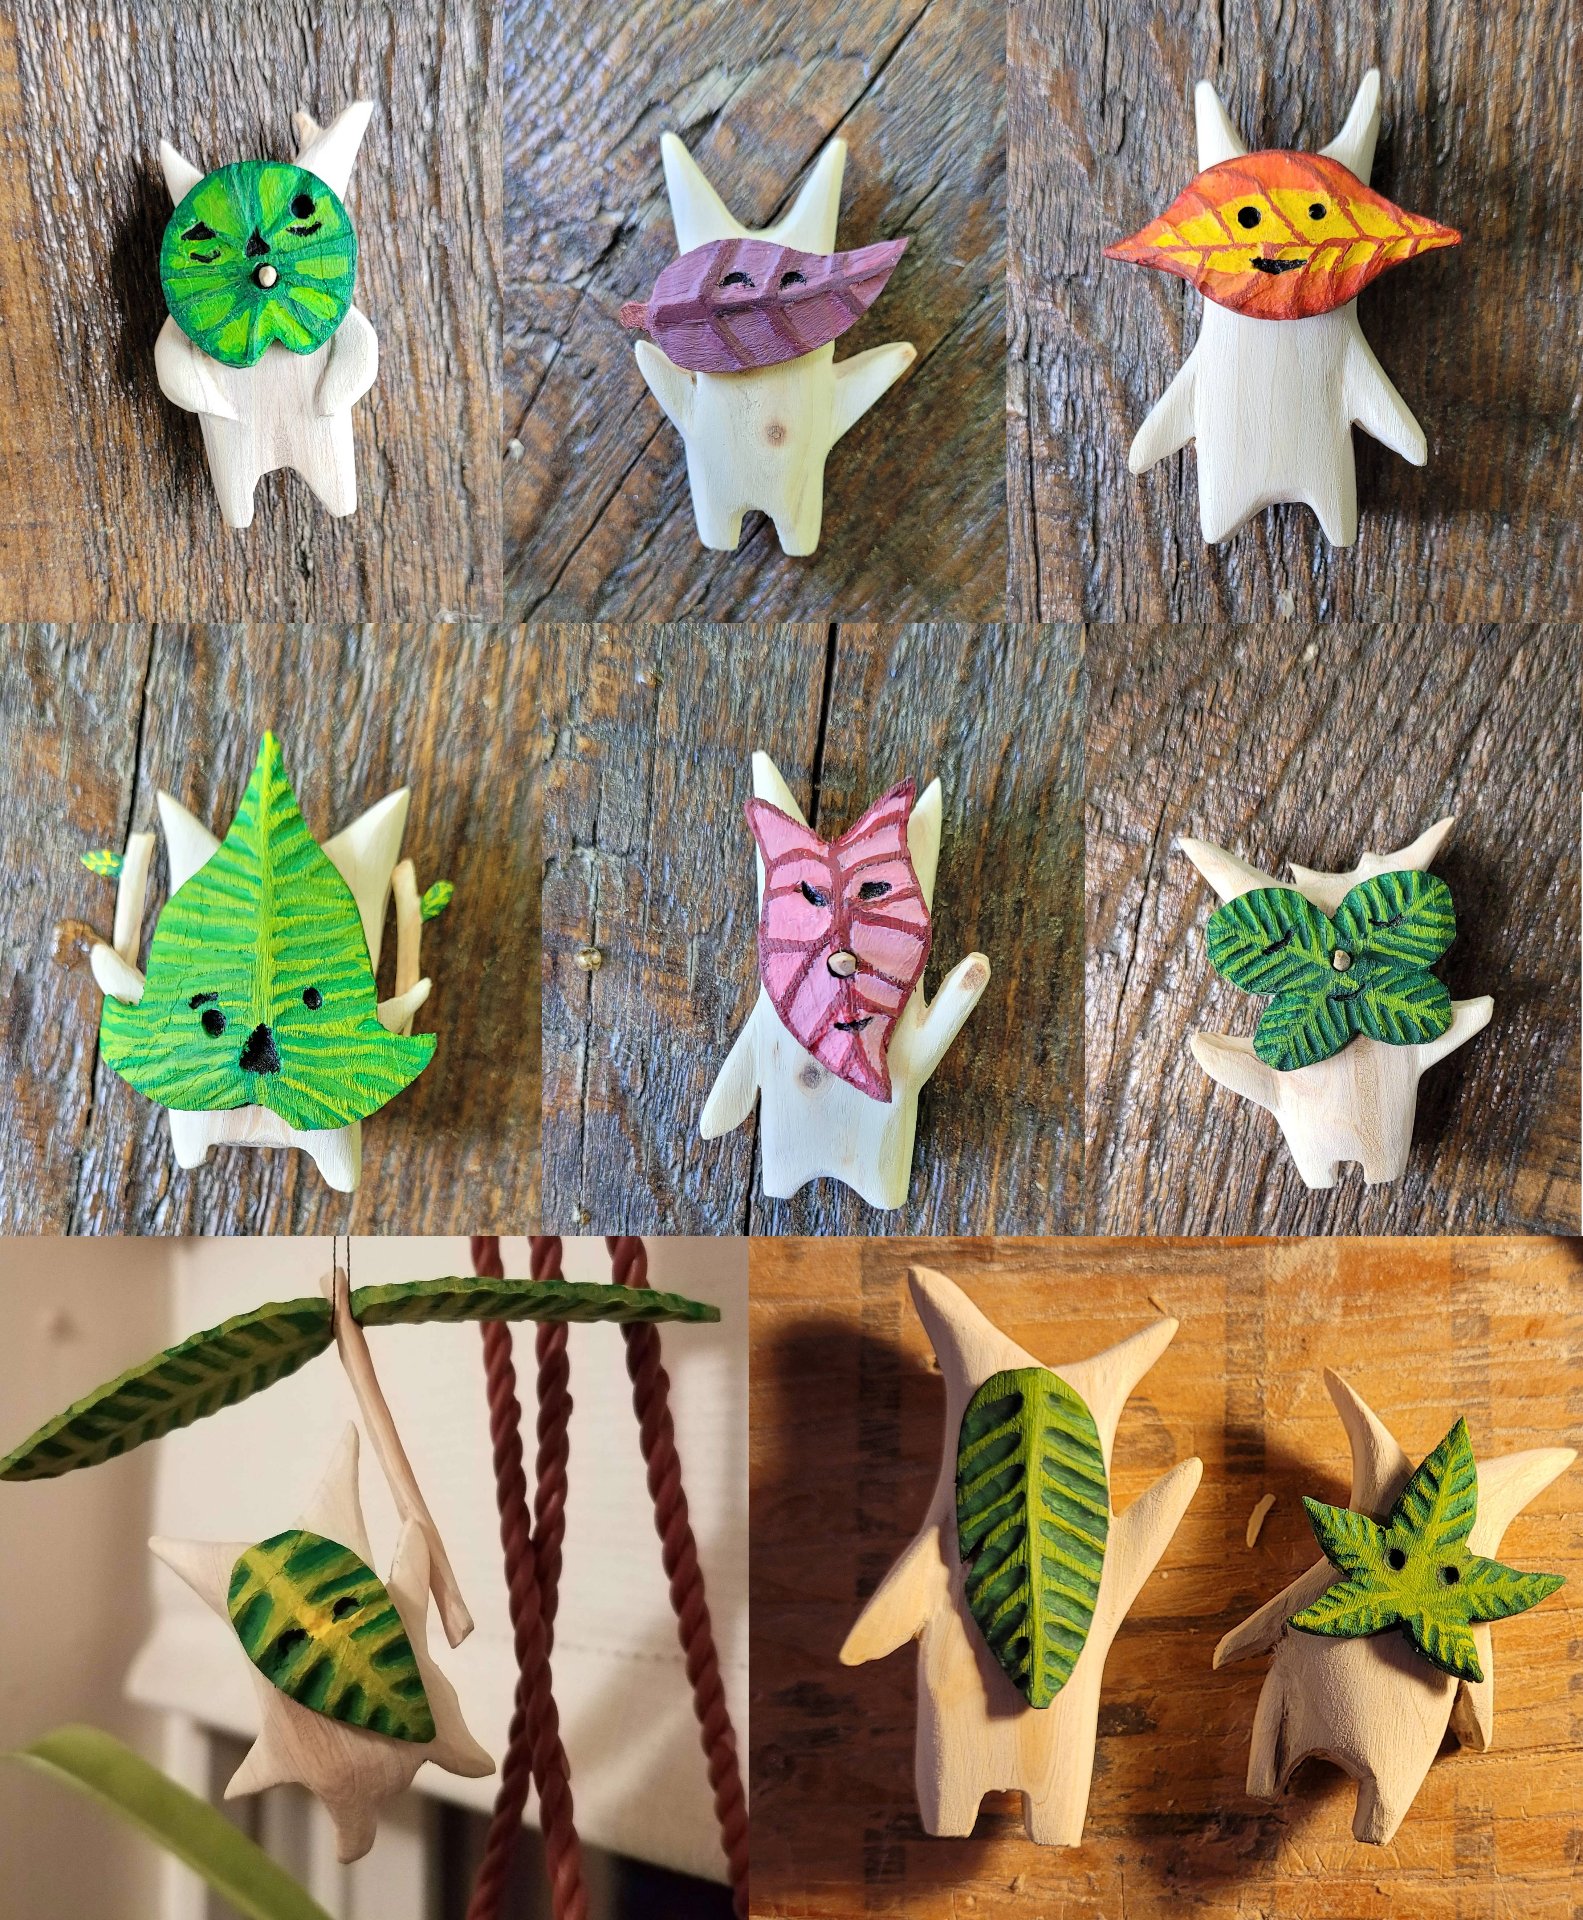
• person rss_feed

    JacobCoffinMakes’s feed

    Blog

    • chevron_right

      One Button Sound Recorder made from spare parts

      JacobCoffinMakes · Wednesday, 7 February - 14:28 edit · 9 minutes
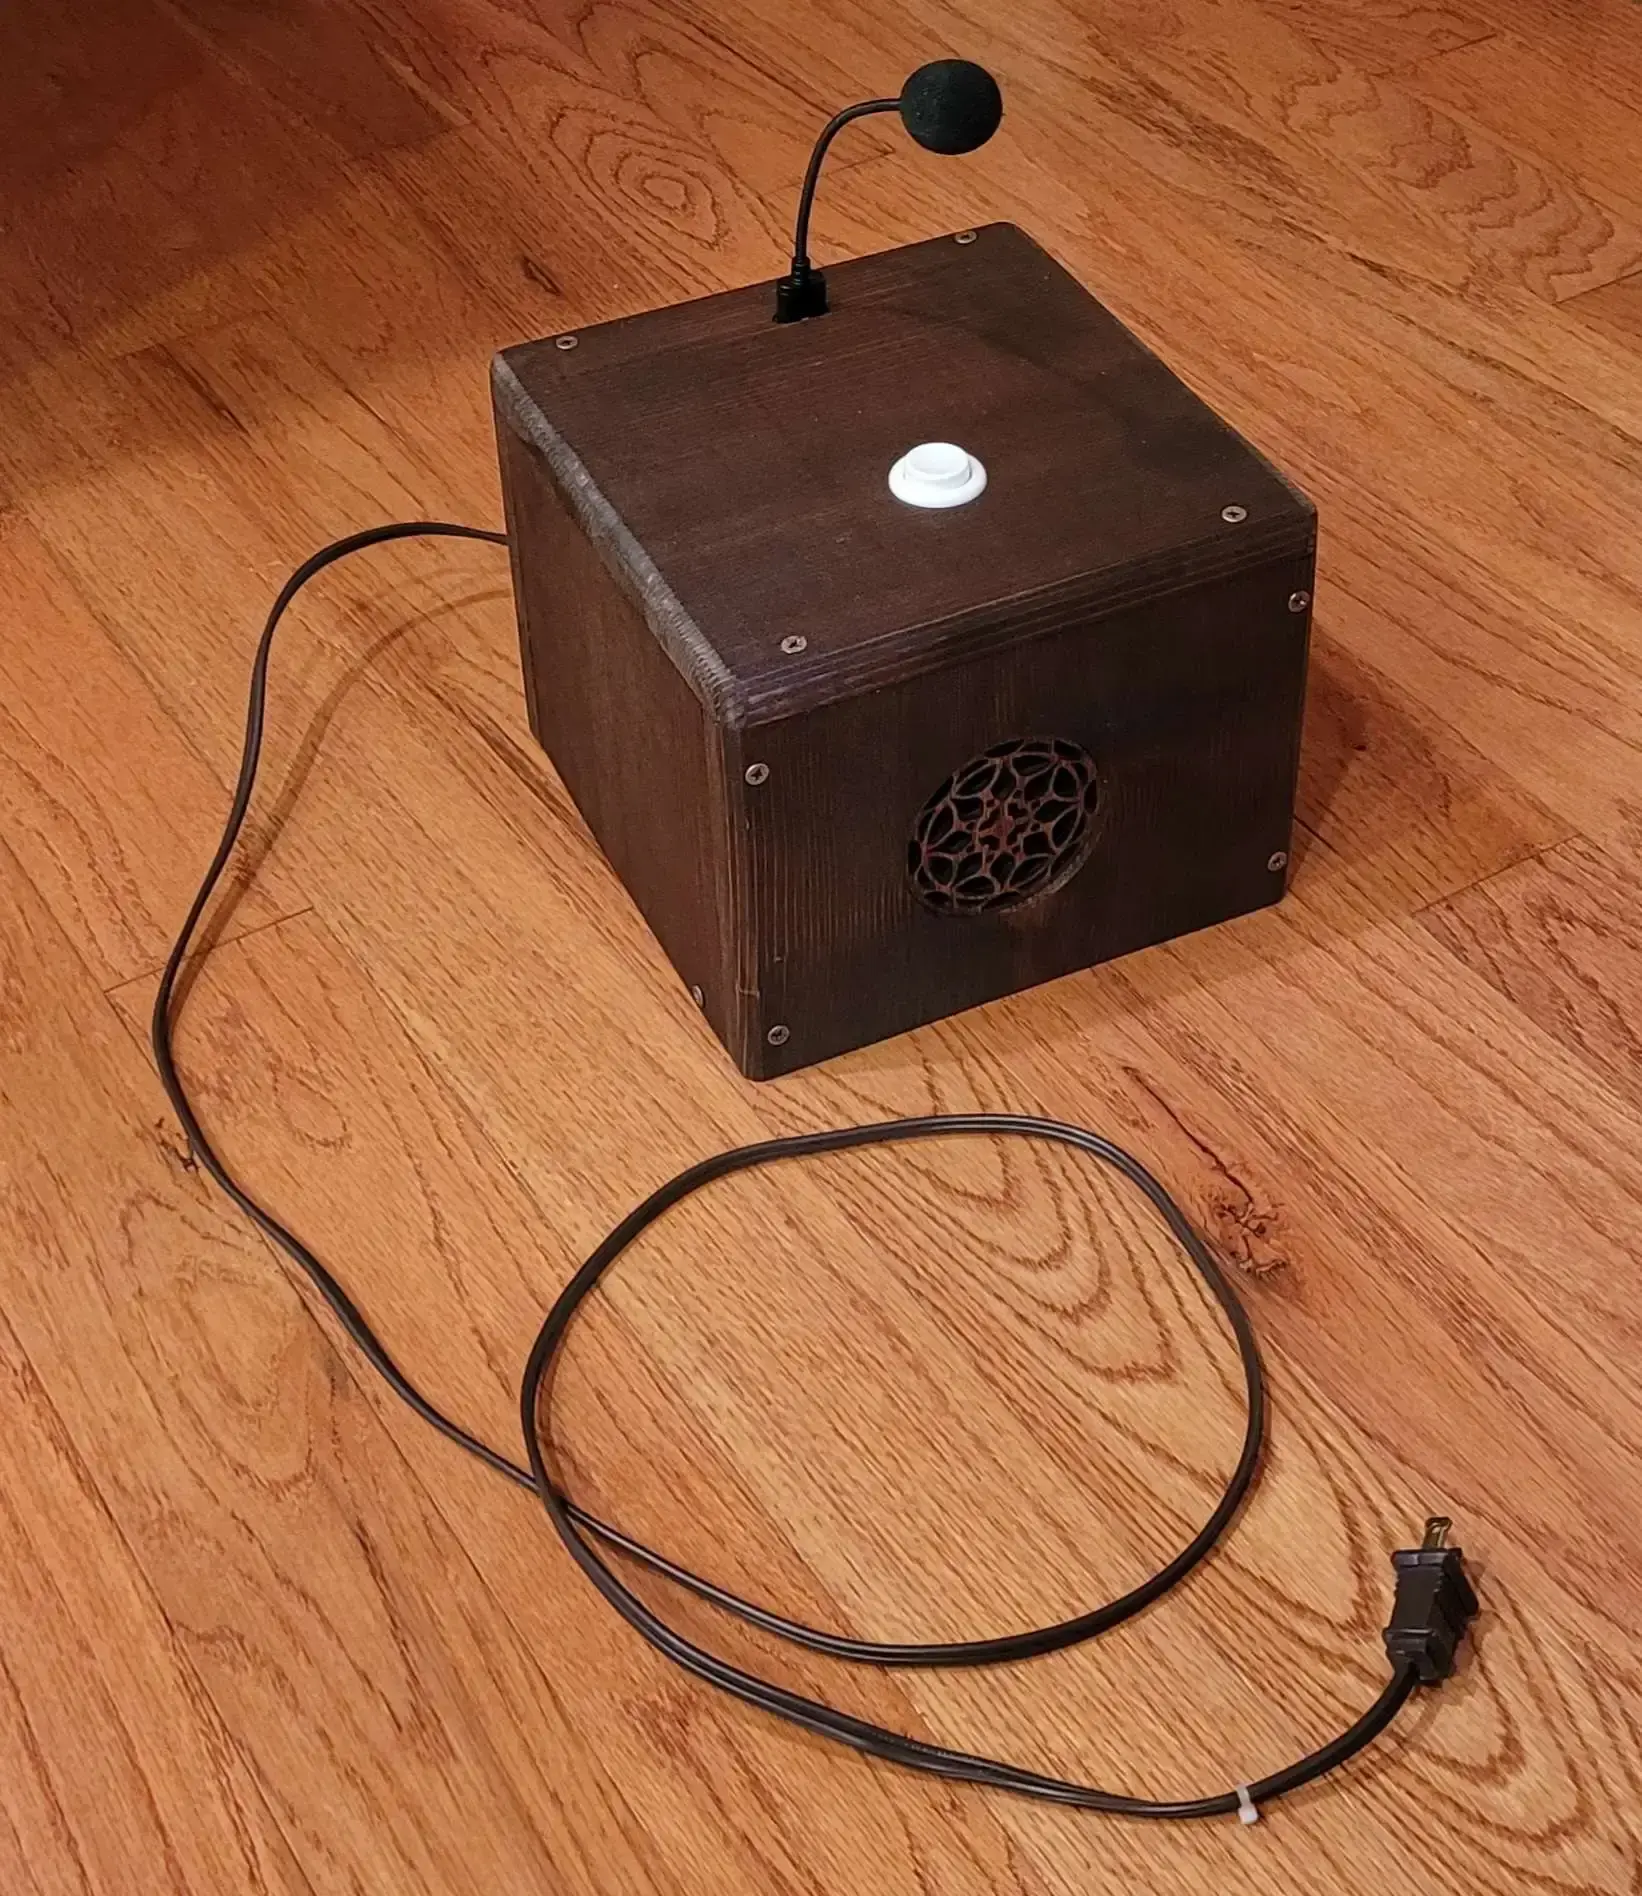
    cover image

    My grandmother recently lost her vision. She wanted a sound recorder so she could continue writing/recording her stories, but she’s never been comfortable with computers or small electronics, even when she could see them. One of the features she really wanted was automatic transcription voice to text. But all the voice recorders I could find online, even simple ones, seemed like they’d be hard for her to use. They had small buttons, recessed into the case (she has trouble feeling stuff like that), switches on the sides, multiple modes, screens she couldn’t see, etc. After the last year of trying to find various devices for her, and of being frustrated at how overly complicated devices supposedly intended for the elderly and vision-impaired still are, I decided to just build something that would actually fit her needs. Unfortunately, I had just a week to do it in before I was heading up to visit.

    The goals:

    • It had to be aggressively simple to use. No modes, no settings, no buttons combos to remember.
    • It had to support advanced features (transcription was one she really wanted, but just being able to get the voice files out to relatives easily was big)
    • Sturdy design

    I googled around and found this tutorial for making a spy device from a raspberry pi. It was pretty much perfect - when it detected motion, the device was meant to record audio, transcribe it, and then send the transcription out to the ‘spy’ as an email. That was perfect - email is a robust system all my other relatives are familiar with, figuring out what to do with the files, renaming them, forwarding them as necessary is well within their abilities. Plus the email account could act as a backup.

    I started with setting up a button. I used this tutorial as my guide, and used an old arcade button left over from helping a friend build an arcade cab. I soldered a 220 resistor in line with the button per the tutorial. The arcade button was a good fit - it’s designed for this kind of project and mounts easily to a hole drilled through a board, it’s big and raised up, meaning its easy to find.

    Then it was on to the python code:

    The changes I had to make were mostly around the motion sensor. We were going to replace that with a single button. Push it once, it plays my voice saying ‘recording’ and starts recording. Push it again, it stops recording and says ‘stop’. It’s been years since I wrote python code, but all I really had to do with identify the parts relevant to my requirements and make changes. I ended up using this code for preventing button bounce, since the built-in GPIO features failed to prevent it. The only change was a minor adjustment to the end of look_for_triggers() (which will show up in my code,) because it was preventing the second button press from being detected. I basically just stitched the button_callback() function to start_recording() and replaced the for loop in audioRecording() with a while loop to support variable-length recordings based on the button press. And I used pygame to play my voice audio. The other change I added was to the email feature. I added some try and except error catching, so failing to send an email (like if her wifi goes down) won’t crash the program. I won’t be around to start it up again so I wanted it to be robust, and to degrade gracefully. I explained that if it says ‘email error’ after ‘stop’ that just means it couldn’t send an email, but the file is still saved and the program still works.

    After getting email to work, the next job was to make sure the program ran as soon as the raspberry pi booted up. My grandmother has lots of friends who love to help, which often means unplugging things, moving them around, losing them, finding them, reorganizing her house, and mailing back audiobooks she hasn’t listened to yet. I needed this thing to be able to survive power loss and general curious fiddling. And if it crashed, power cycling would be an ugly but functional way to restart the program.

    I used this guide and modified the line to say @reboot python3 /home/audio/sound_recorder_good.py

    Once that was done, I found I had to replace the ‘input(“Press enter to quit”)’ line at the end of the main function with an endless while loop, because the program was no longer running from the terminal and couldn’t use input.

    You can find my code here: https://mega.nz/file/OJV1hZJB#pVeddKWKu6EwC6yxiMMsSVSCQdoTUkhtcfWM6ryAYIw

    At this point, it was pretty reliable, so I started work on the physical case. It’s basically just a wooden box containing the pi, a button, a speaker, the microphone, and built to keep people from opening it up, unplugging components, or fiddling with the speaker settings. I'd been joking with my spouse that it would look like a bad prop from the twilight zone, just a wooden box with a single button, a speaker, and a microphone sticking out. But I think it came out okay for how quickly I had to make it.
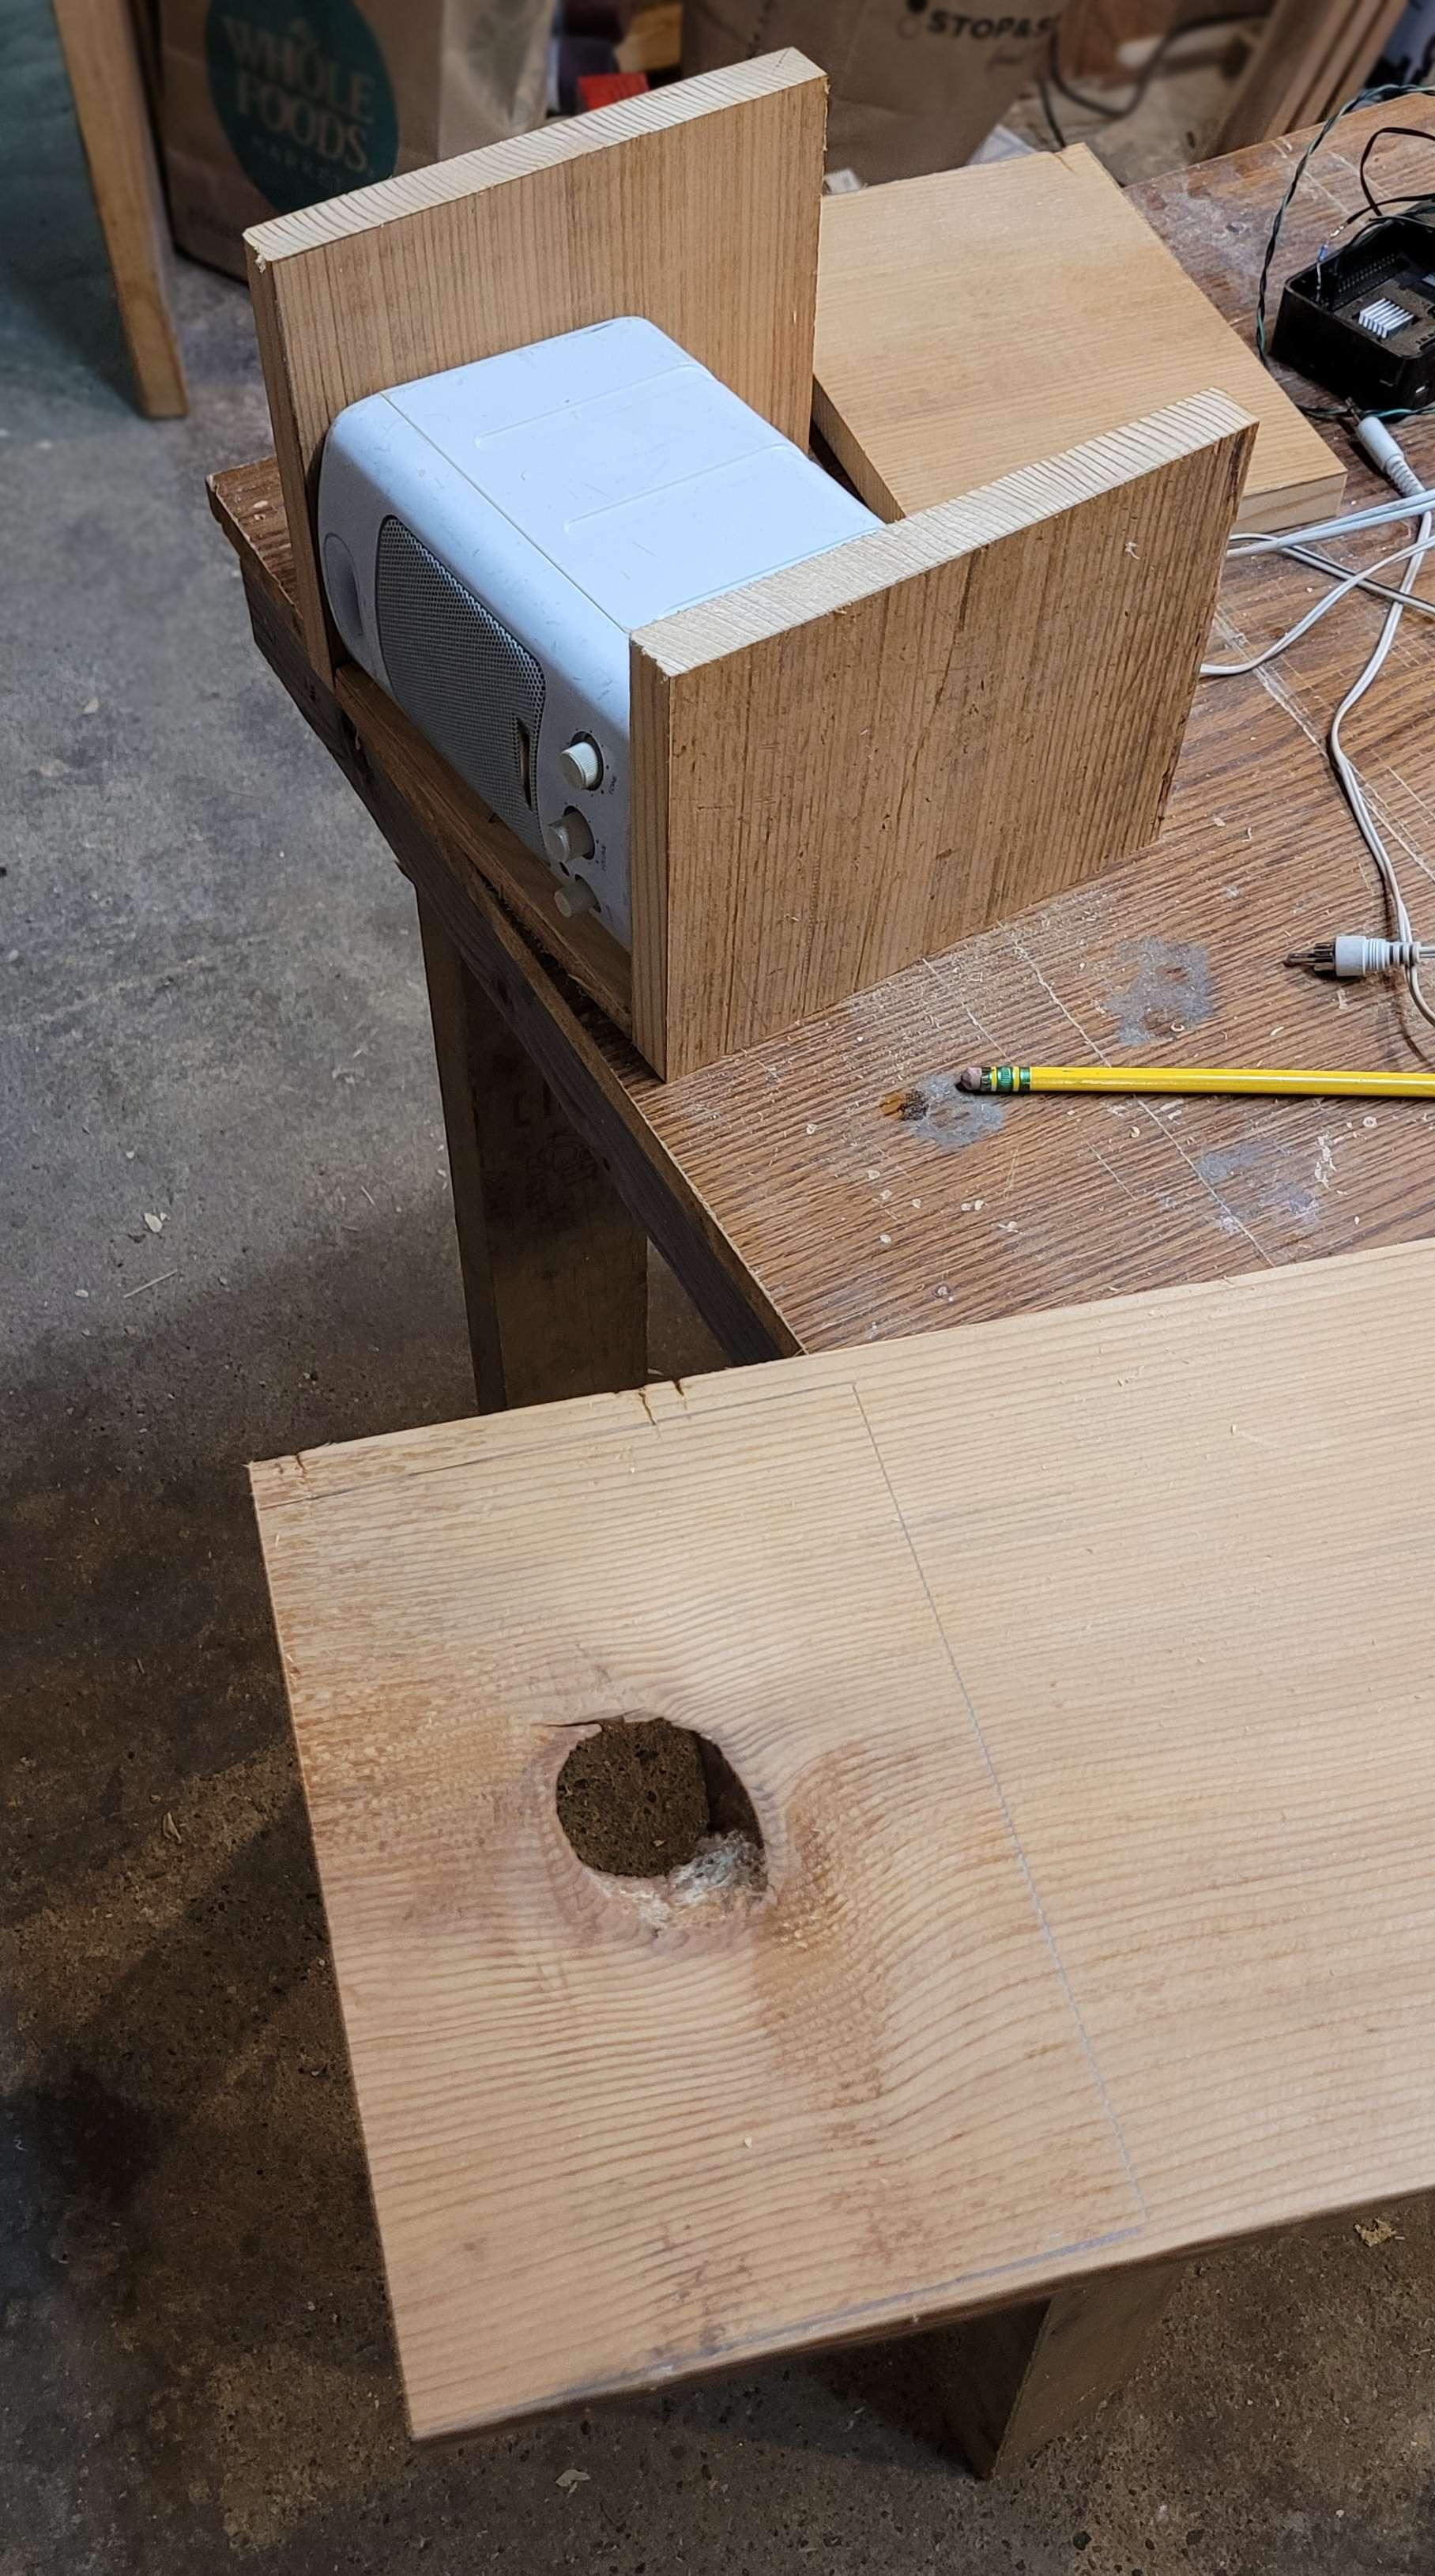
    figuring out fit and layout

    I measured my interior components, tried a few layouts, and finally cut up a board I'd gotten from my local Everything Is Free page. It had been a floorboard in someone's attic for years before they renovated.

    My planned layout had the computer speaker on the bottom in the front, with the button above that, and the raspberry pi stuck to the back wall with a square cutout above it lined up with one of its USB ports. This way the microphone could just be plugged in, and it wouldn't be in the way when you reached for the button.

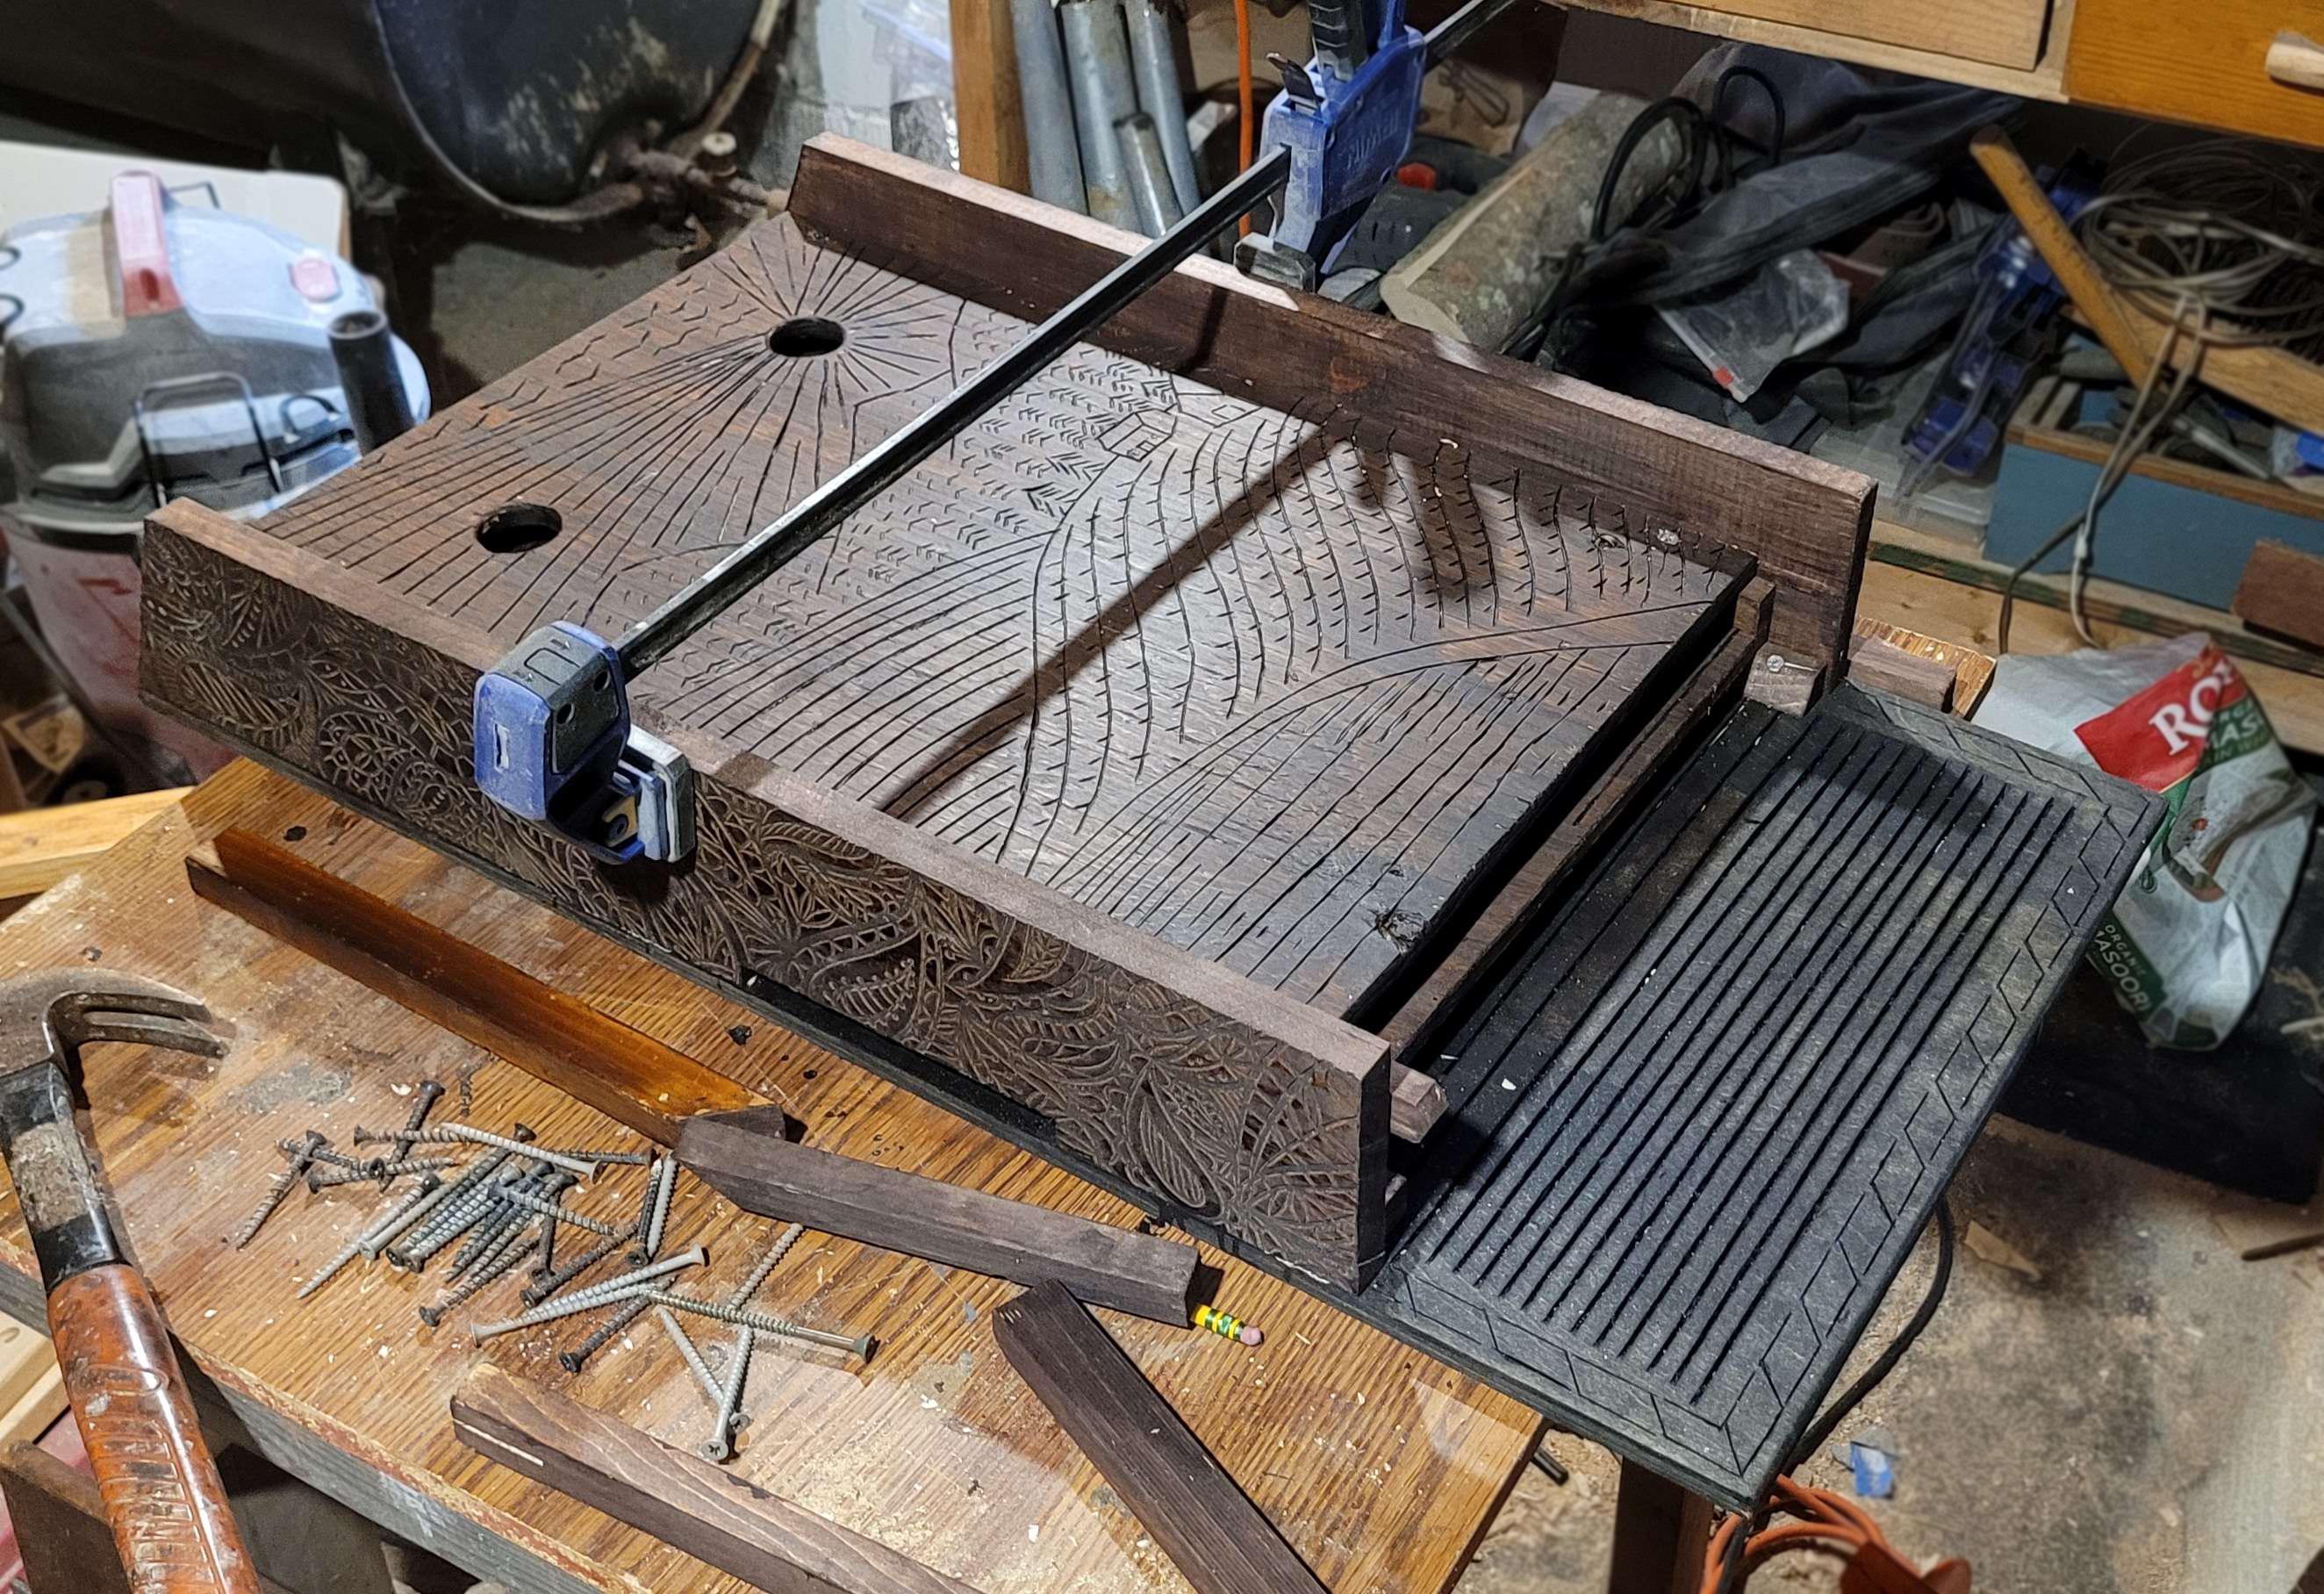
    In the picture above, the sides, back and floor are already cut. The front is ready for cutting in the foreground (I used the hole saw to cut out a speaker hole around the knot hole, so I wouldn't have to waste any wood).
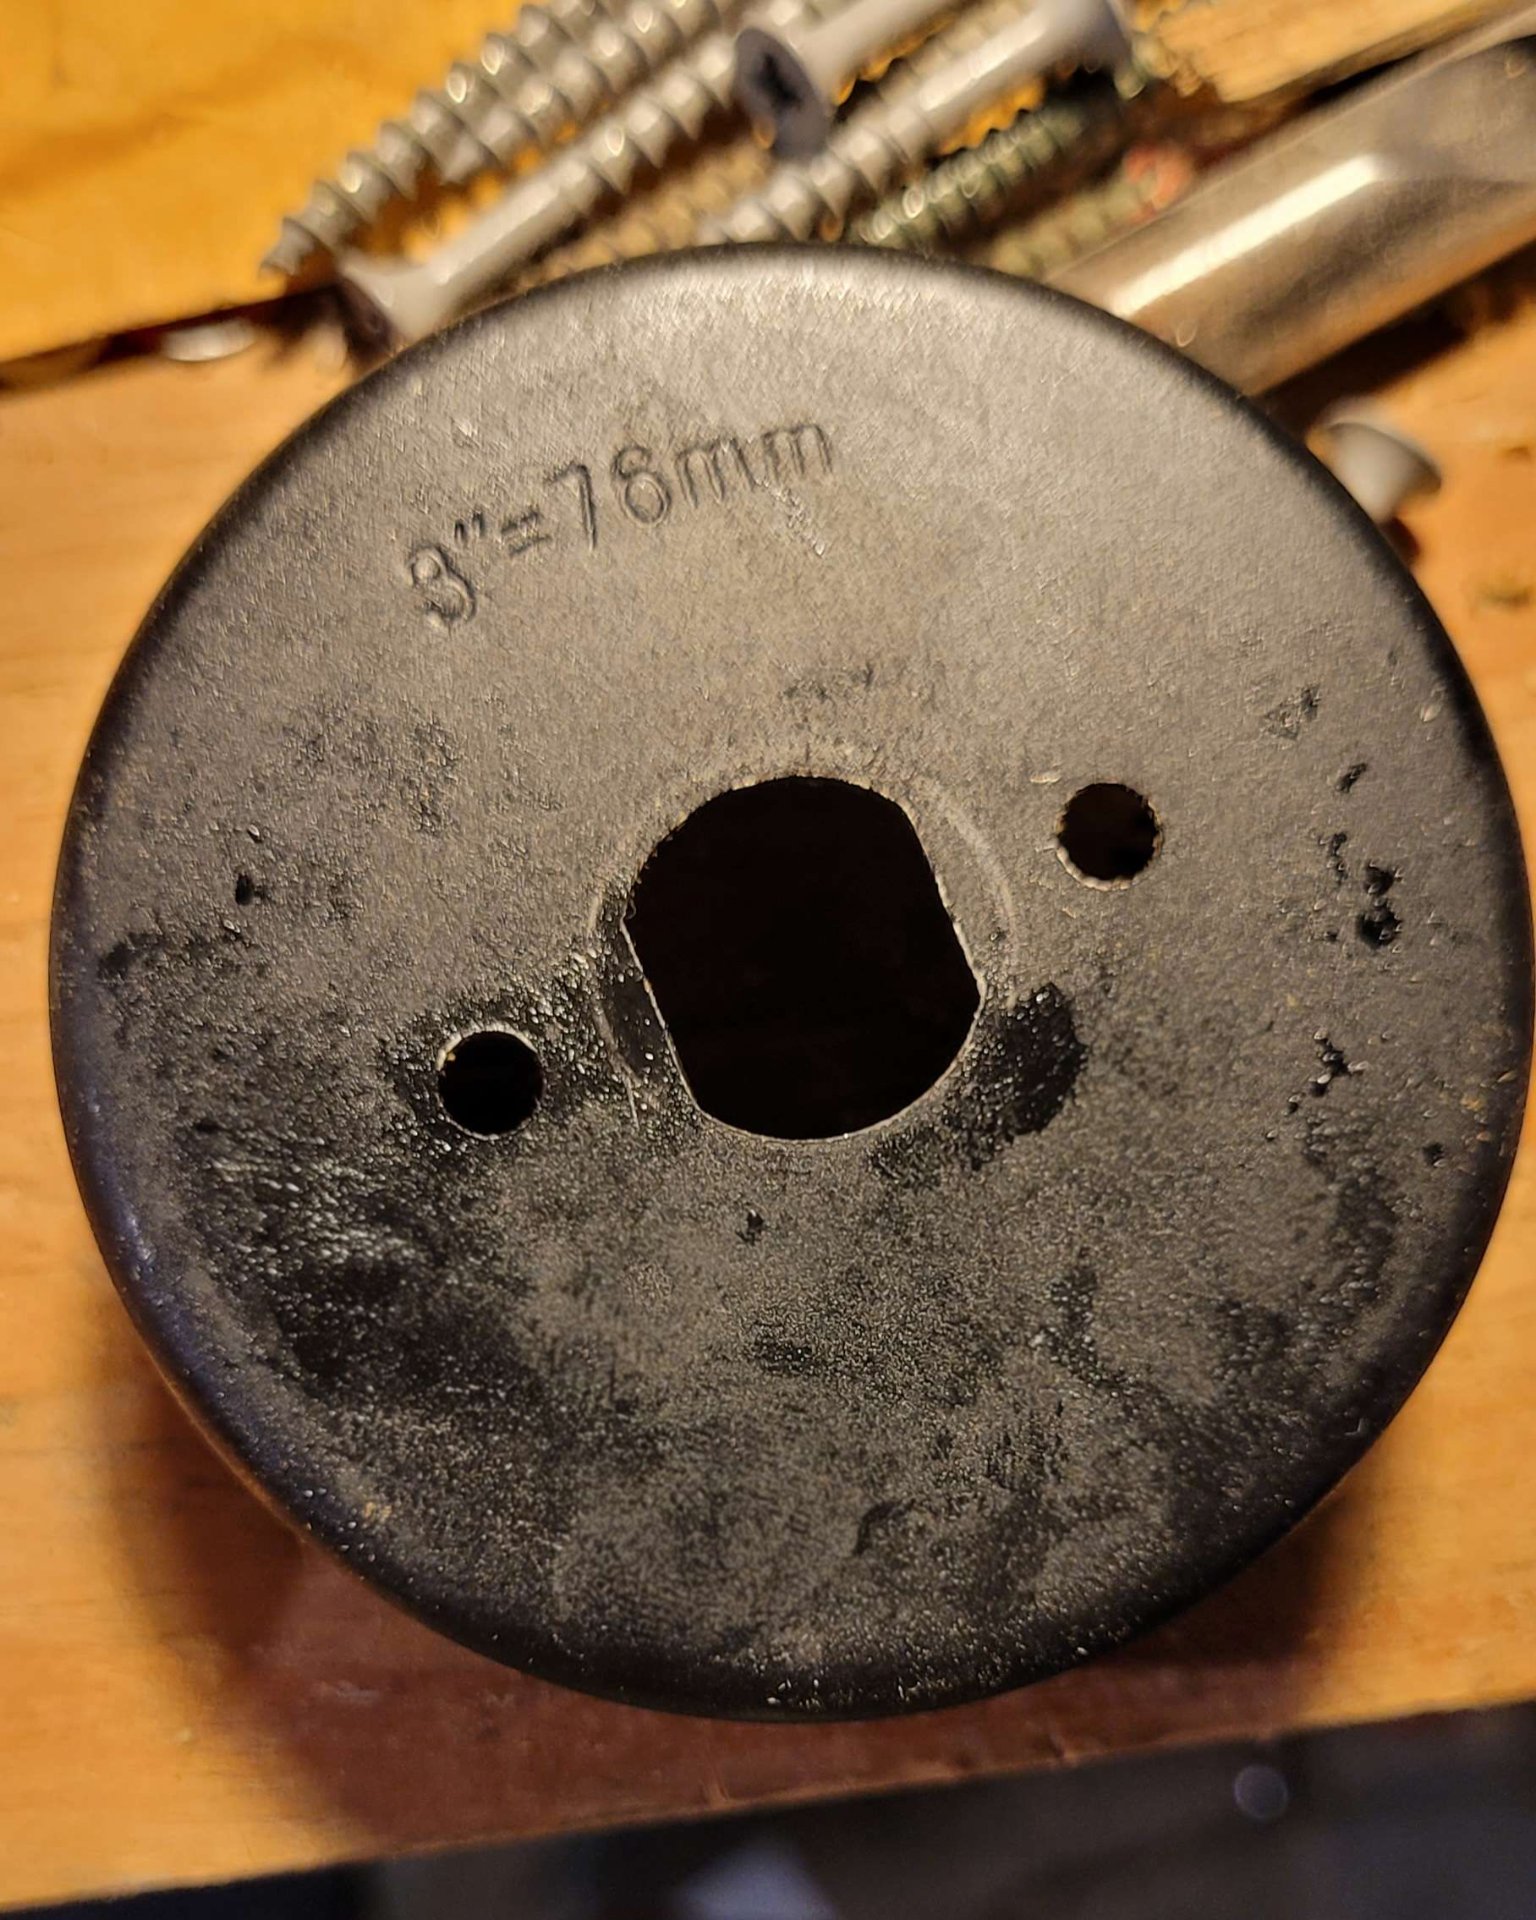
    the holesaw

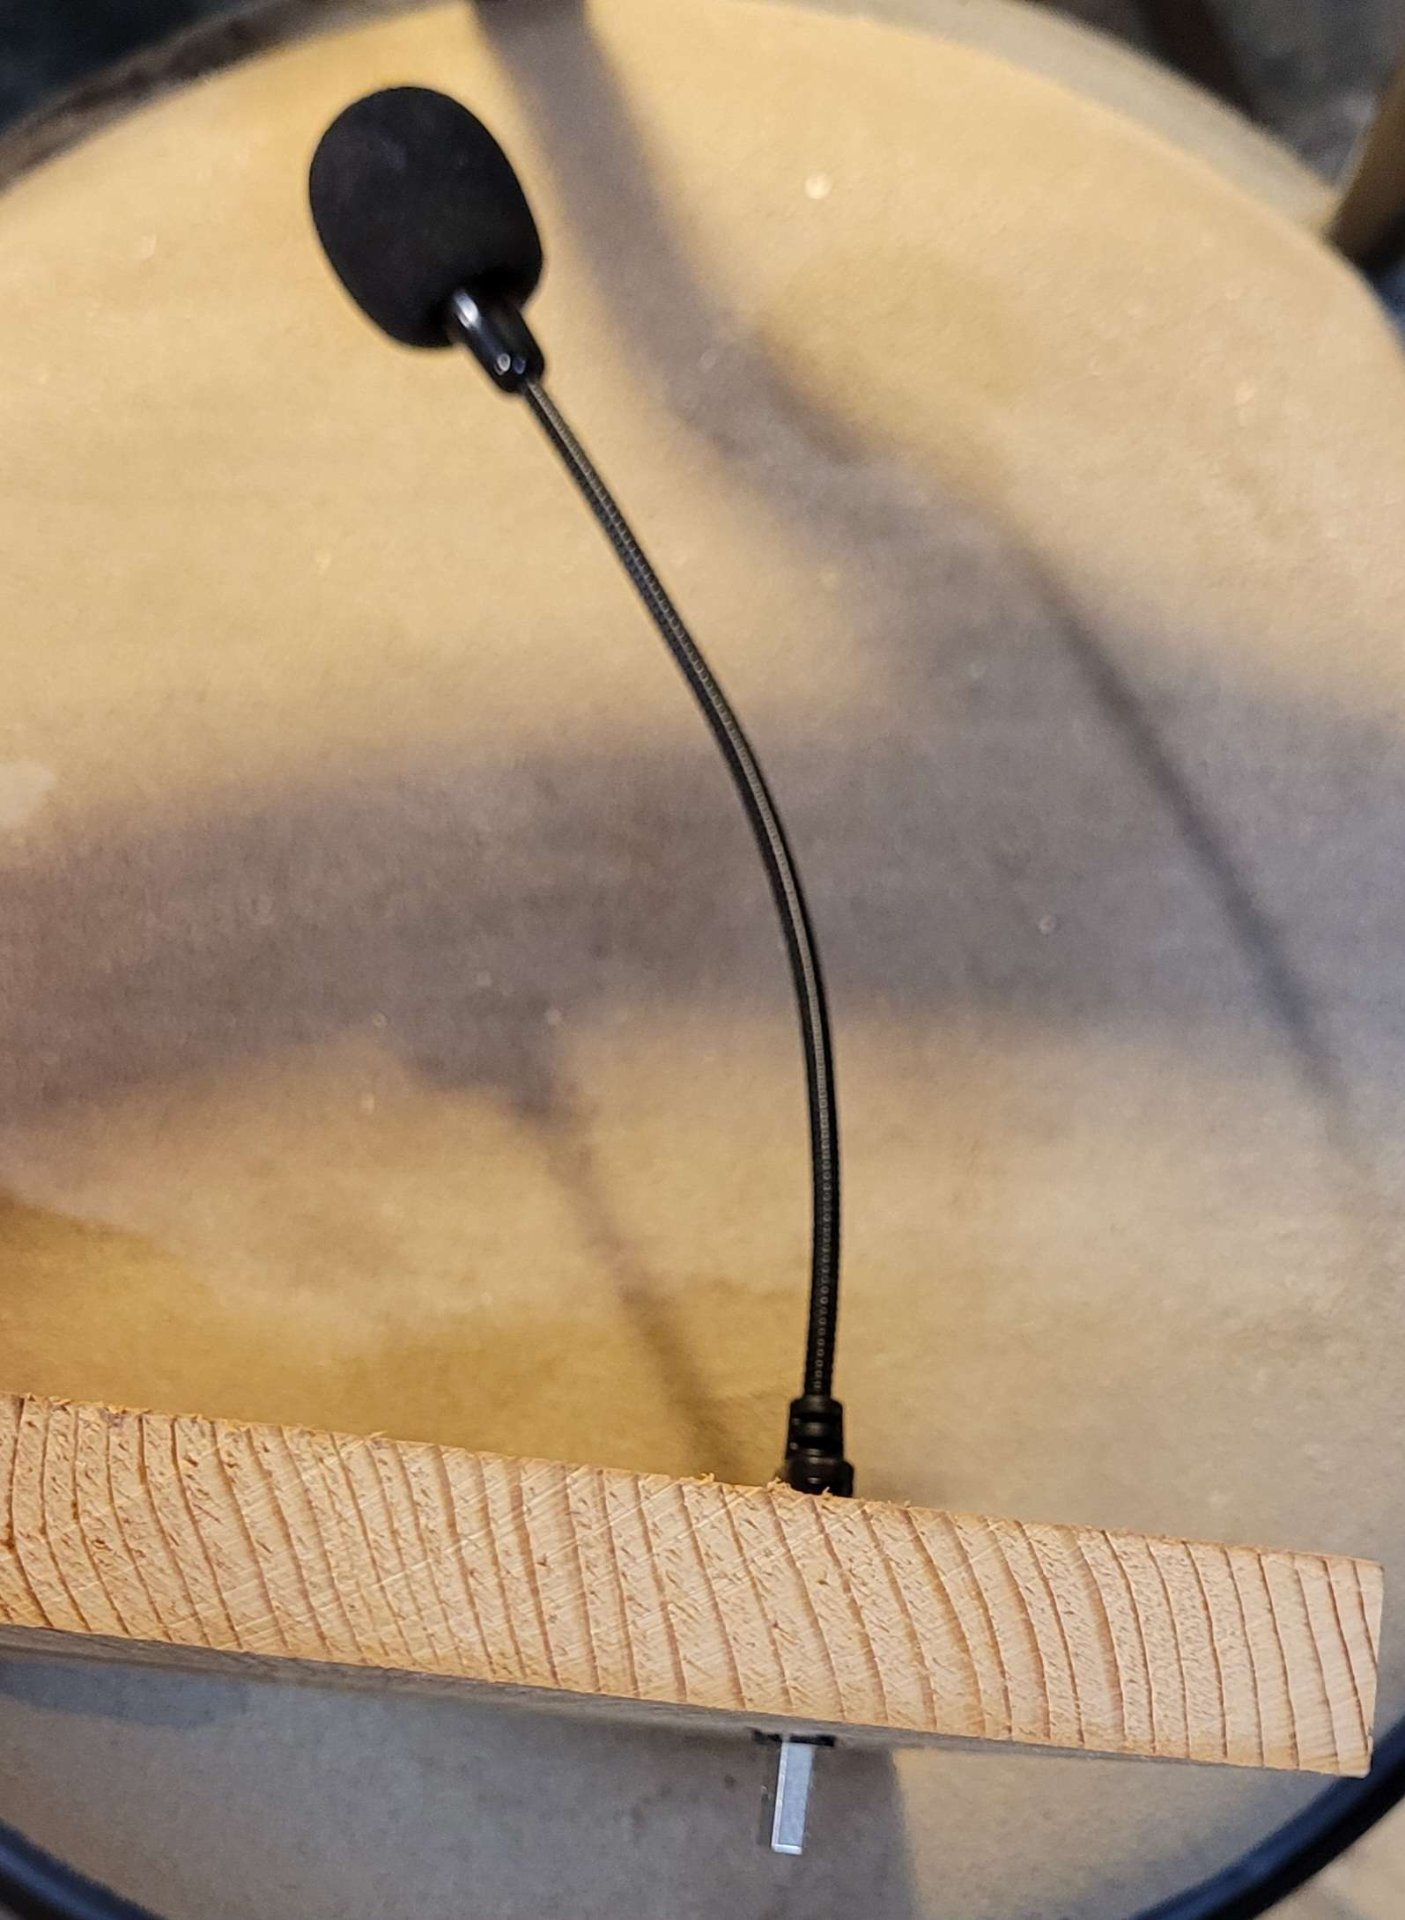
    microphone testfit

    The top from the side, with the square hole cut to fit the microphone
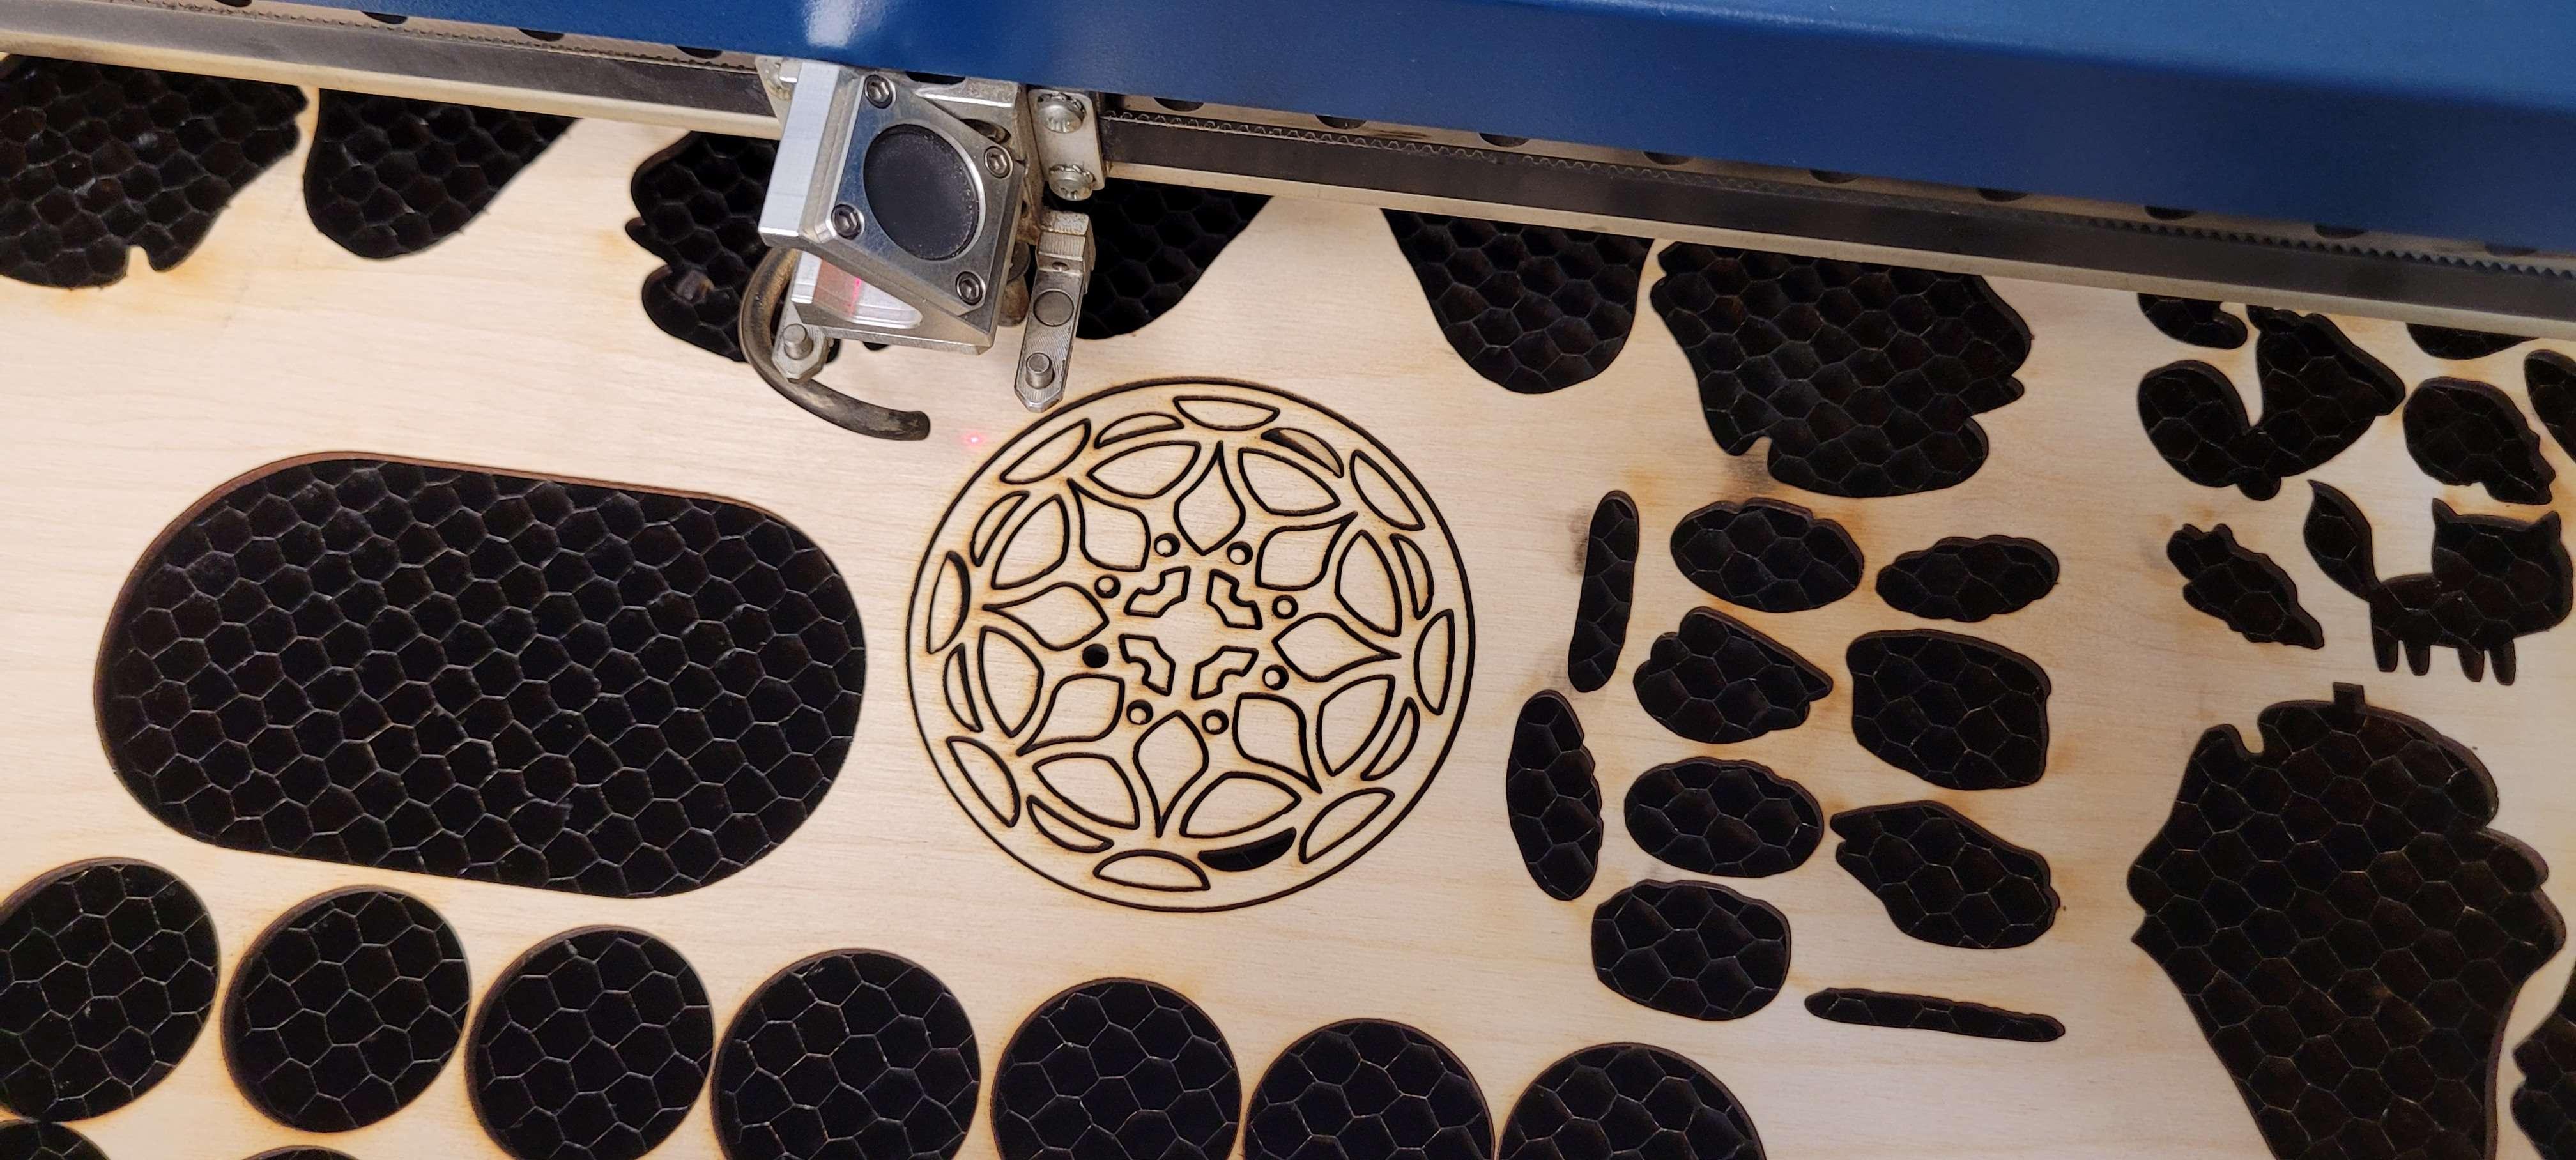
    laser cutter

    That night, my SO and I visited our local makerspace and borrowed their laser cutter.
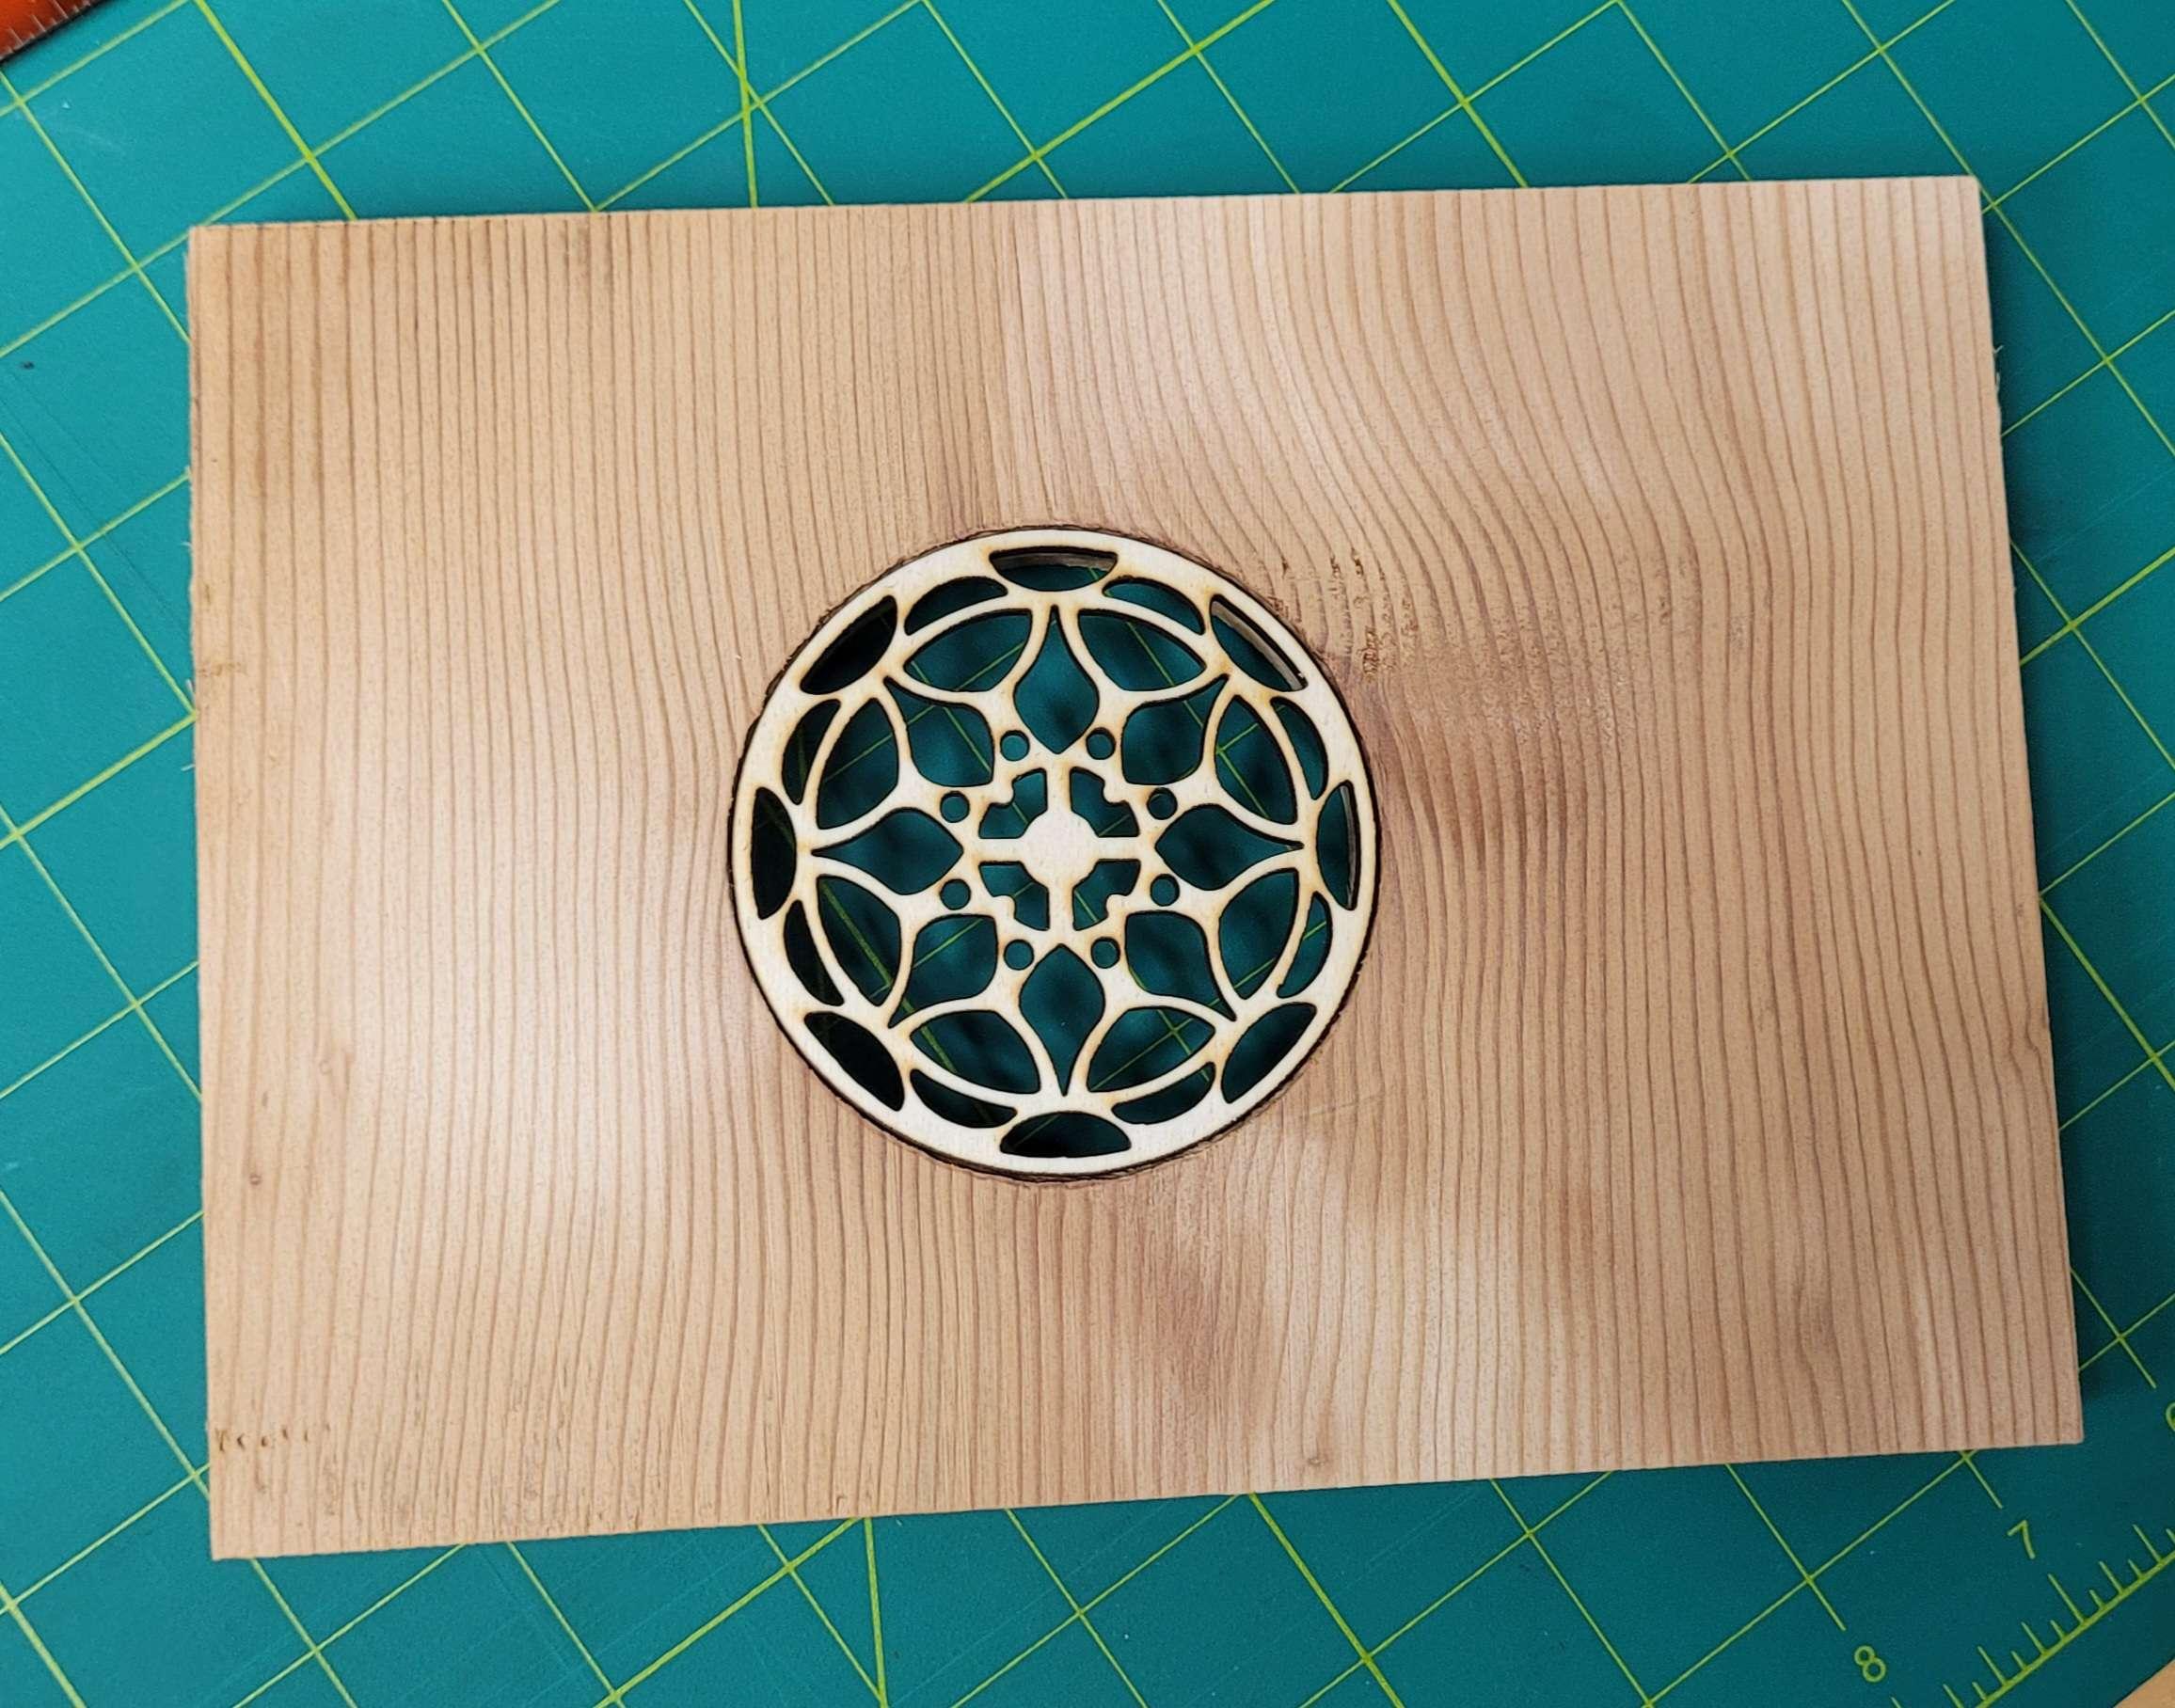
    the faceplate

    Test fit for the front plate. Given that the cutter can do just about any shape, no matter how elaborate, we decided to give the grille a little flair. Maybe the twilight zone and 1950s stuff was still on our minds.
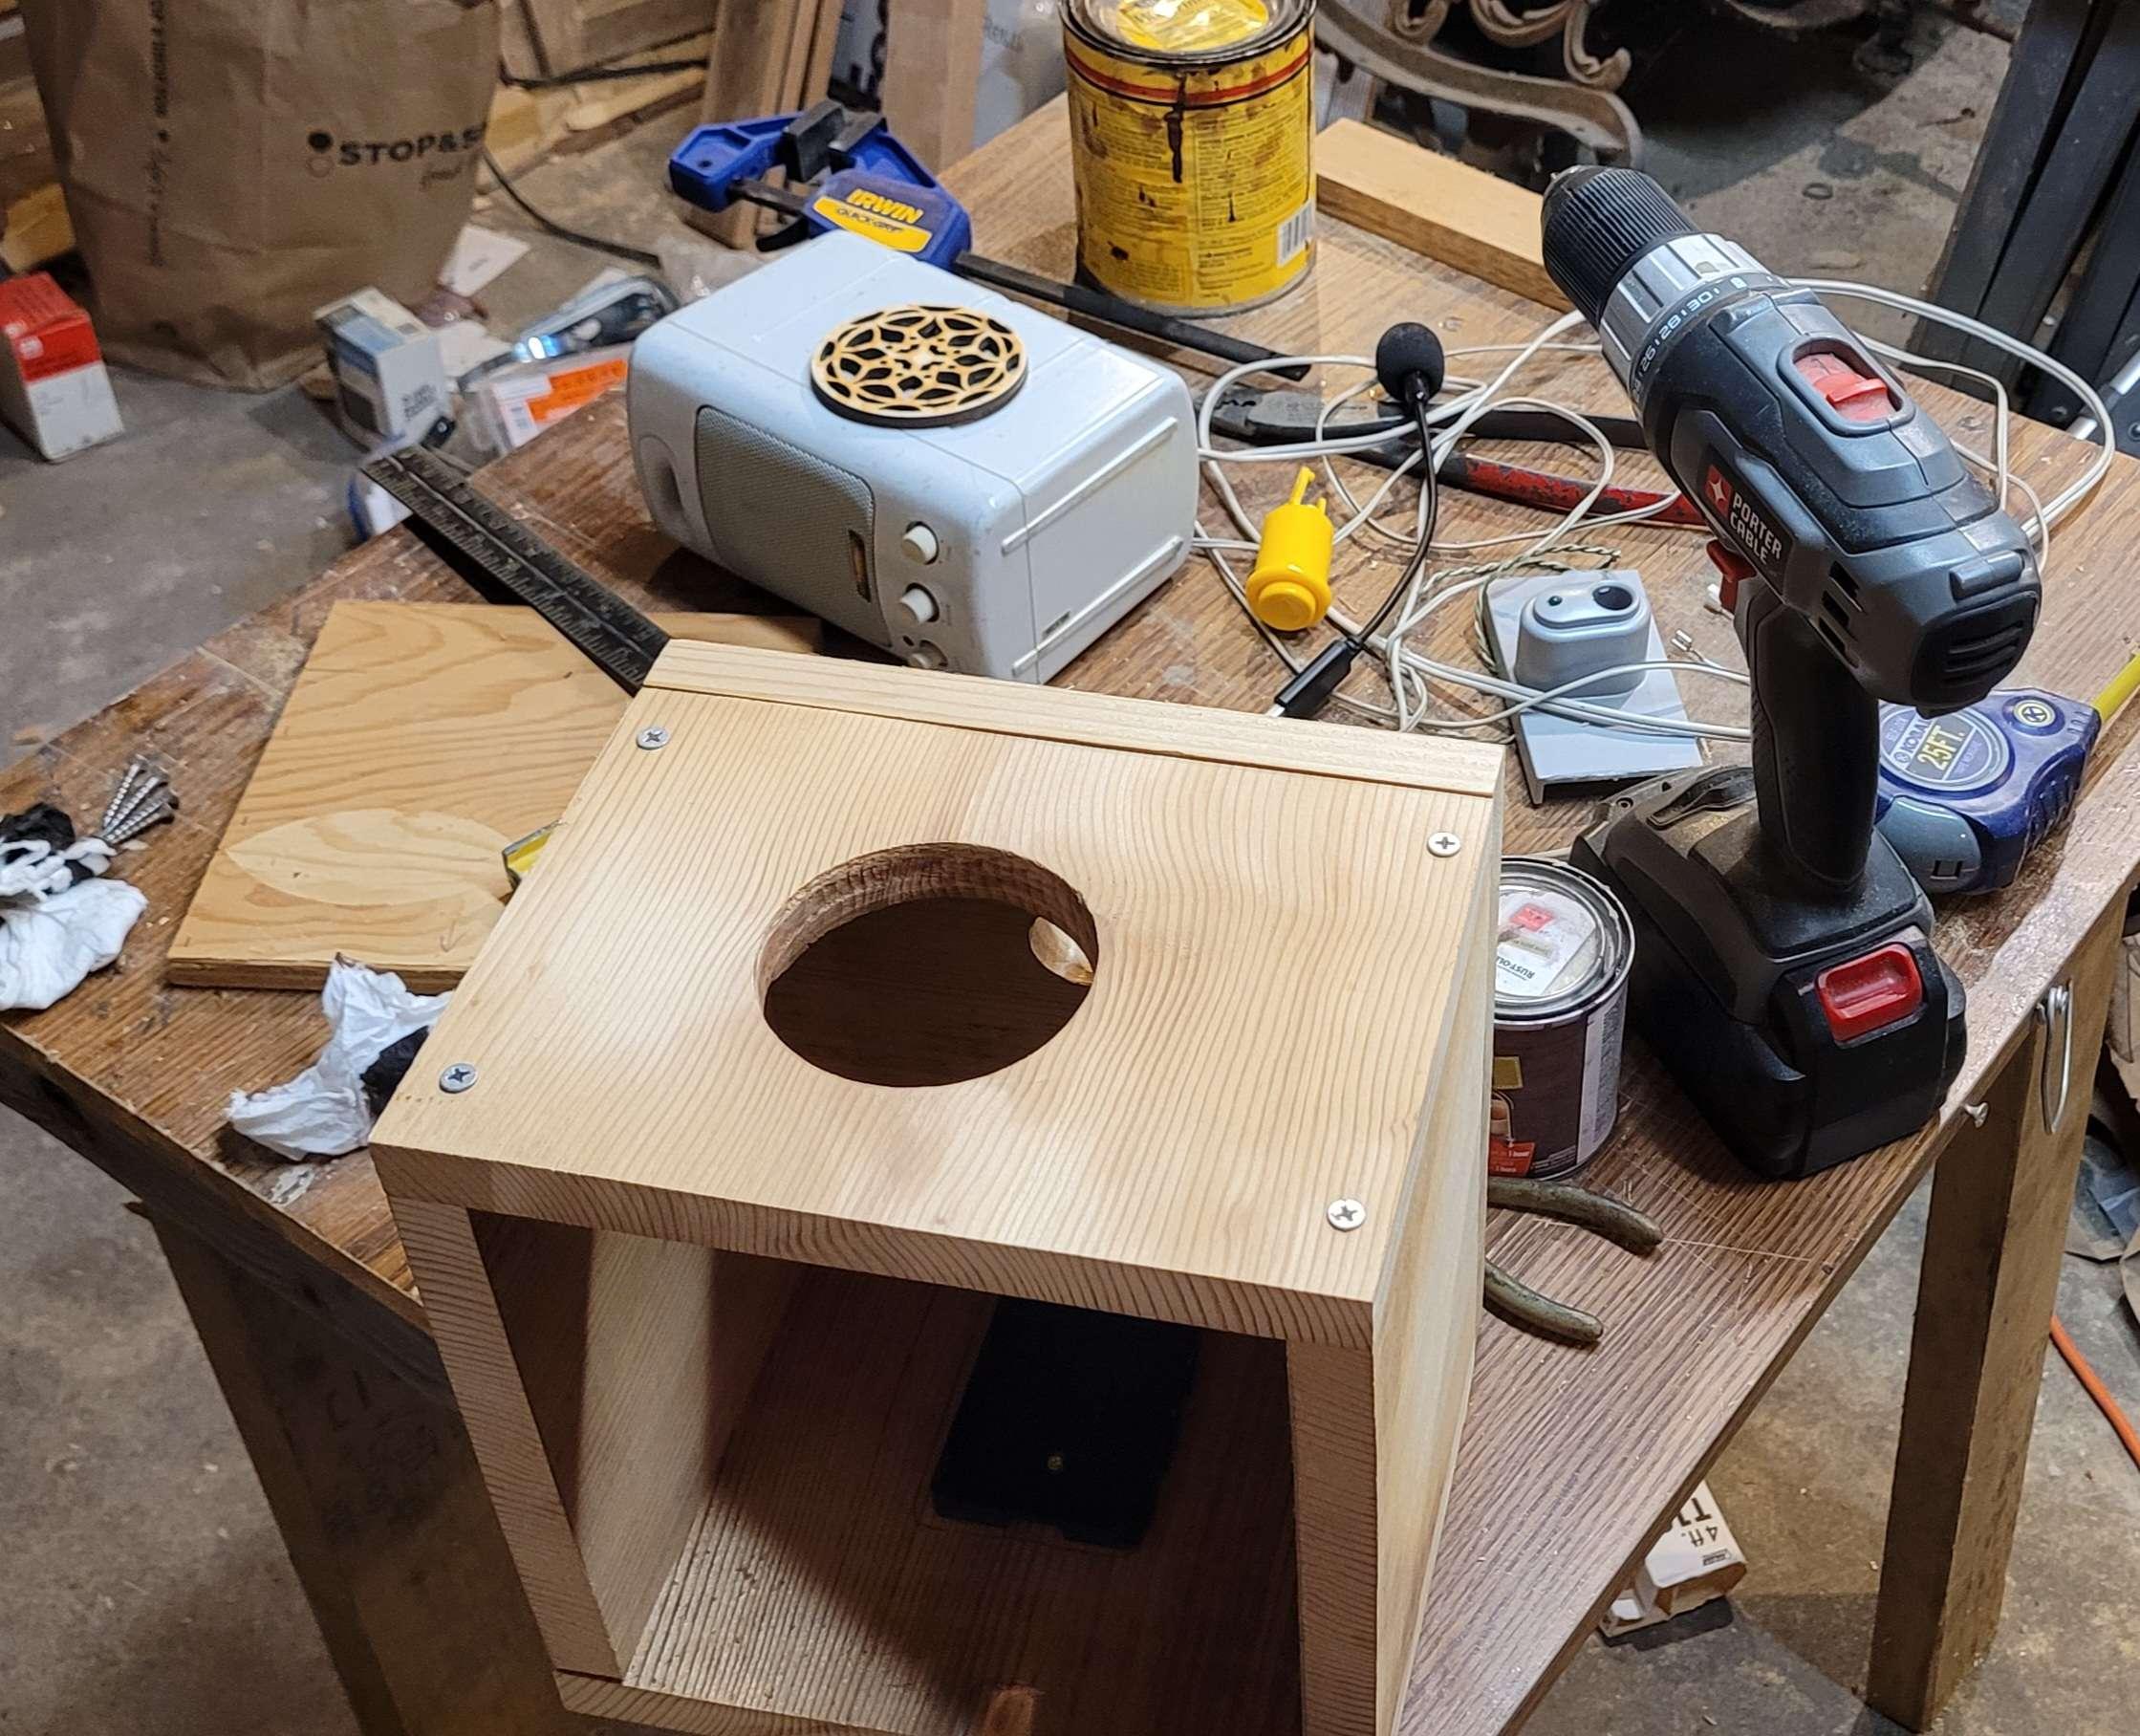
    assembly

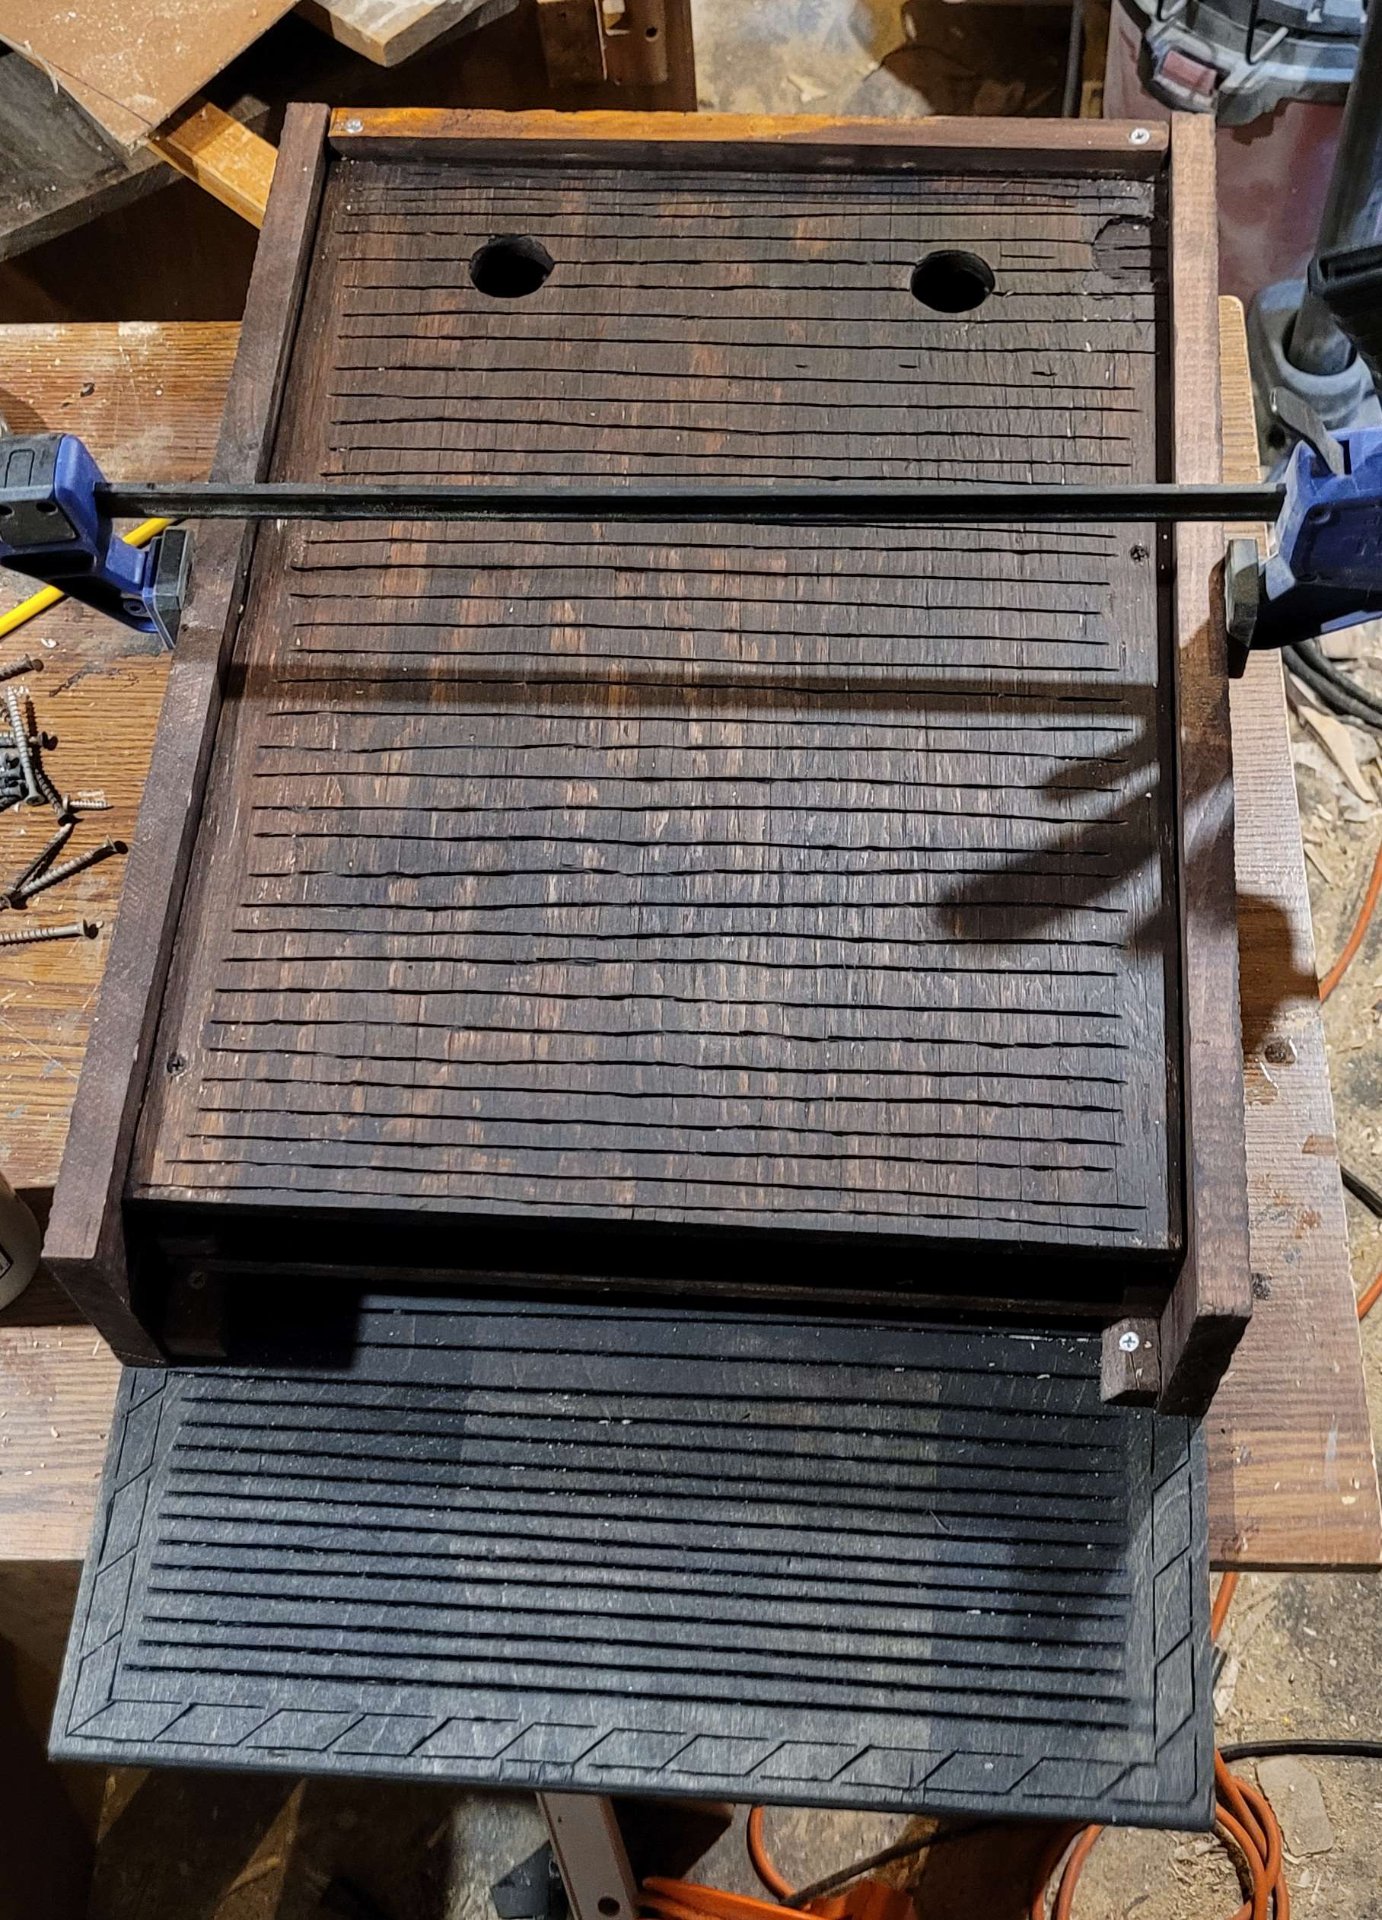
    The case during fabrication, looking like a big birdhouse. I assembled it so I'd have it in one piece while I sanded the sides and corners, stained it, then replaced the screws with ones I'd spraypainted gold. The old screws just went back in the box or got painted and used.

    I pre-drilled all the holes before screwing it together, so I wouldn't split any of the boards. Pine is more forgiving than oak, but pre-drilling doesn't take much more work and it's well worth it. I also like to use the fillips bit, stick it into the hole on its own, and run it for a second, making a divot space for the screw head, so it can't act as a wedge and split the wood.
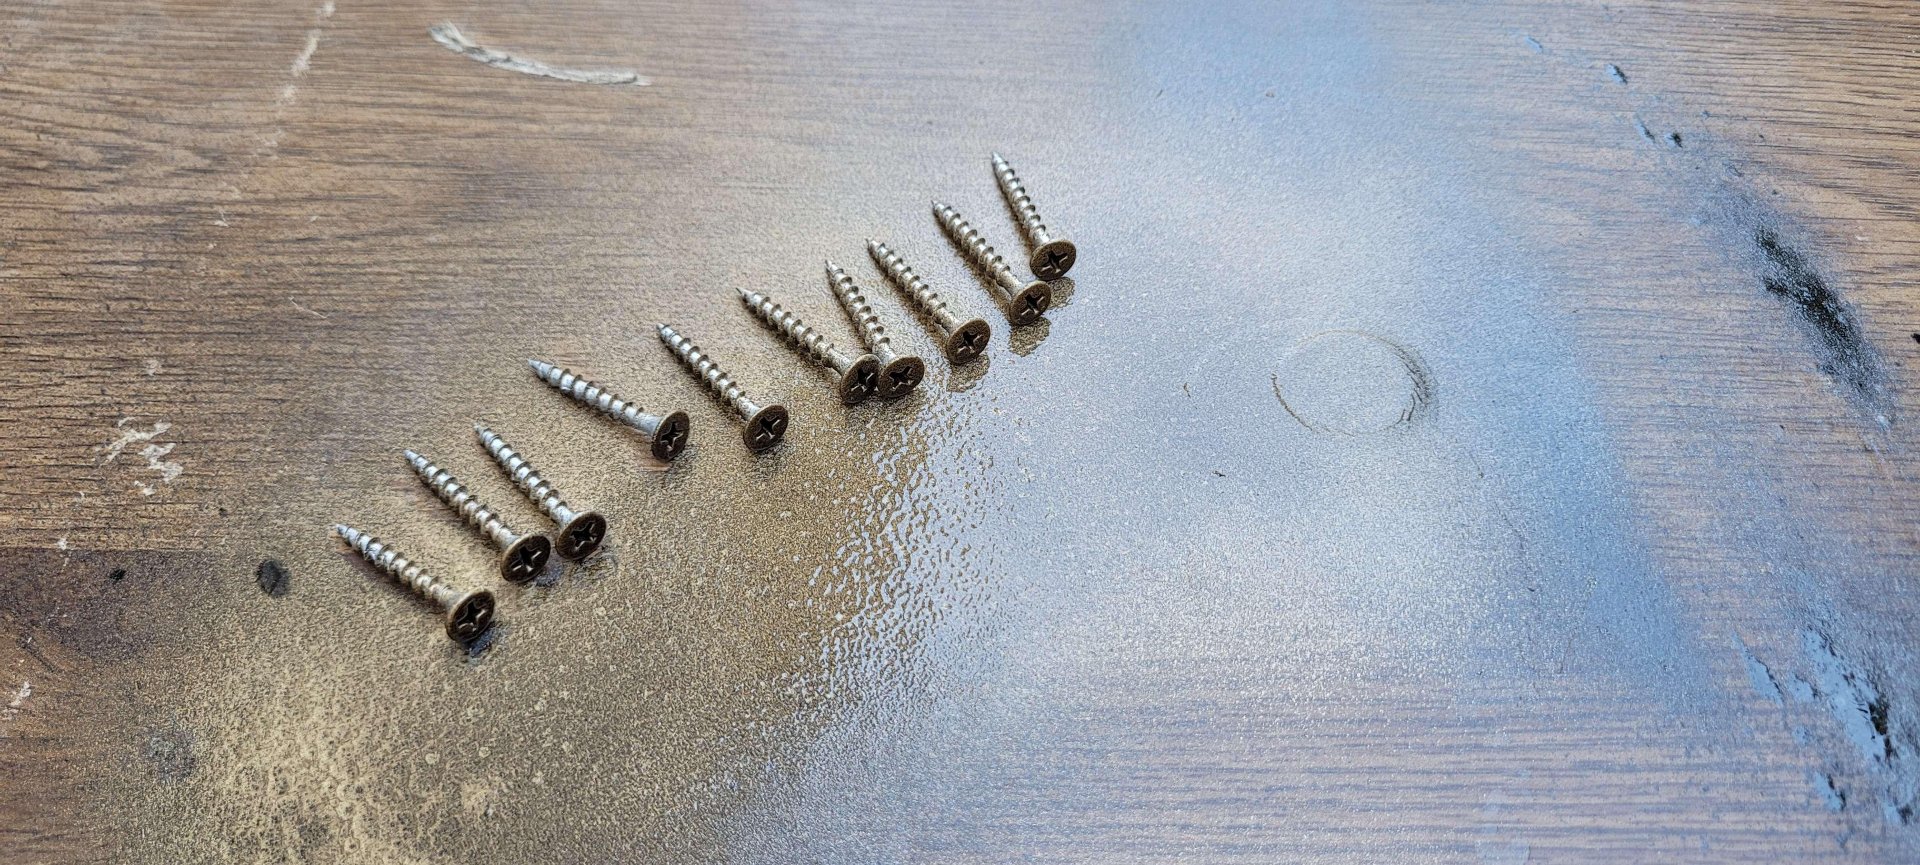
    painting the screws

    A little gold paint to go with the dark wood
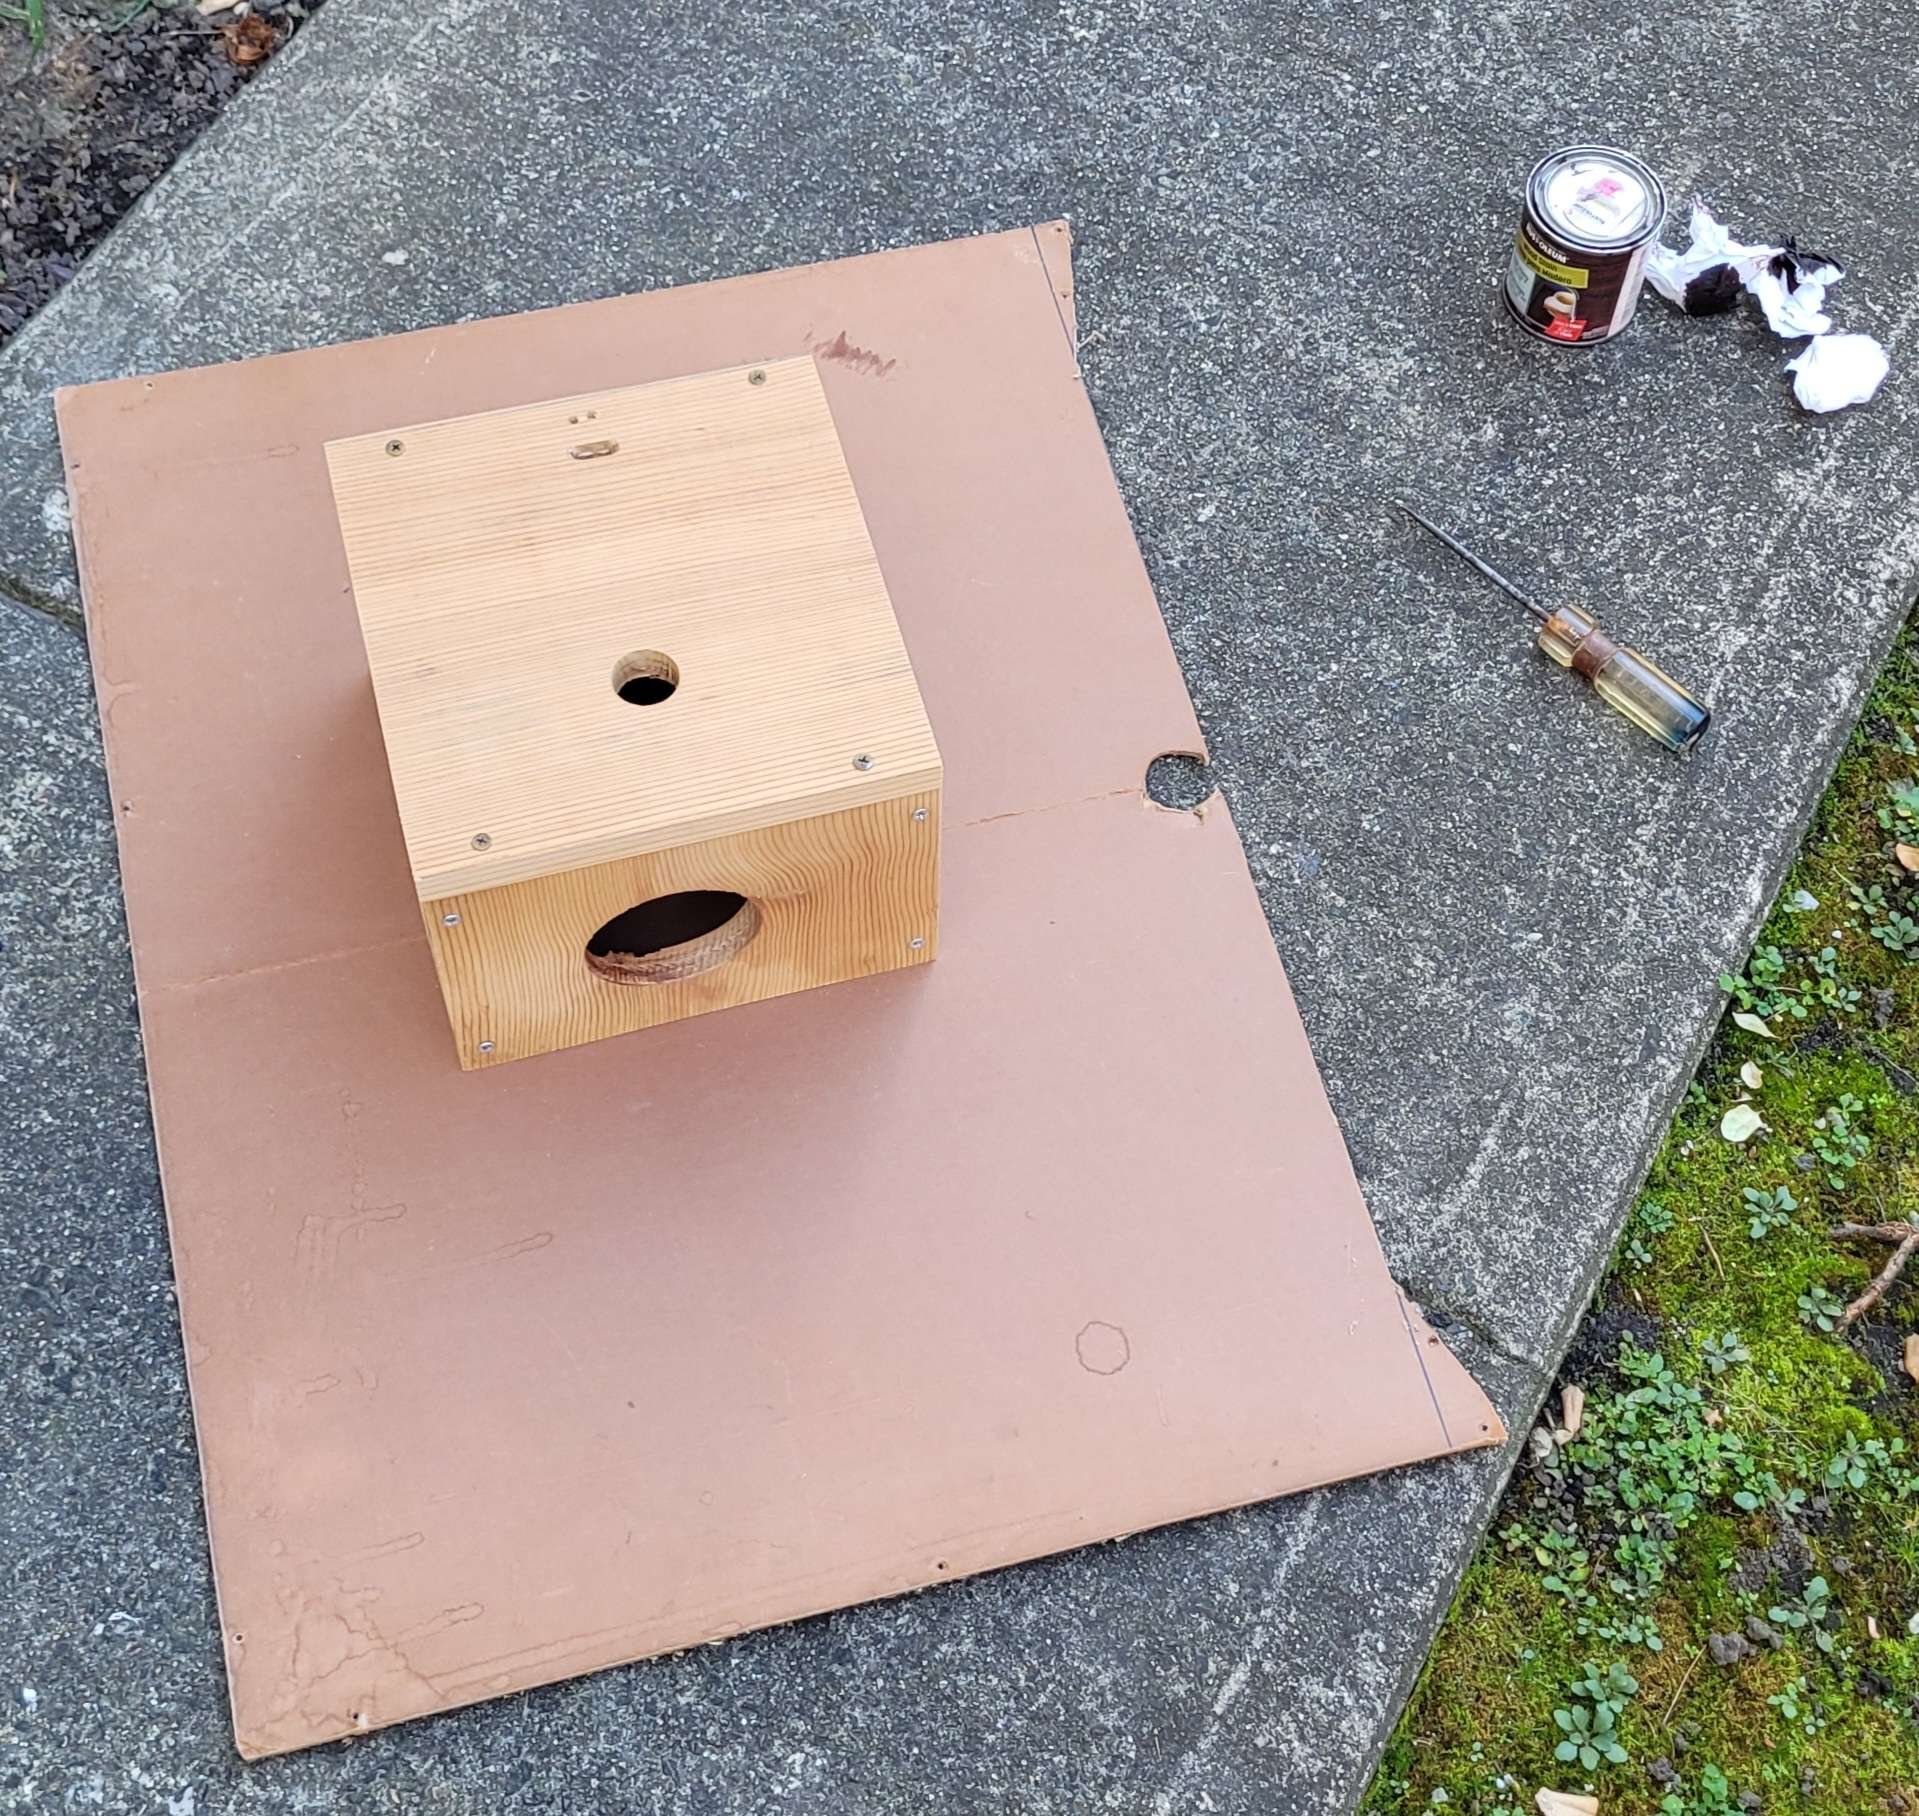
    that

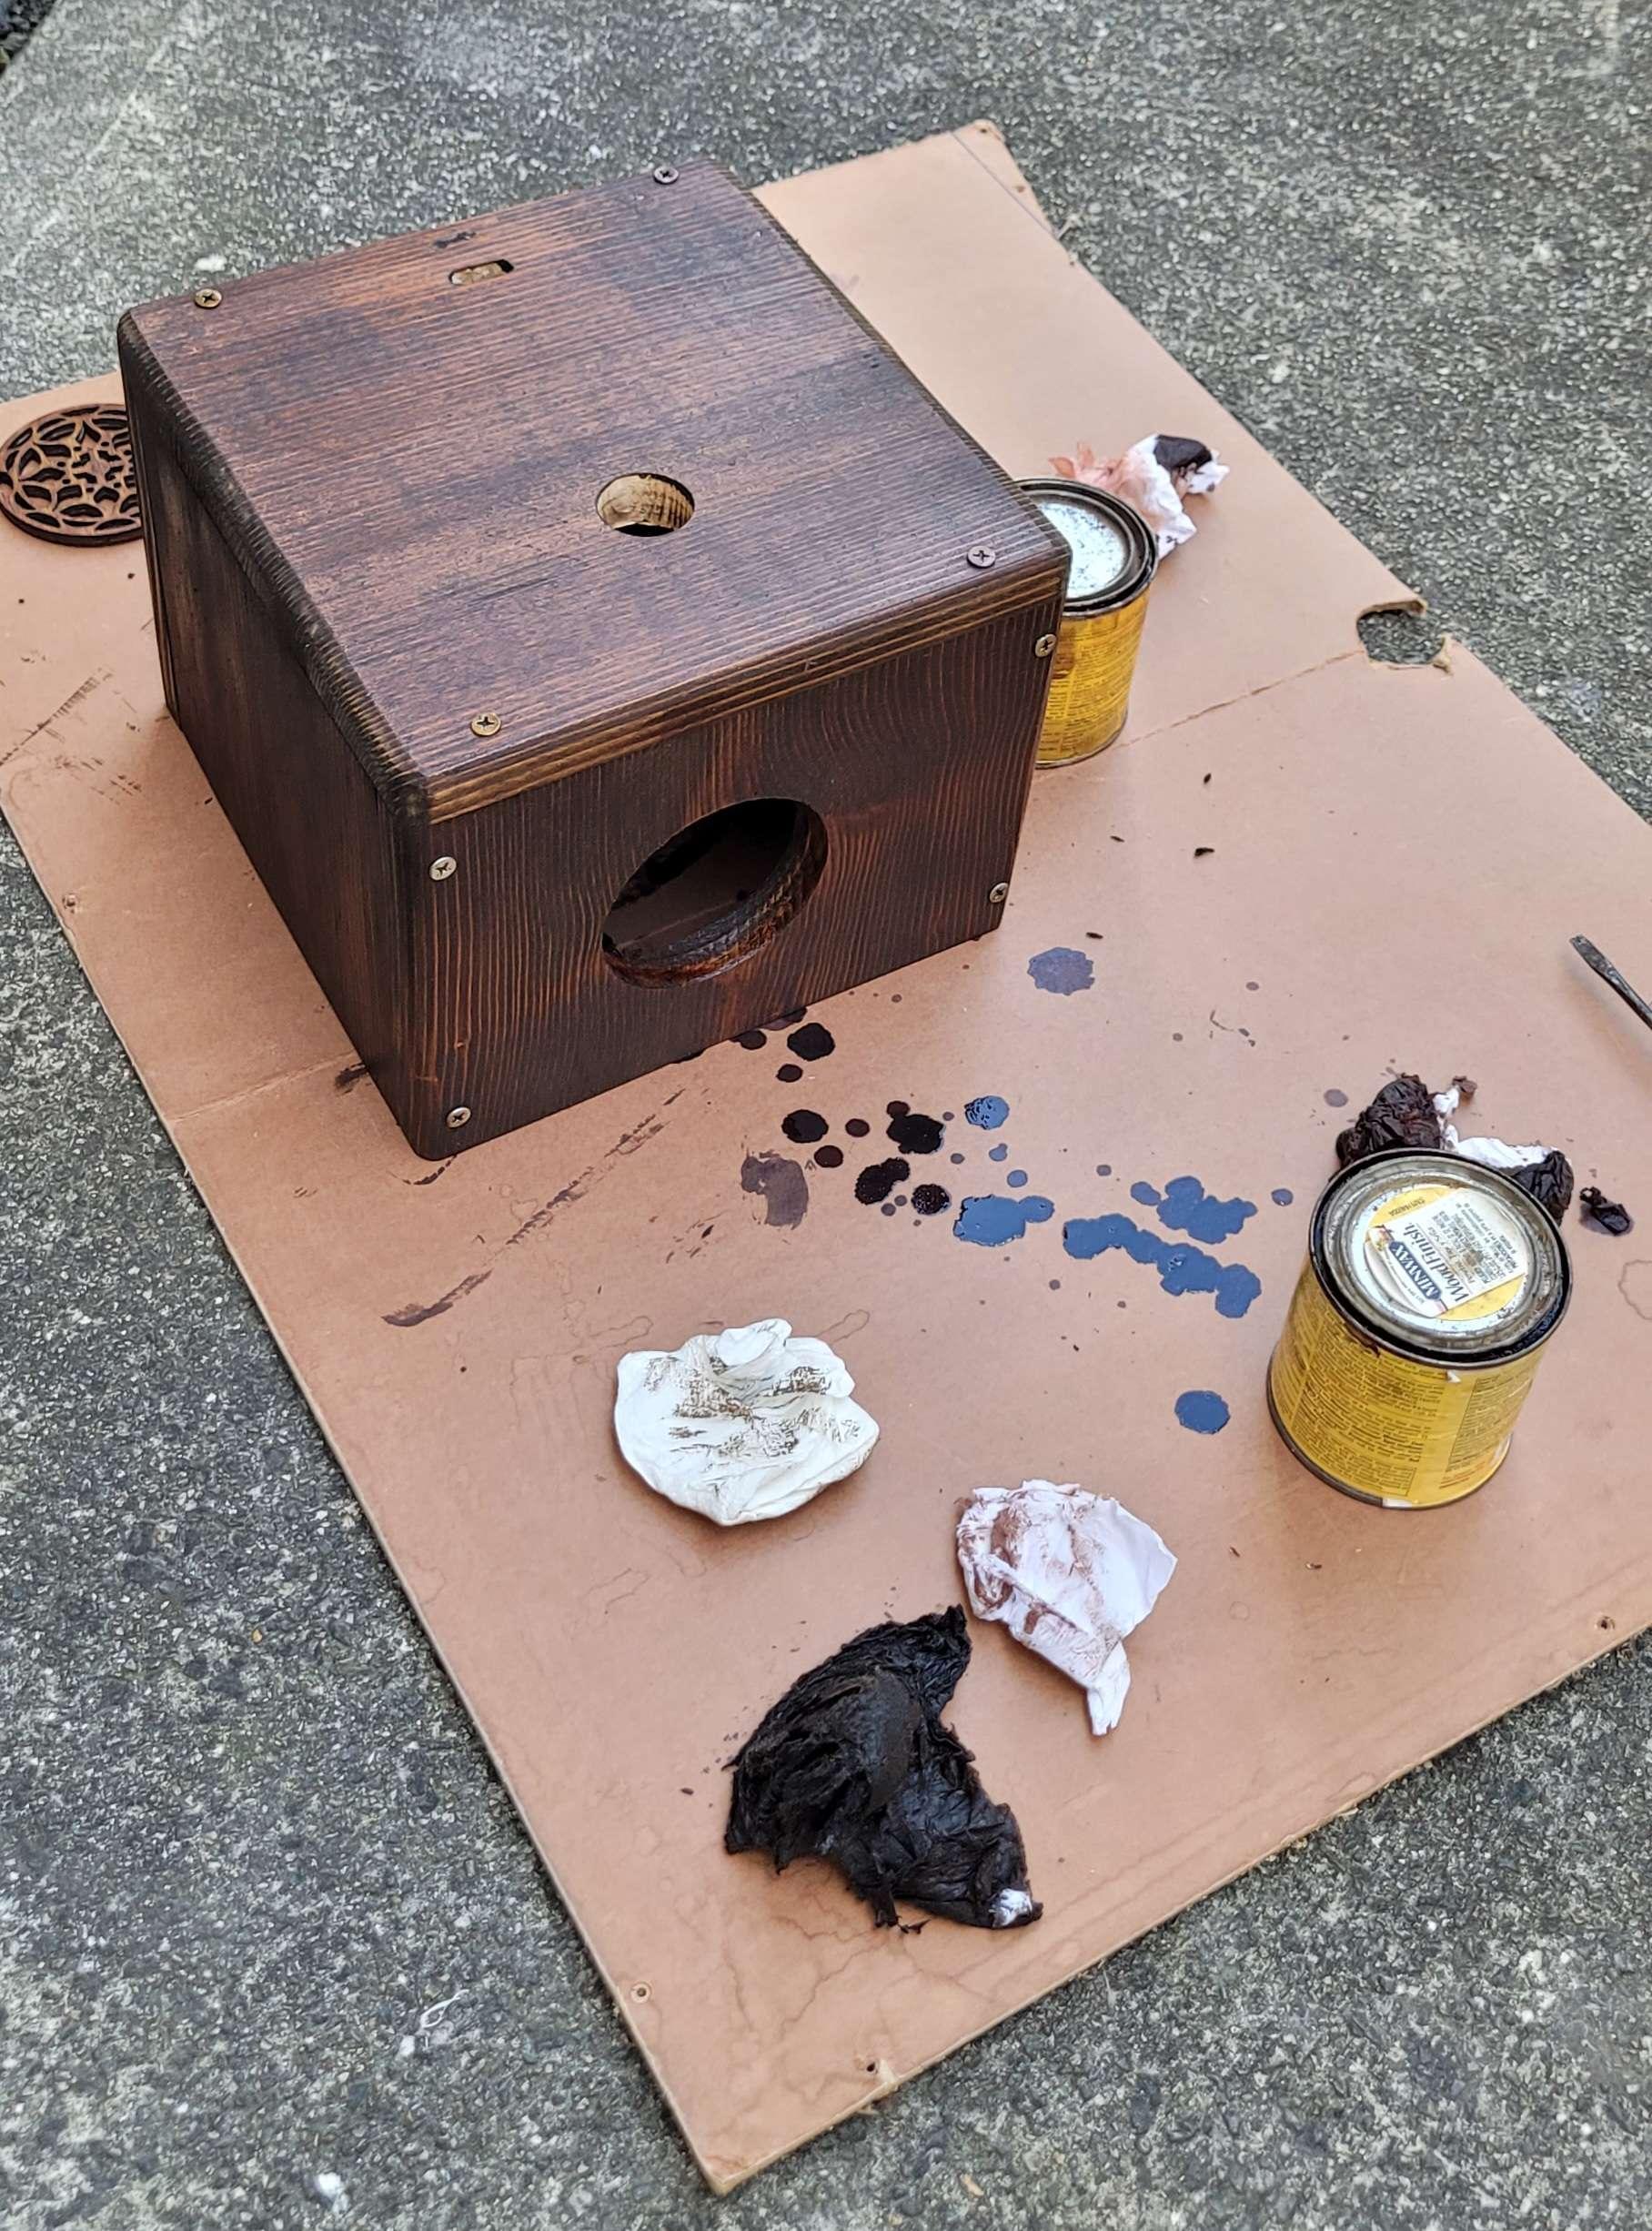
    a quick coat of dark walnut

    A quick coat of Dark Walnut.

    the hatch closed

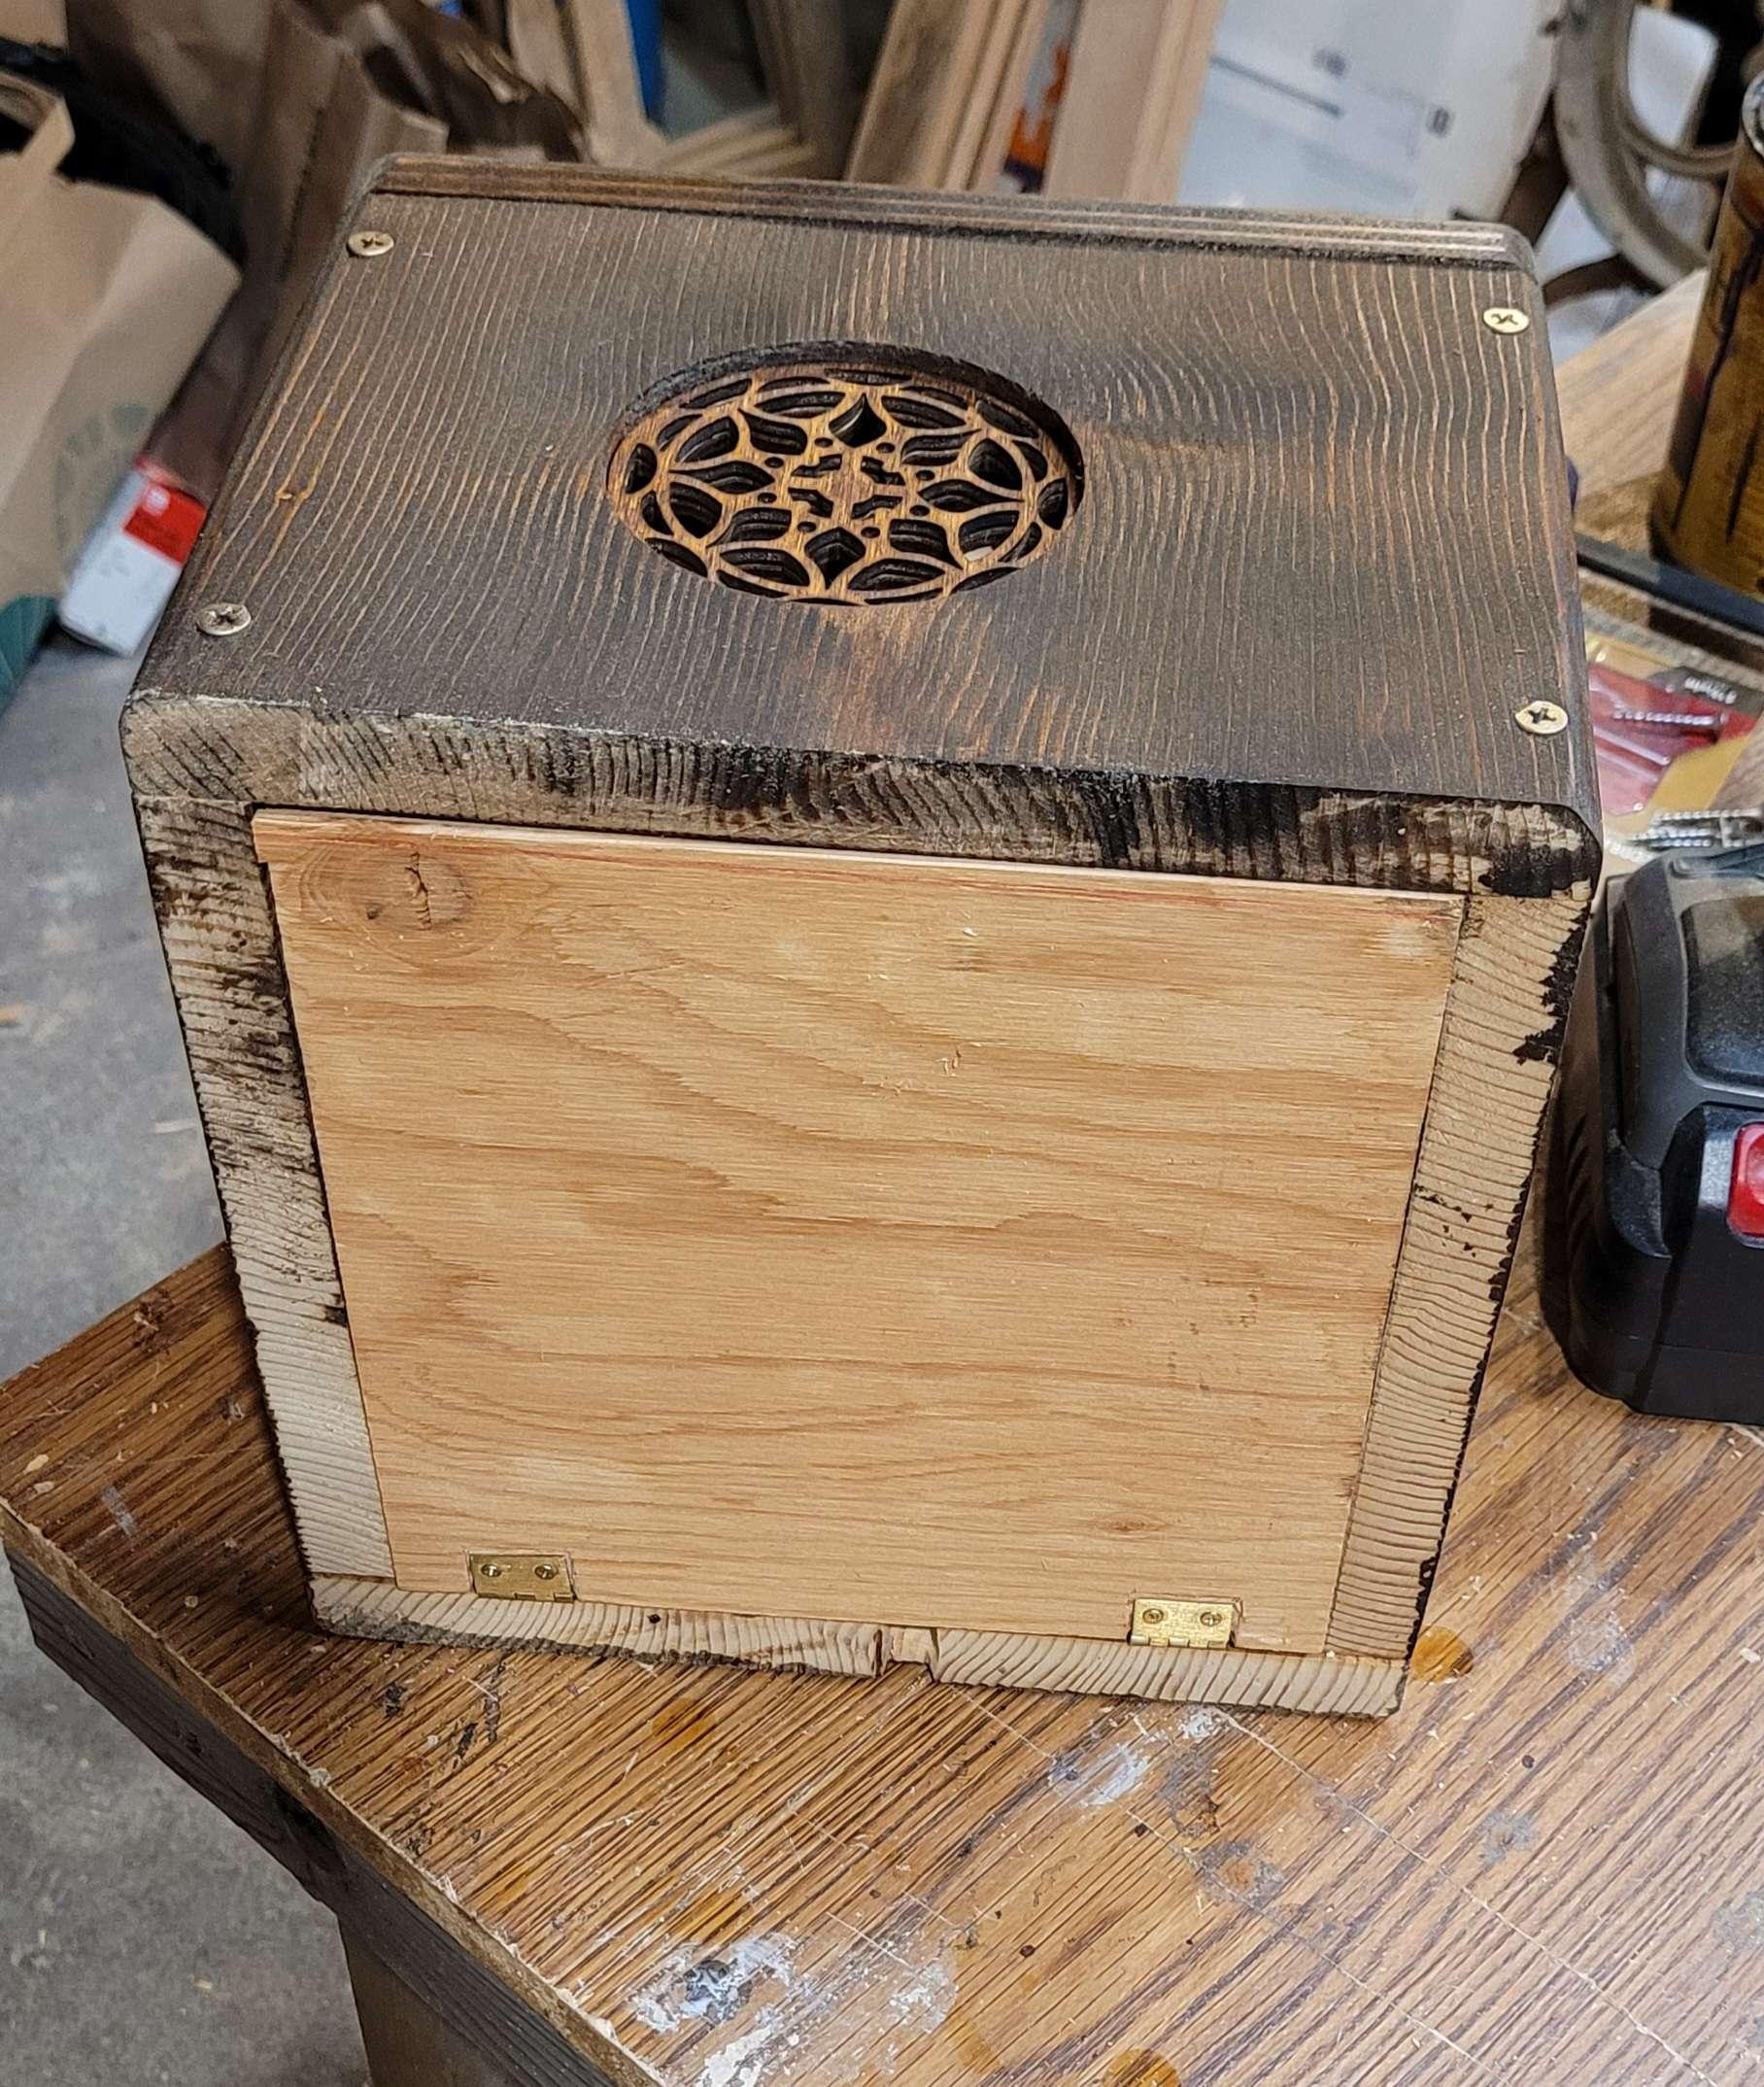
    The bottom is really simple, just some extra hinges I had, recessed into the wood enough to have good range of motion. To hold it shut, I drilled a hole and drove a screw in from the left side. After backing it out and driving it in a couple times with the screw gun, it could be done by hand easily.
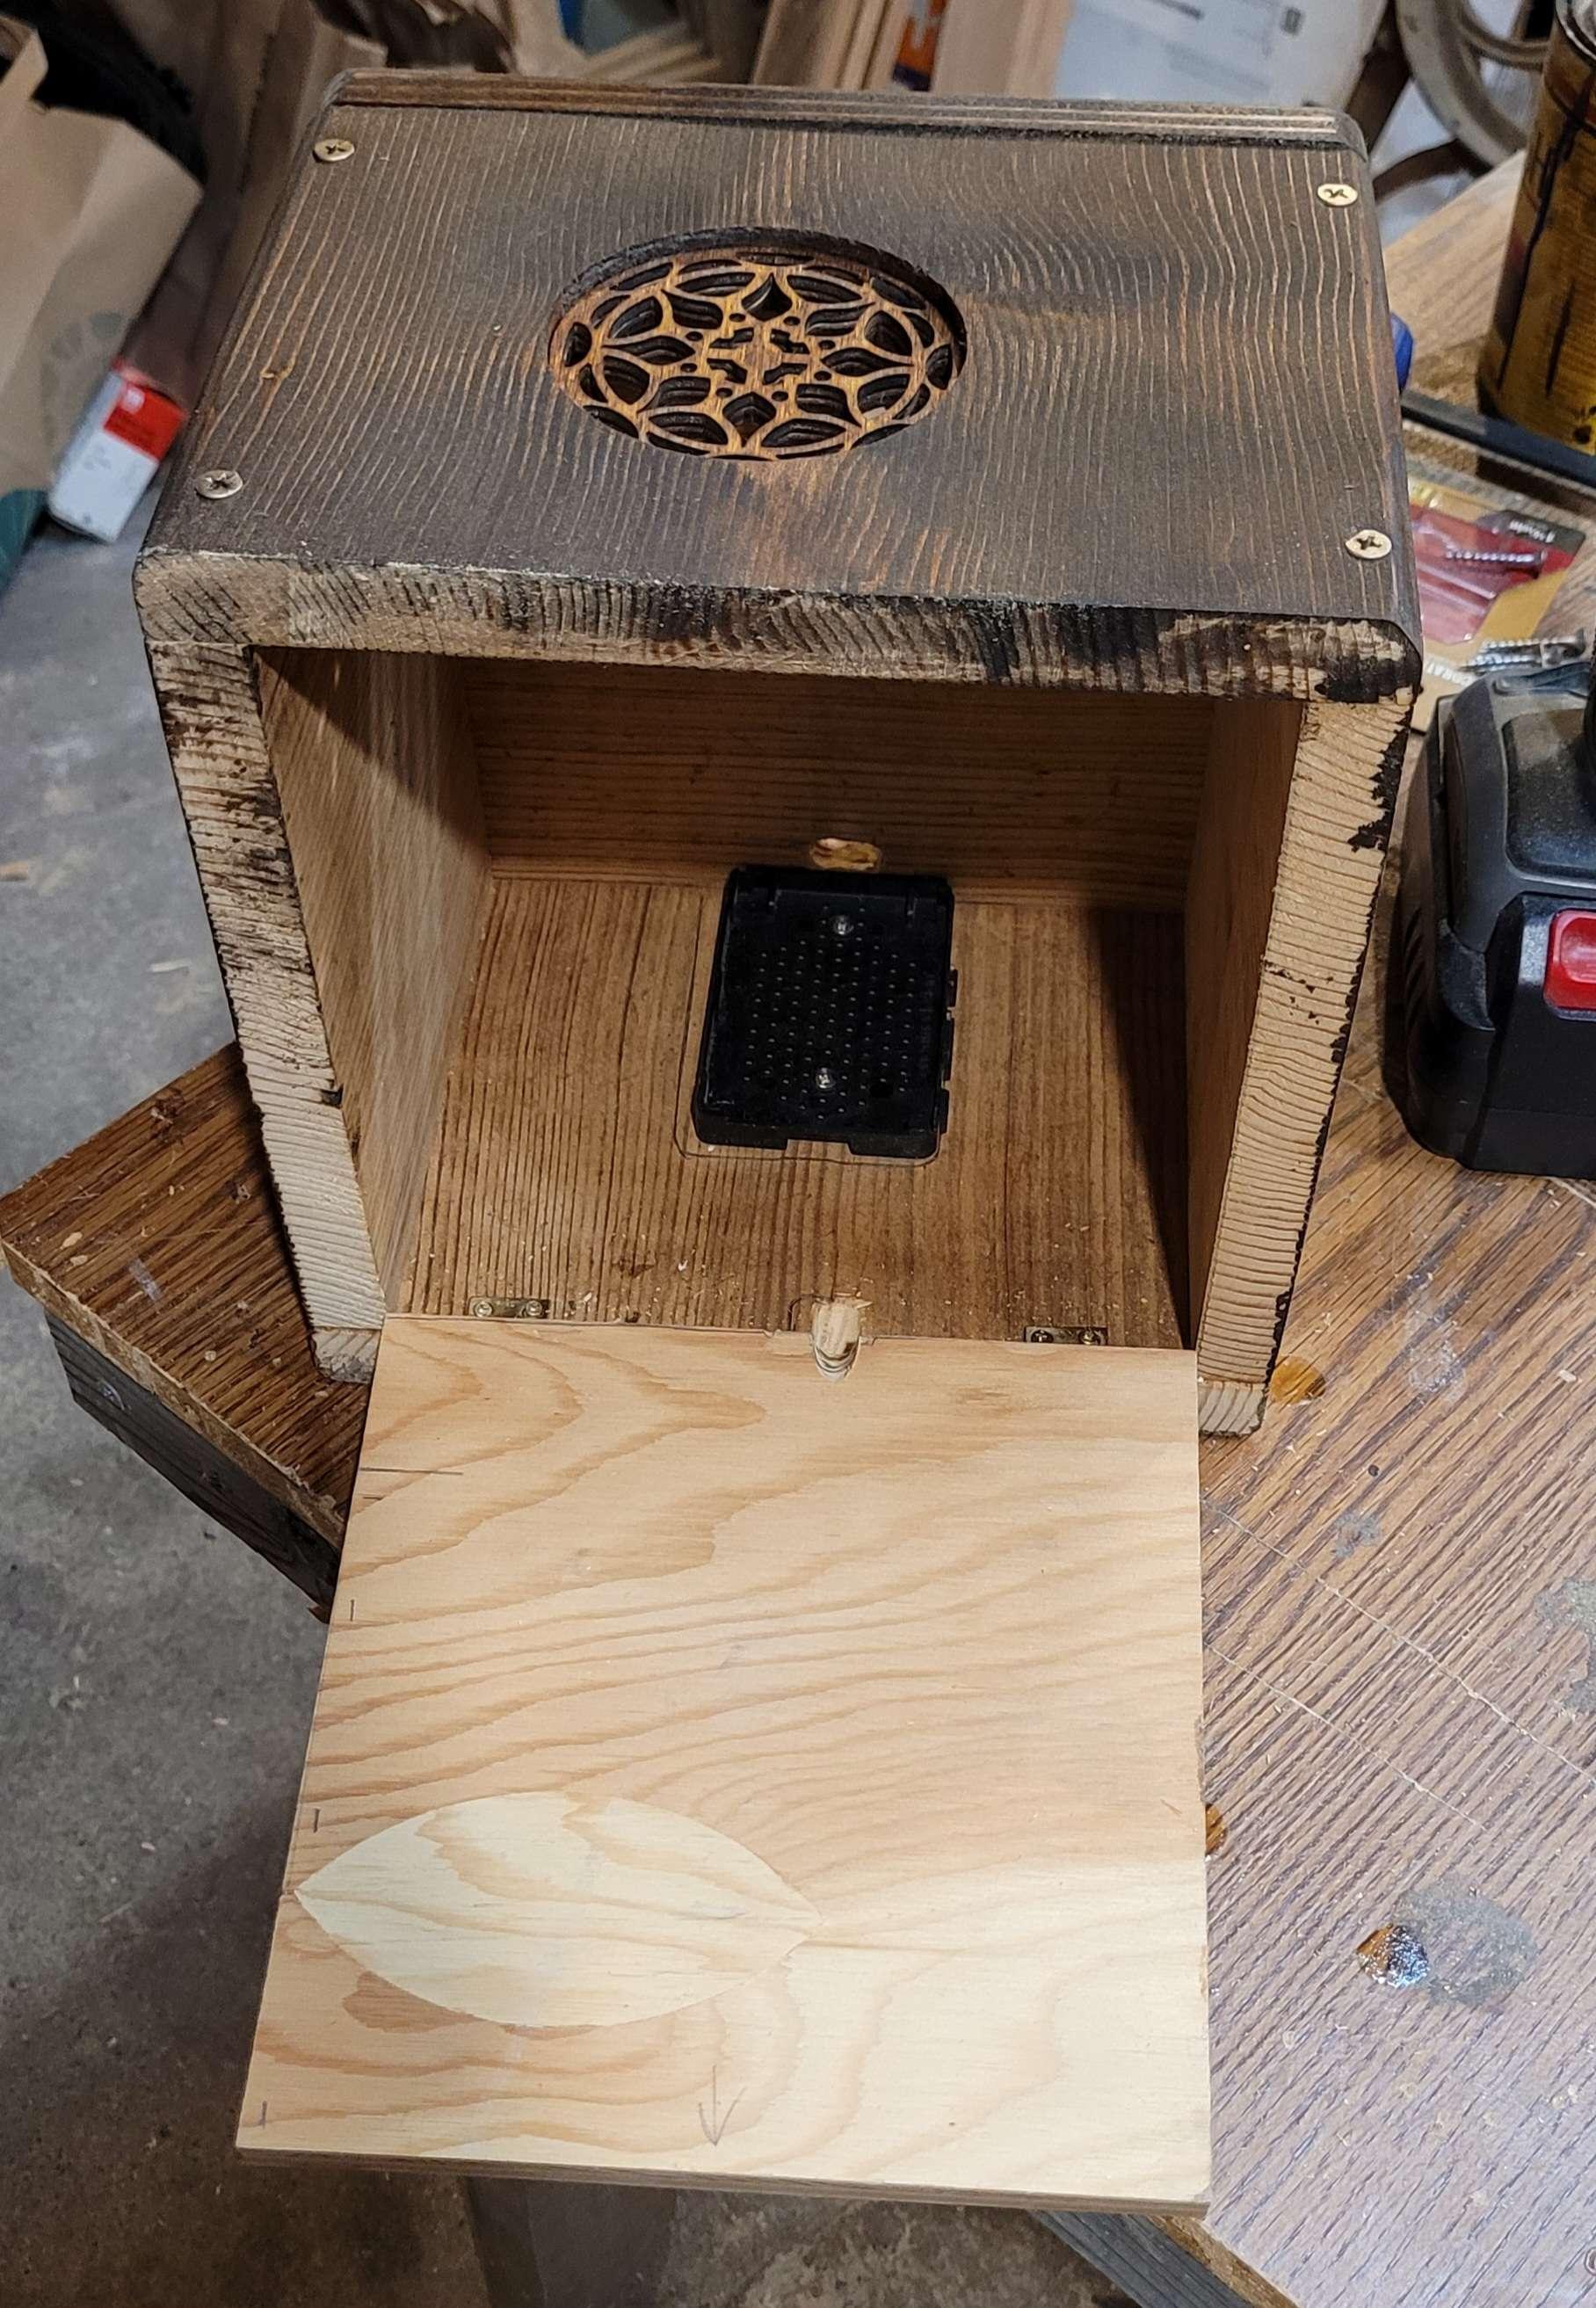
    the hatch open

    The raspberry pi had this plastic case when I found it in e-waste, I just took it apart and screwed the back of the case to the inside of the bigger wooden case.

    The small notch between the door and back plate is for the two-prong extension cord I'm using to power the pi and the speaker.
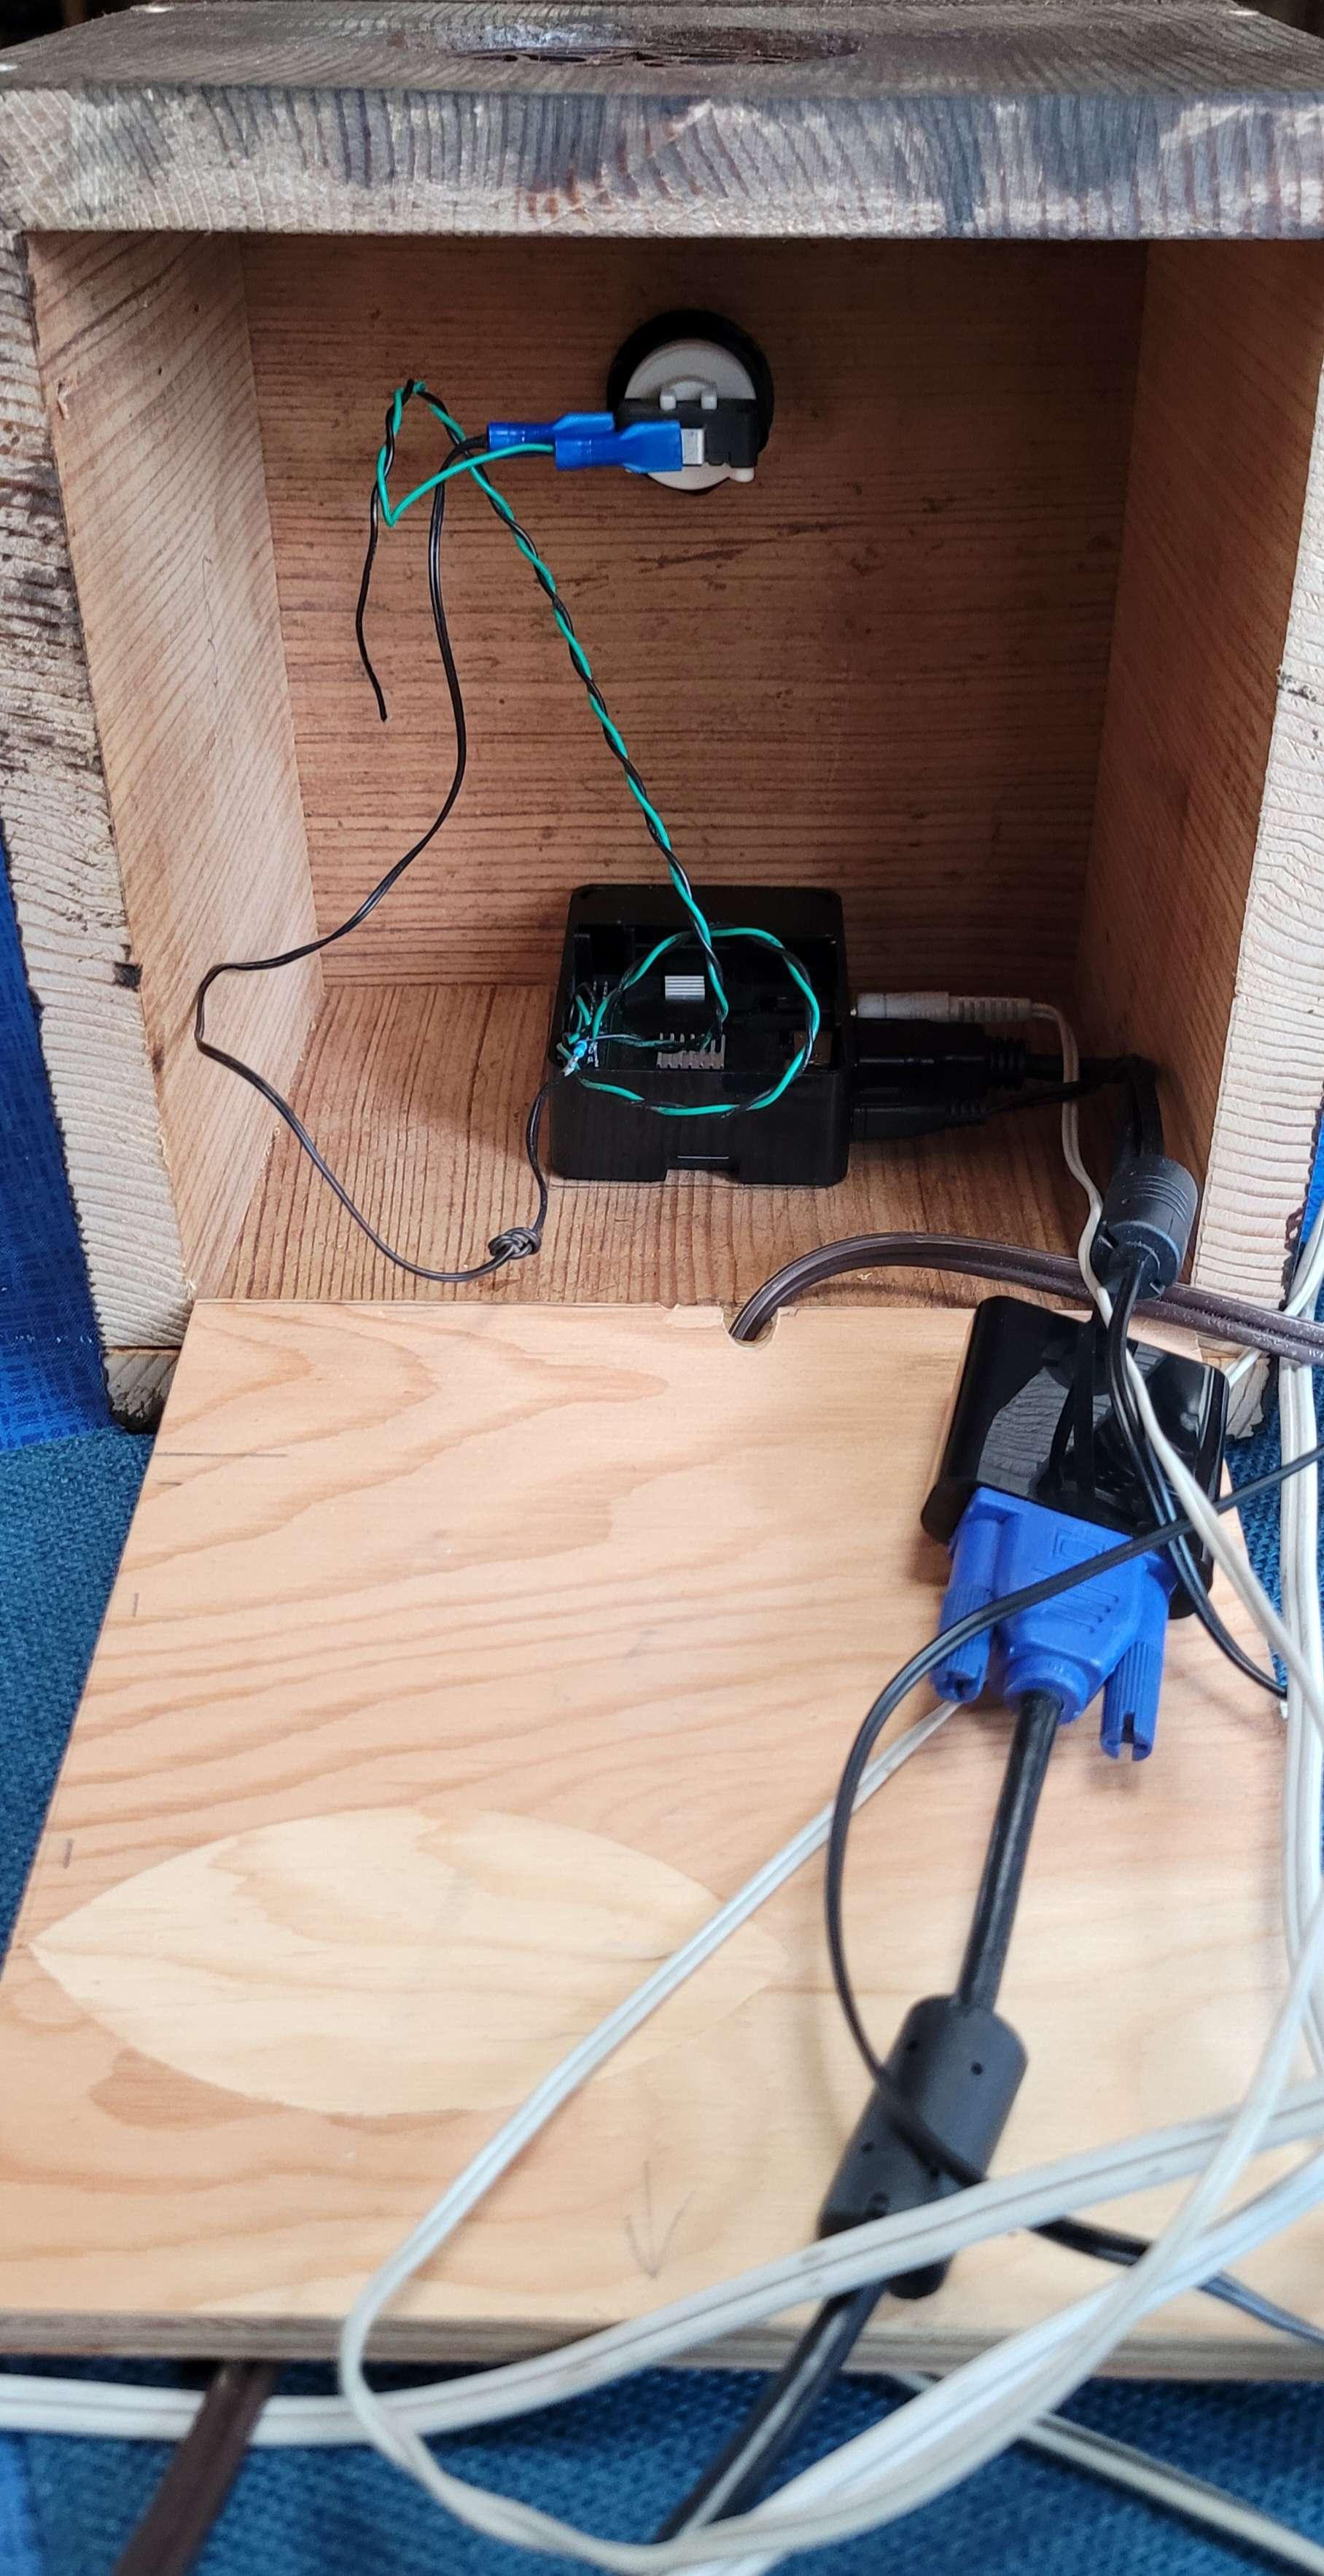
    components

    The case during setup, with the button wired up.

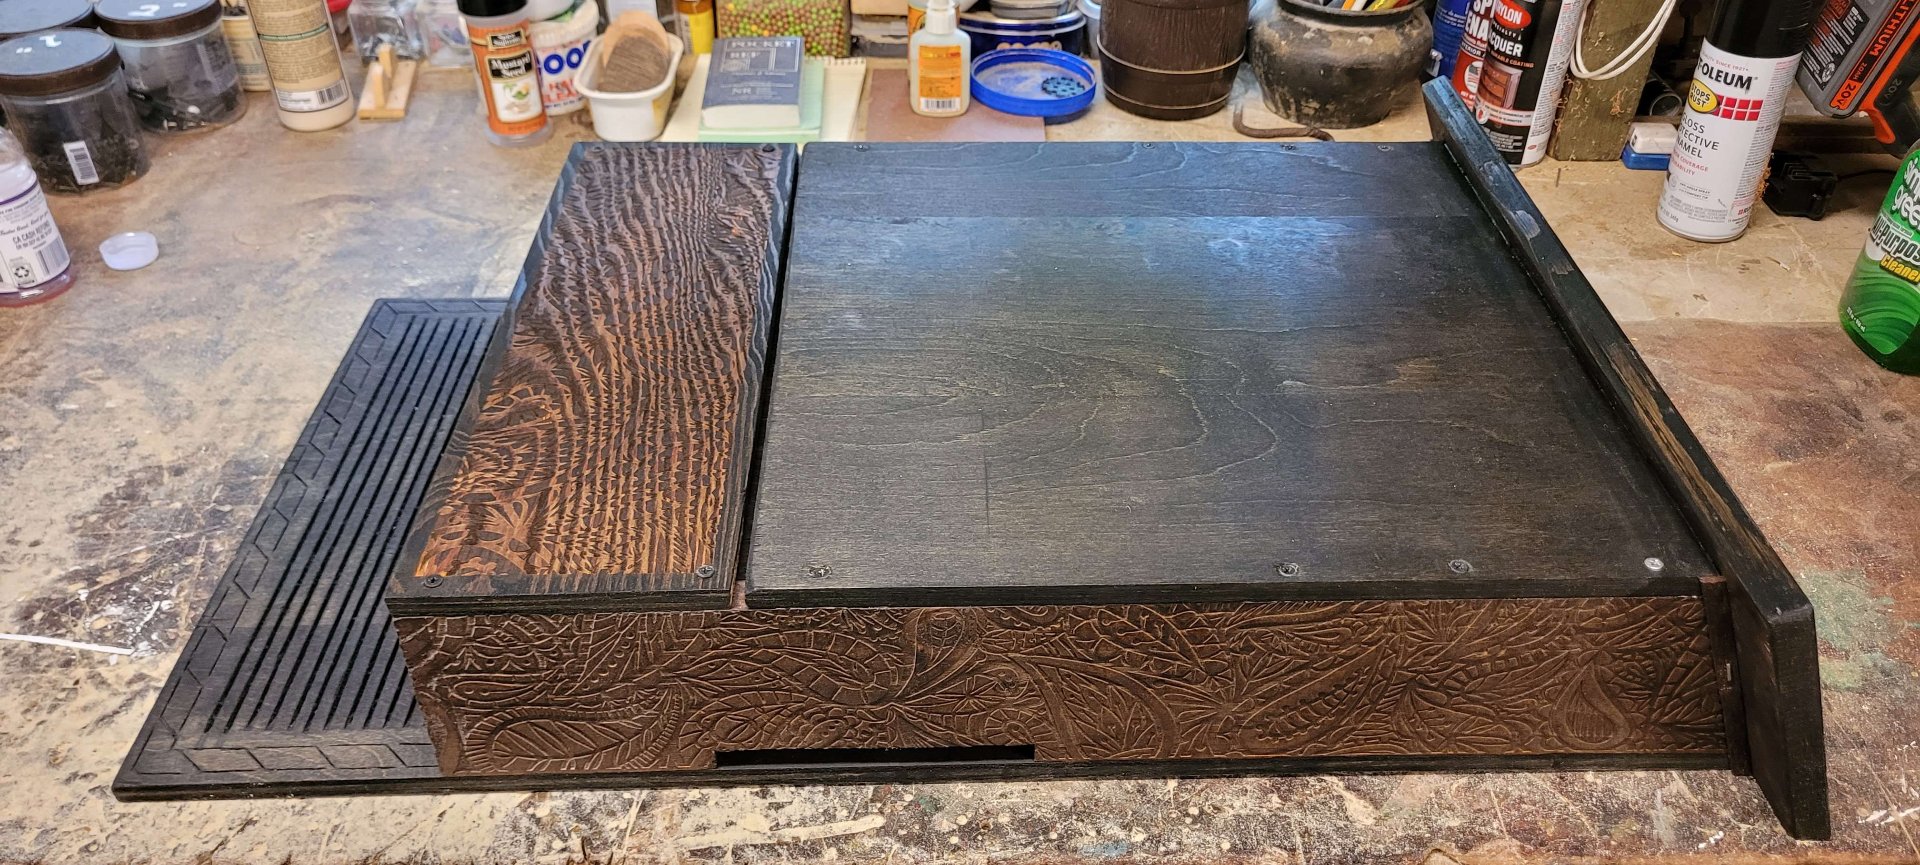
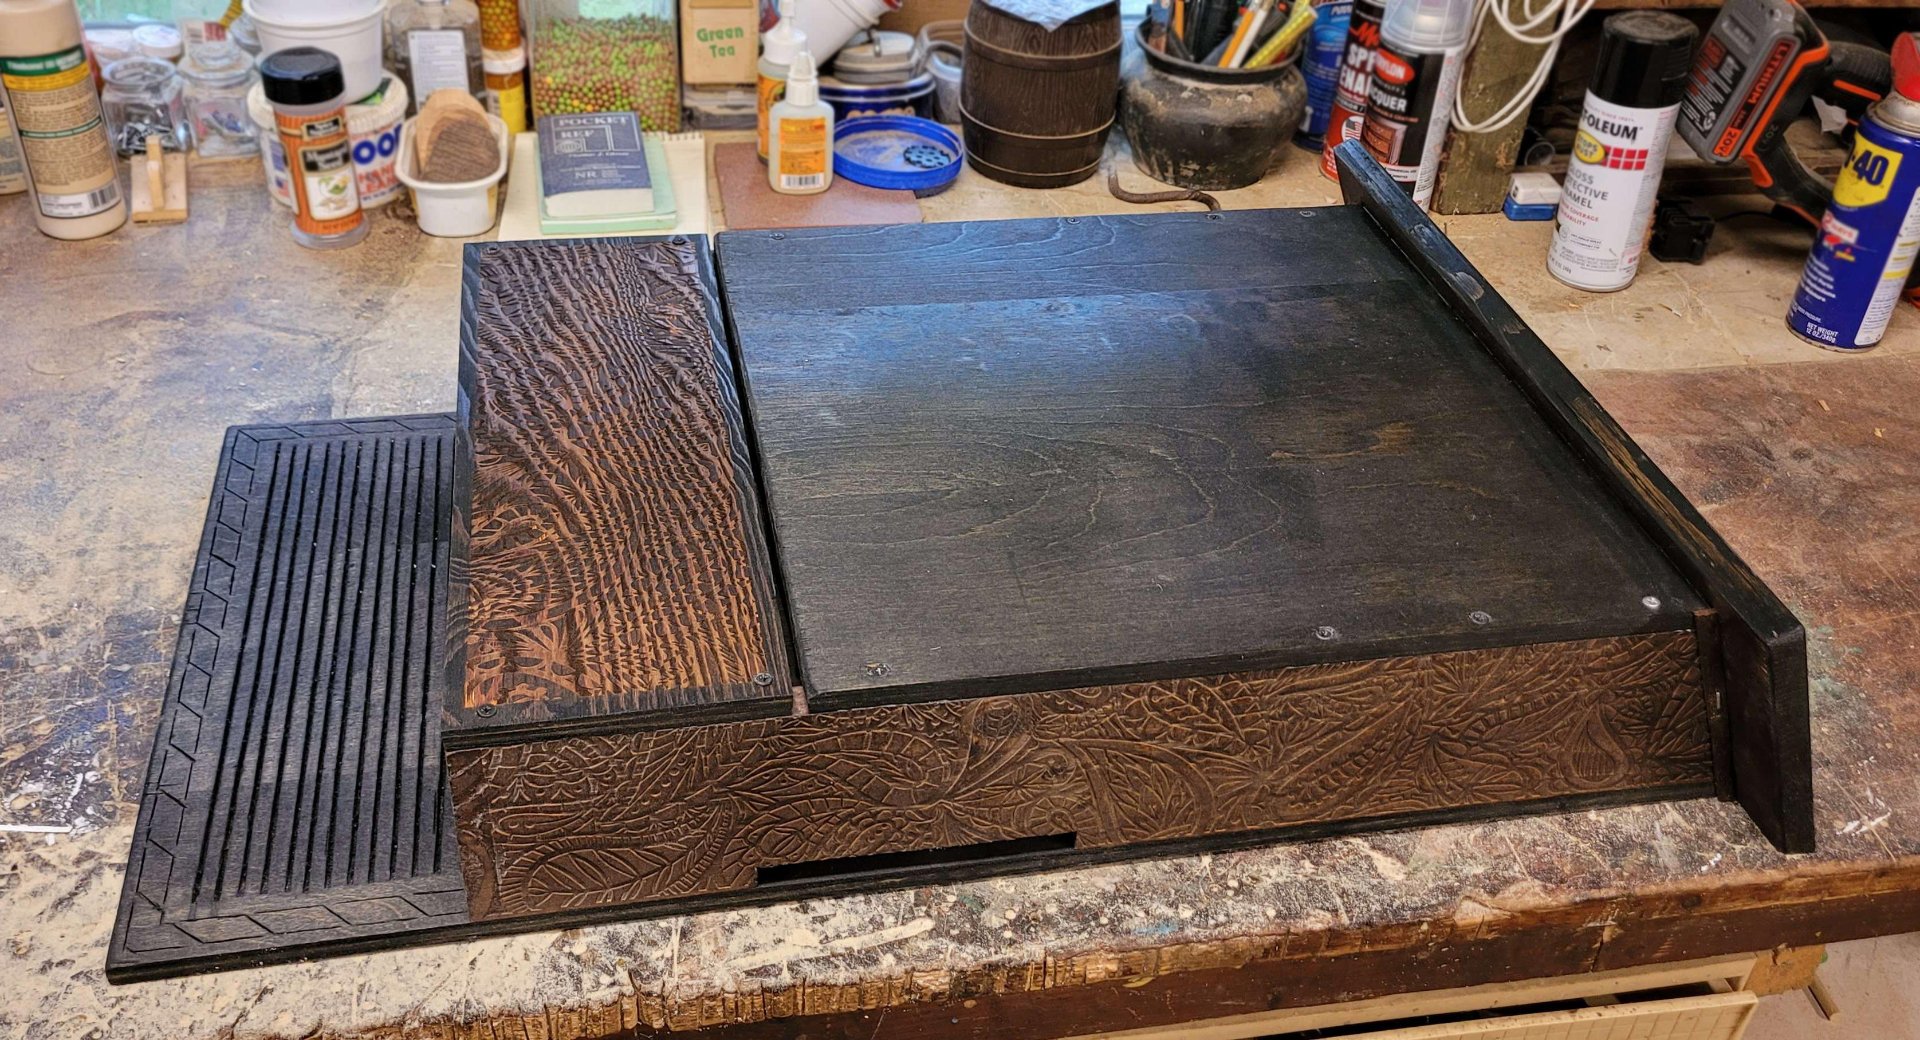
    the finished version

    The last of the setup was just connecting it to my grandmother’s wifi, packing it all into the case, and making sure it still worked before showing her how to use it.

    She liked it, especially the simplicity of the design, but wanted the transcription capability because she wanted to use it to write.

    My first attempt was to use spchcat:

    Originally I’d planned to follow step 3 of the Pi Spy tutorial but found that DeepSpeech was no longer supported(?) and hadn’t really been made with anything less than a Pi4 in mind (I’m using a 3b). Luckily, a bunch of other speech recognition options are available, and I settled on spchcat mostly because it was the first one I found that fit my use case.

    If you’re going to install it on a raspberry pi, I very much recommend their issues page for getting through dependency hell. Especially if you put a 64bit OS on your pi. (Remember to get the :armhf version of whatever library it needs.) Pulseaudio also seems to help.

    This is a pretty short post, I mostly just wanted to make my updated code available. It’s… not great. I’m not a programmer by trade, and I’m a strong believer in ‘finished not perfect’ even when I know what I’m doing. It seems to be functional, that’s about all I can promise. Maybe don’t let anyone shout bash commands around it. There’s also still no error catching around the length of the recording, or the transcription, though that at least doesn’t seem to cause any issues when it fails.

    This is definitely more of a jumping off point than a proper finished product, but hopefully it’ll be useful to someone who’s trying to make the same thing or something similar. Even if it’s not perfect, maybe it’ll save you from repeating some of the work I’ve done so far.

    The updated code is here: https://mega.nz/file/LQlz1BjQ#3R6E9_k1jfmjzFUcBXq_Qi3IGf46iuYtZ95fQlAO-HI

    She used it for awhile until a power outage corrupted the SD card. I rebuilt it, this time using a raspberry pi install with a GUI so I could support Team Viewer, per a recommendation here: https://slrpnk.net/post/3586855

    In order to run the program from startup in the desktop environment, I had to skip crontab and take advice from the last post on this thread to edit /etc/xdg/lxsession/LXDE-pi/autostart to include @/usr/bin/python3 /home/audio/sound_recorder_good.py

    This time I skipped spchcat altogether and went back to my older code, and redirected the email to point to another relative. I bought them a nice program for transcribing audio, and helped install it on their desktop.

    • Pictures 13 image

    • visibility
    • visibility
    • visibility
    • visibility
    • visibility
    • visibility
    • visibility
    • visibility
    • visibility
    • visibility
    • visibility
    • visibility
    • visibility
    • chevron_right

      Table fixup

      JacobCoffinMakes · Tuesday, 6 February - 00:11 · 1 minute · 3 visibility

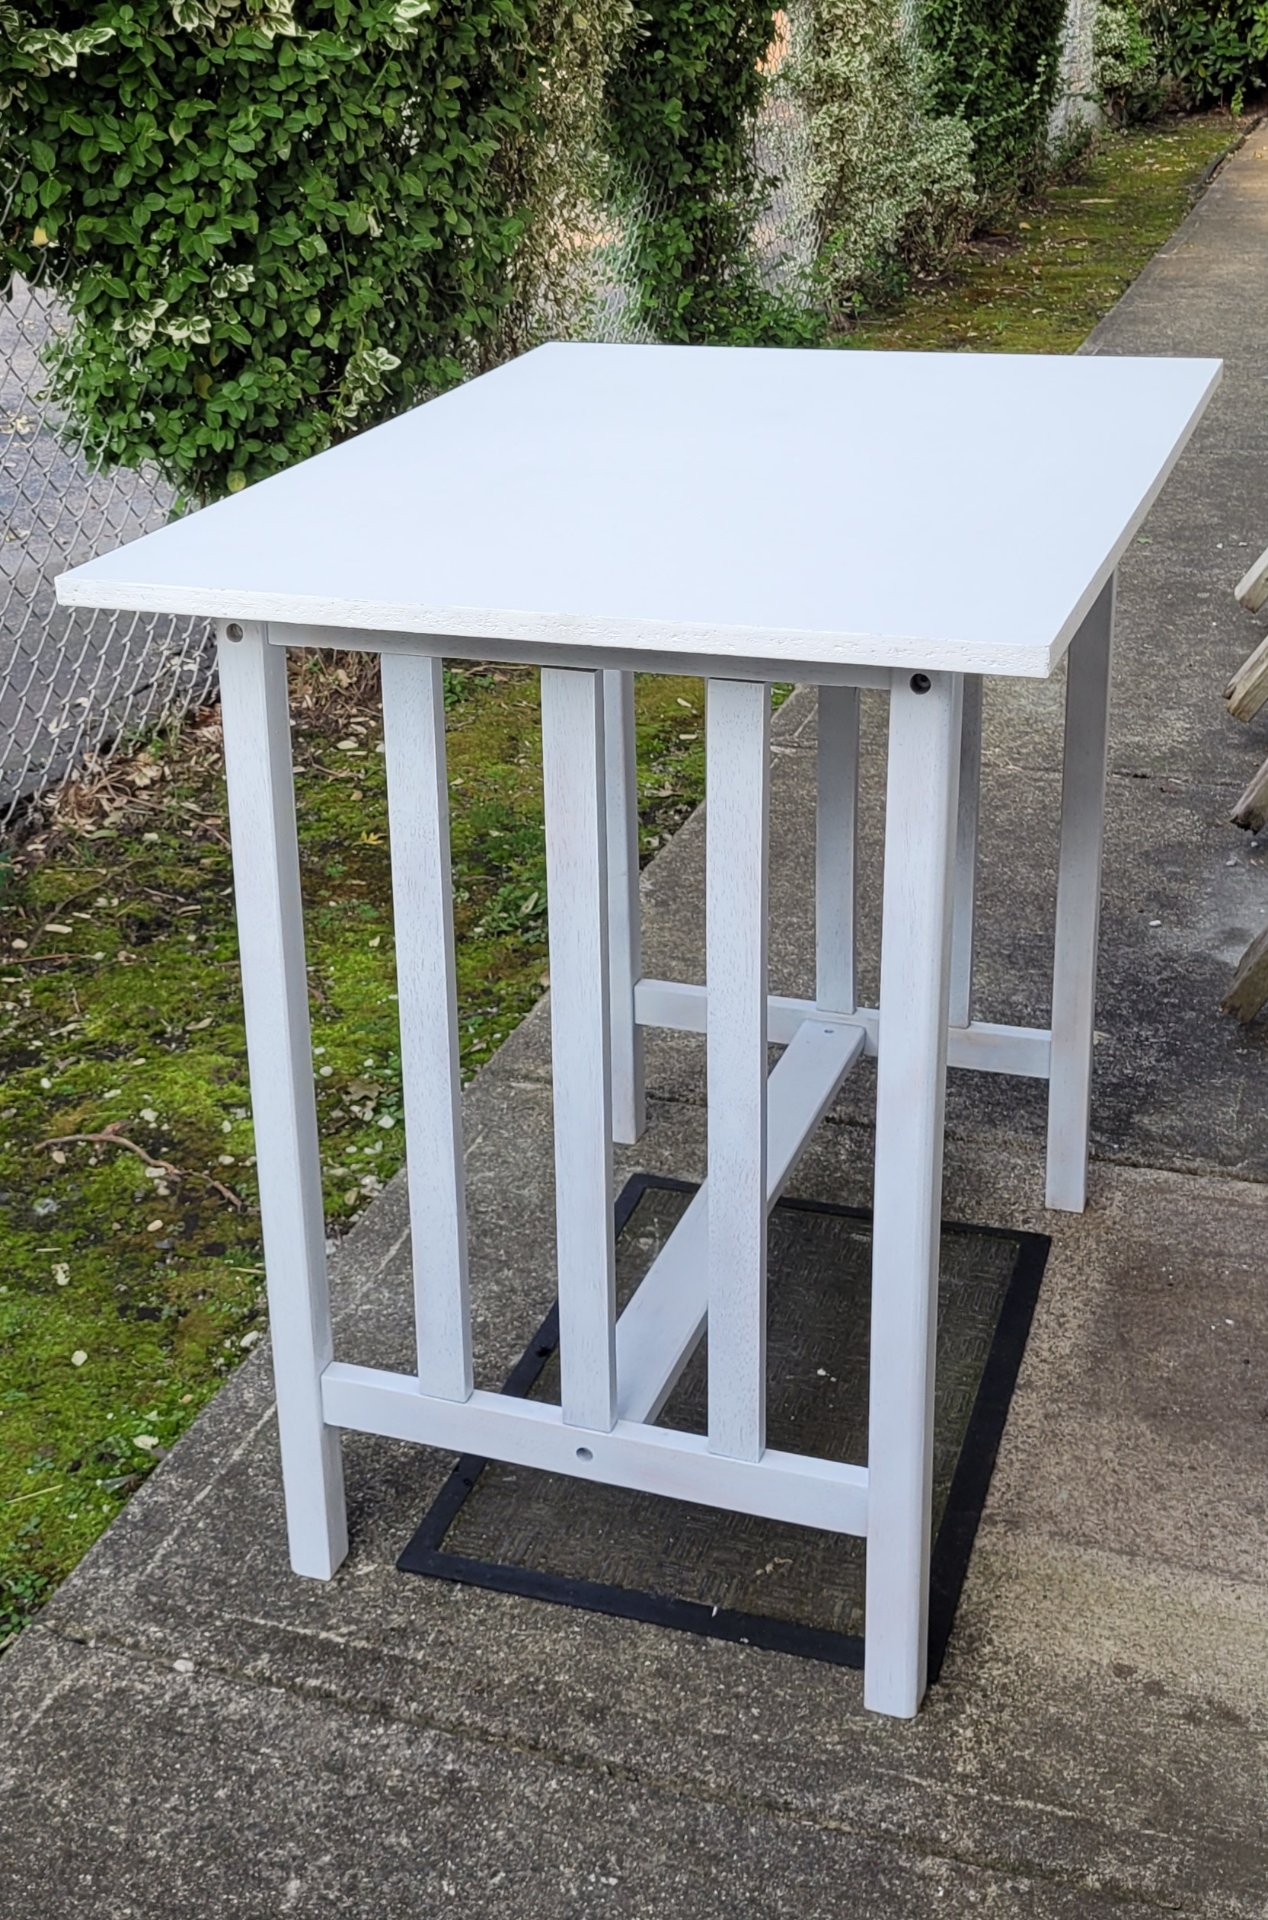
    before and after

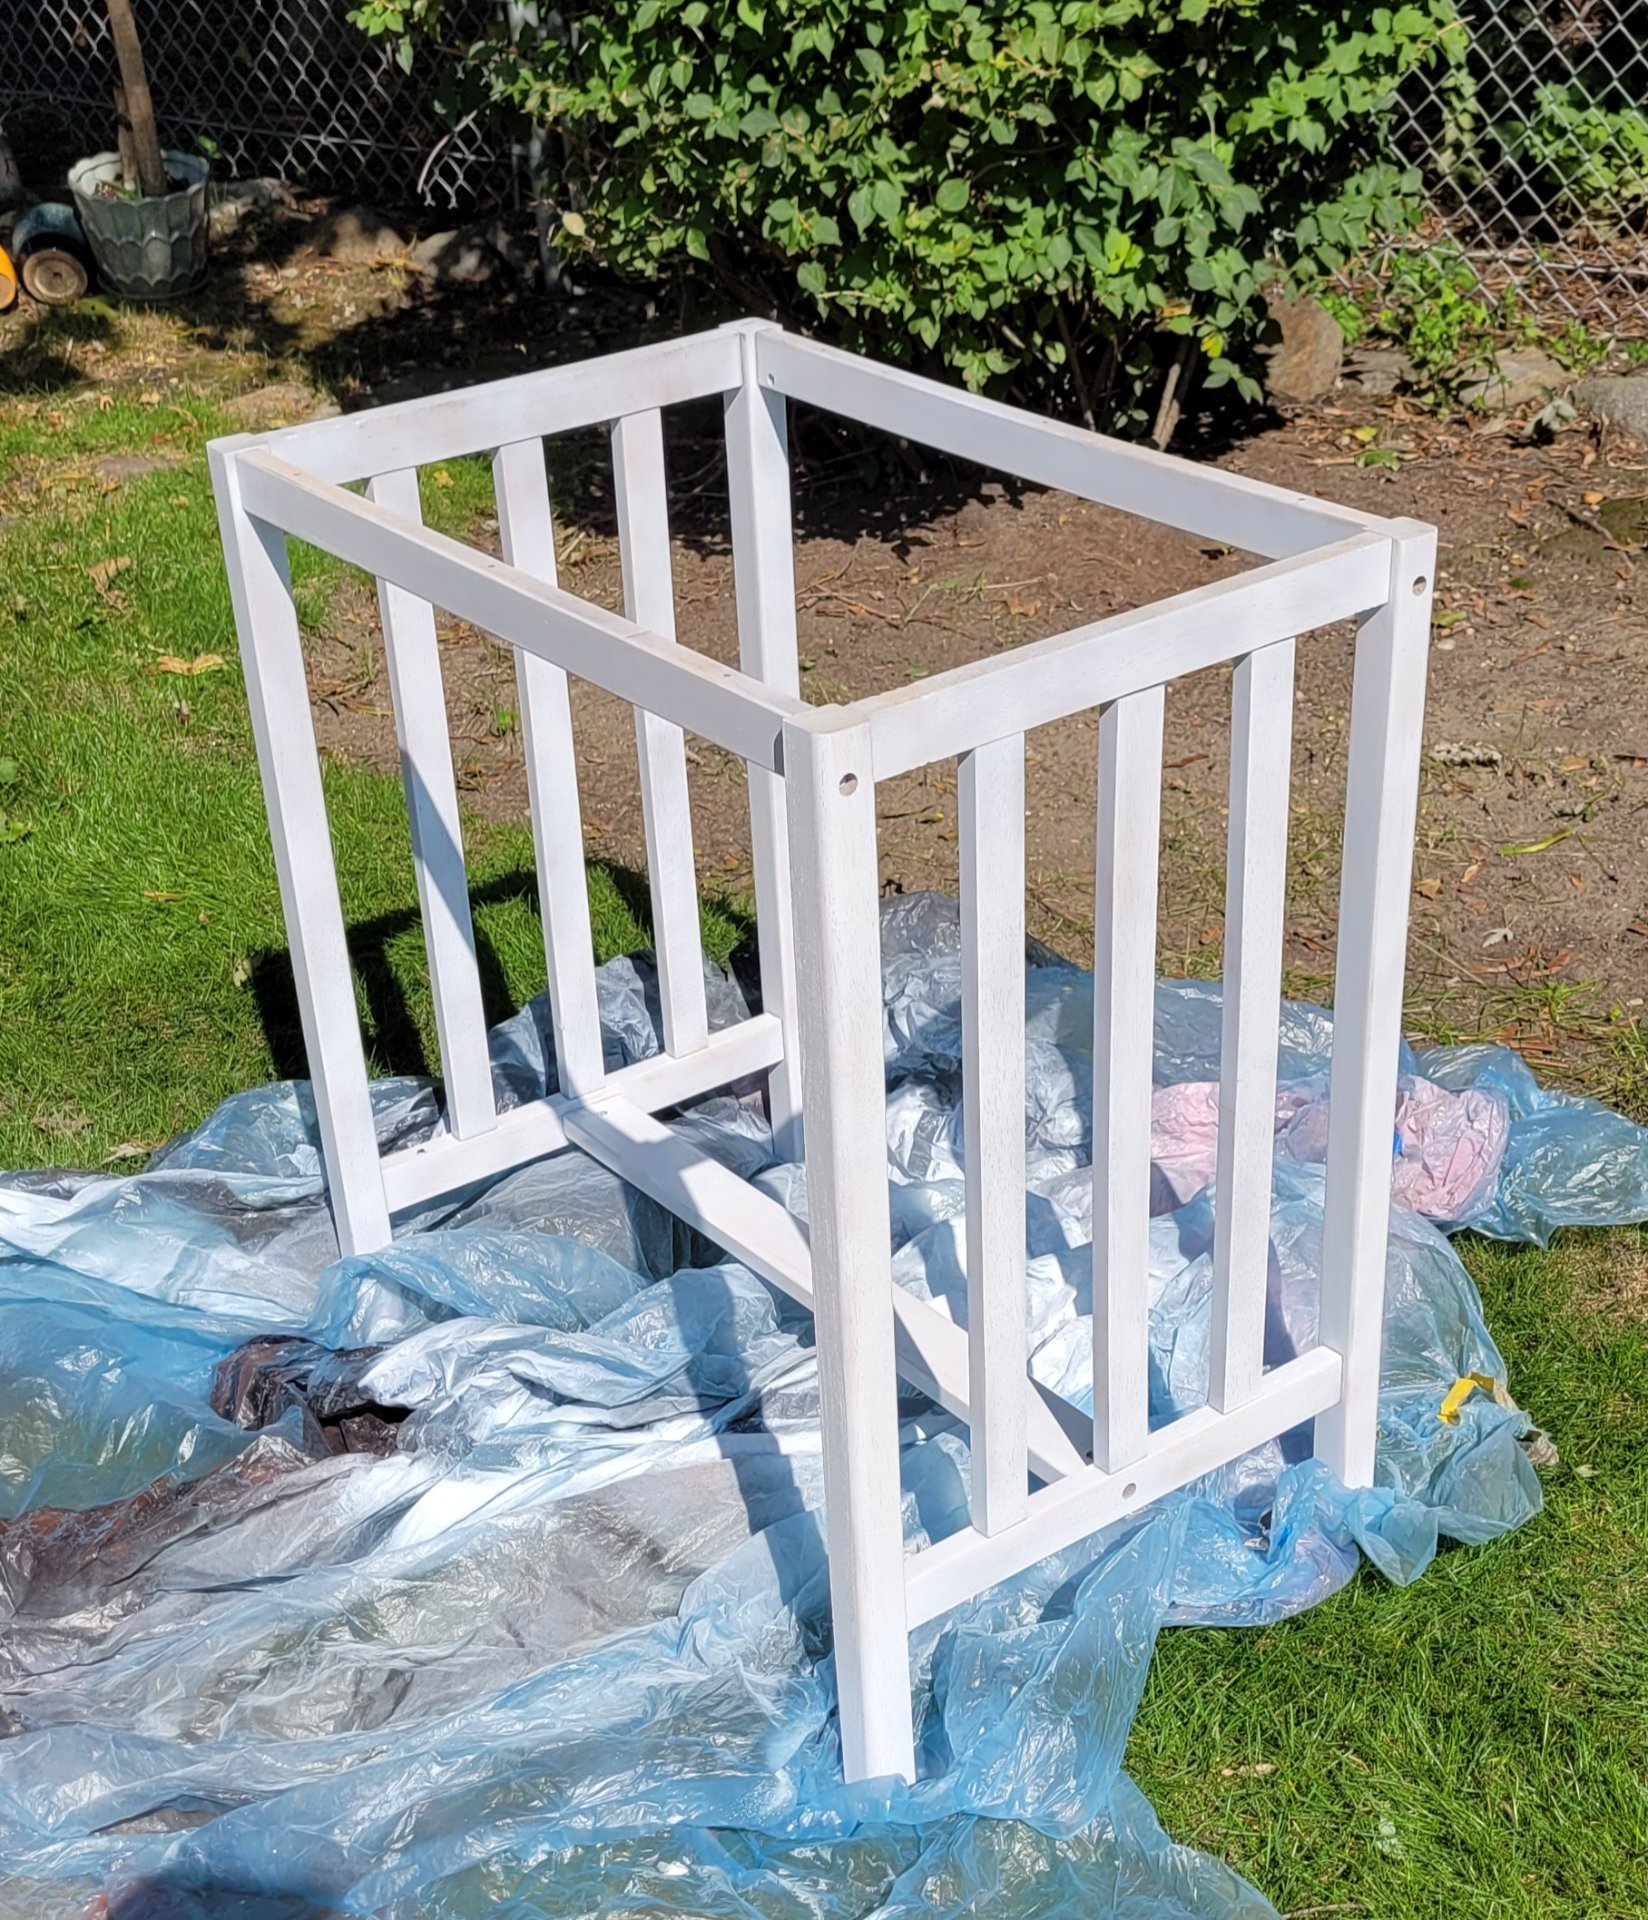
    This table was in pretty rough shape, the top was missing, the varnish was flaking, and the wood had greyed in the weather. There was some discoloration I suspected was mold.

    I had a scrap of particleboard left over from an arcade cabinet I helped a friend build, which happened to be a good fit for the top, so I decided to combine the two and put them up on my local Buy Nothing -type group. I sanded off the finish, posted a picture asking if anyone would like it once I fixed it up and what color they'd like it painted (normally I restain them but I wanted to get this one done quickly to clear space, and I didn't love how the wood looked (it had a lot of those zigzaggy joints they use for cheap lumber).

    A couple people were interested, one picked white, and I painted it up. I laid out a dropcloth and set the table upsidedown first so I could get all the spots underneath the joints, then I flipped it and painted it standing upright.

    painting

    Some of my yellowjacket buddies came to check out what I was doing but we managed to coexist. Nobody got stung and nobody got sprayed with paint.

    I turned it four times so I could see how each side looked in direct sunlight, and made sure I hadn't missed anything.

    While it dried, I used some white acrylic paint on the sanded edge of the particleboard, to seal up the material. Once that was ready, I flipped the top so the good side faced down, flipped the old table base so it was upside down on top of the upside-down top, measured the distance to each side and adjusted till they were even. Then I drilled through the existing holes in the base, just through the plastic veneer on the particleboard, and drove six drywall screws through.

    finished

    • Pictures 3 image

    • visibility
    • visibility
    • visibility
    • favorite

      1 Like

      The Quuuuuill

    • chevron_right

      Bat house built from salvaged lumber

      JacobCoffinMakes · Monday, 5 February - 23:41 · 5 minutes

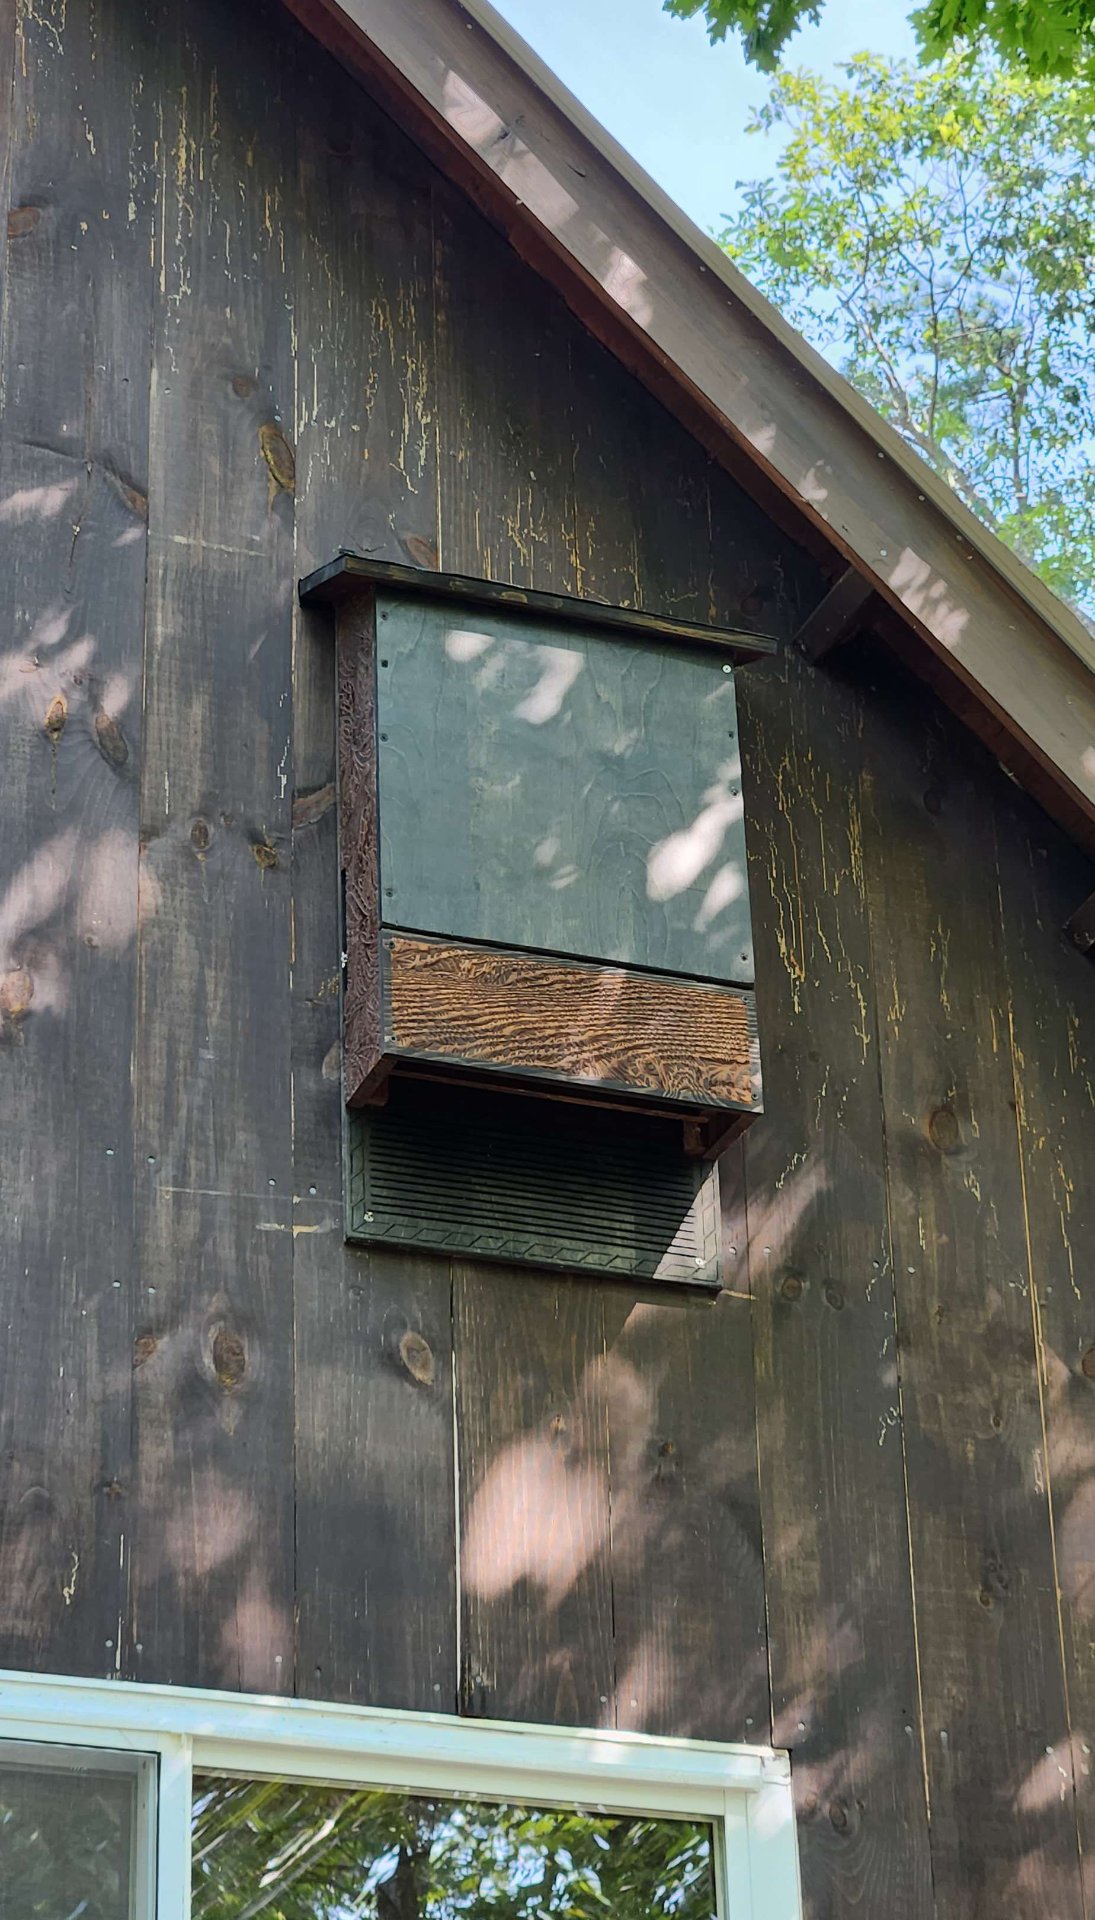
    the bat house

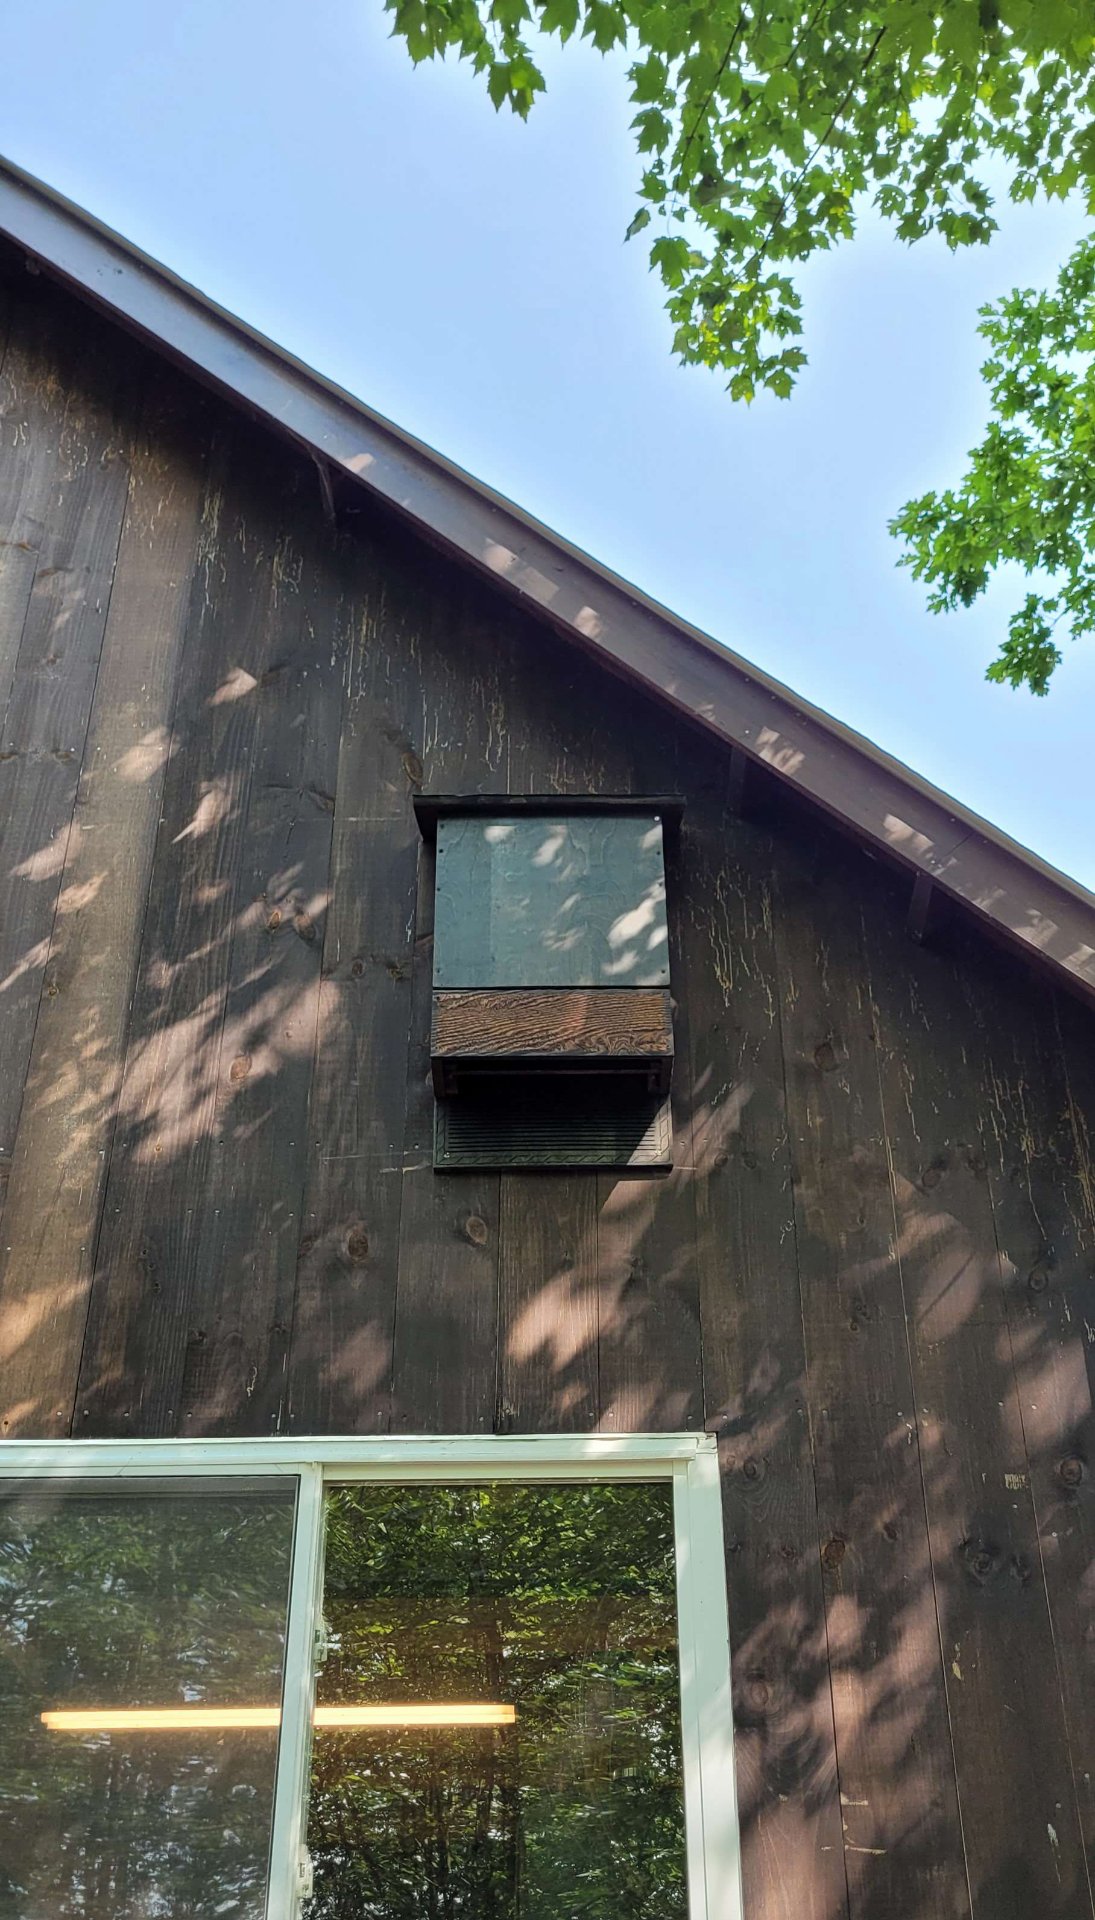
    There are bats living around my parent's house. I wanted to build them a house of their own. They seem to like the barn - we think the scratches on the wall below the eaves might be from bats landing and climbing their way up into shelter. They only seem to exist below the eaves, so I'm hoping that's a good sign that they'll notice their new house quickly.

    For the last few years, I've been trying to make everything I build out of old materials, stuff I find on trash day, pull from construction debris, or get from my local Everything is Free page, so that was part of the challenge of building this one. I pretty much managed it - the only thing I bought new was the caulking I used to seal the joints, everything else, wood, stains, screws, bituthene, etc was all old stuff.

    the bat house front

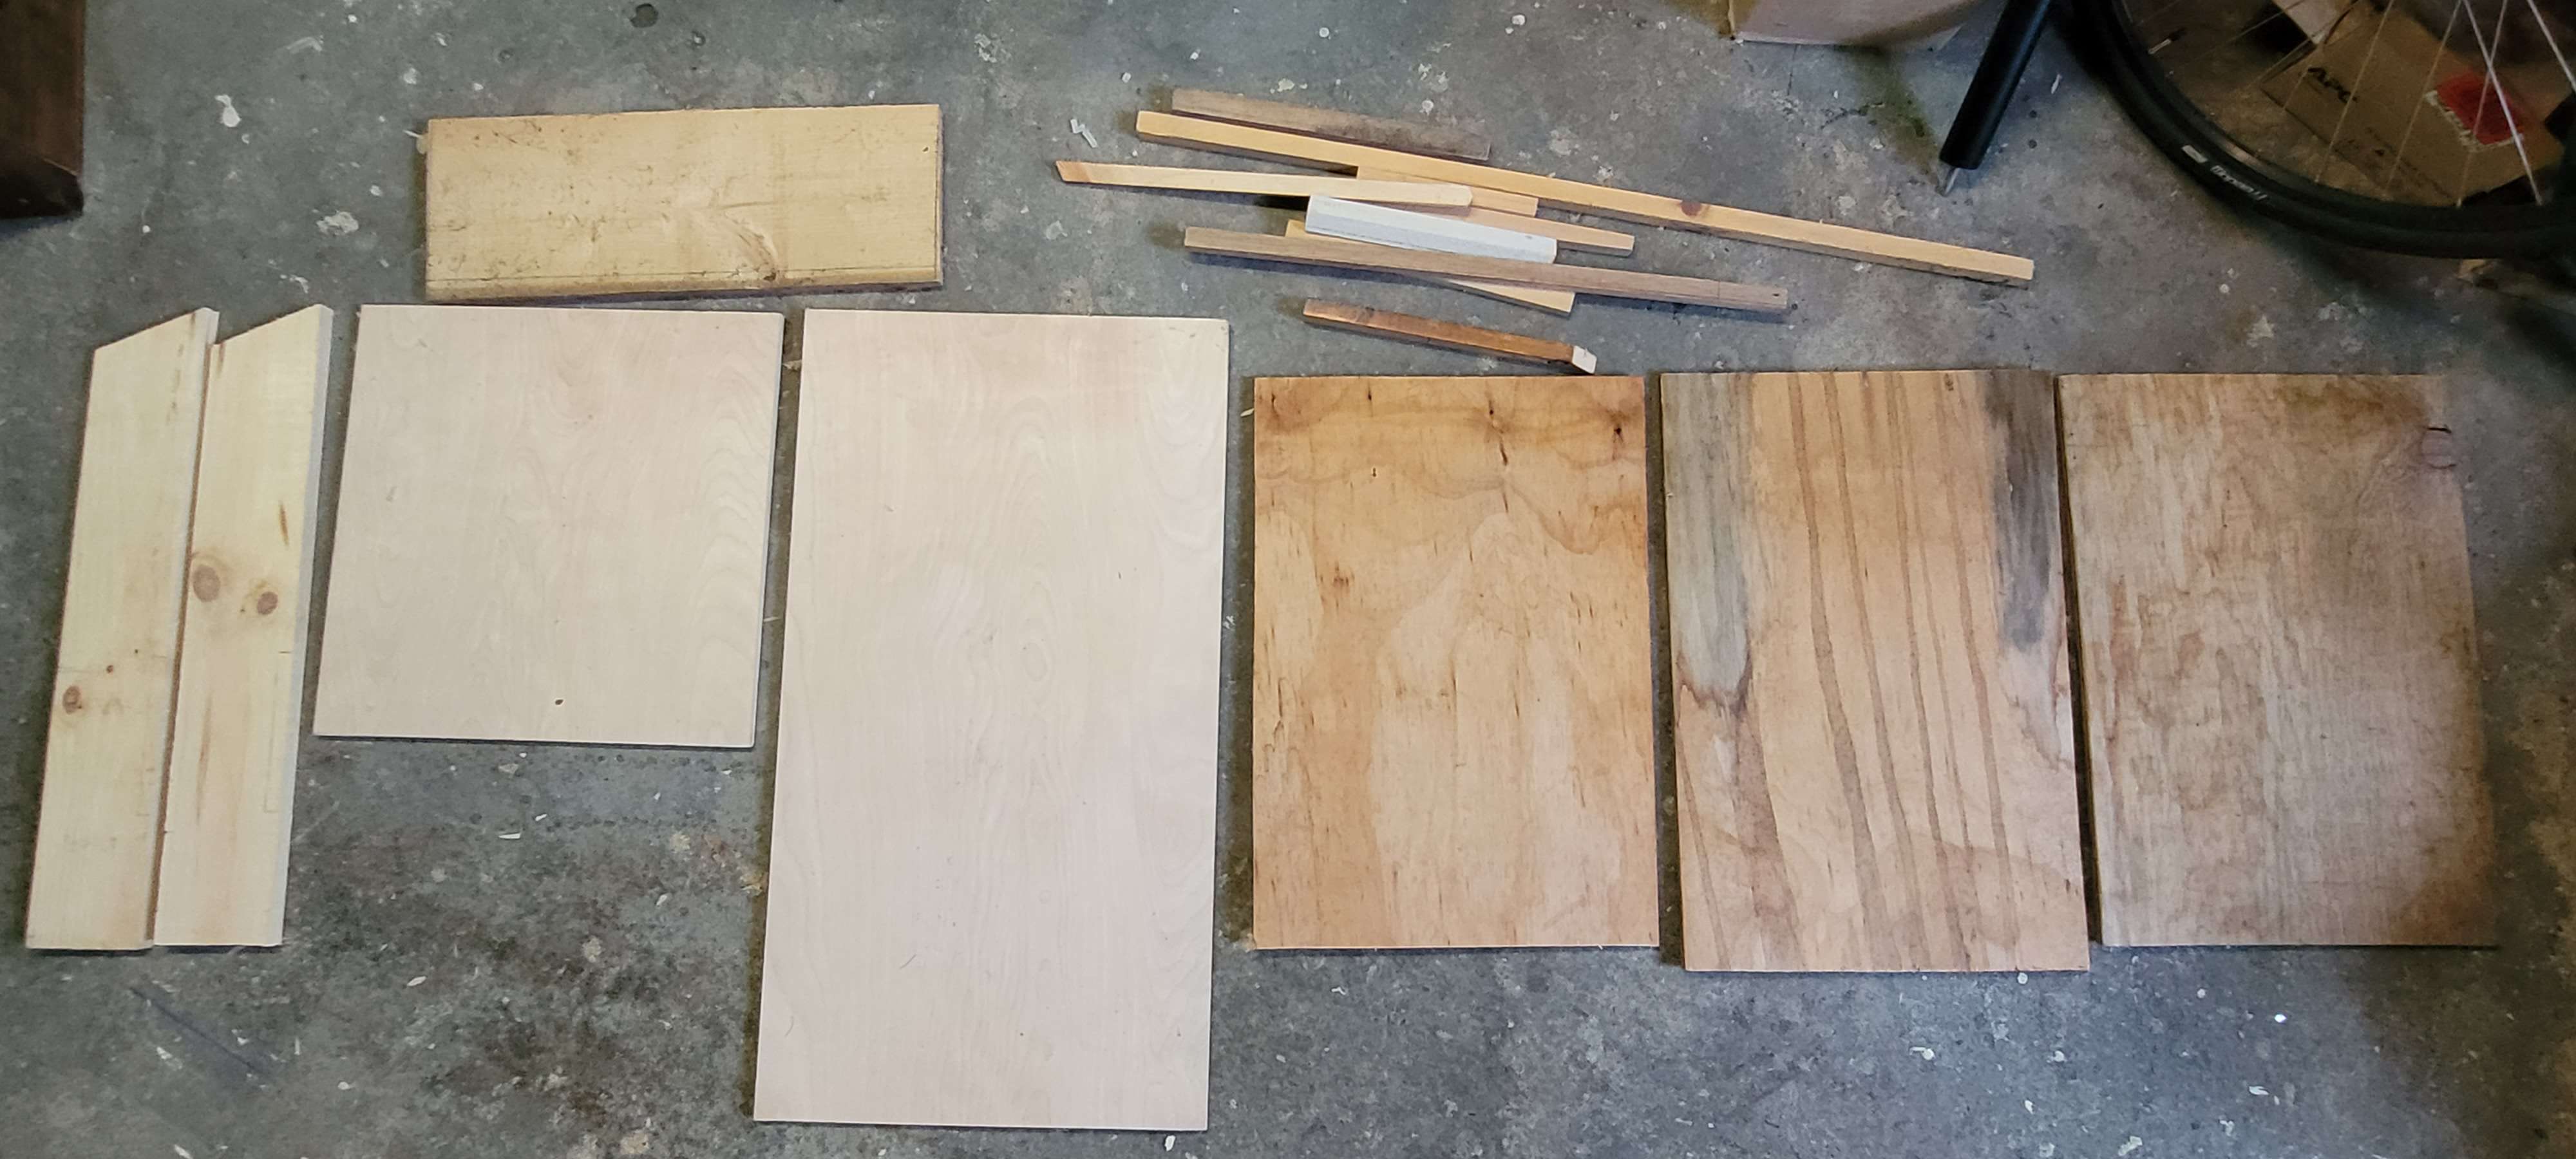
    the pieces, early fabrication, most of them are cut to size but not ready for assembly yet

    It's a kind of motley collection of starting materials but I like the challenge of finding secondhand stuff that'll work. On the uphand, I didn't have to cut up bigger lumber just to make the spacers, they were all small scraps from other projects. I don't remember where I got the nice piece of half-inch cabinet plywood. The 3/8" plywood came from a fellow I met through Everything is Free, and the pine boards were found on trash day.

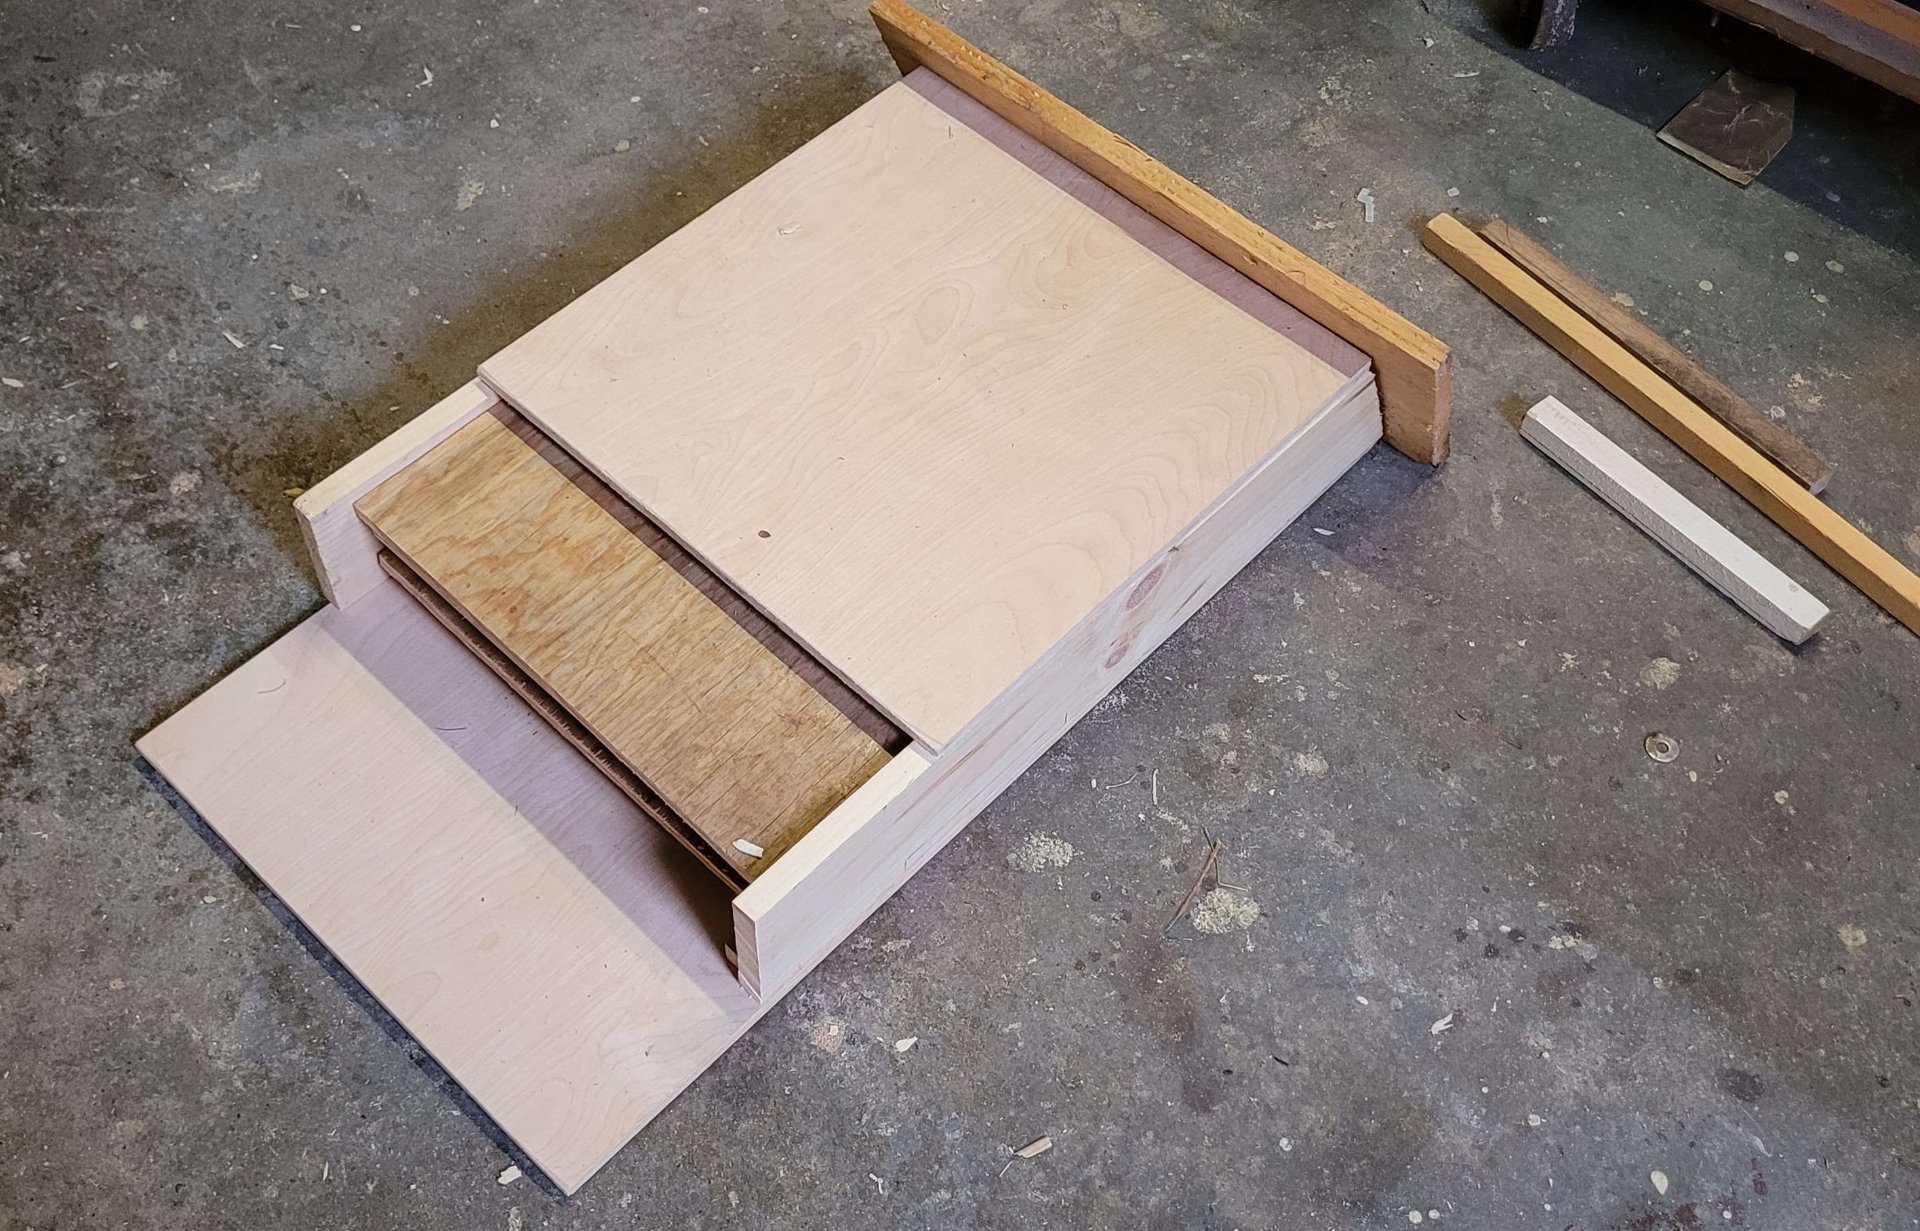
    test fit

    A quick test fit to get an idea as to how it would look. I didn't have enough half-inch plywood yet for the lower part of the front. I followed this guide: https://www.mass.gov/doc/build-a-four-chamber-bat-house/download from the state of Massachusetts as closely as I could since we're in a similar region, though I had to make it slightly narrower than the specified 17.5 inches because of the dimensions of the 1/2" plywood. I also made the roof slightly wider, because the board was already that length and it seemed like it would offer additional protection, so no need to shorten it.

    the sides after laser cutting

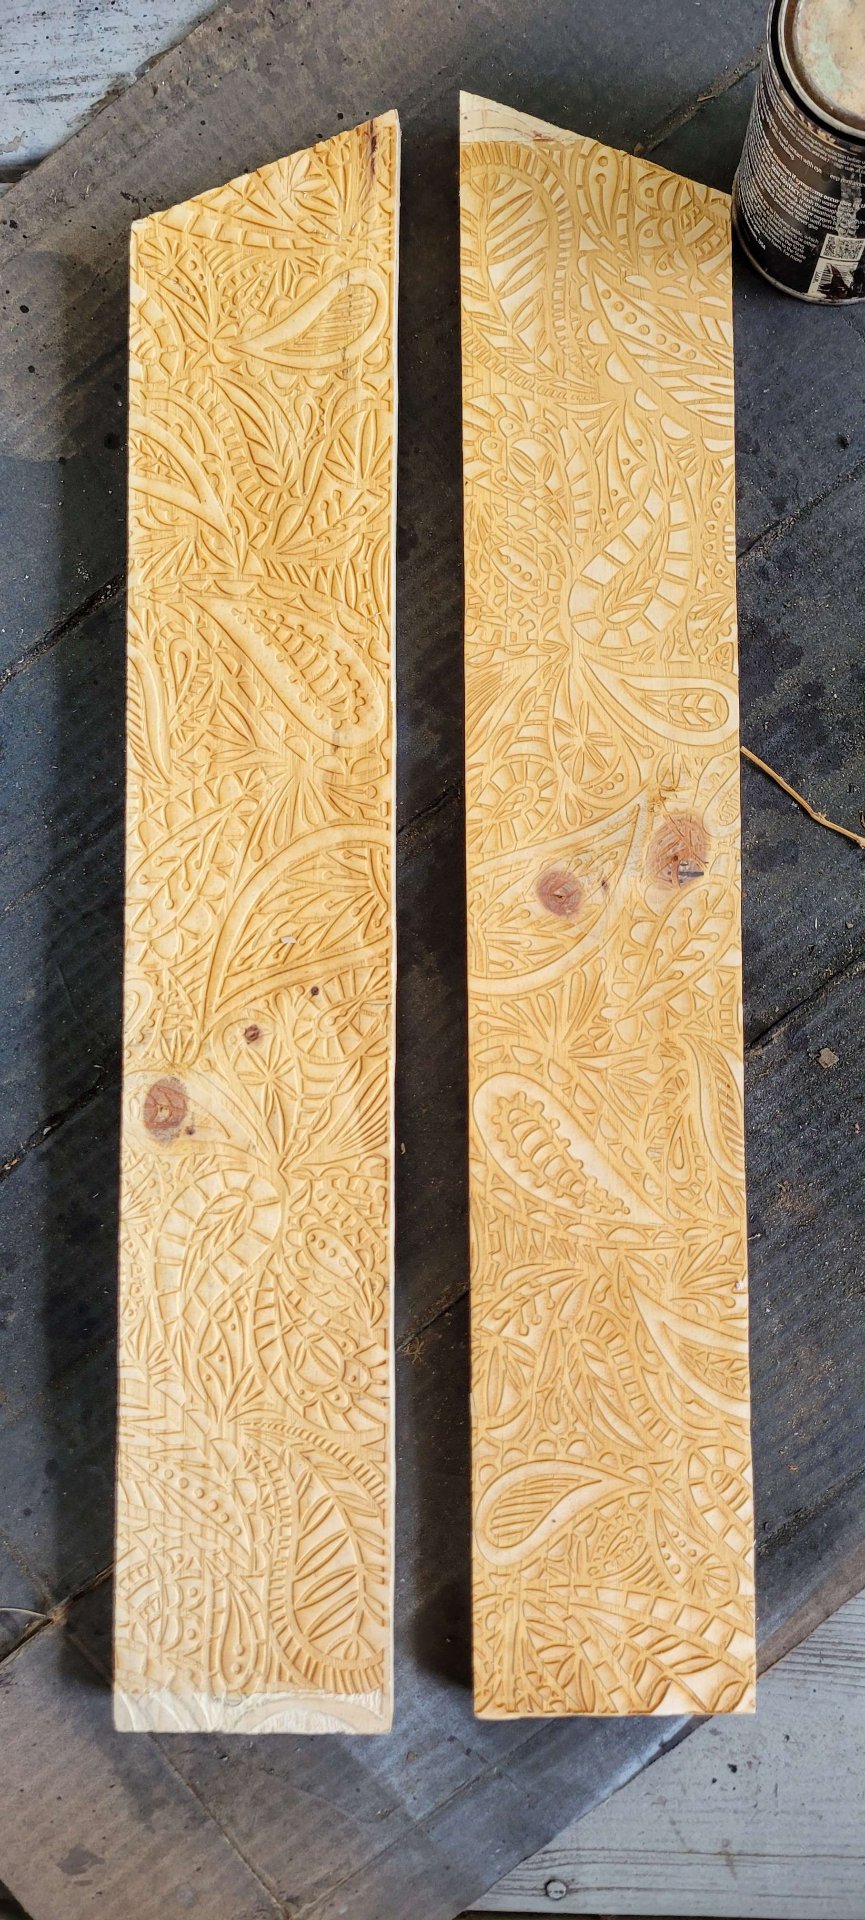
    We had access to a laser cutter through a local makerspace, so my SO and I decided to burn a paisley pattern into the smaller panels just as a quick flourish. I'm actually very pleased with how that little detail looked on the finished version, and it's something I'll play with in future furniture building projects. The sides were slightly longer than the laser cutter's working space, so I had to carve a little of the pattern by hand, but once it was stained they blended in pretty well.

    the interior baffles

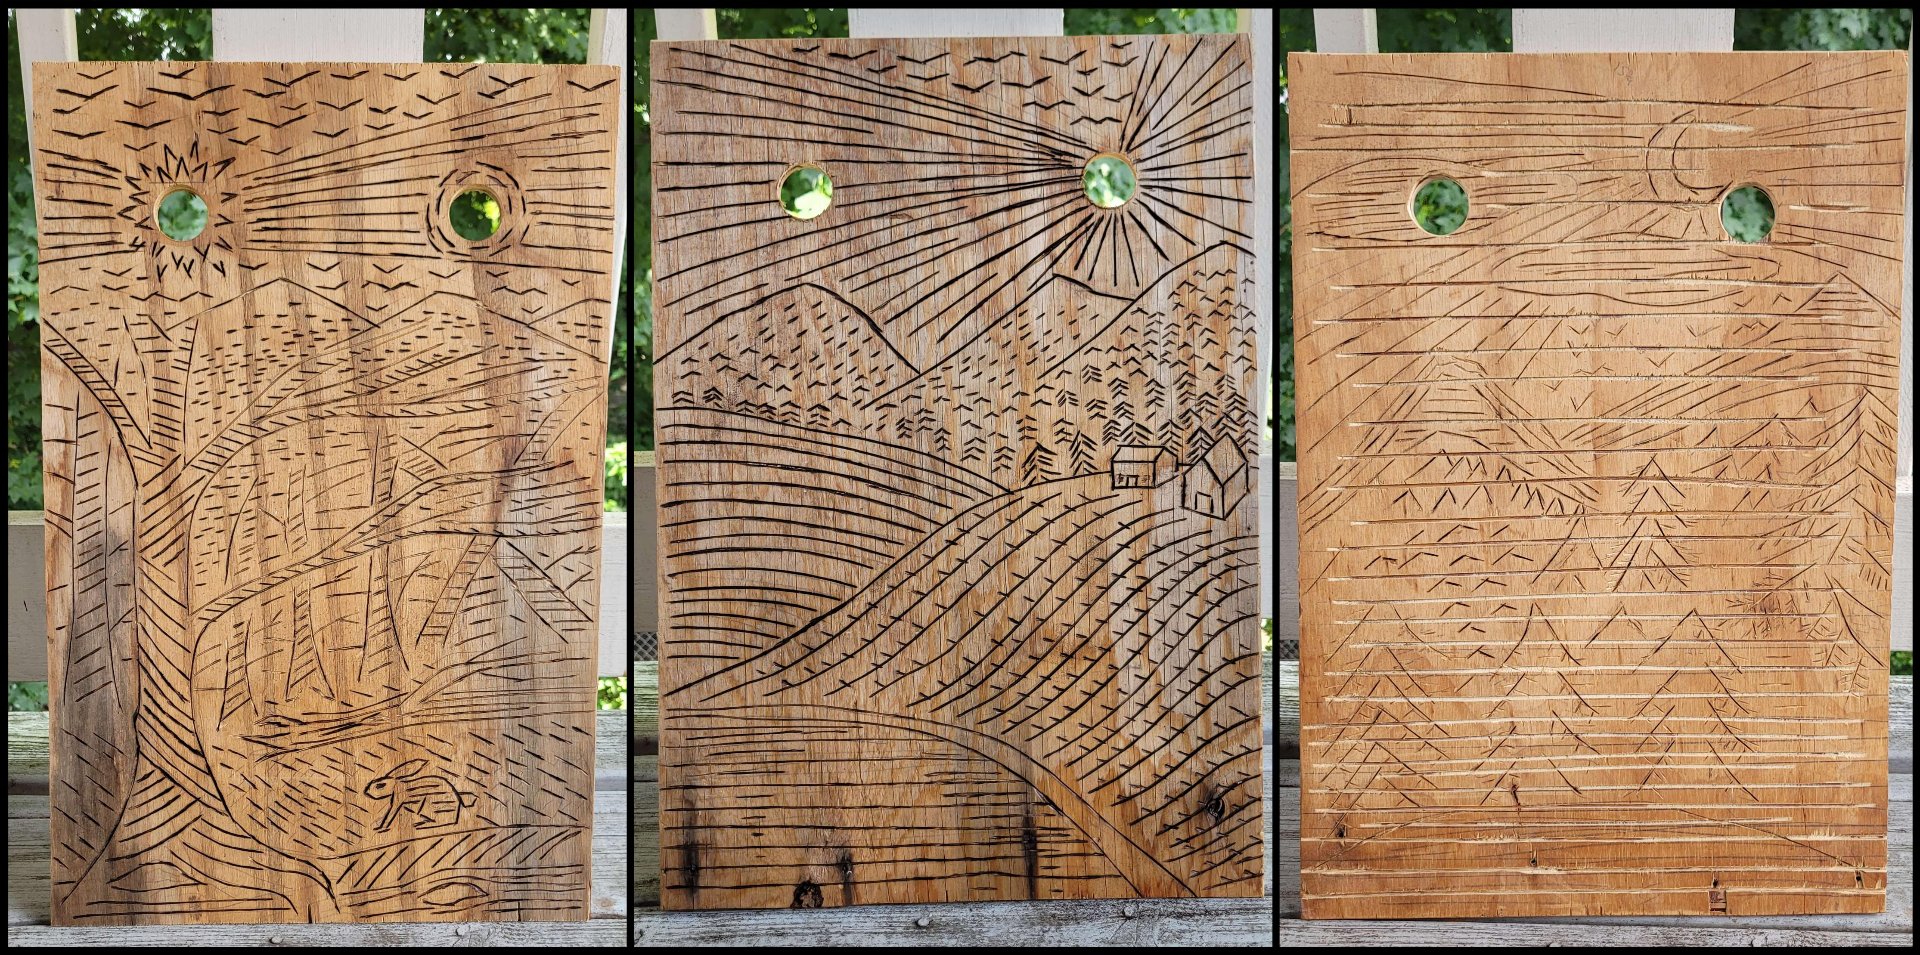
    The instructions tell you to cut groves into the interior surfaces to make it easier for the bats to climb. For most of them I did regular horizontal lines, 1/4" to 1/2" apart, but I got bored a couple times and cut climbable murals instead. I tried to emphasize lots of horizontal handholds, and I made sure that each compartment got at least one regular 'ladder' too. Given that they seem to already be climbing the wooden siding of the barn, I think they'll still find this pretty usable.

    The instructions all said to stain it with water based stain so the fumes/smell wouldn't bother the bats. I did all the interior surfaces with a can of espresso-colored water-based stain and the outside surfaces with two coats of oil-based stain for improved water resistance (and because I ran out of the water-based stuff). I left all the panels leaning upright on our porch for several weeks so they could offgas with good ventilation, prior to assembly. All the stains came from Everything is Free.

    I decided to stain the paisley panels with red mahogany stain and the rest with two coats of ebony to give them a little more contrast. This left the roof and front stained black for maximum sun-warming. On the front paisley panel, which had a frame around the pattern, I did my best to do the inside in red and the frame in black, to match the sides. It was all pretty much hidden by the very distinct grain that piece of plywood happened to have. A prestain might have helped, though I mostly wish I'd had more of the cabinet plywood I used for the upper front and back.

    caulking the sides

    The silicone caulking was the only thing I bought new for this project. I could probably have kept asking around until I found some, but I settled for giving the rest of the tube away on Everything is Free because I didn't think I'd use it for anything before it expired. The directions emphasized that you really want a good seal everywhere except the specified vents, because the bats need to be warm and dry, so I made sure to seal all the exterior joints well.

    the inside during assembly

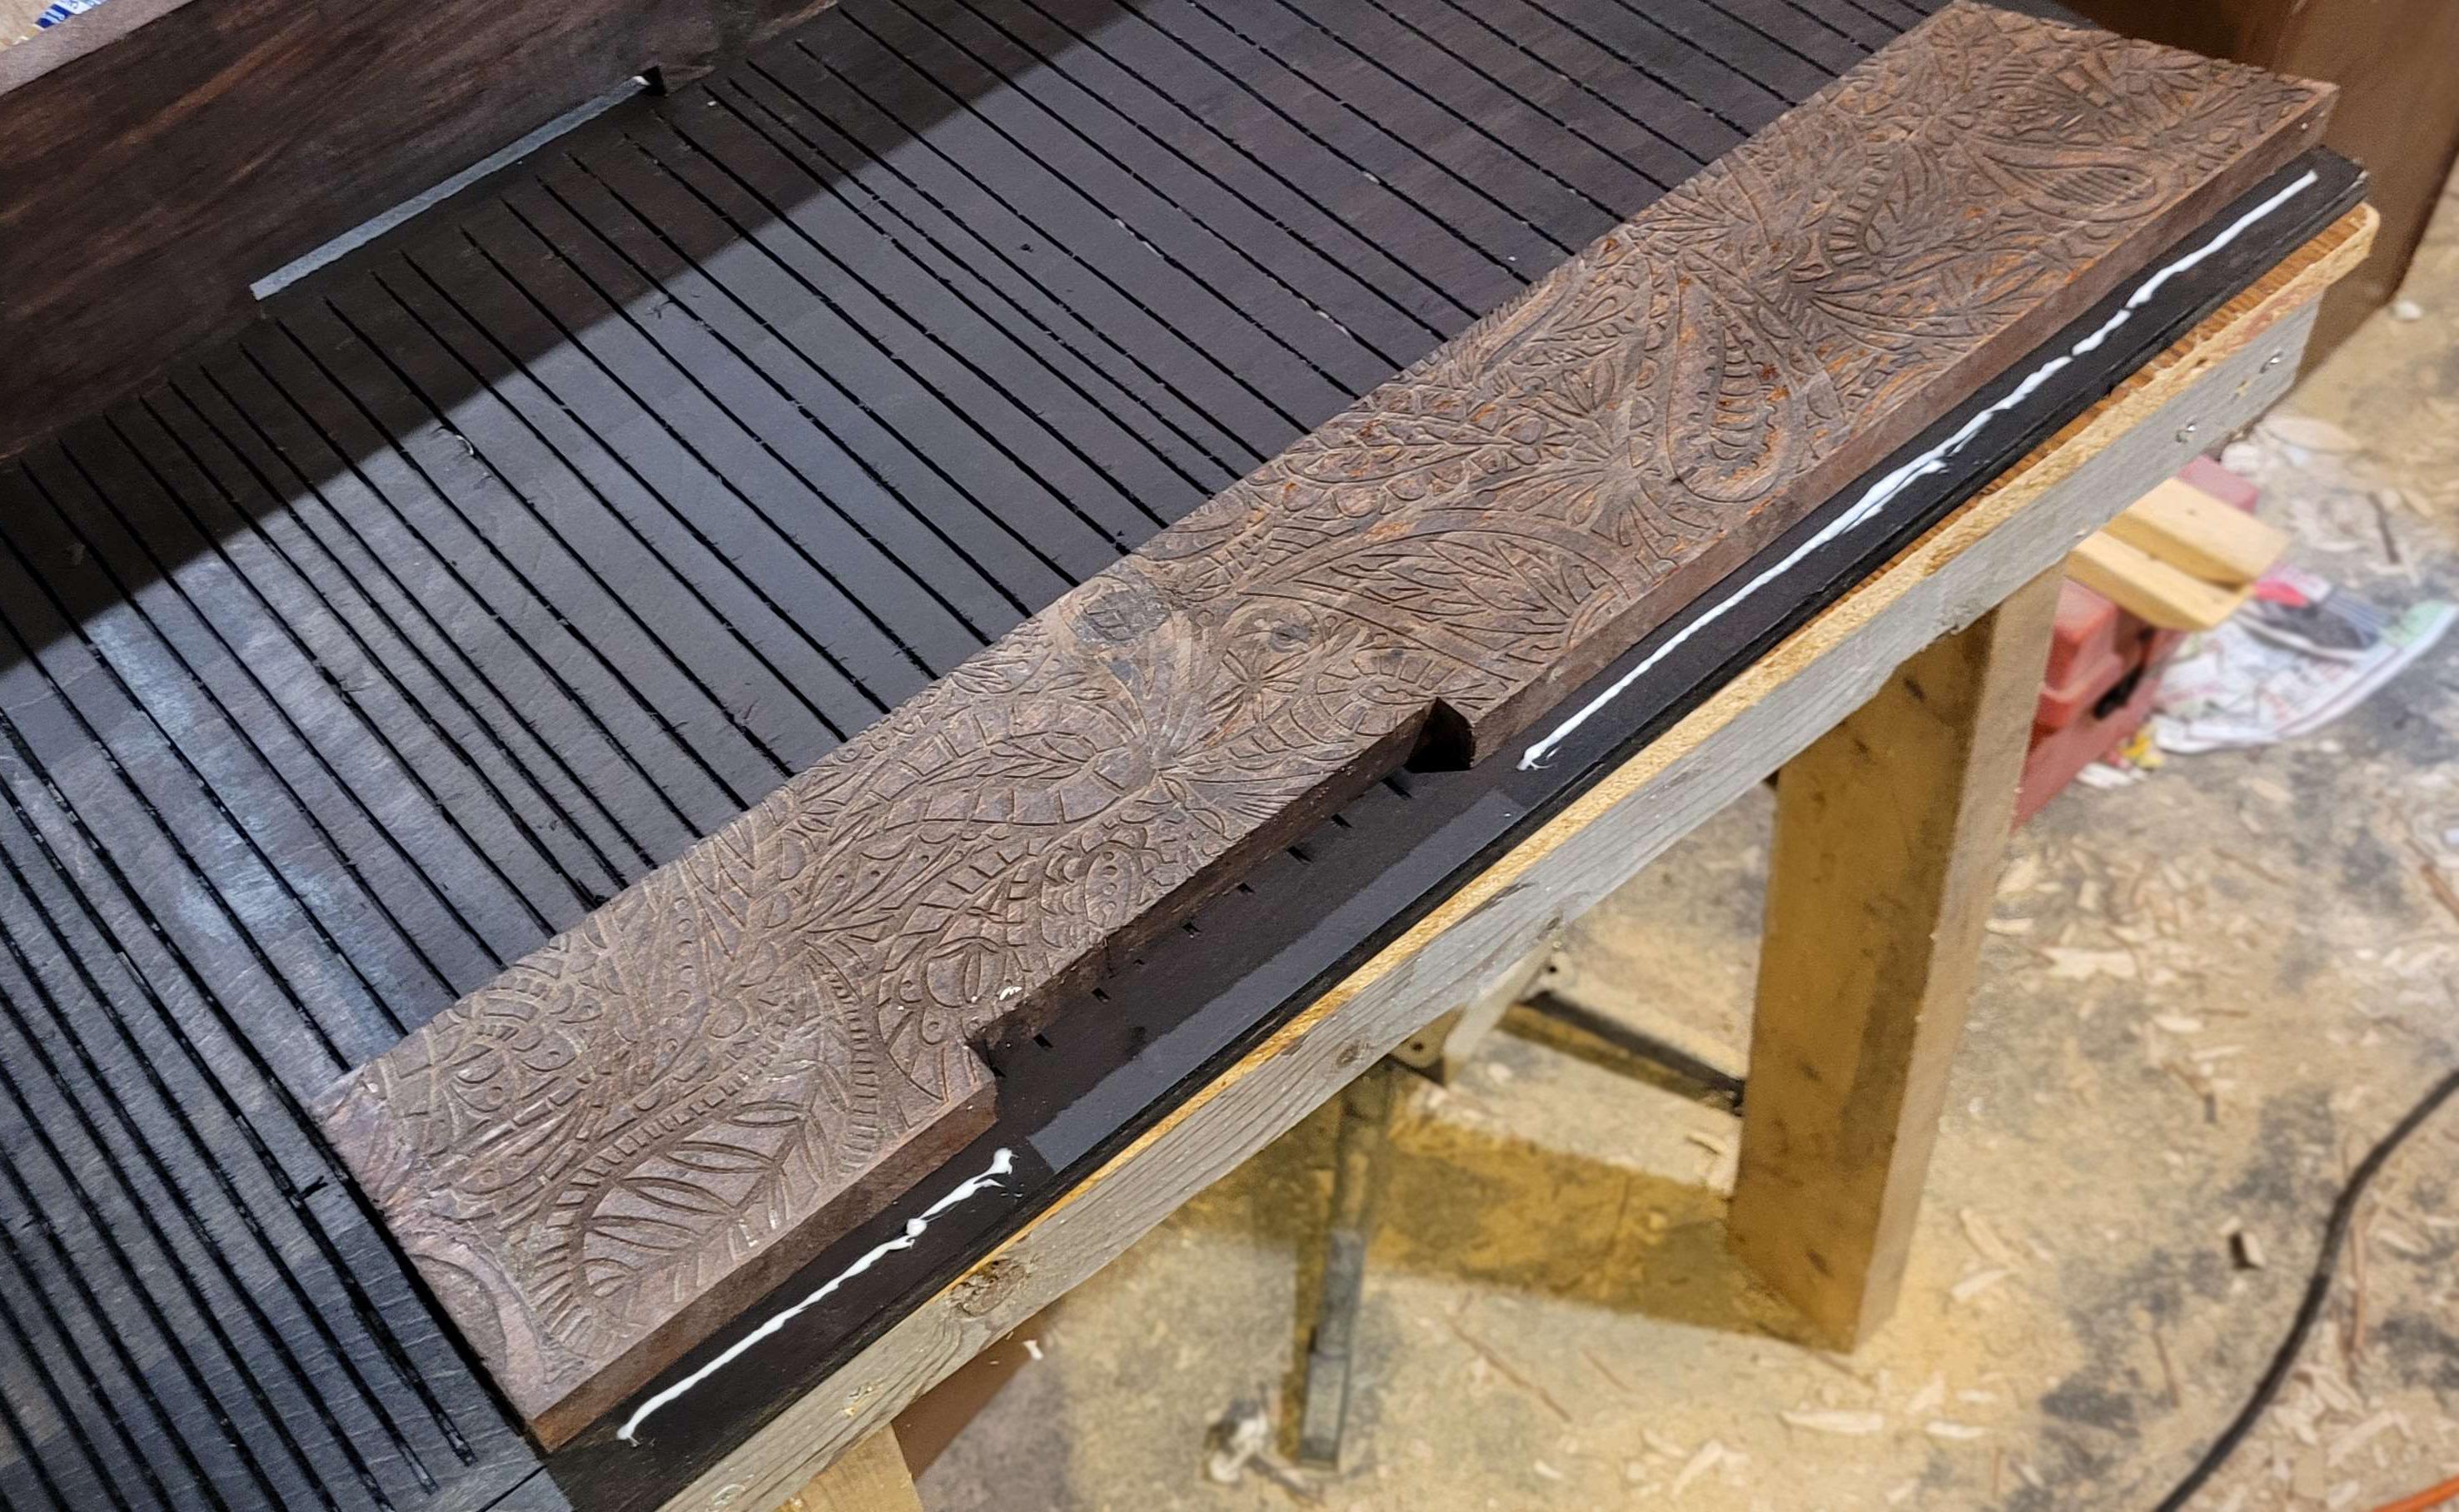
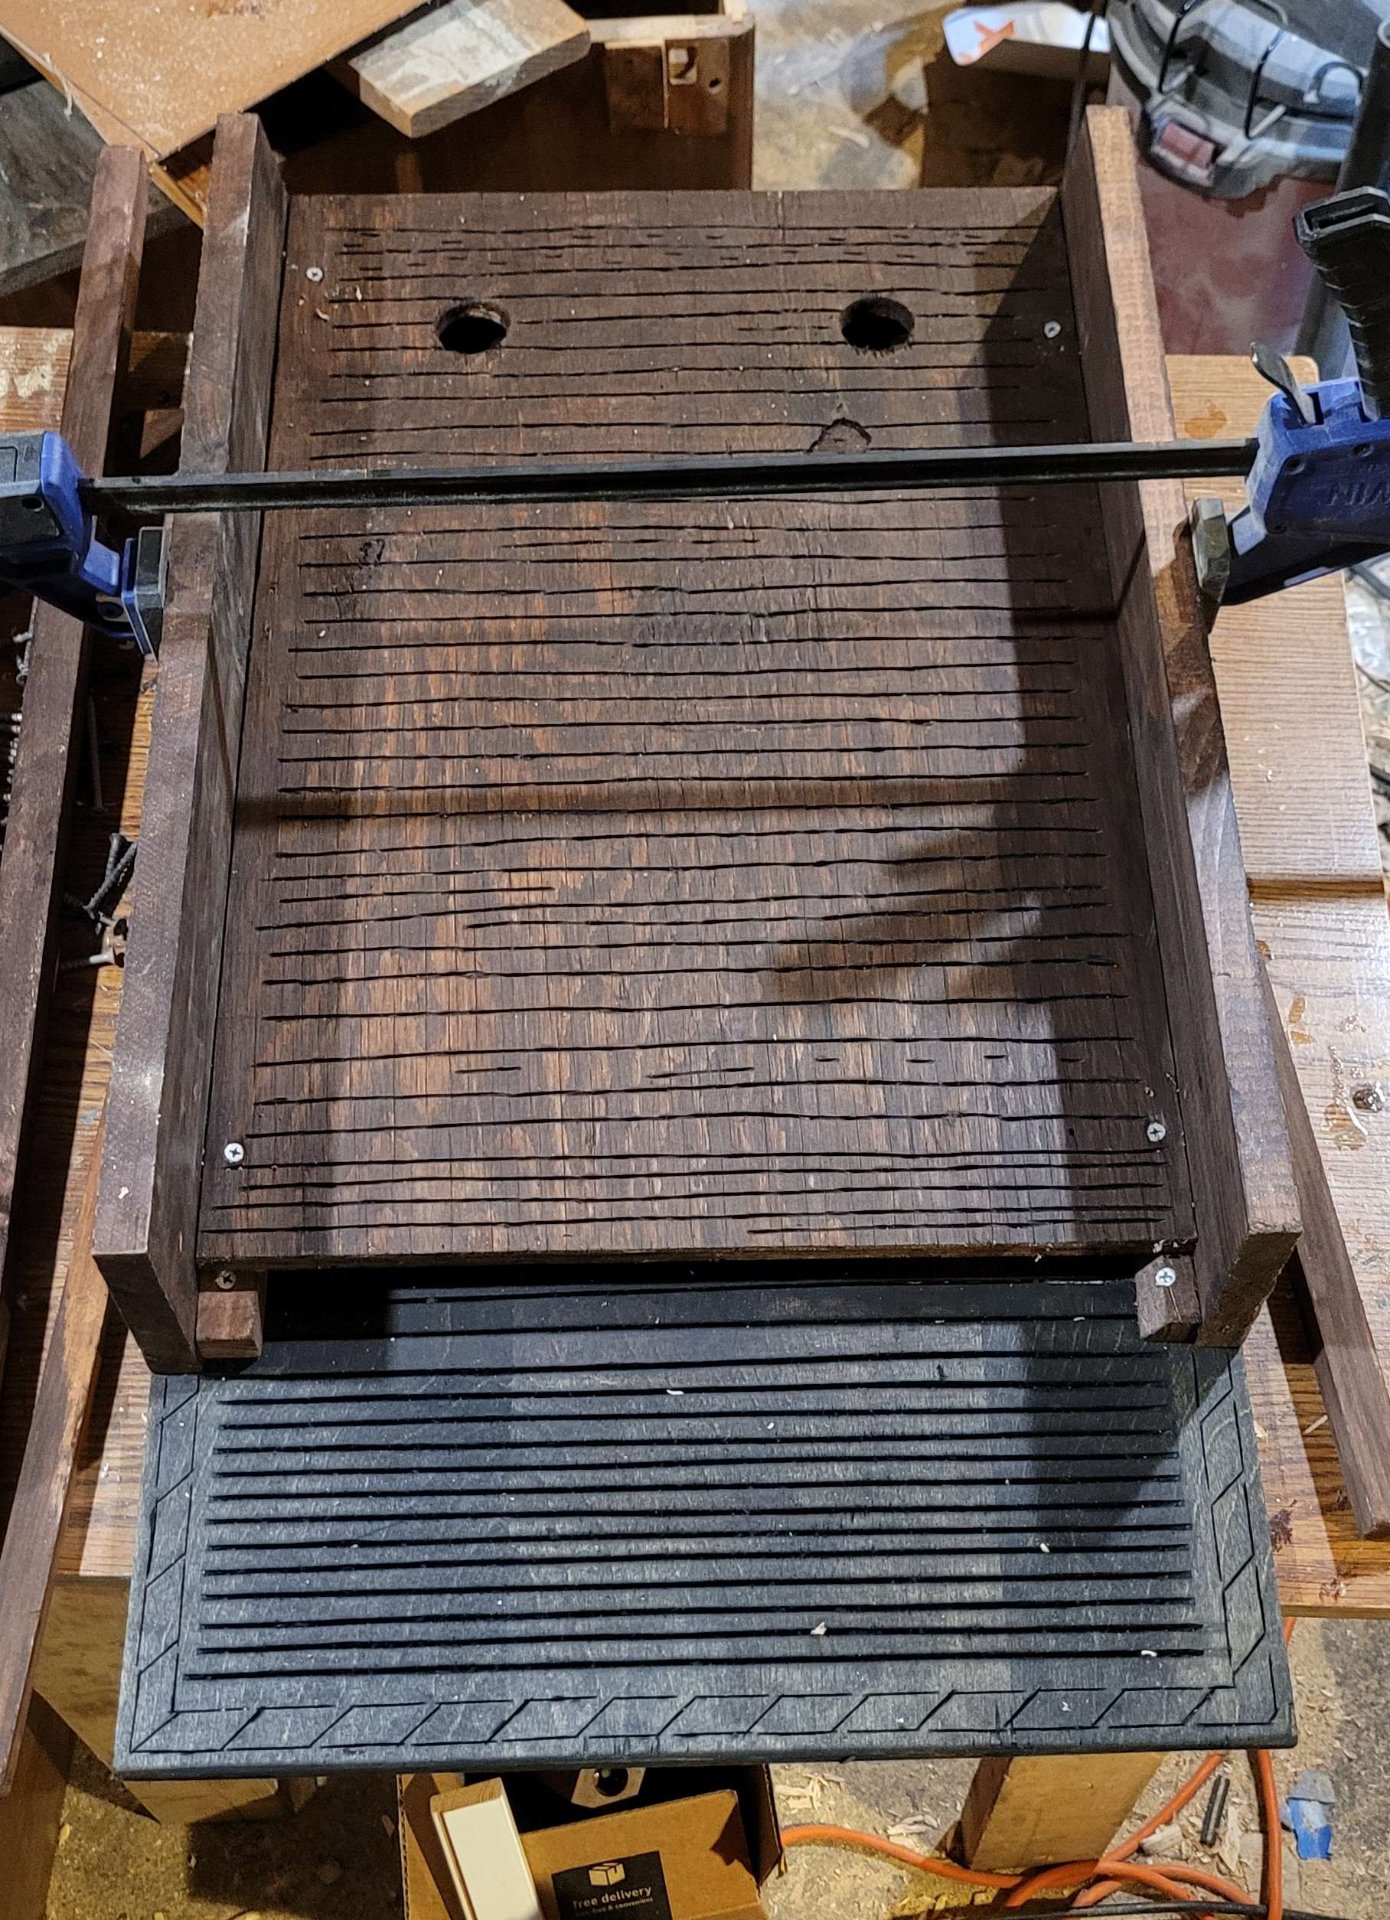
    The first interior divider/baffle in place. some of these grooves were cut with a skillsaw, others I used a dremel. The bar clamp is to keep the sides from spreading apart as I added the interior structure - that way the front panel would fit correctly when I got to it.

    the next baffle during assembly

    The second layer.

    the third layer

    The third layer.

    final assembly

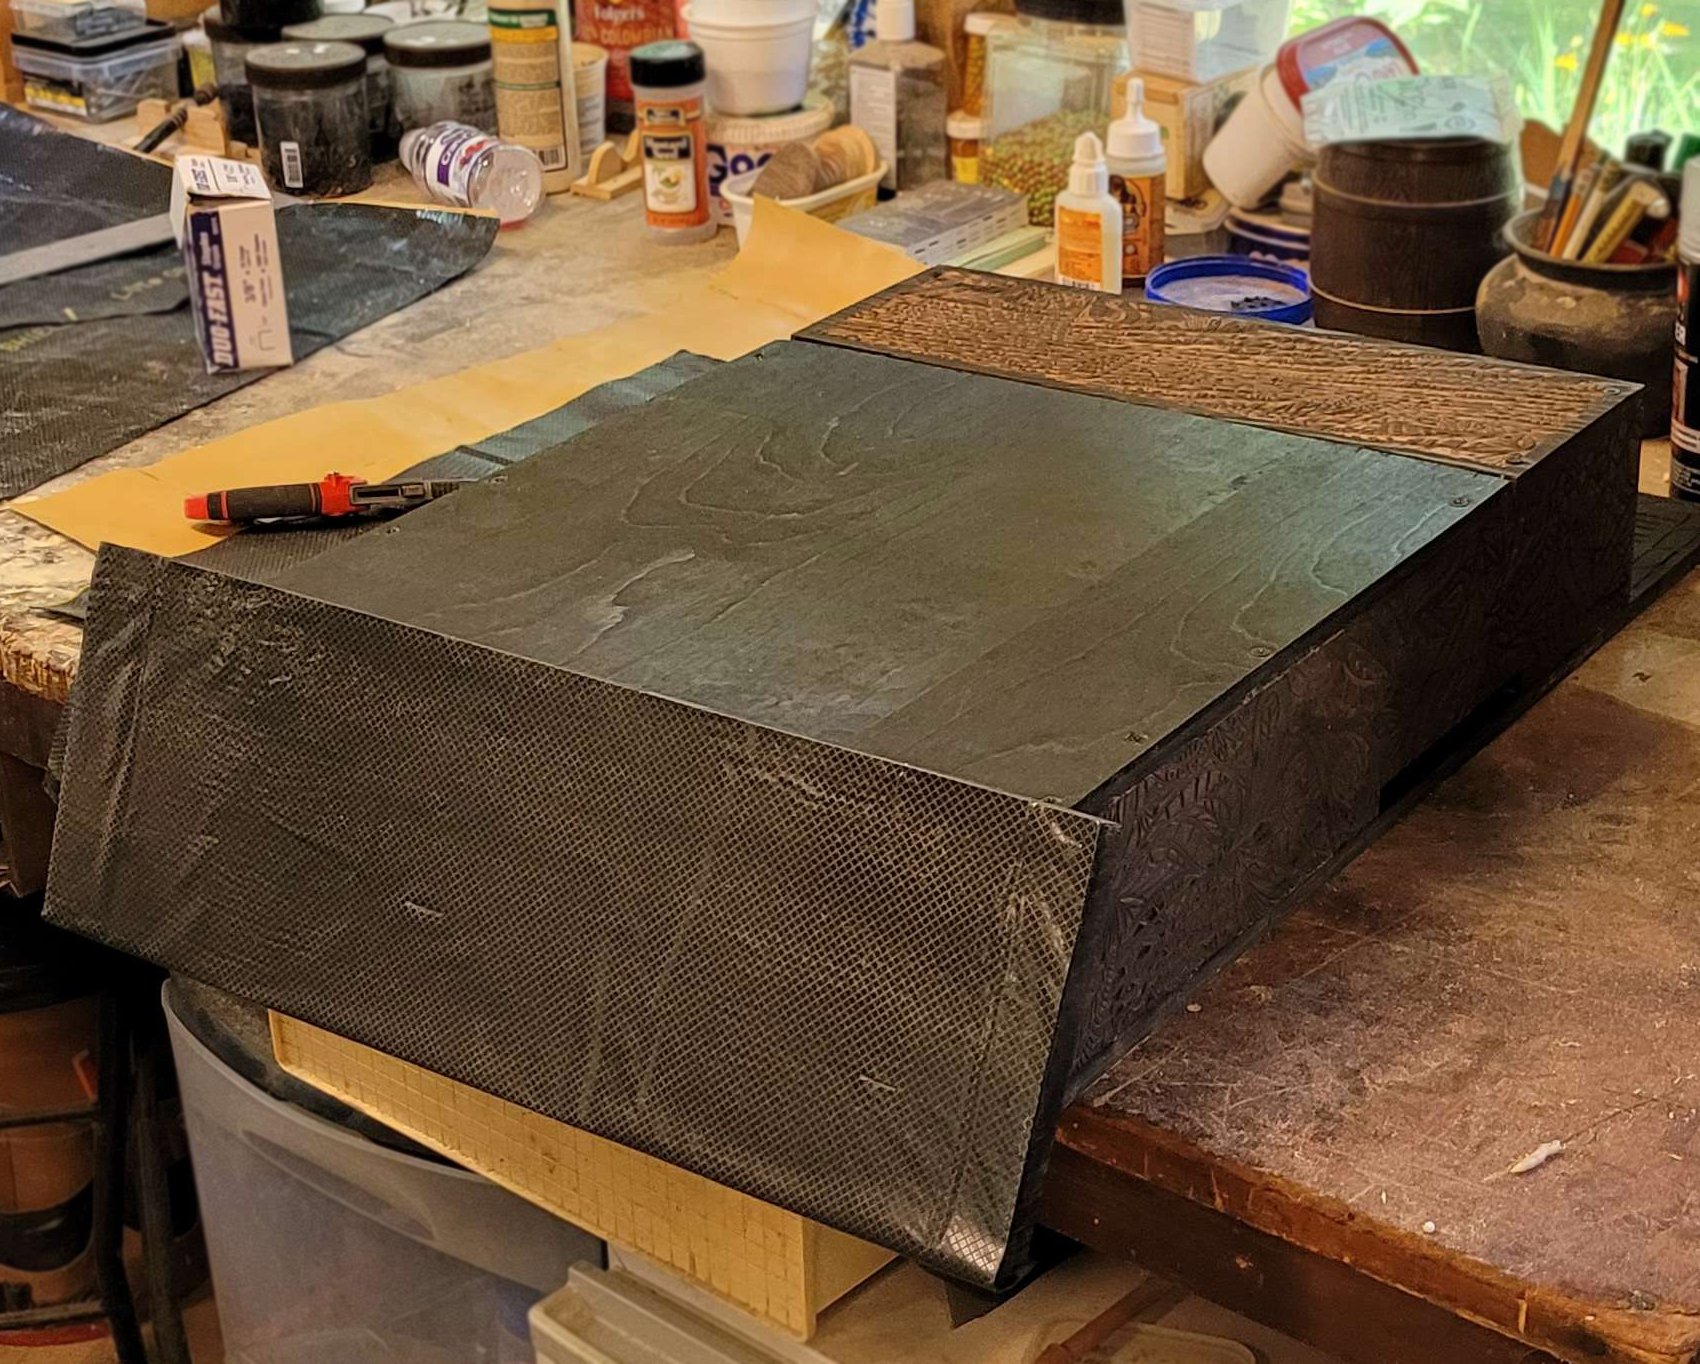
    Once it was all assembled, I added a coat of oil-based urethane to the top and sides of the roof to help with water resistance. If it warped, that could allow drafts and additional moisture intrusion. I also added little bits of trim to the sides under the roof, after sealing that joint a second time.

    final assembly 2

    chimney strips

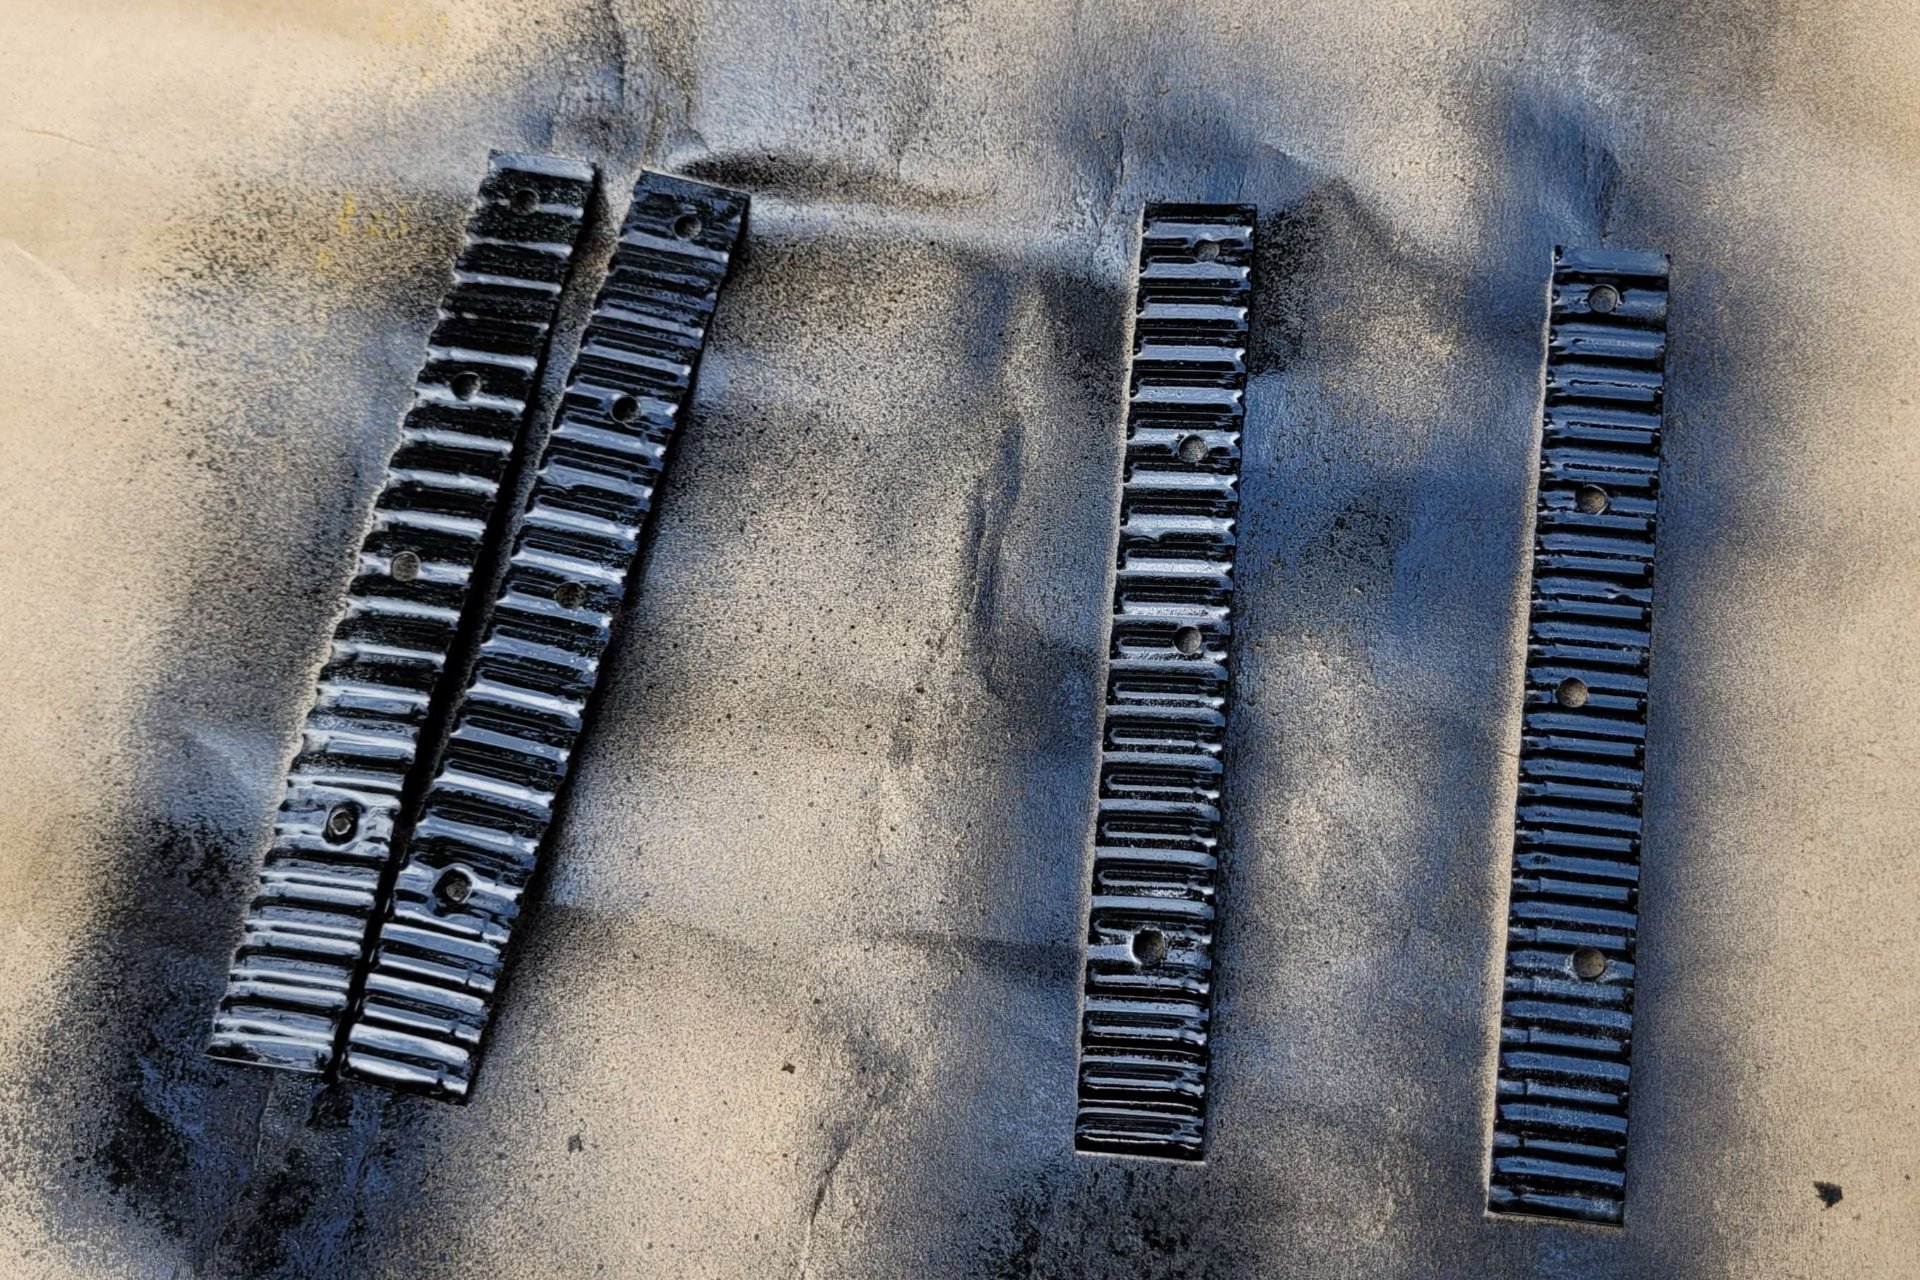
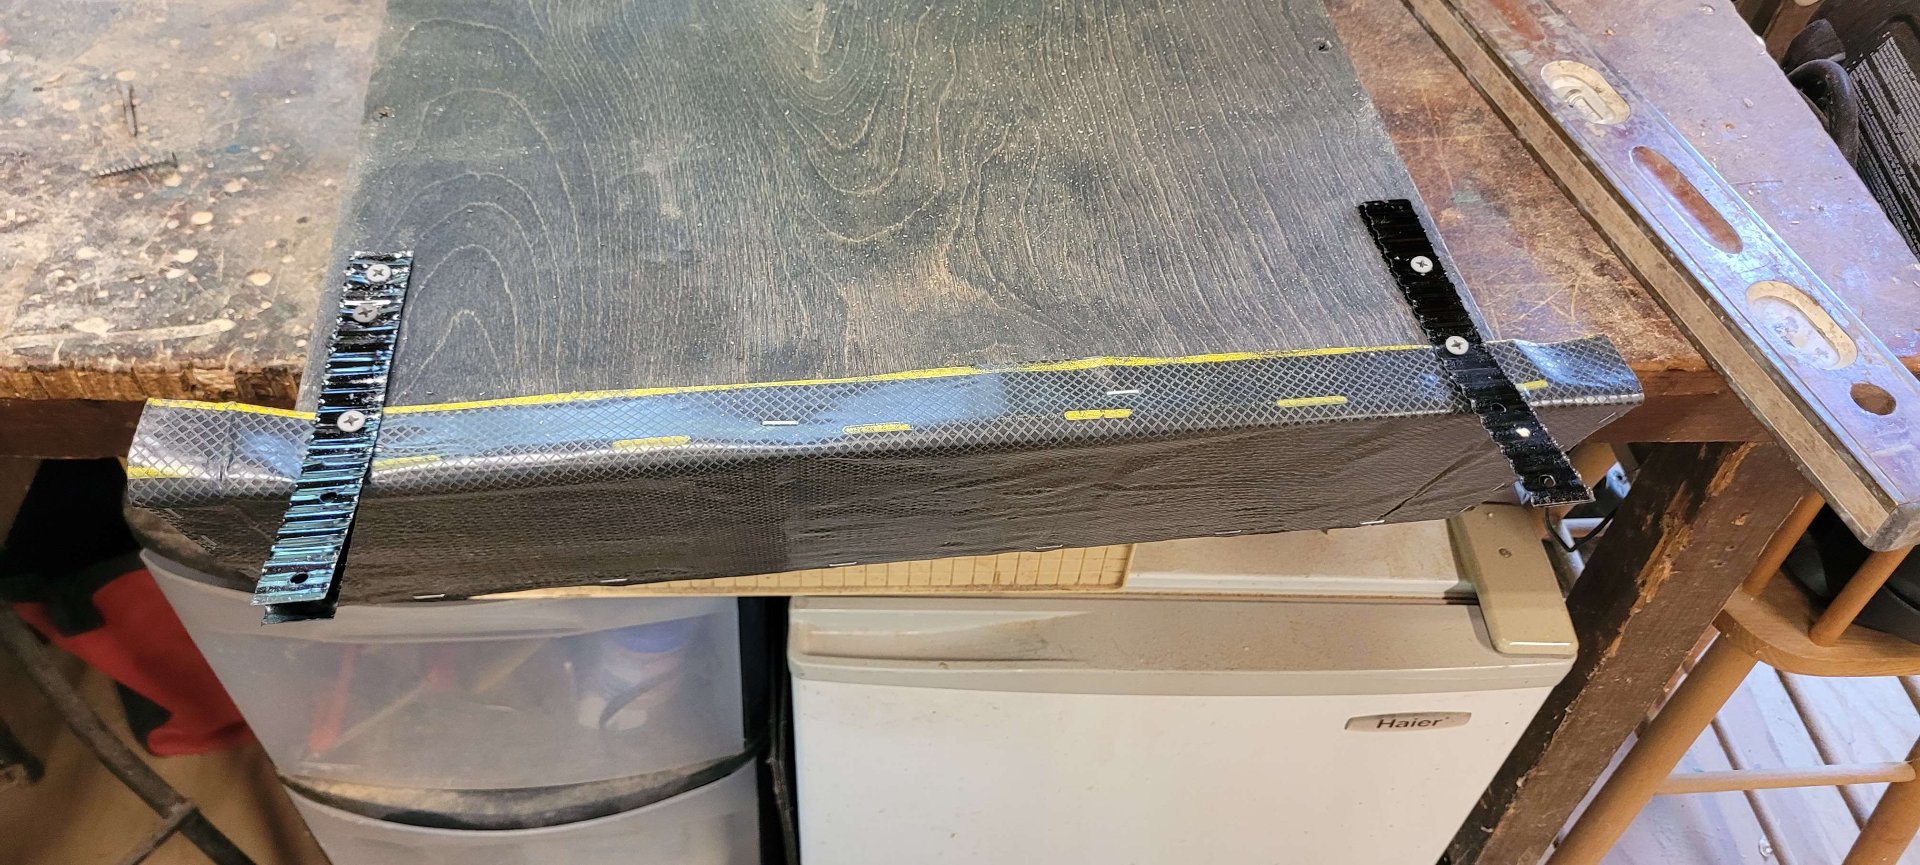
    The metal strips are something my dad had from past projects, for attaching chimneys to the roofing around them. I found two sets of two where the existing holes lined up, and drilled two new ones in each set so they all had four. Then I painted them and attached them to the back.

    roofing the bat house

    Another relative provided a scrap of bituthene which we stuck/stapled to the roof for additional waterproofing.

    attaching hangers

    The metal brackets allowed us to hang it up. I put two screws through each one, then two screws through the landing strip at the bottom, and two toenailed in through the vents on the sides. I'm told that was overkill but I really didn't want any bats we housed to fall off the wall someday.

    move in ready!

    All set up and ready to house some bats! Given the timeline, they probably won't move in until next year, but that will give it more time for the smells from the stains, urethane, caulking, etc to dissipate.

    I originally shared this post here: https://imgur.com/gallery/l04HMe8

    • Pictures 16 image

    • visibility
    • visibility
    • visibility
    • visibility
    • visibility
    • visibility
    • visibility
    • visibility
    • visibility
    • visibility
    • visibility
    • visibility
    • visibility
    • visibility
    • visibility
    • visibility
    • favorite

      1 Like

      poVoq

    • 2 Comments

    • 6 February poVoq

      Those laser cutter made patterns are very nice. Interesting how such technology makes things cheap that on first glance look super expensive due to the labour previously involved.

    • 7 February JacobCoffinMakes

      Yeah! To be honest, I'd always thought they were kind of a solution in need of a problem, probably because I'd mostly seen flimsy things people had made entirely out of thin plywood, where they'd tried to replace every tool in the woodshop with the laser cutter. But now that I've used them for awhile, I've been finding tons of cool uses - they're an absolutely awesome addition to woodworking capabilities, and I'm super lucky to have access to one.

      I love the ability to quickly add detail flair to otherwise plain projects. The speed of the laser cutter, and the availability of beautiful, elaborate patterns online and in programs like canva, makes what should be a super costly part of the project quite trivial. The cutter is awesome for surface etching, but it's also great for the kind of tasks I would normally use a scrollsaw for like fabricating parts out of thin plywood or other material, and it's absolutely awesome for cutting stencils for spraypaint. I used to cut them by hand for hours with a razor knife - the laser cutter can do it in minutes, and can cut thicker paper or thin cardboard, which makes for much sturdier stencils. It's also the easiest way to cut plexiglass, and to do some (to me) otherwise impossibly elaborate stuff with it. If I had access to one with a six-foot-square bed, I could make almost anything. Add in some proper metalworking tools, and we'd really be cooking.

      I have another project I'll post soon, where I was spraypainting the wood, then selectively burning the paint off, applying stain, and wiping it off the painted parts, to get a sort of 'laser cutter in color' effect.

    • chevron_right

      I made a chart of spices and their substitutions

      JacobCoffinMakes · Friday, 2 February - 19:49 edit · 1 minute

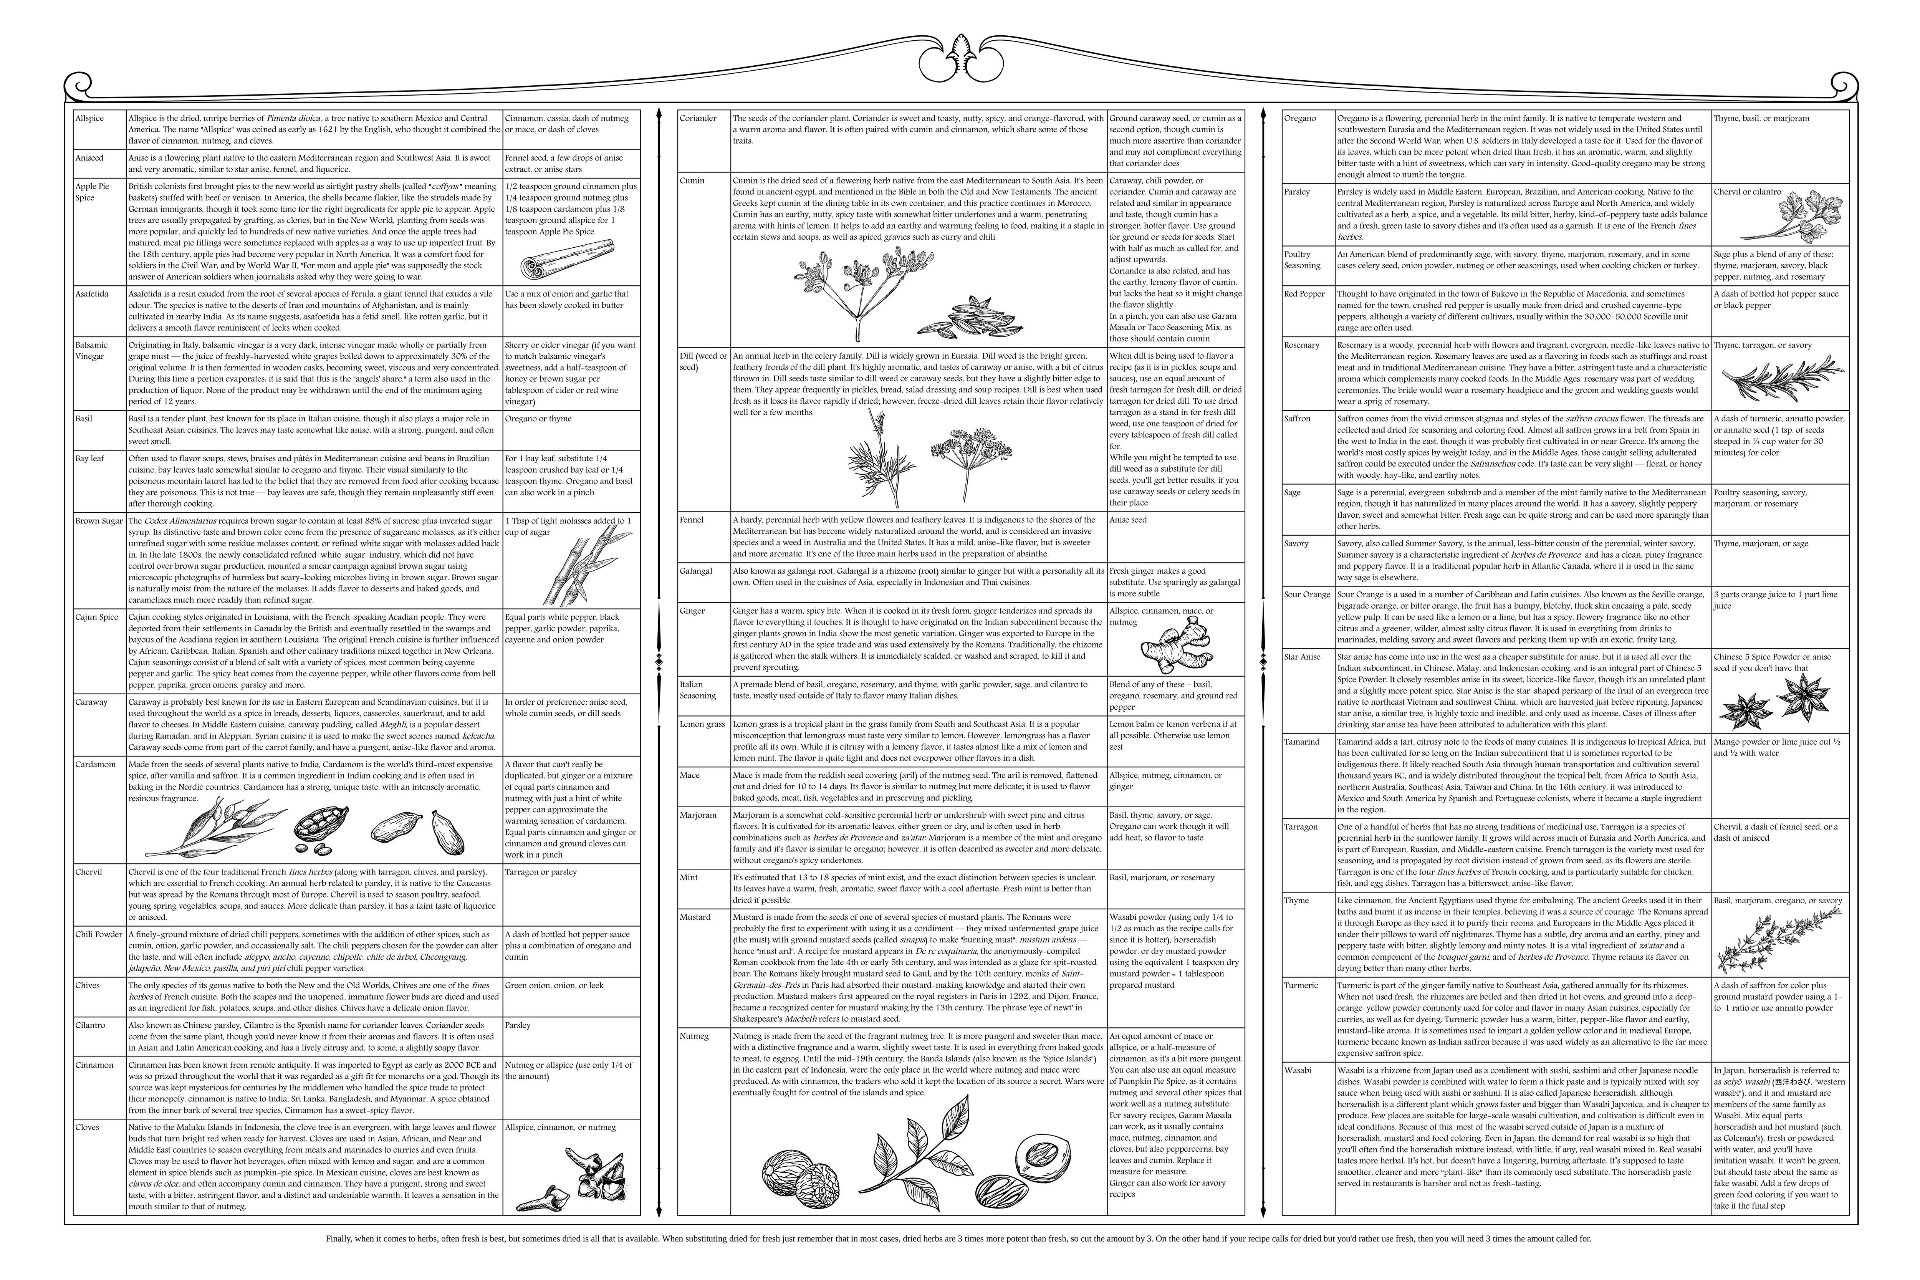
    the chart

    A few years ago, while we were cooking, my SO showed me a blog post about common spices and their substitutions. I thought it’d be cool to use that to make a chart we could hang on the wall. It turned into a fun light research project, then a fun art project.

    I started reading various blogs and realized that while many covered the same core spices, there were a lot of others that only one blog or another mentioned. So I started gathering them all up. As I read about them on Wikipedia I’d stumble into their histories, and scope creep hit. I decided to add a column for interesting facts about each. (While gathering those, I was kind of struck at the disparity between them - some spices have centuries of warfare, murder, and espionage wrapped around them, while others are so common or easy to grow that nobody seems to have stabbed anyone at all for it.)

    I built it first as a spreadsheet in Google sheets while I was researching, pasted it into a poster-size libre office writer document for layout and font changes, exported that as a pdf so I could import it into GIMP. That let me make more detailed changes and add the flourishes that hopefully make it look like something that might’ve hung on the wall in your grandparents’ kitchen.

    This was a pretty casual project spread over seven months. It’s got forty-some spices with descriptions, fun facts, and substitutions shamelessly plagiarized from cooking blogs and Wikipedia.

    I’ve learned since that several spices are actually really unspecific, like what’s sold as oregano apparently may come from several different plants. So I’ll say it’s useful for cooking and accurate to the best of my ability, but I wouldn’t reference it as a historical or scientific resources.

    If you’d like a printable version, I uploaded it here: https://jacobcoffinwrites.files.wordpress.com/2023/07/spice_list_printable.pdf

    #food

    • Pictures 1 image

    • visibility
    • chevron_right

      Lathe Turning Projects - Knife Repair 2

      JacobCoffinMakes · Friday, 2 February - 19:45 · 3 minutes

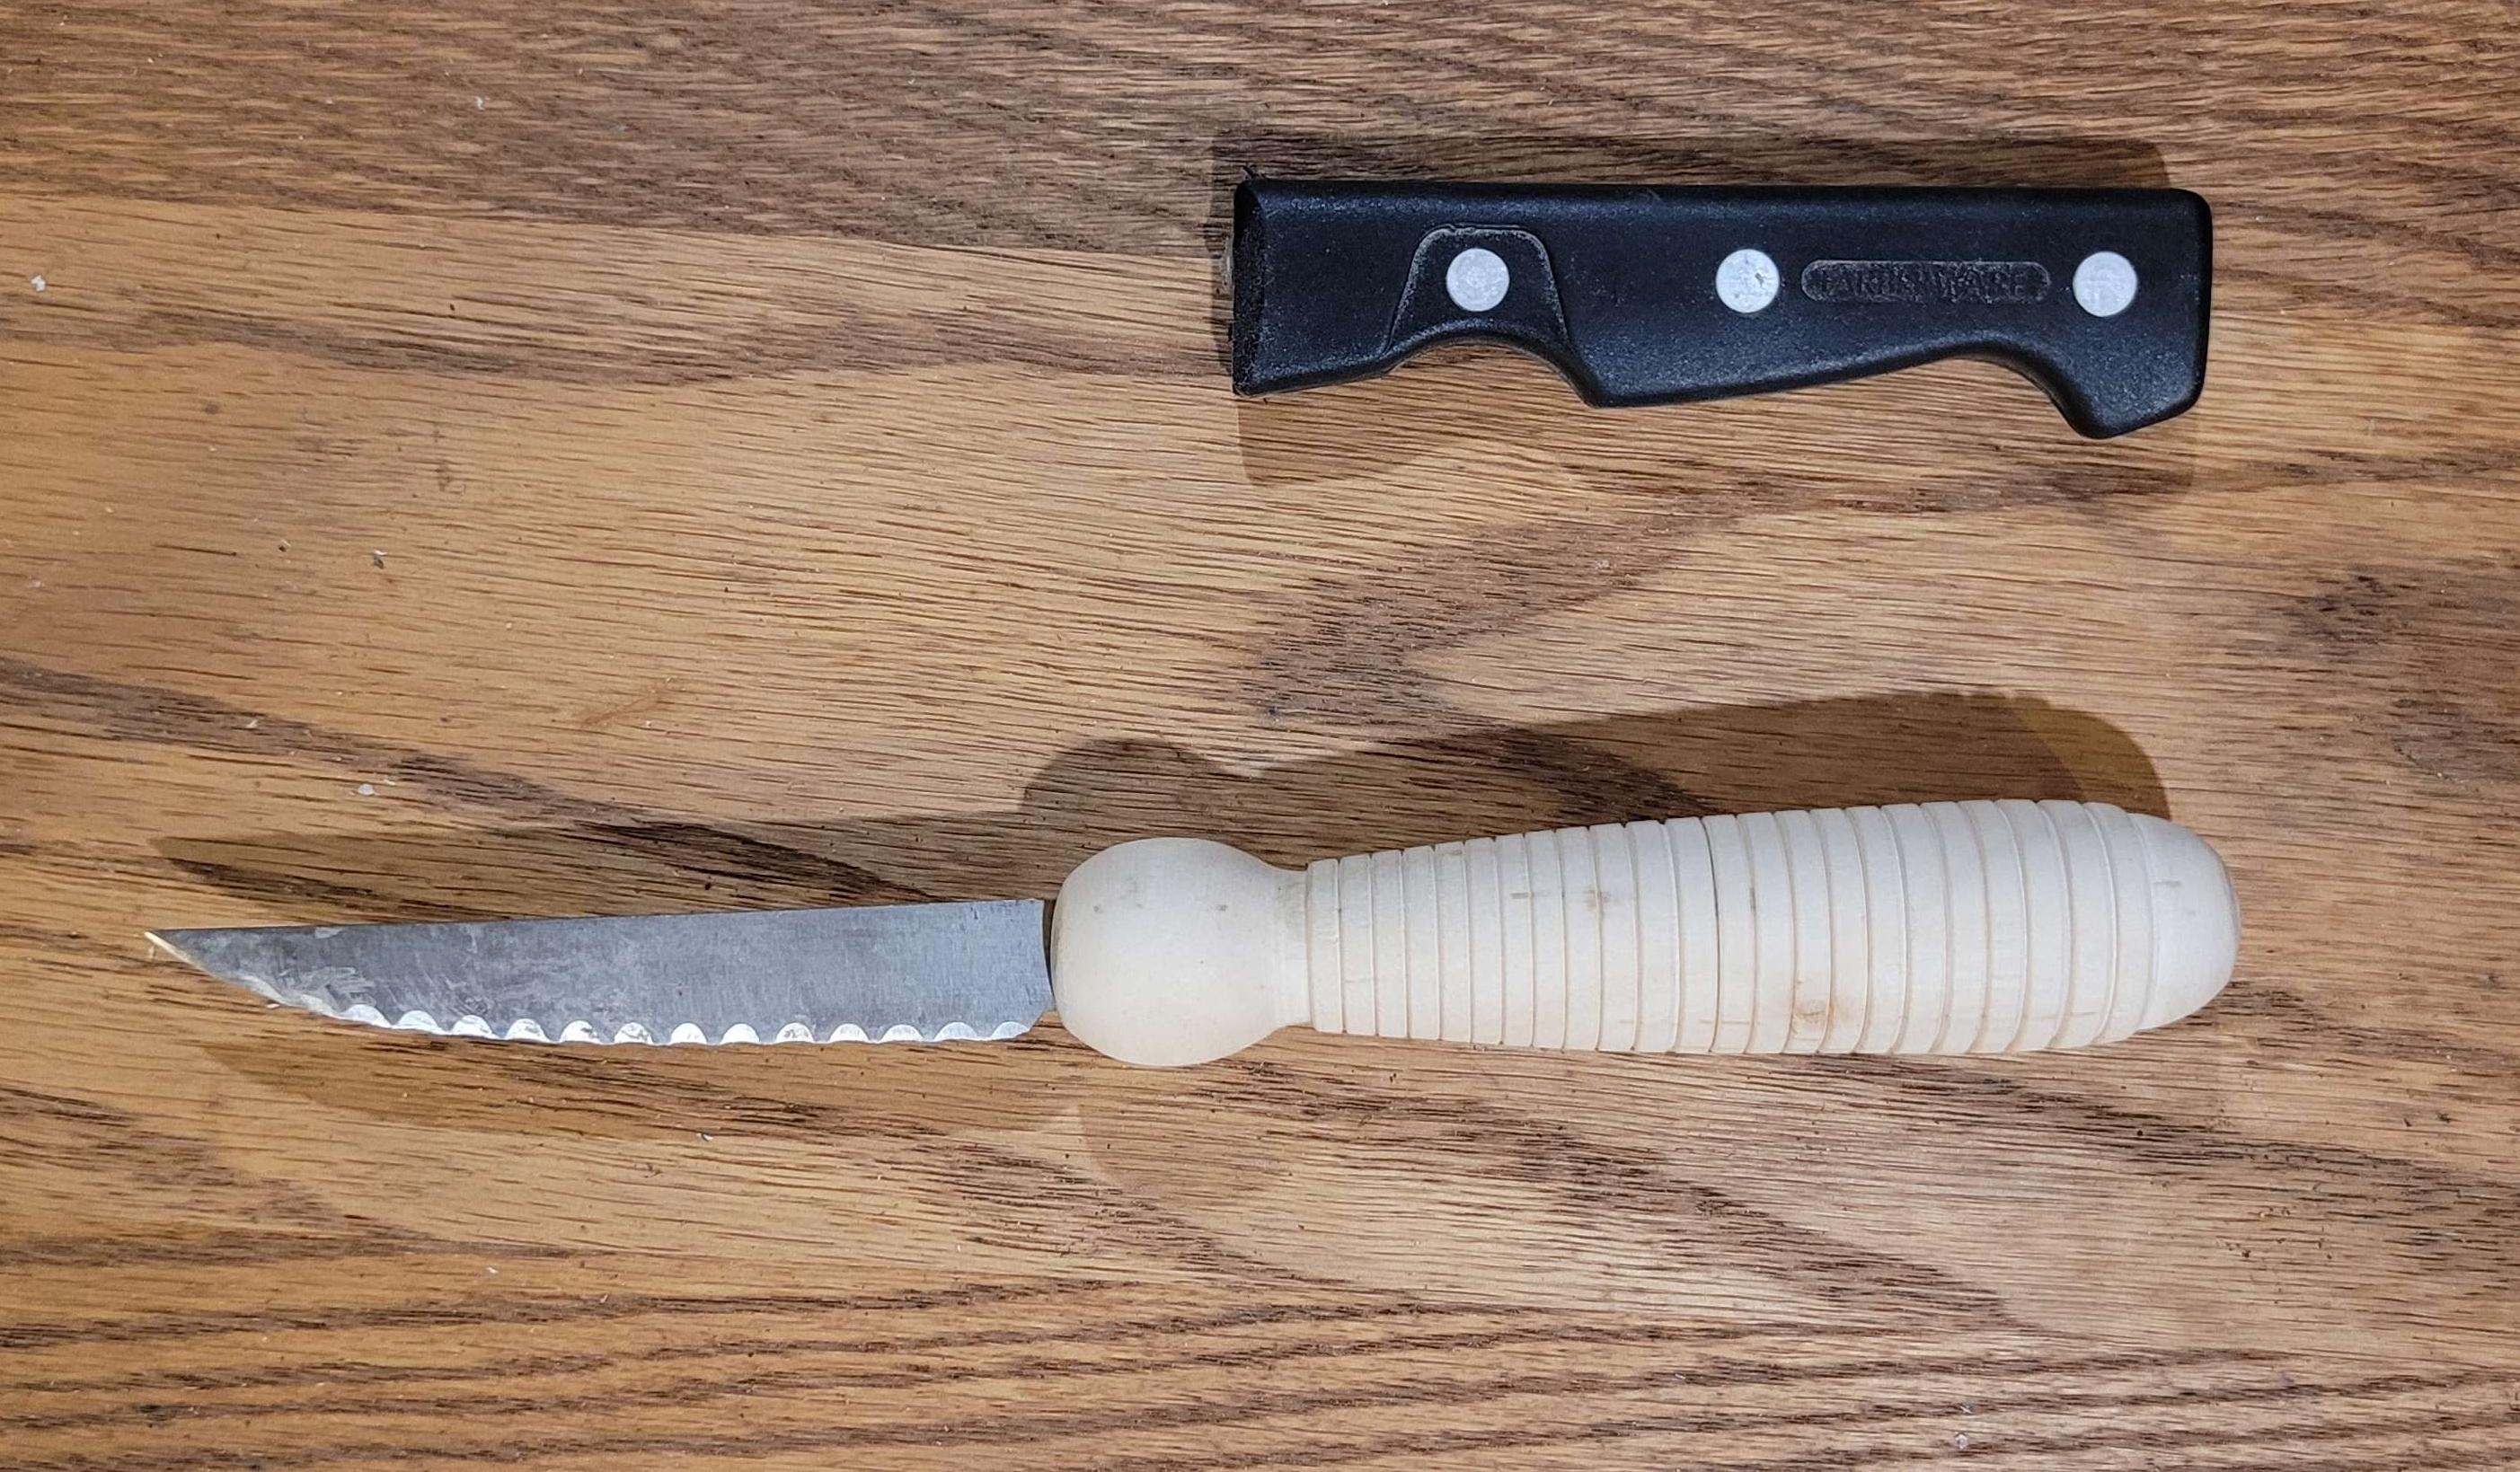
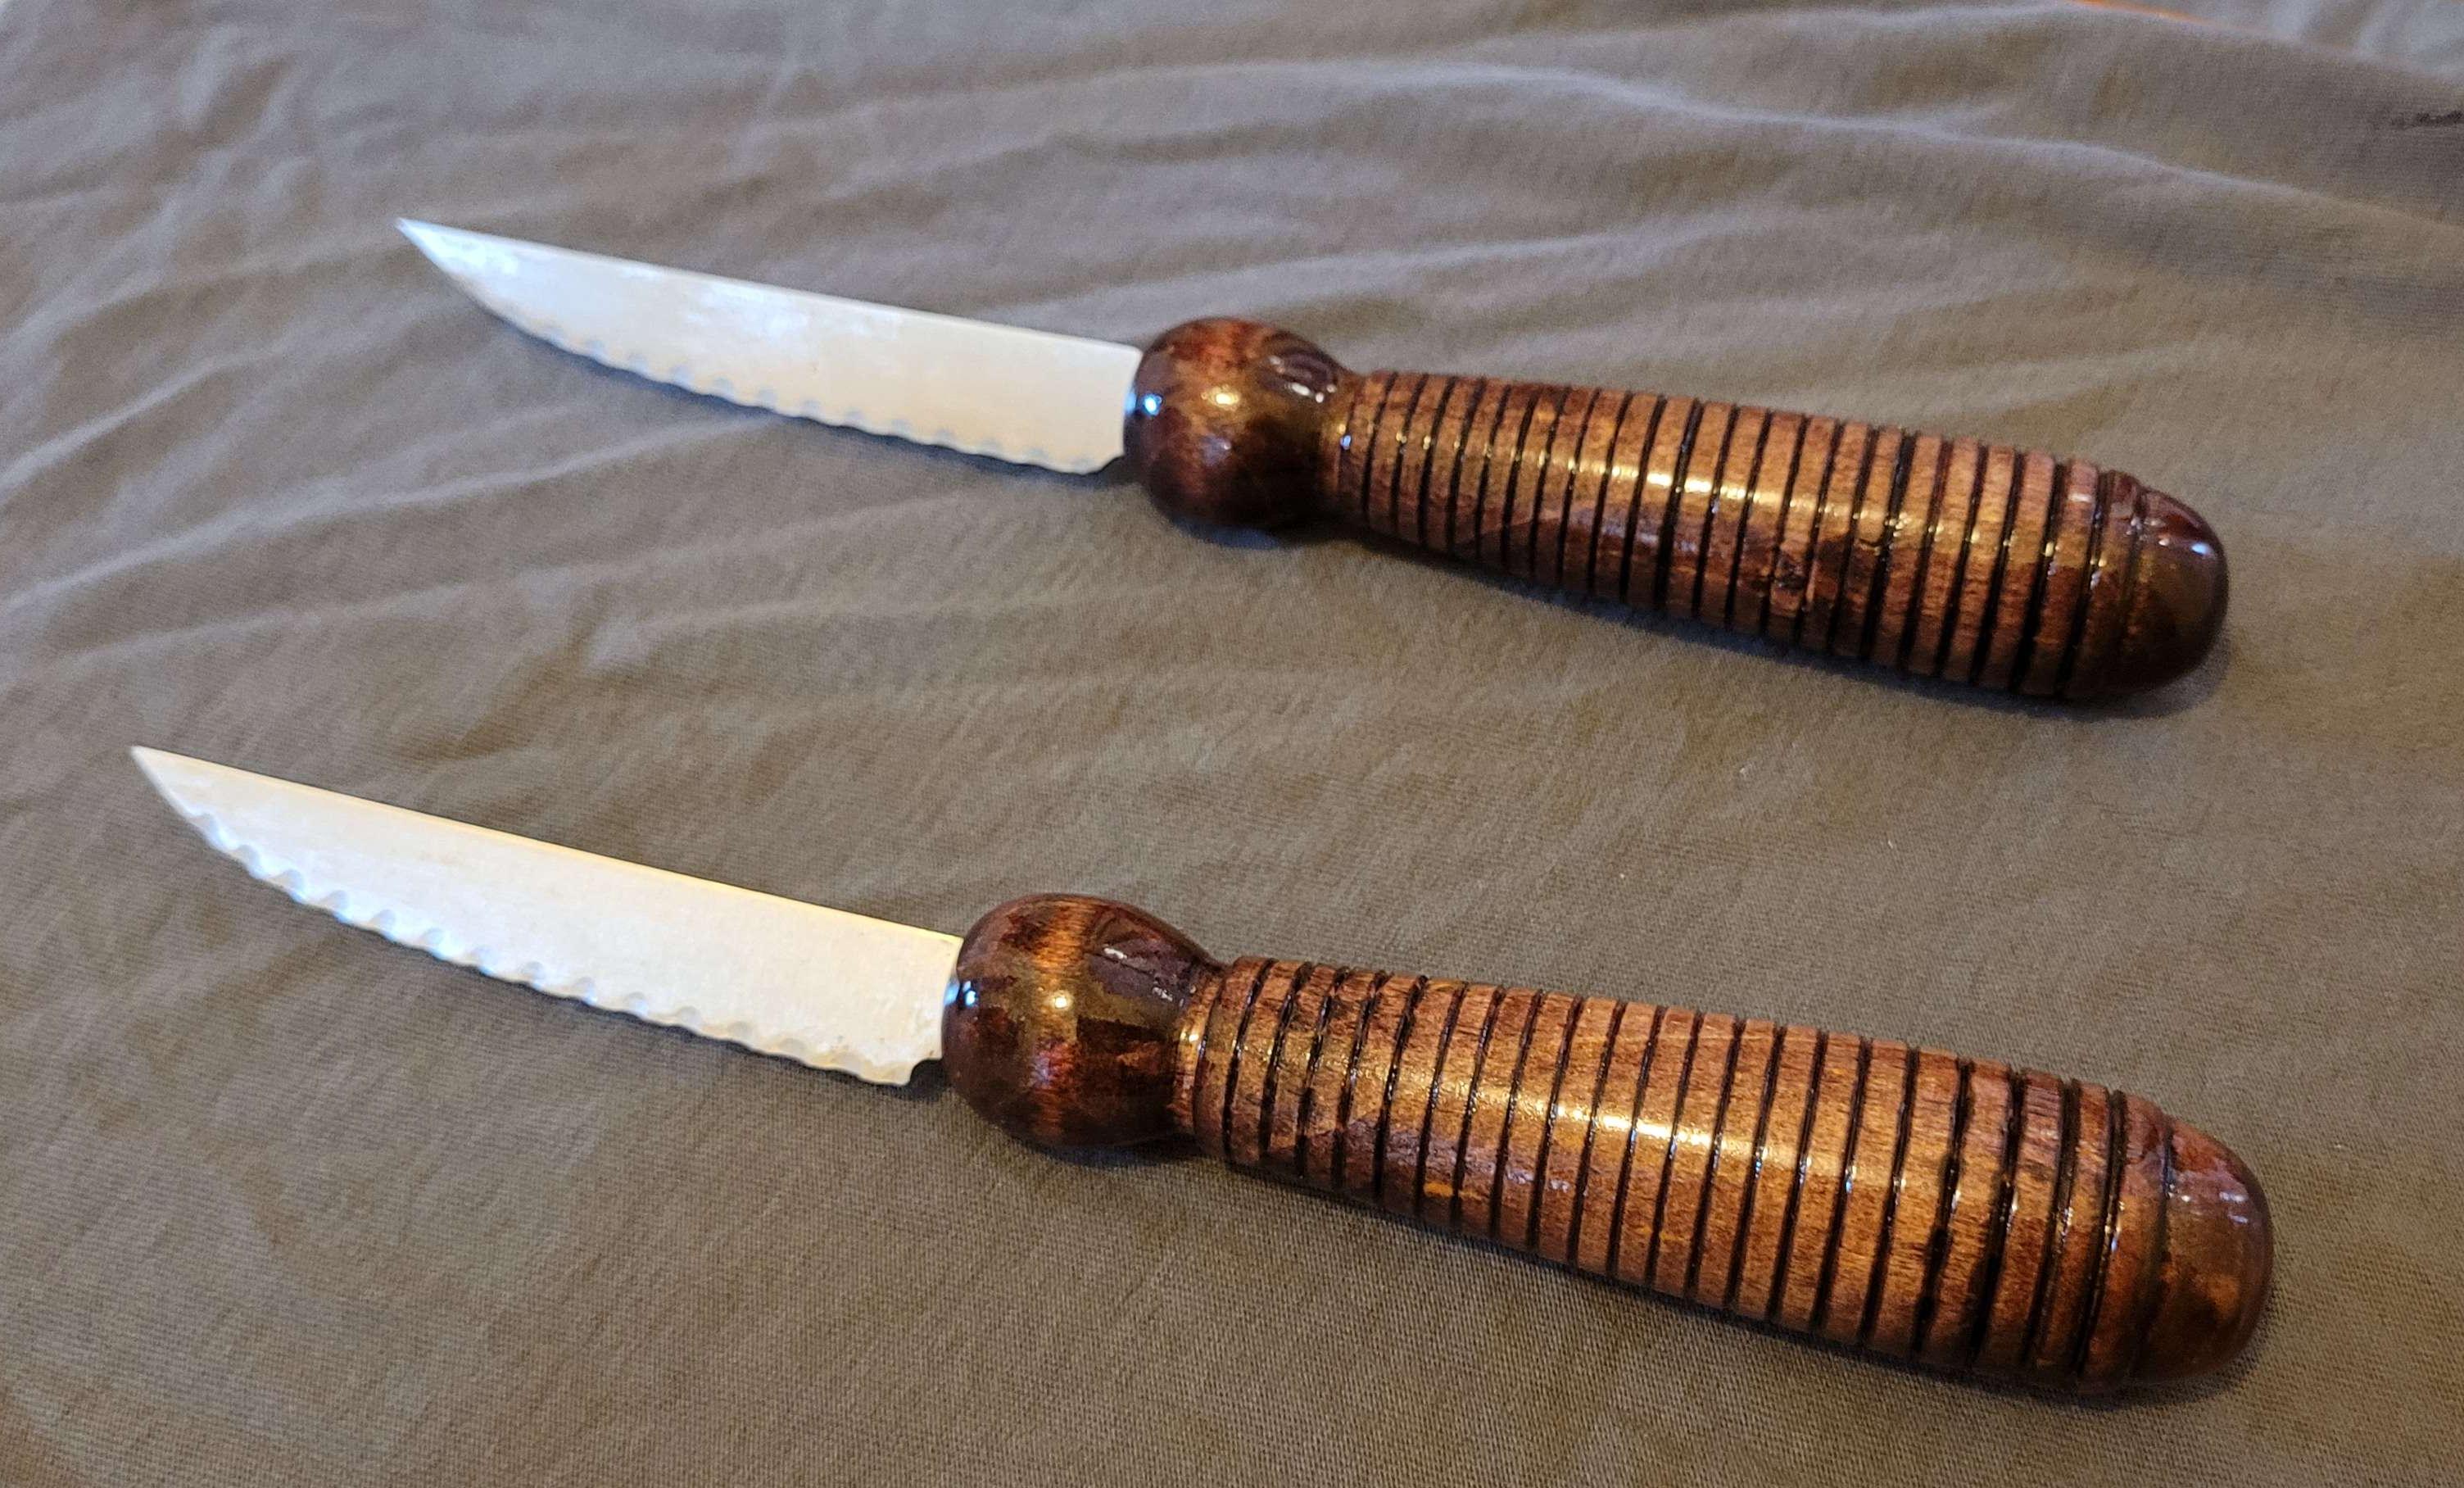
    before and after

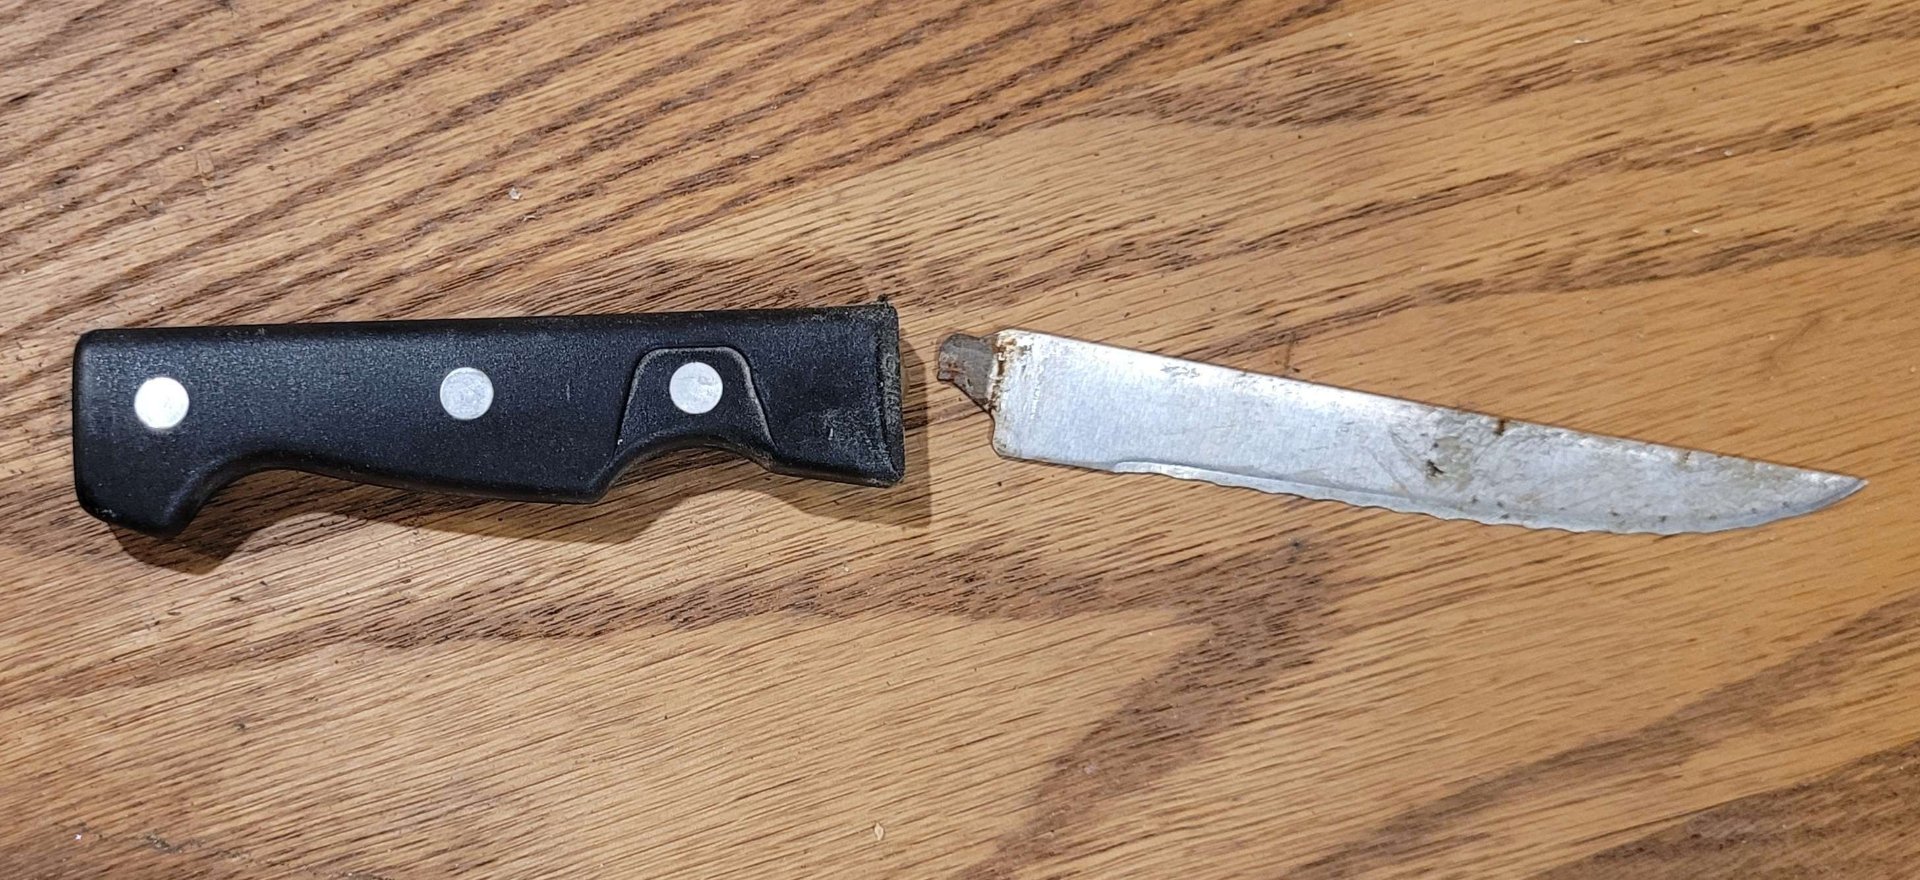
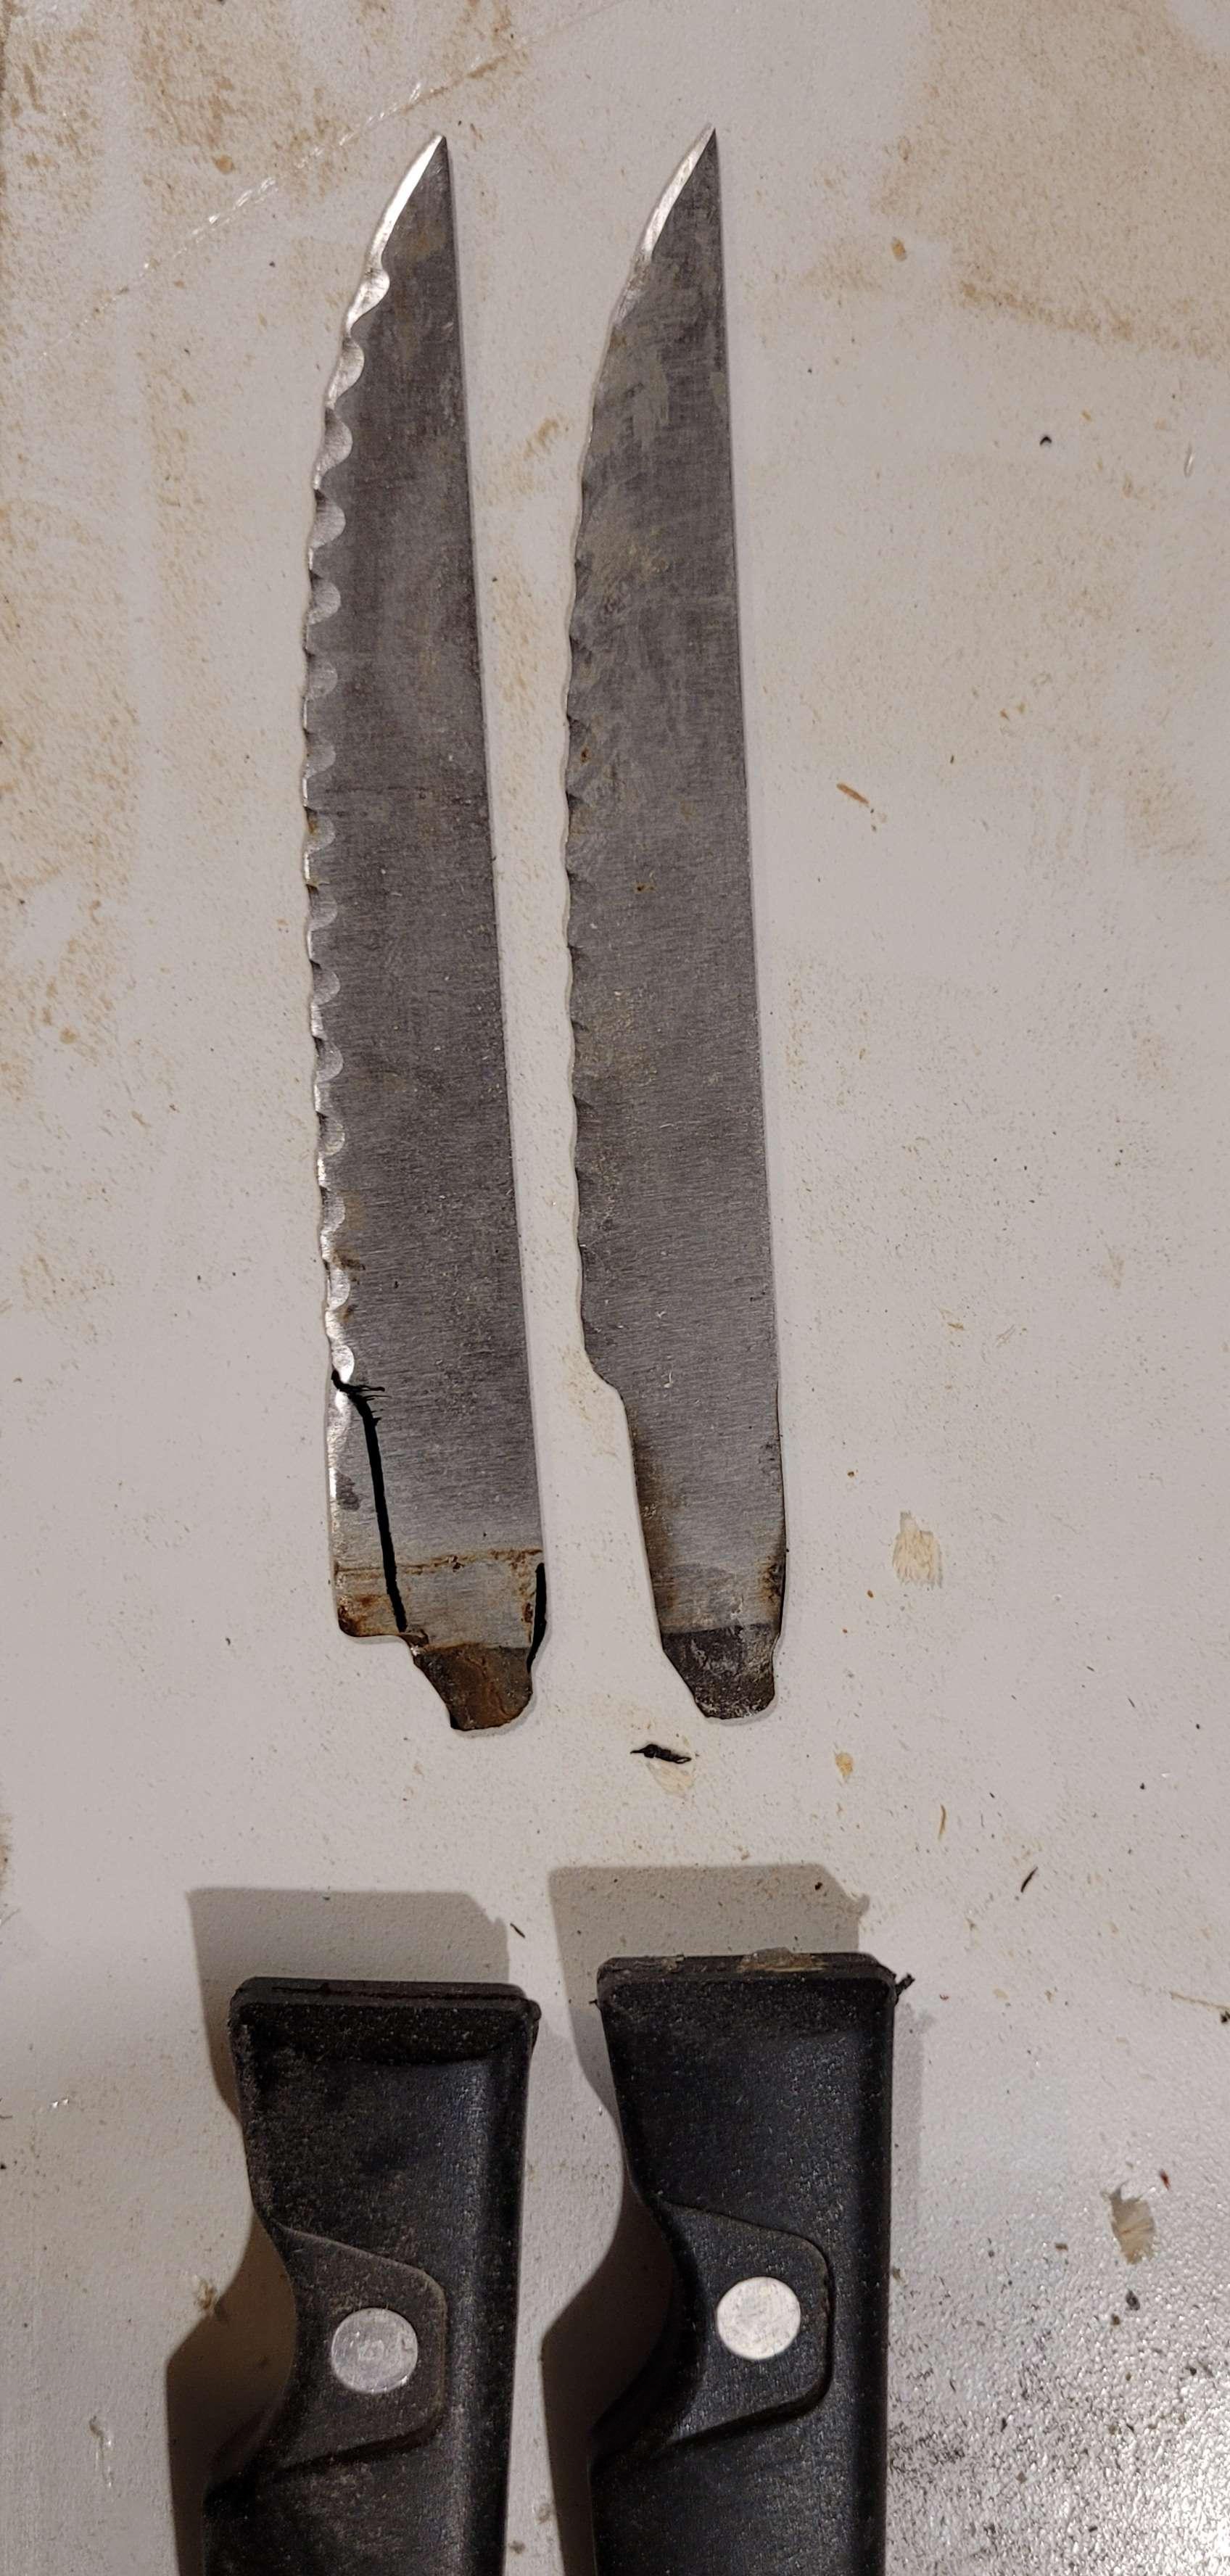
    I had two of these basic farberware kitchen knives break in the same way. Both blades had the tang snap back inside the handle. Gluing it back in the grip didn't work, so I set them aside for a bit.

    the broken knife

    I have been fixing broken kitchen tools lately, so I decided to replace the handles for both knives.

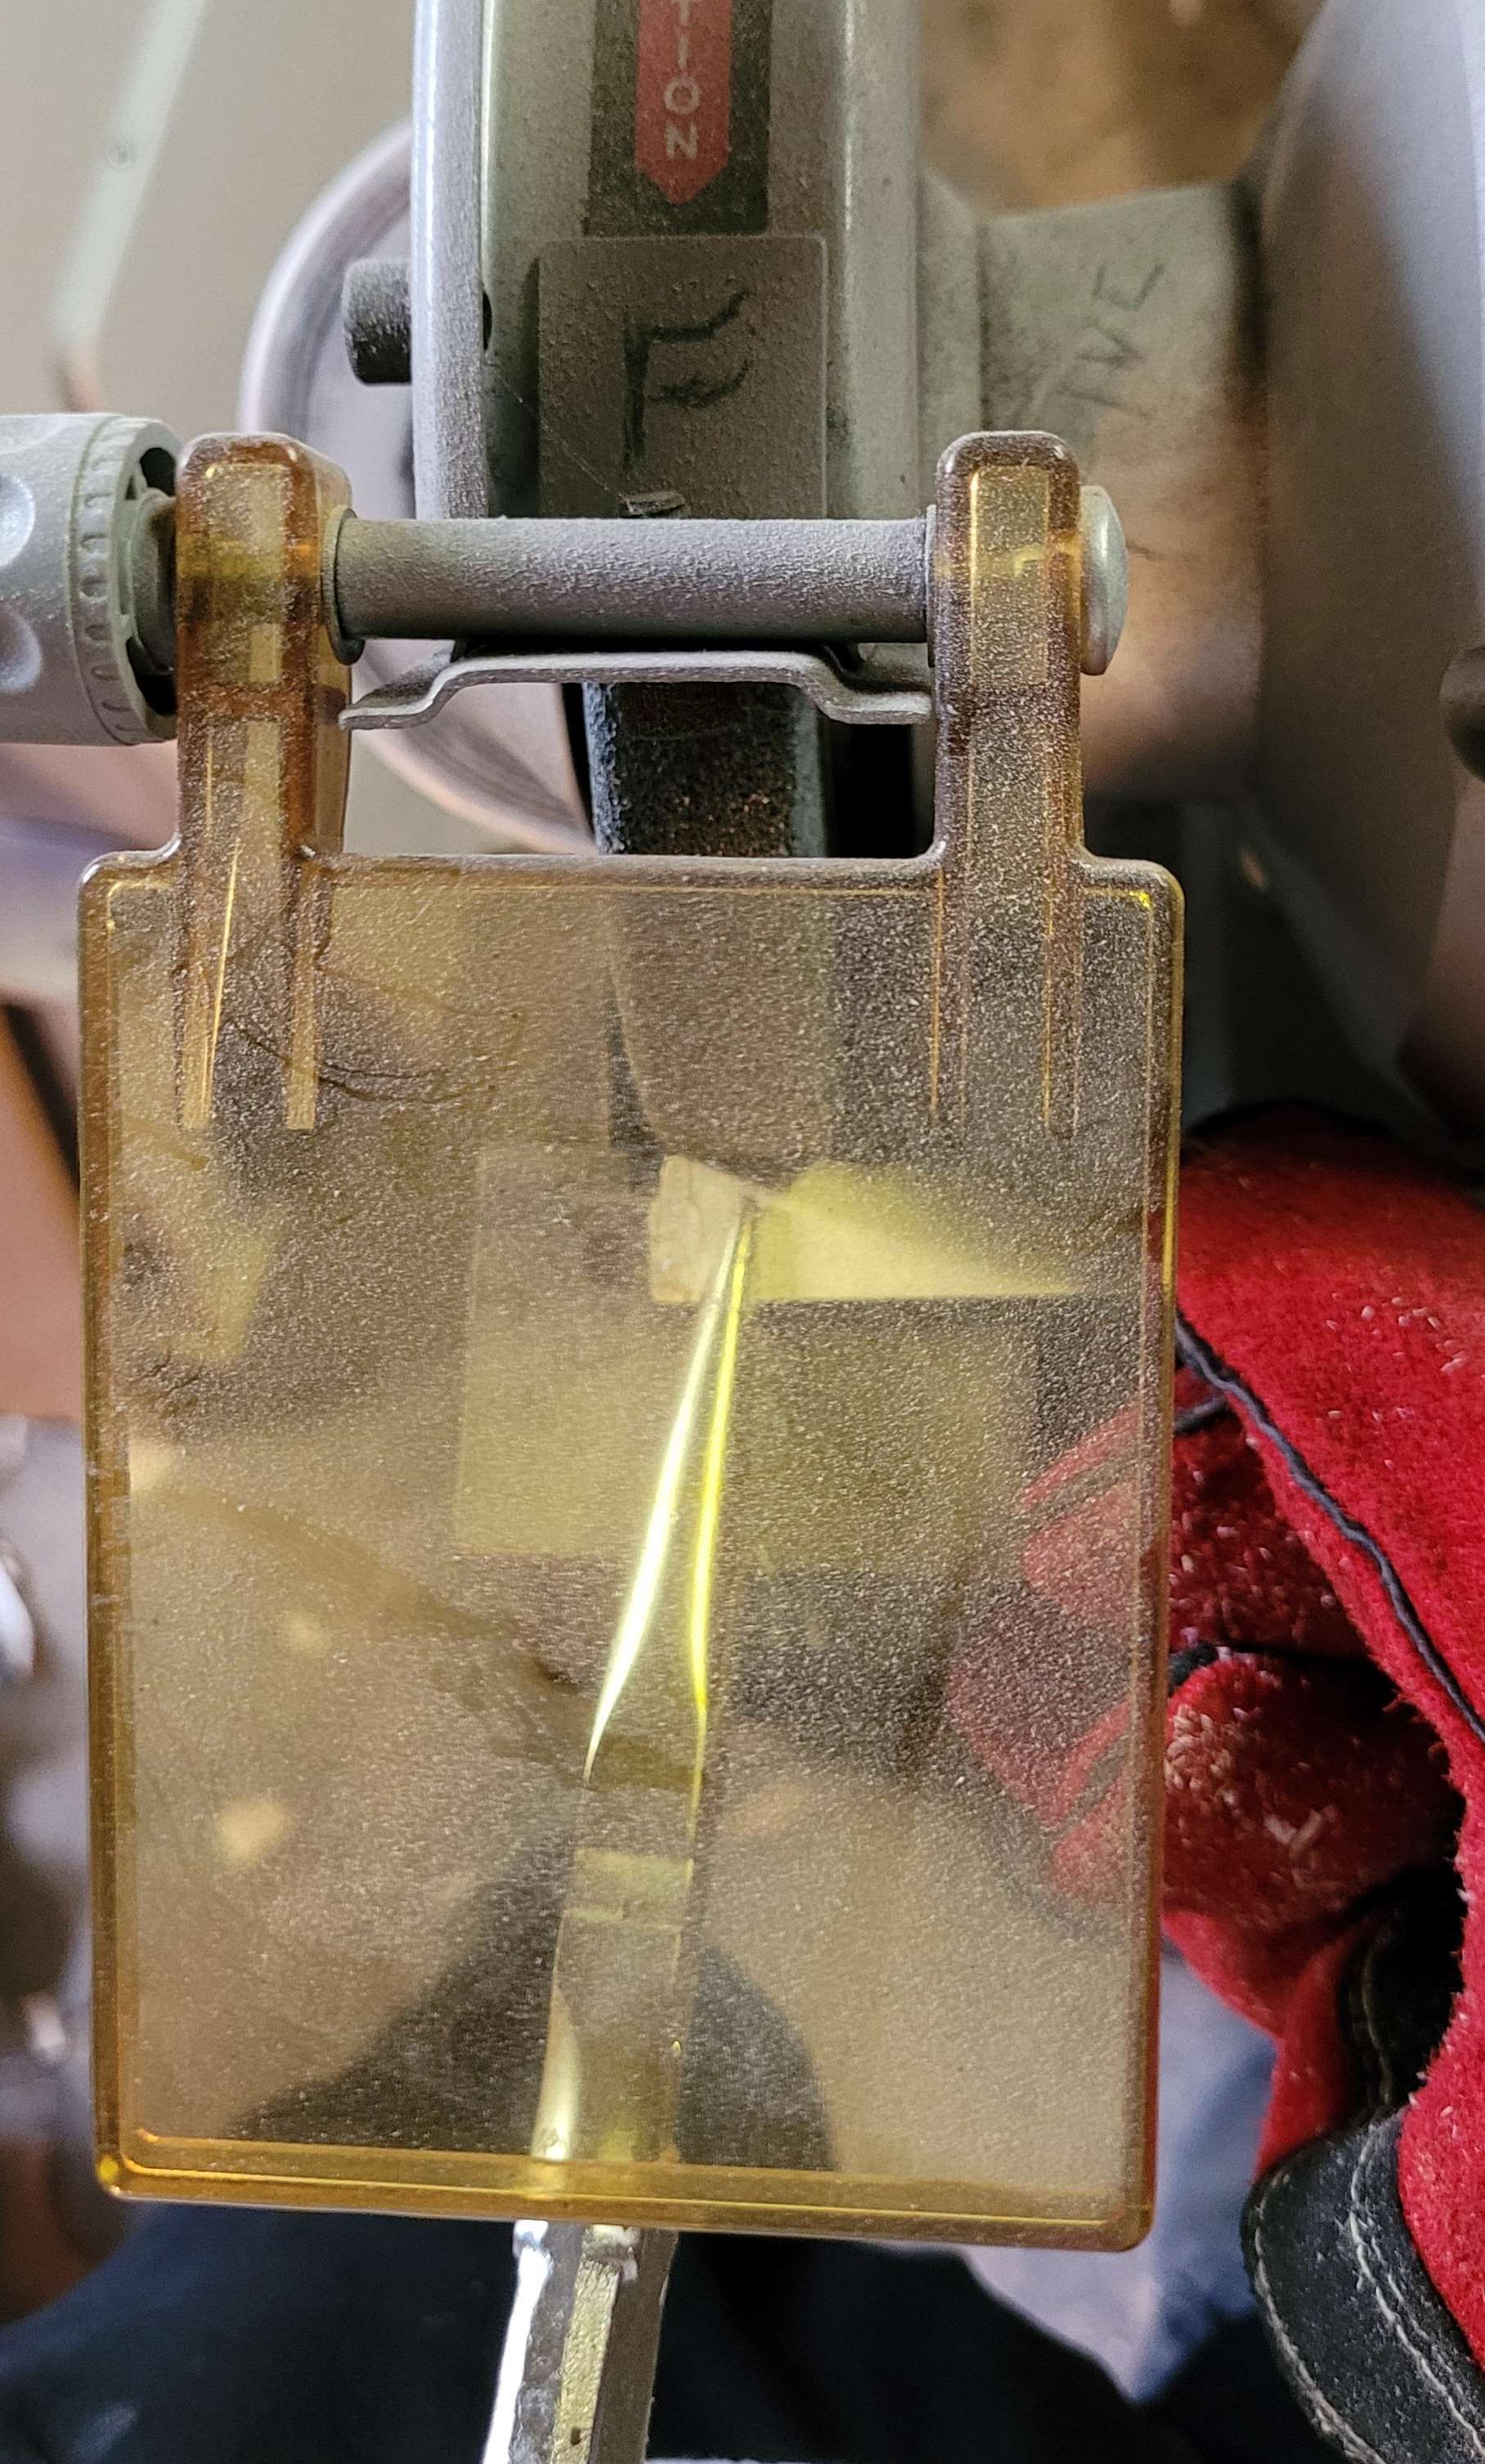
    the knife blade with the edge near the broken part being ground down

    I started by grinding a new tang into the knife blade. I had to shorten the blade of the knife to do this but my favorite kitchen knives are short, so I don't think I'll mind.

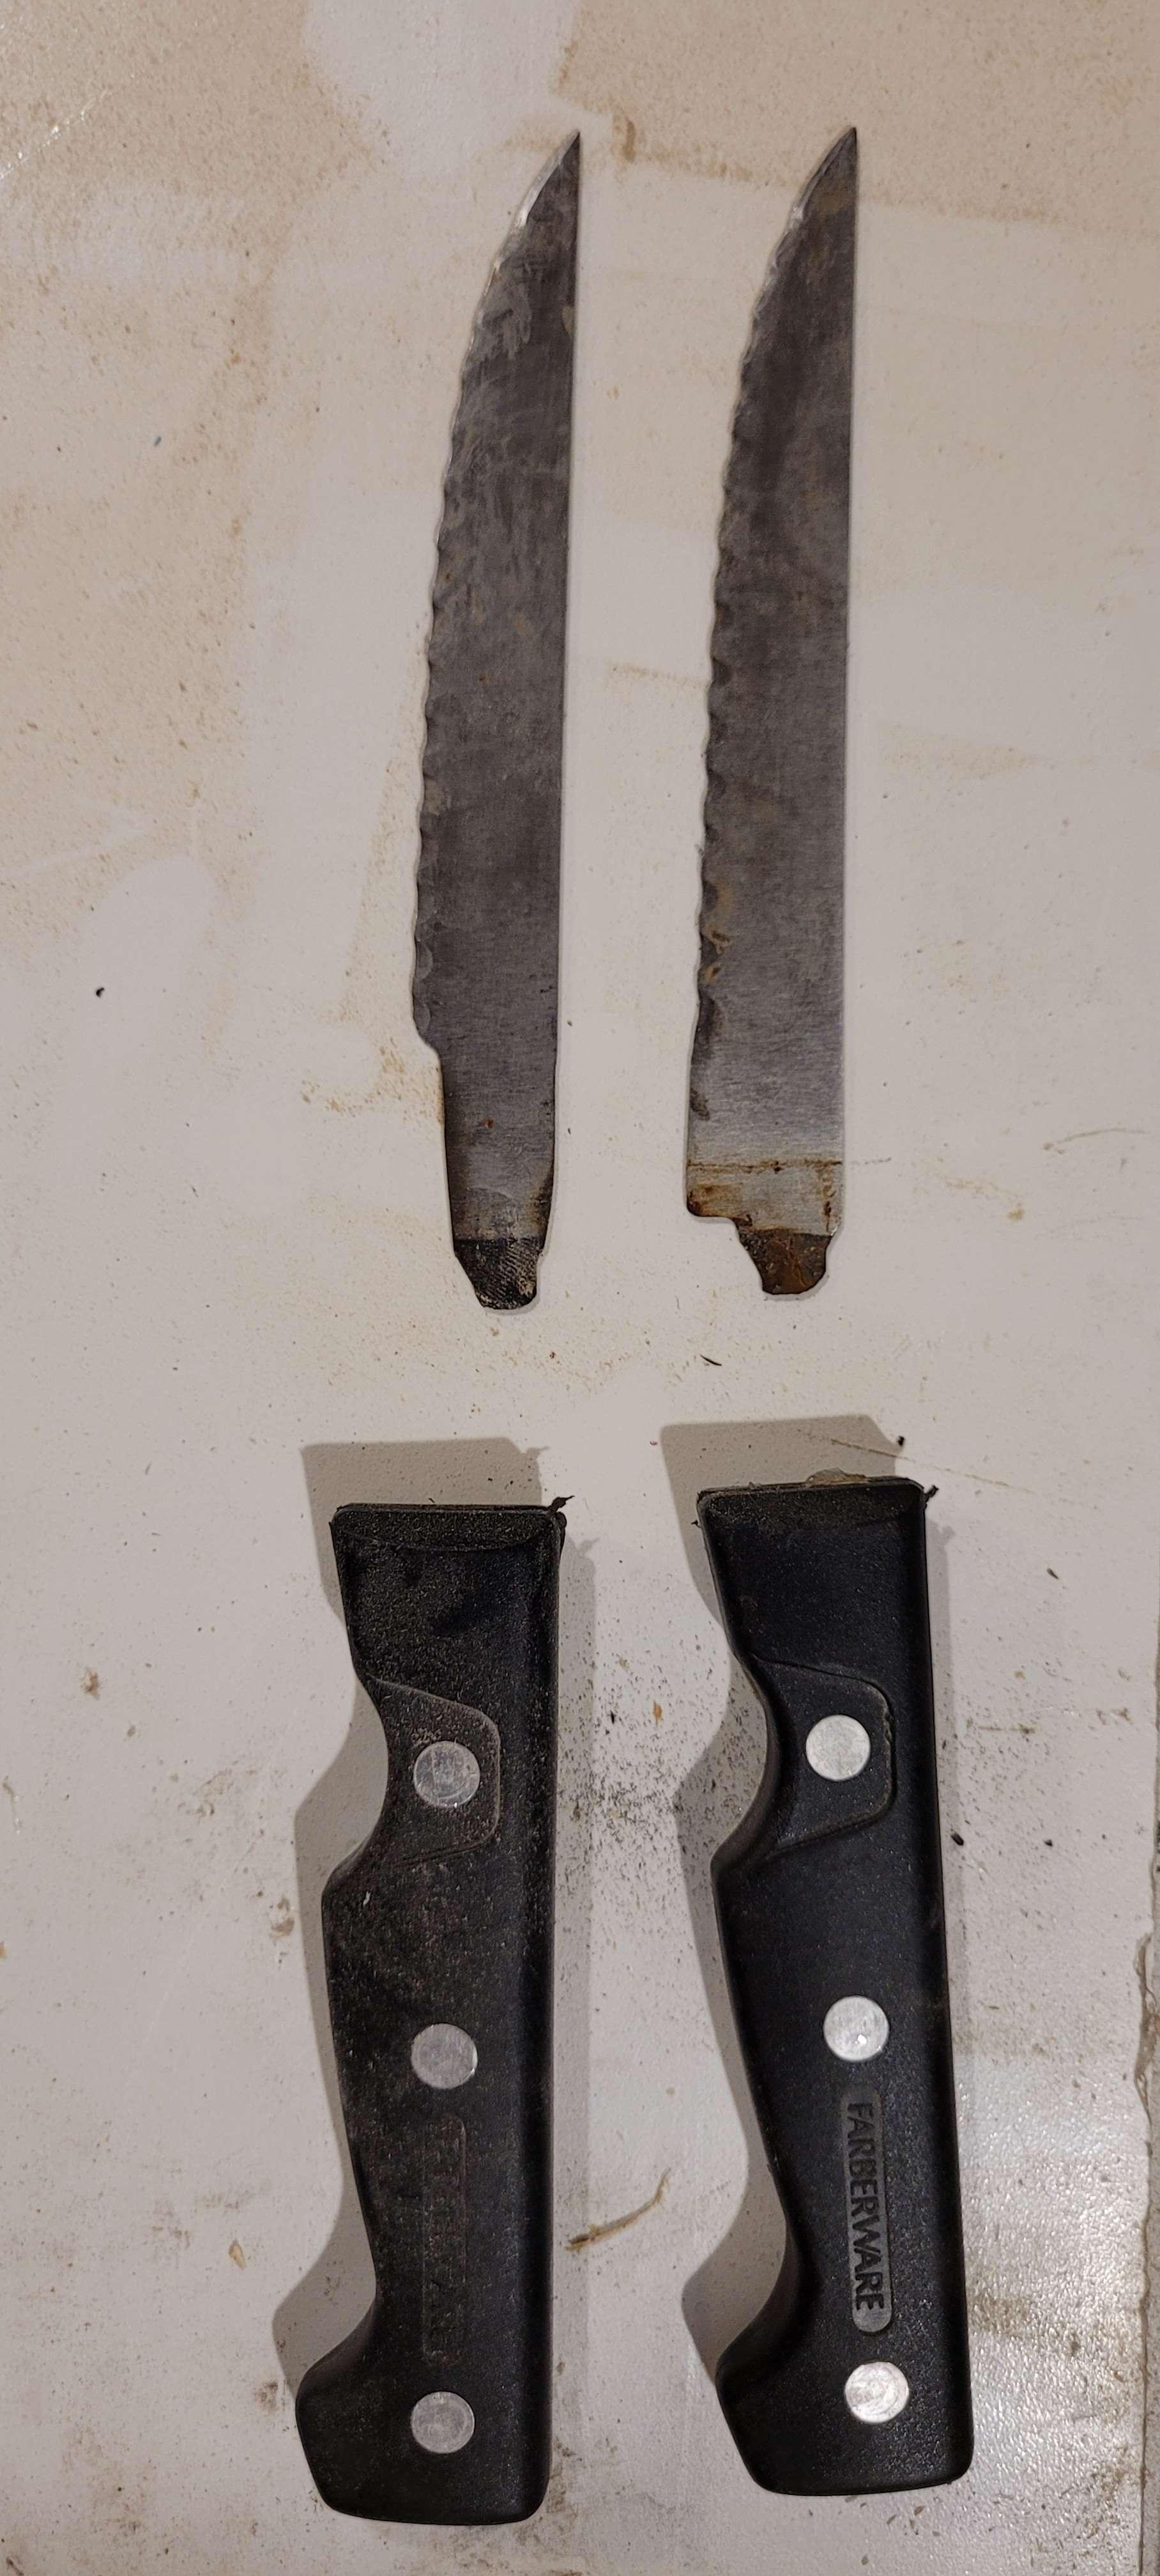
    one ground down, one still freshly broken off

    The re-ground knife on the left, with the unmodified one on the right

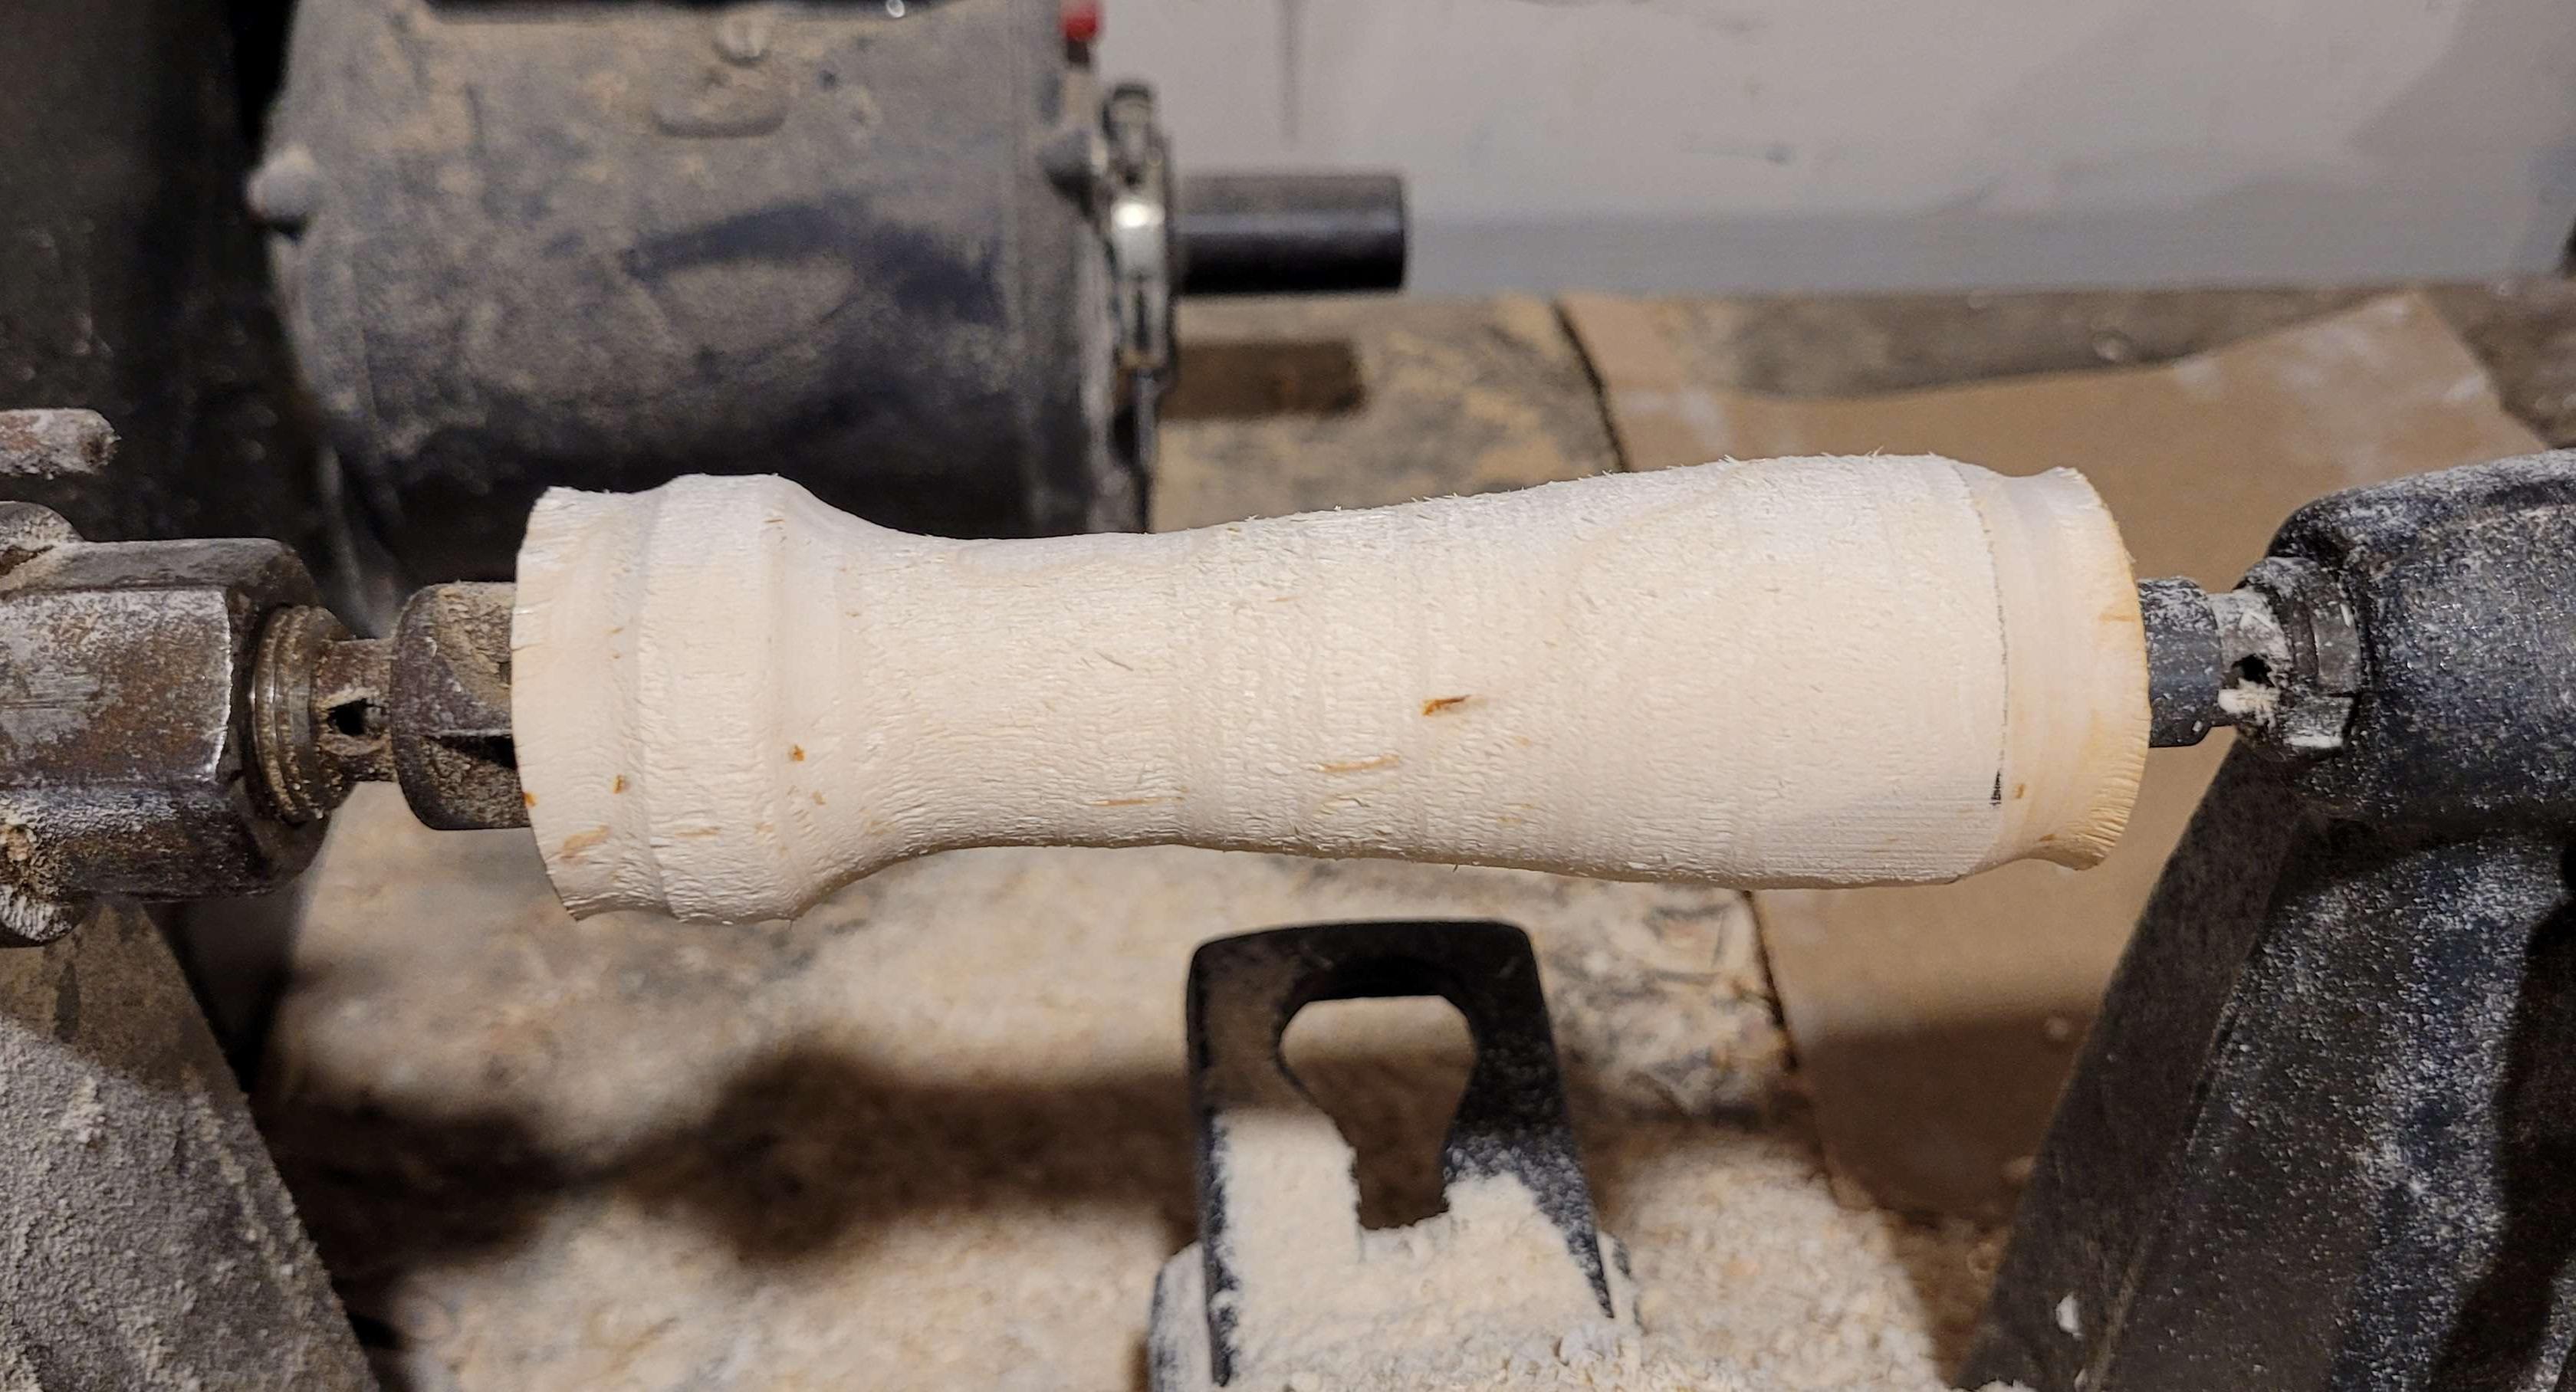
    rough handle for the first knife

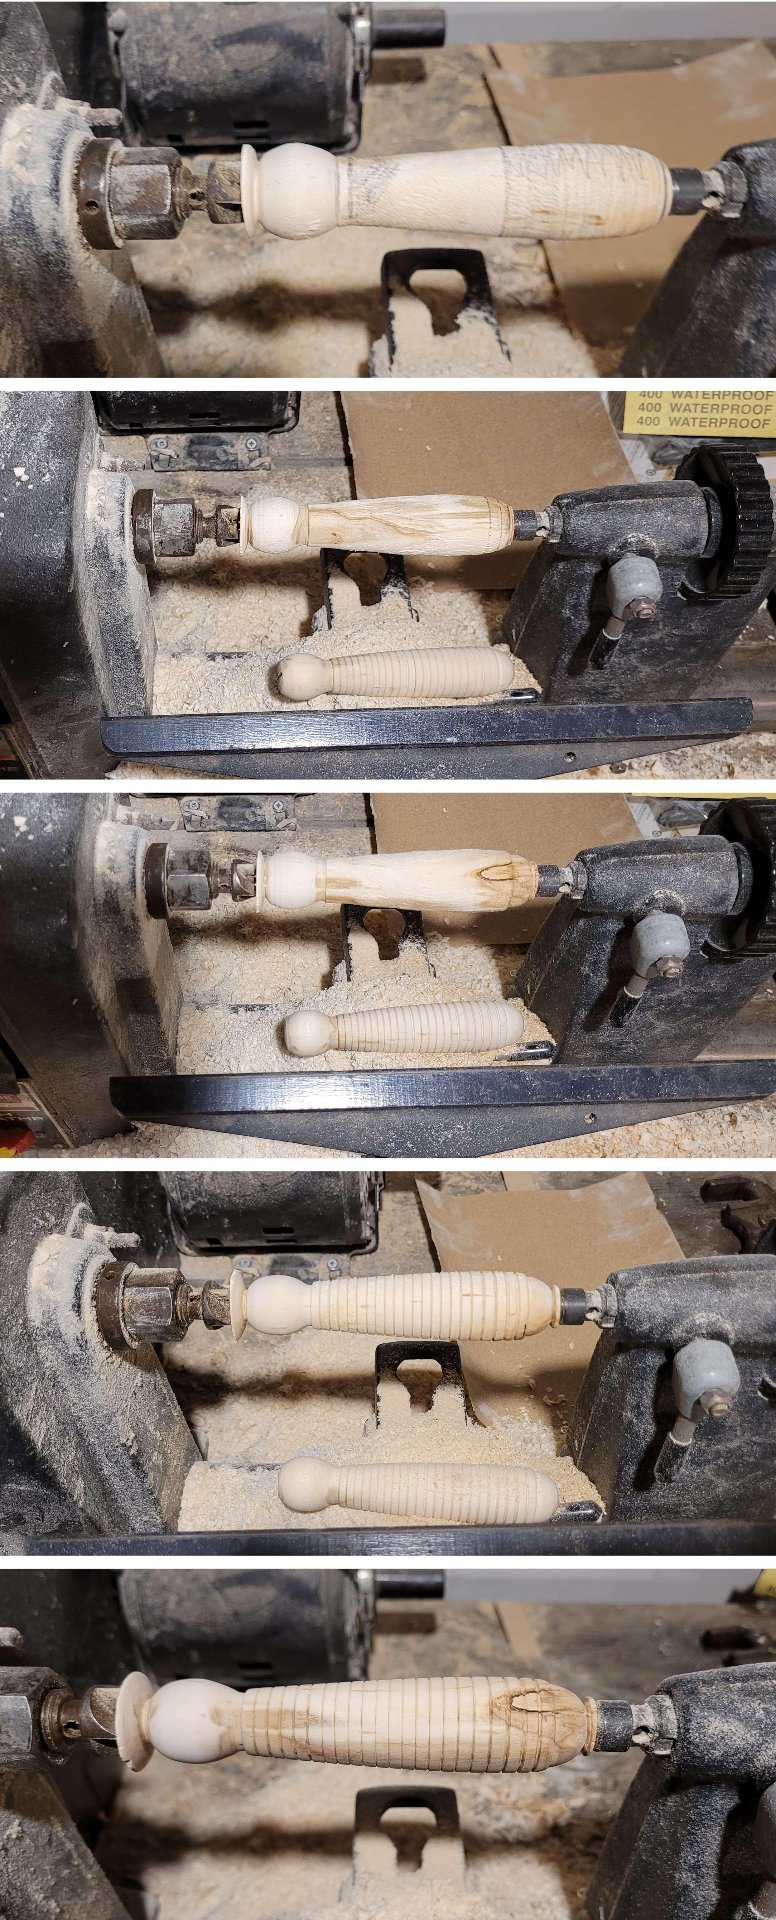
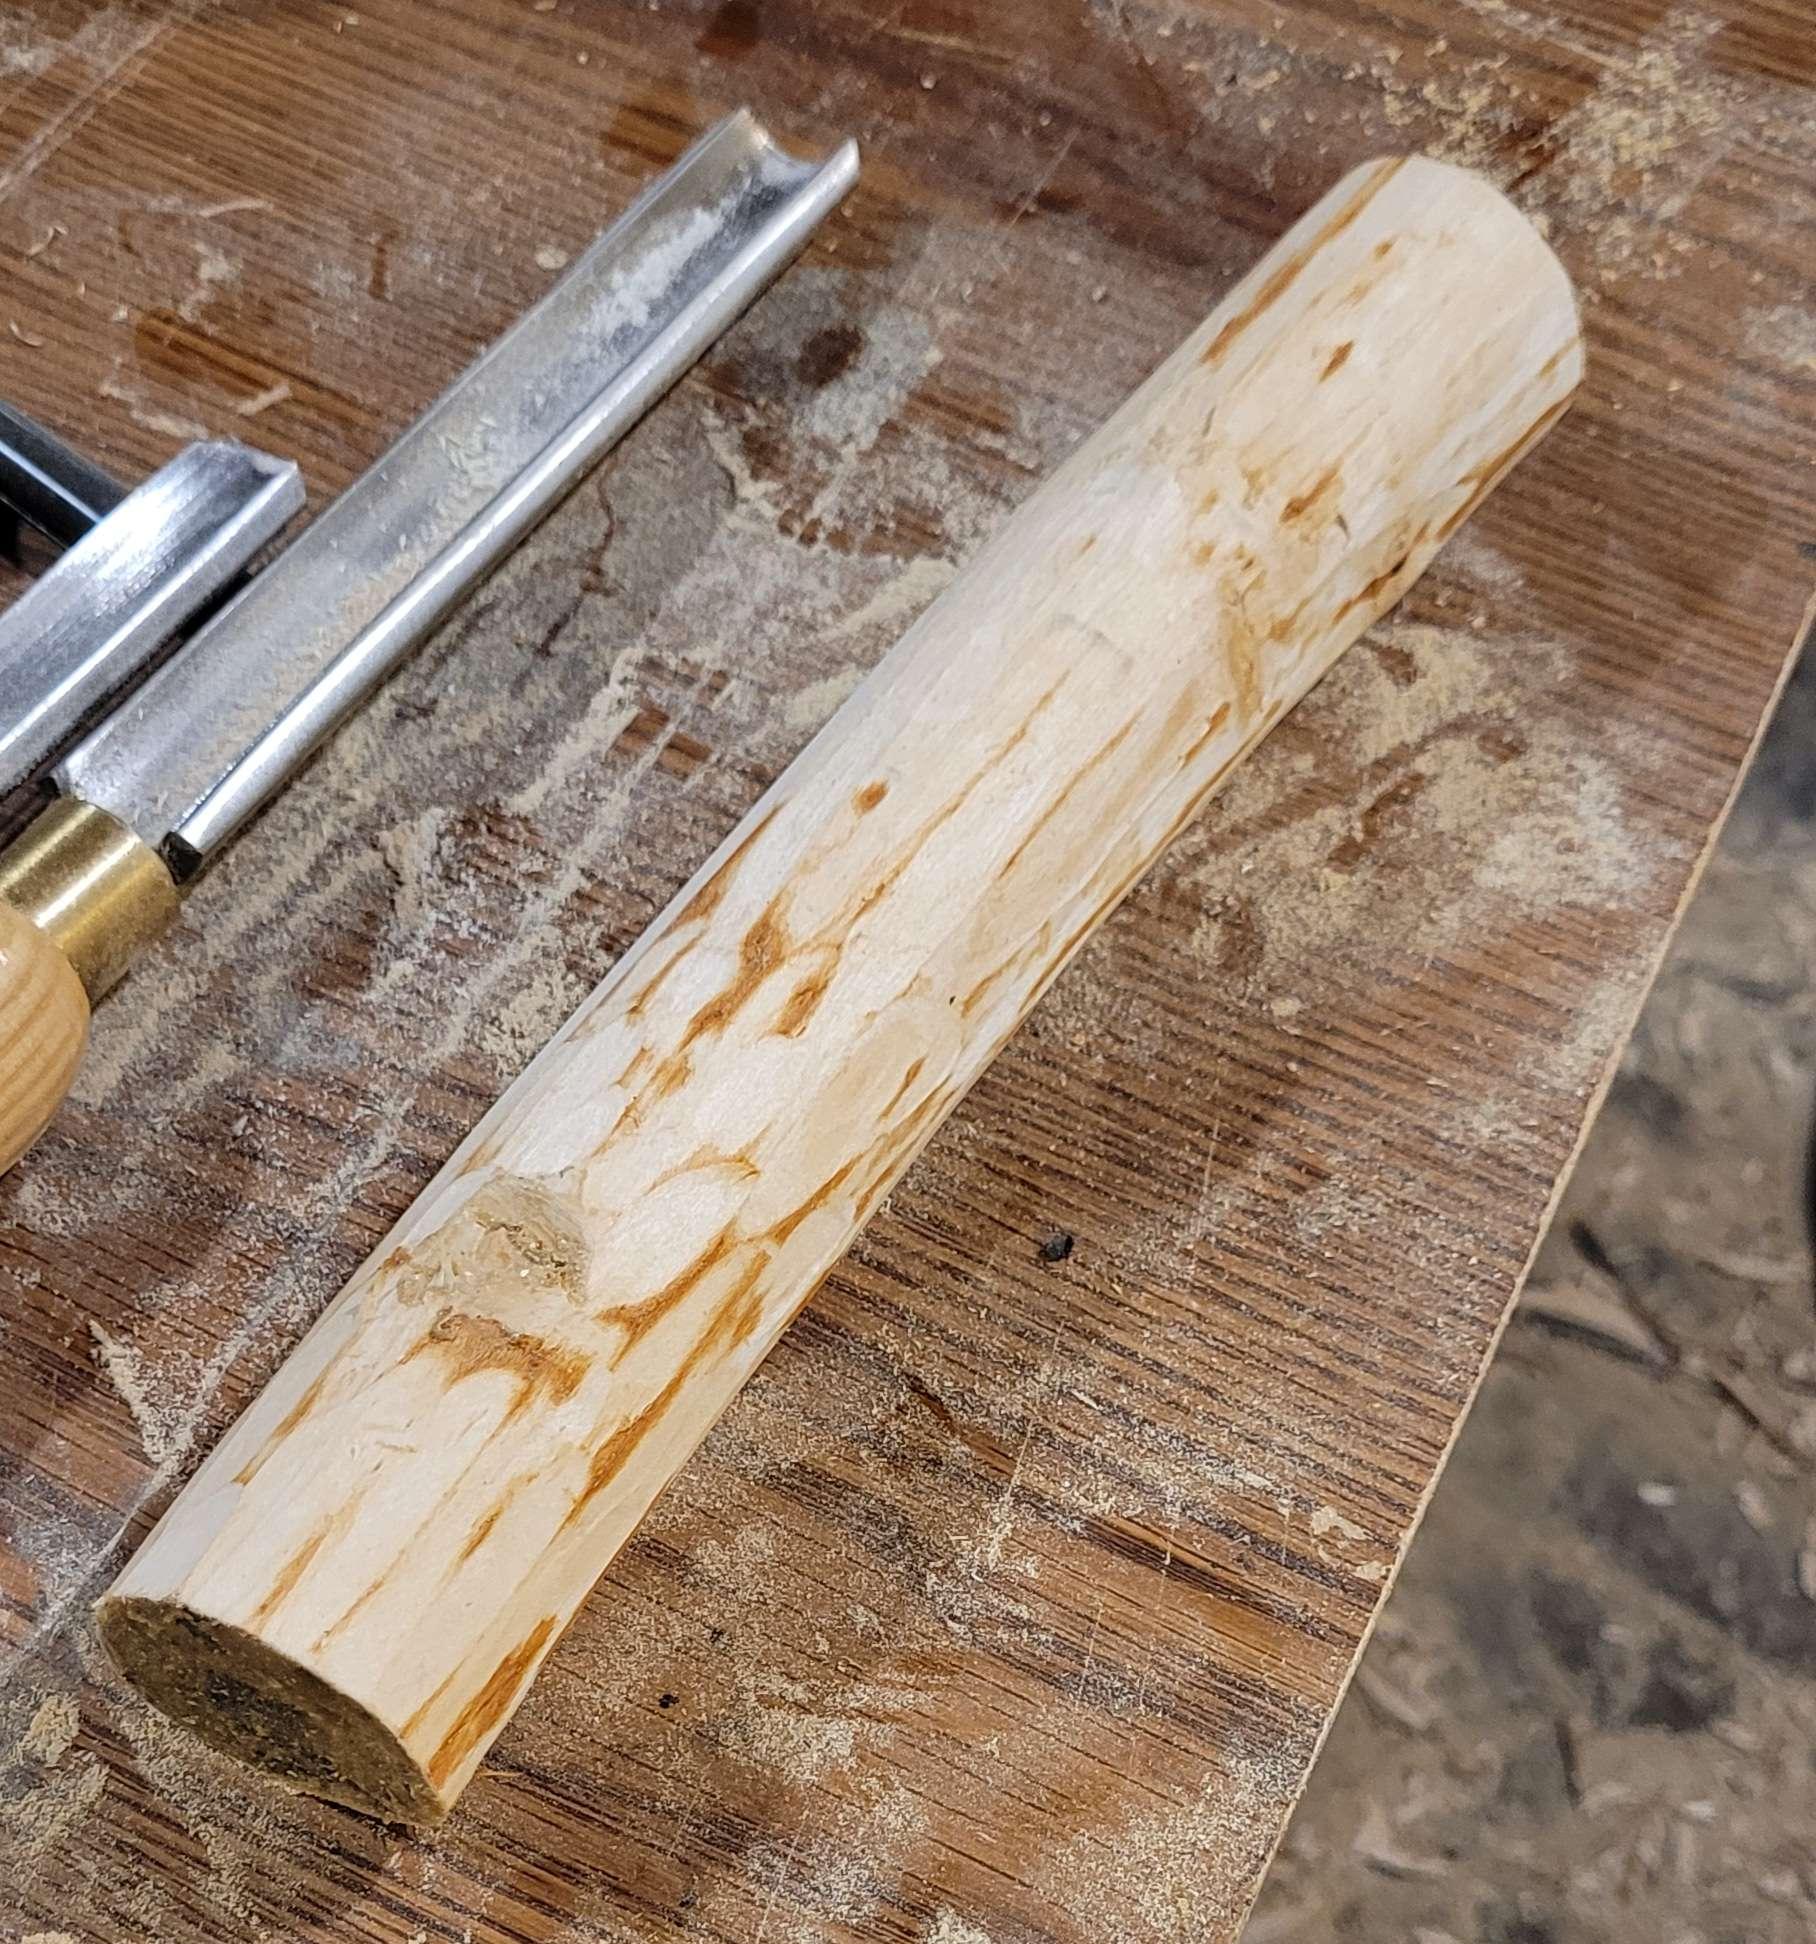
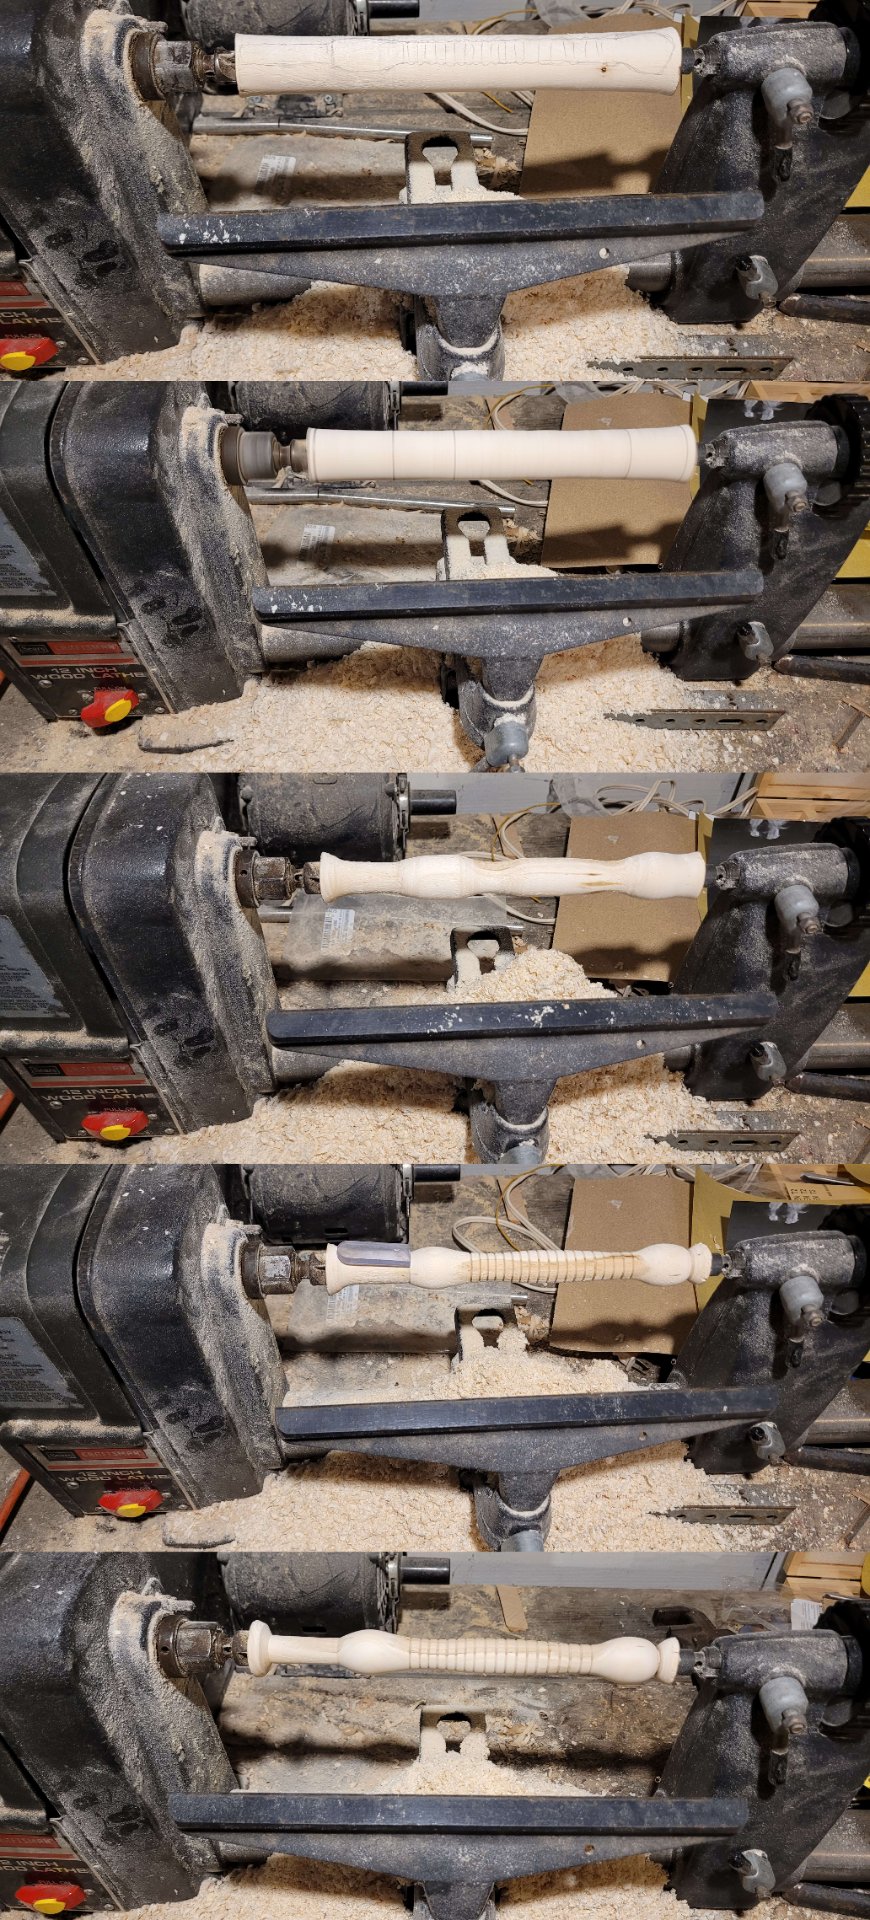
    Next I turned the first handle on the lathe. I started with a piece of an oak branch I collected after a storm broke it off a tree in a local park three years ago. Several large (up to 8" diameter) branches came down, and the city took their time in cleaning it up. It was good hardwood that would have just been chipped anyways, so we decided to save them some person-hours and gas and went down with a hand saw one night, cut the branches into manageable pieces, and carried most of it home.

    Once we got it home, I sealed the ends with wax and stripped the bark with a draw knife so it could dry in the basement. The slow (1 year per inch of material is what I've read) drying process seemed impractical at the time but I barely noticed it, getting distracted with other projects.

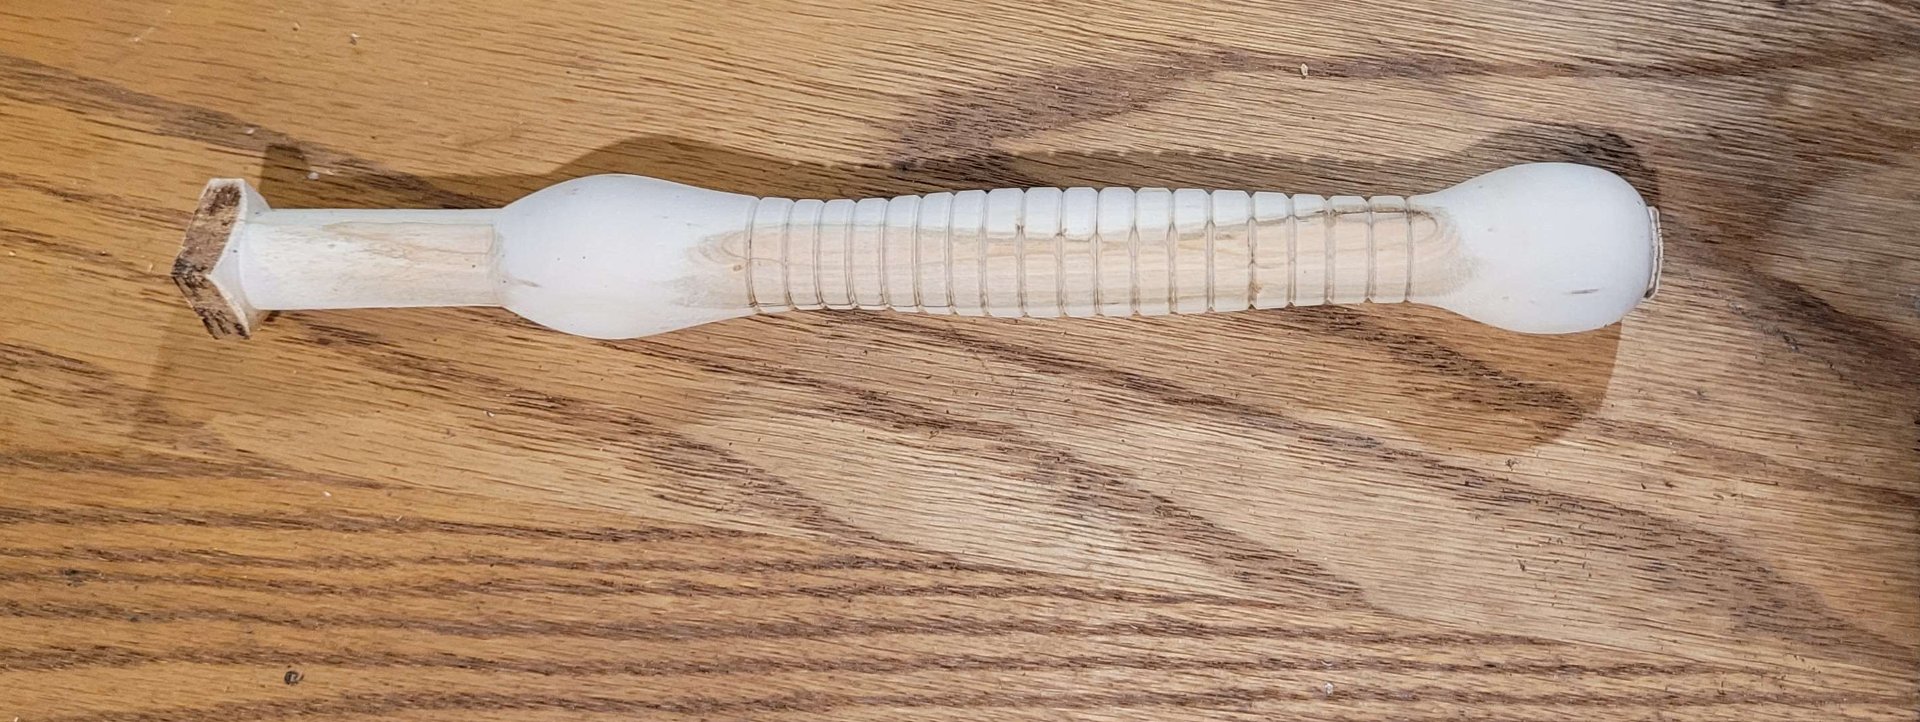
    For these knives and the rubber scraper, I used the smallest of the branches we took.

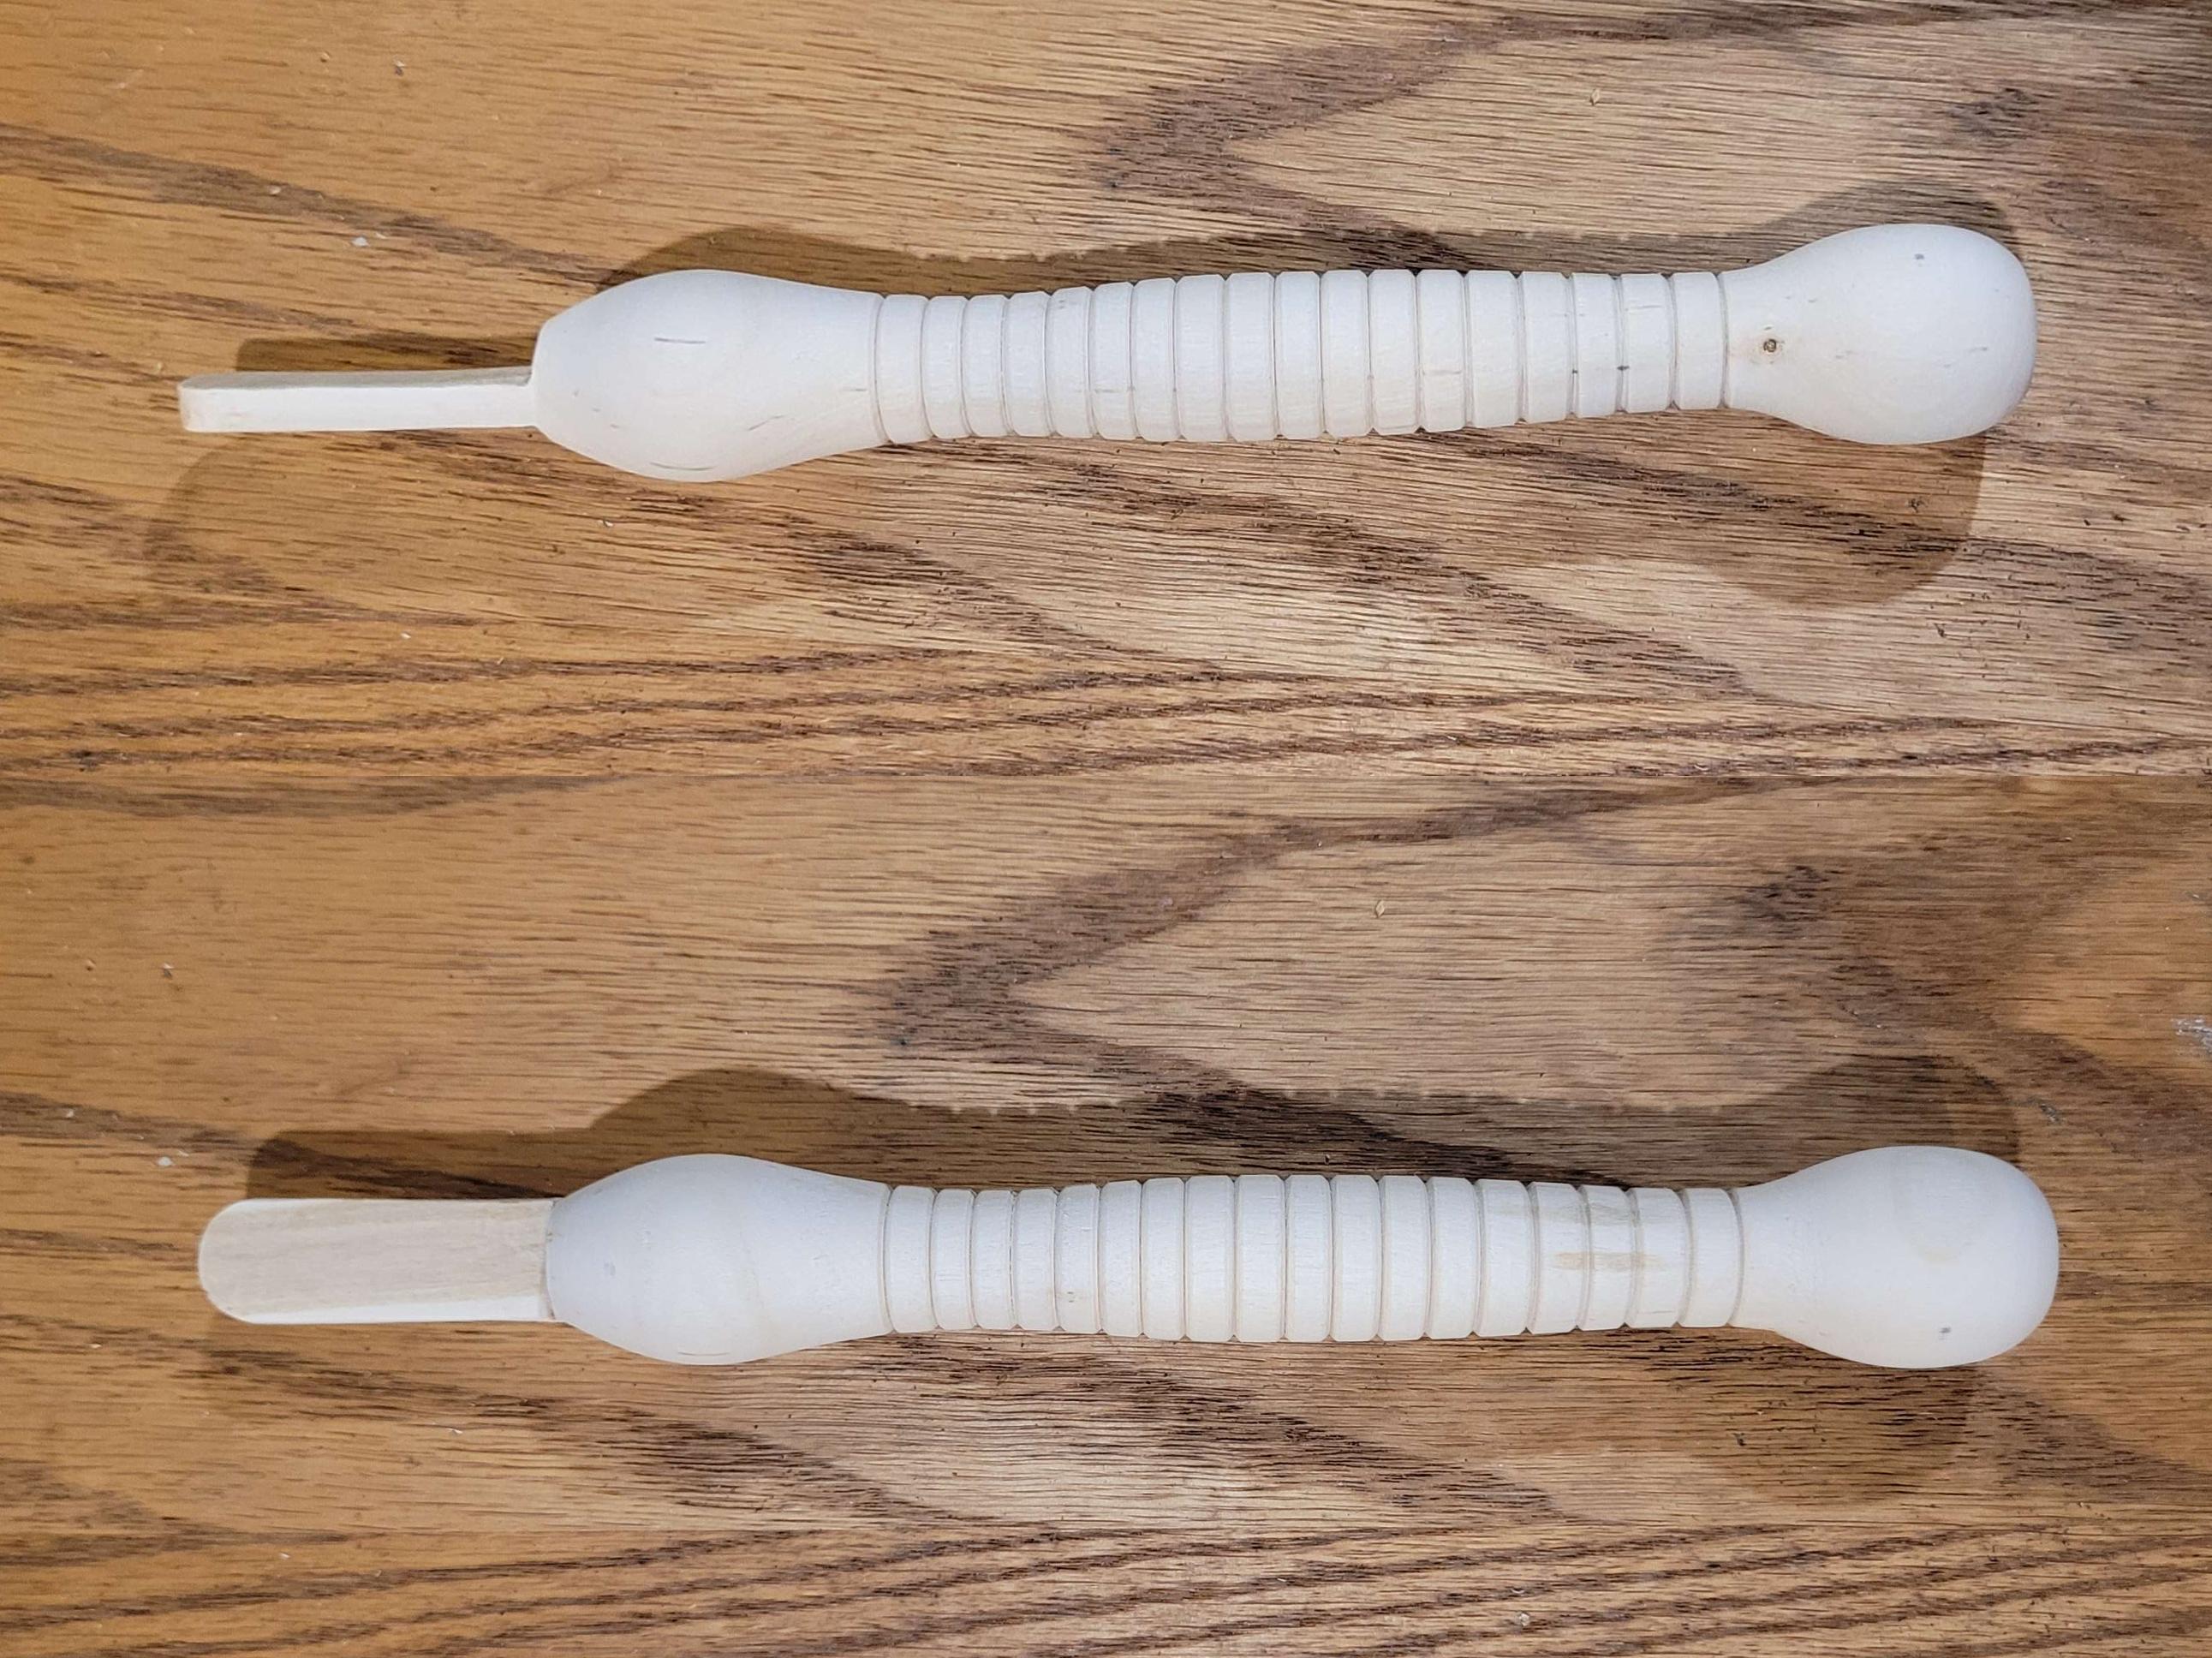
    comparison

    The knife handle after I removed it from the lathe, cut away the scrap on either end, sanded either end through all the same grits of sandpaper I used while it was on the lathe, and drilled/cut the slot for the tang.

    making the duplicate

    The second handle took much longer to make - turns out it's harder to duplicate the dimensions of an existing piece than it is just winging it. That said, there's a noticeable difference in quality just between these two, so I'm learning as I go at least.

    Like the first, I removed it from the lathe and cut away the extra material, and sanded both ends through all the grits of sandpaper I used on the piece while it was on the lathe.

    marking the second blade

    I ground a matching tang into the second blade, drilled and cut the slot into the top of the second handle, and put them together for a test fit.

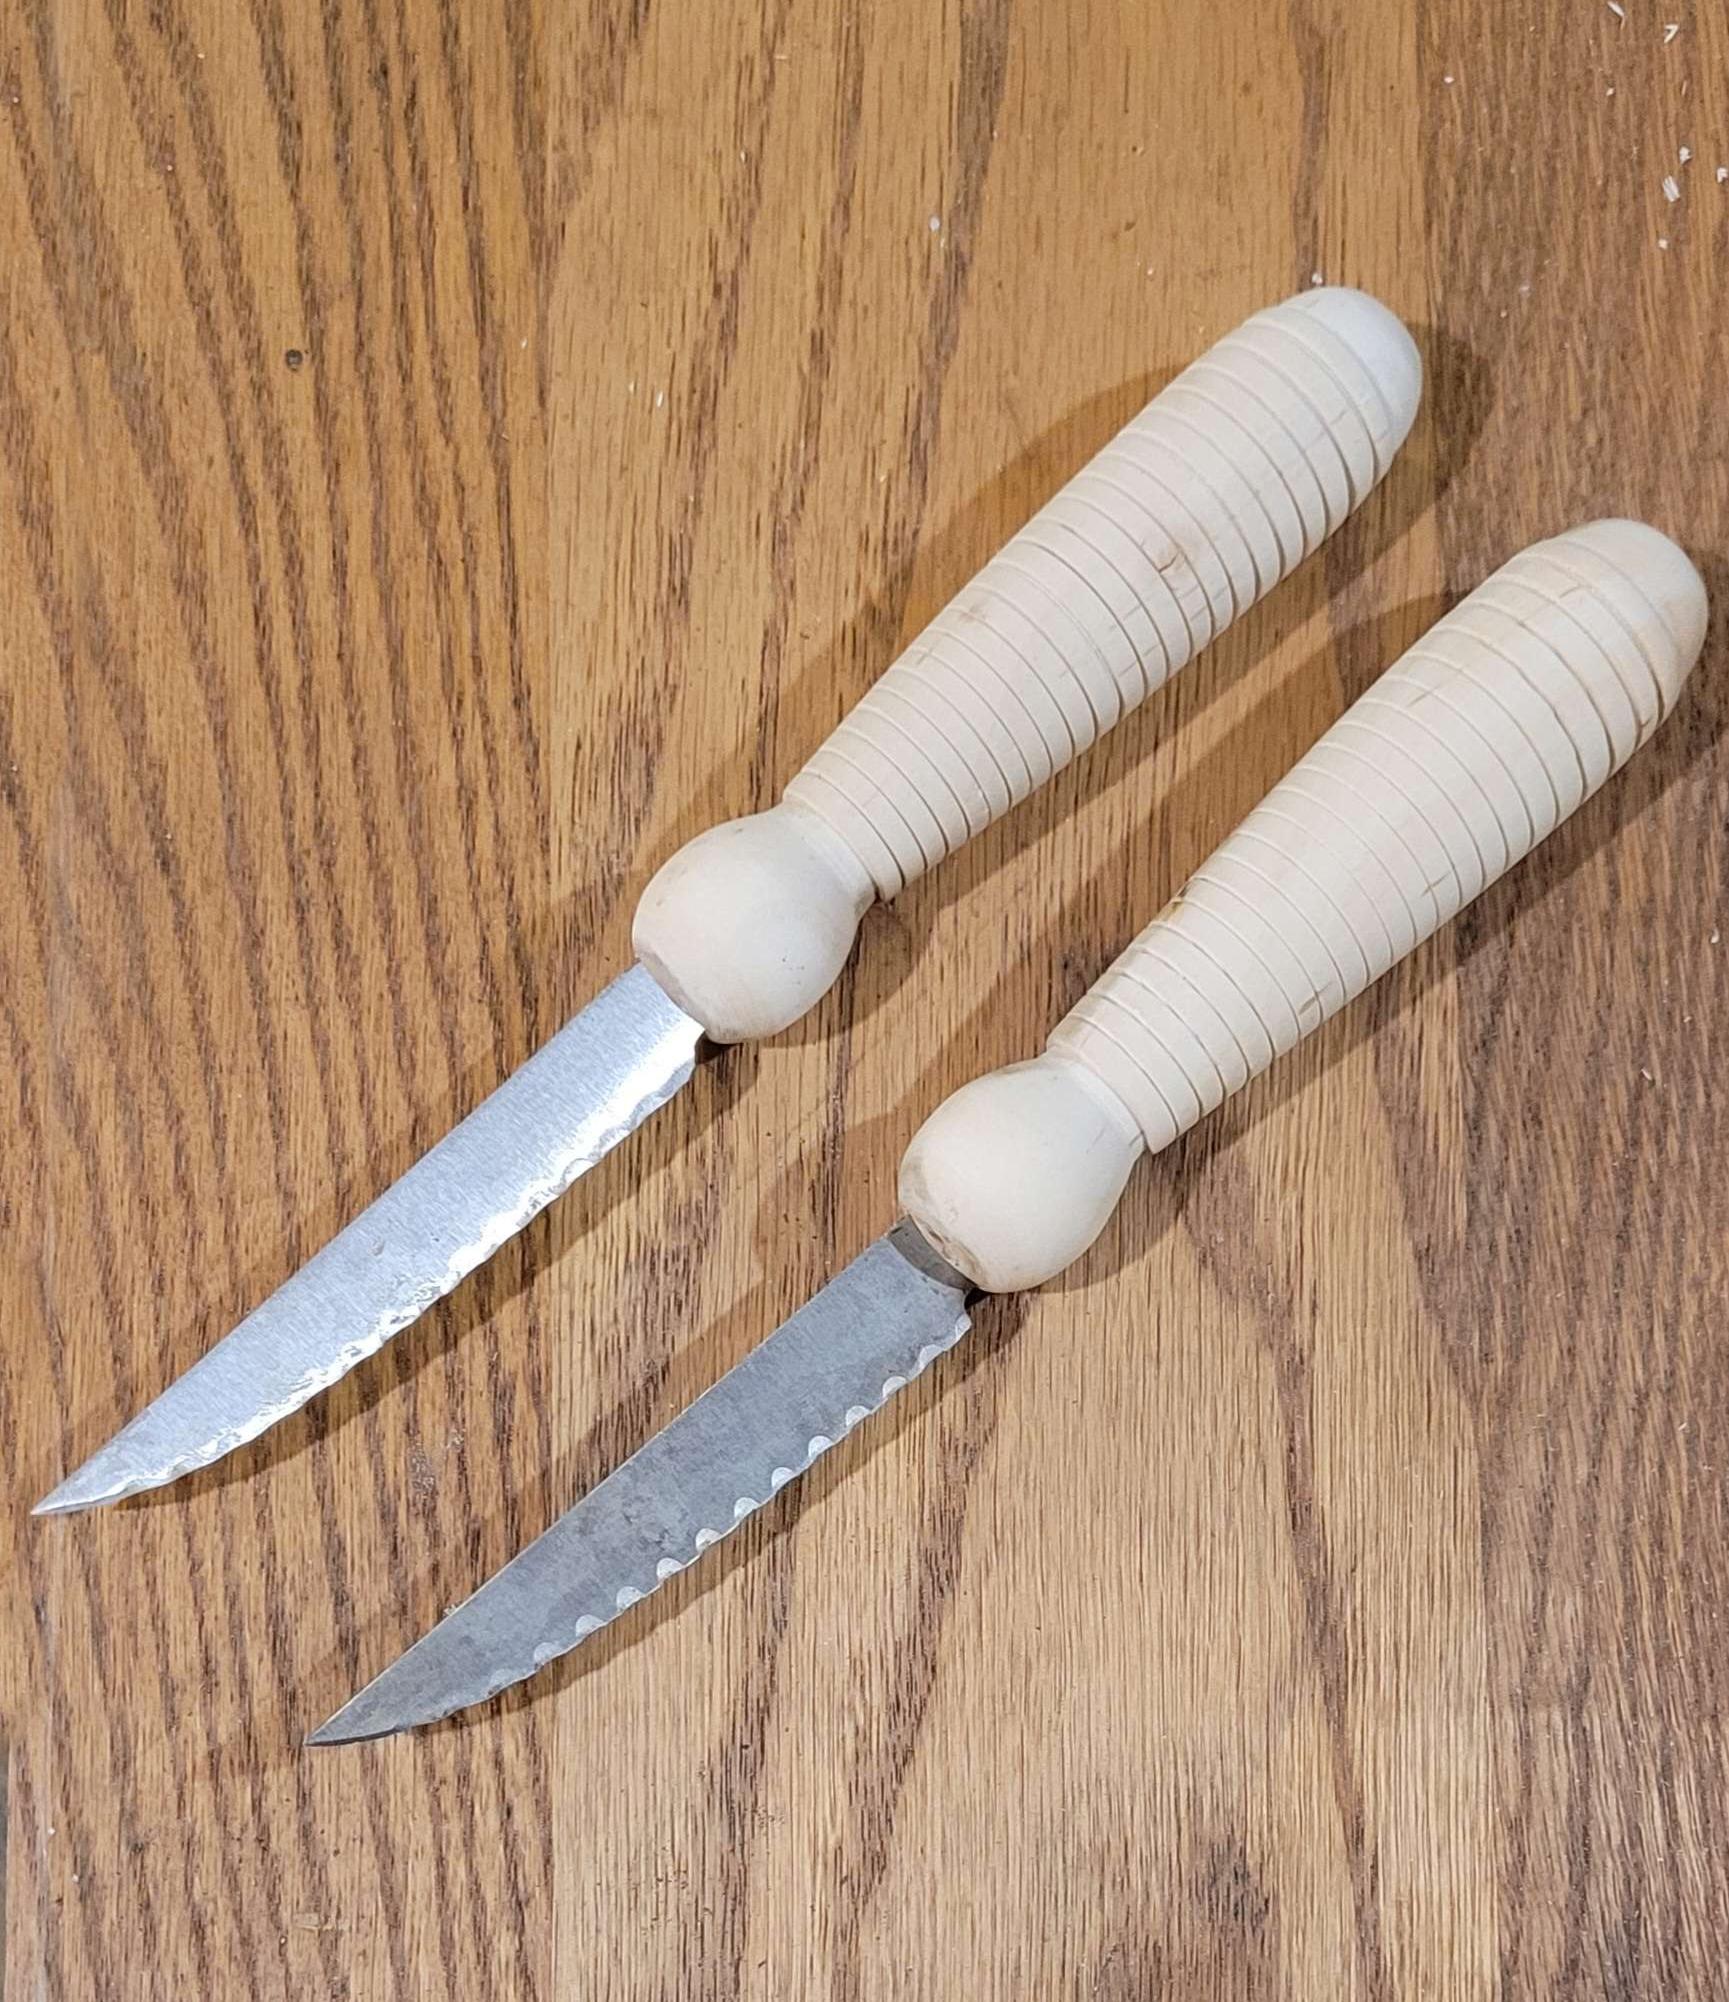
    the two knives, unfinished

    All in all, I was pleased with the result. The blades fit very tightly, and the handles looked and felt nice enough. The next step was to stain them.

    staining the handles

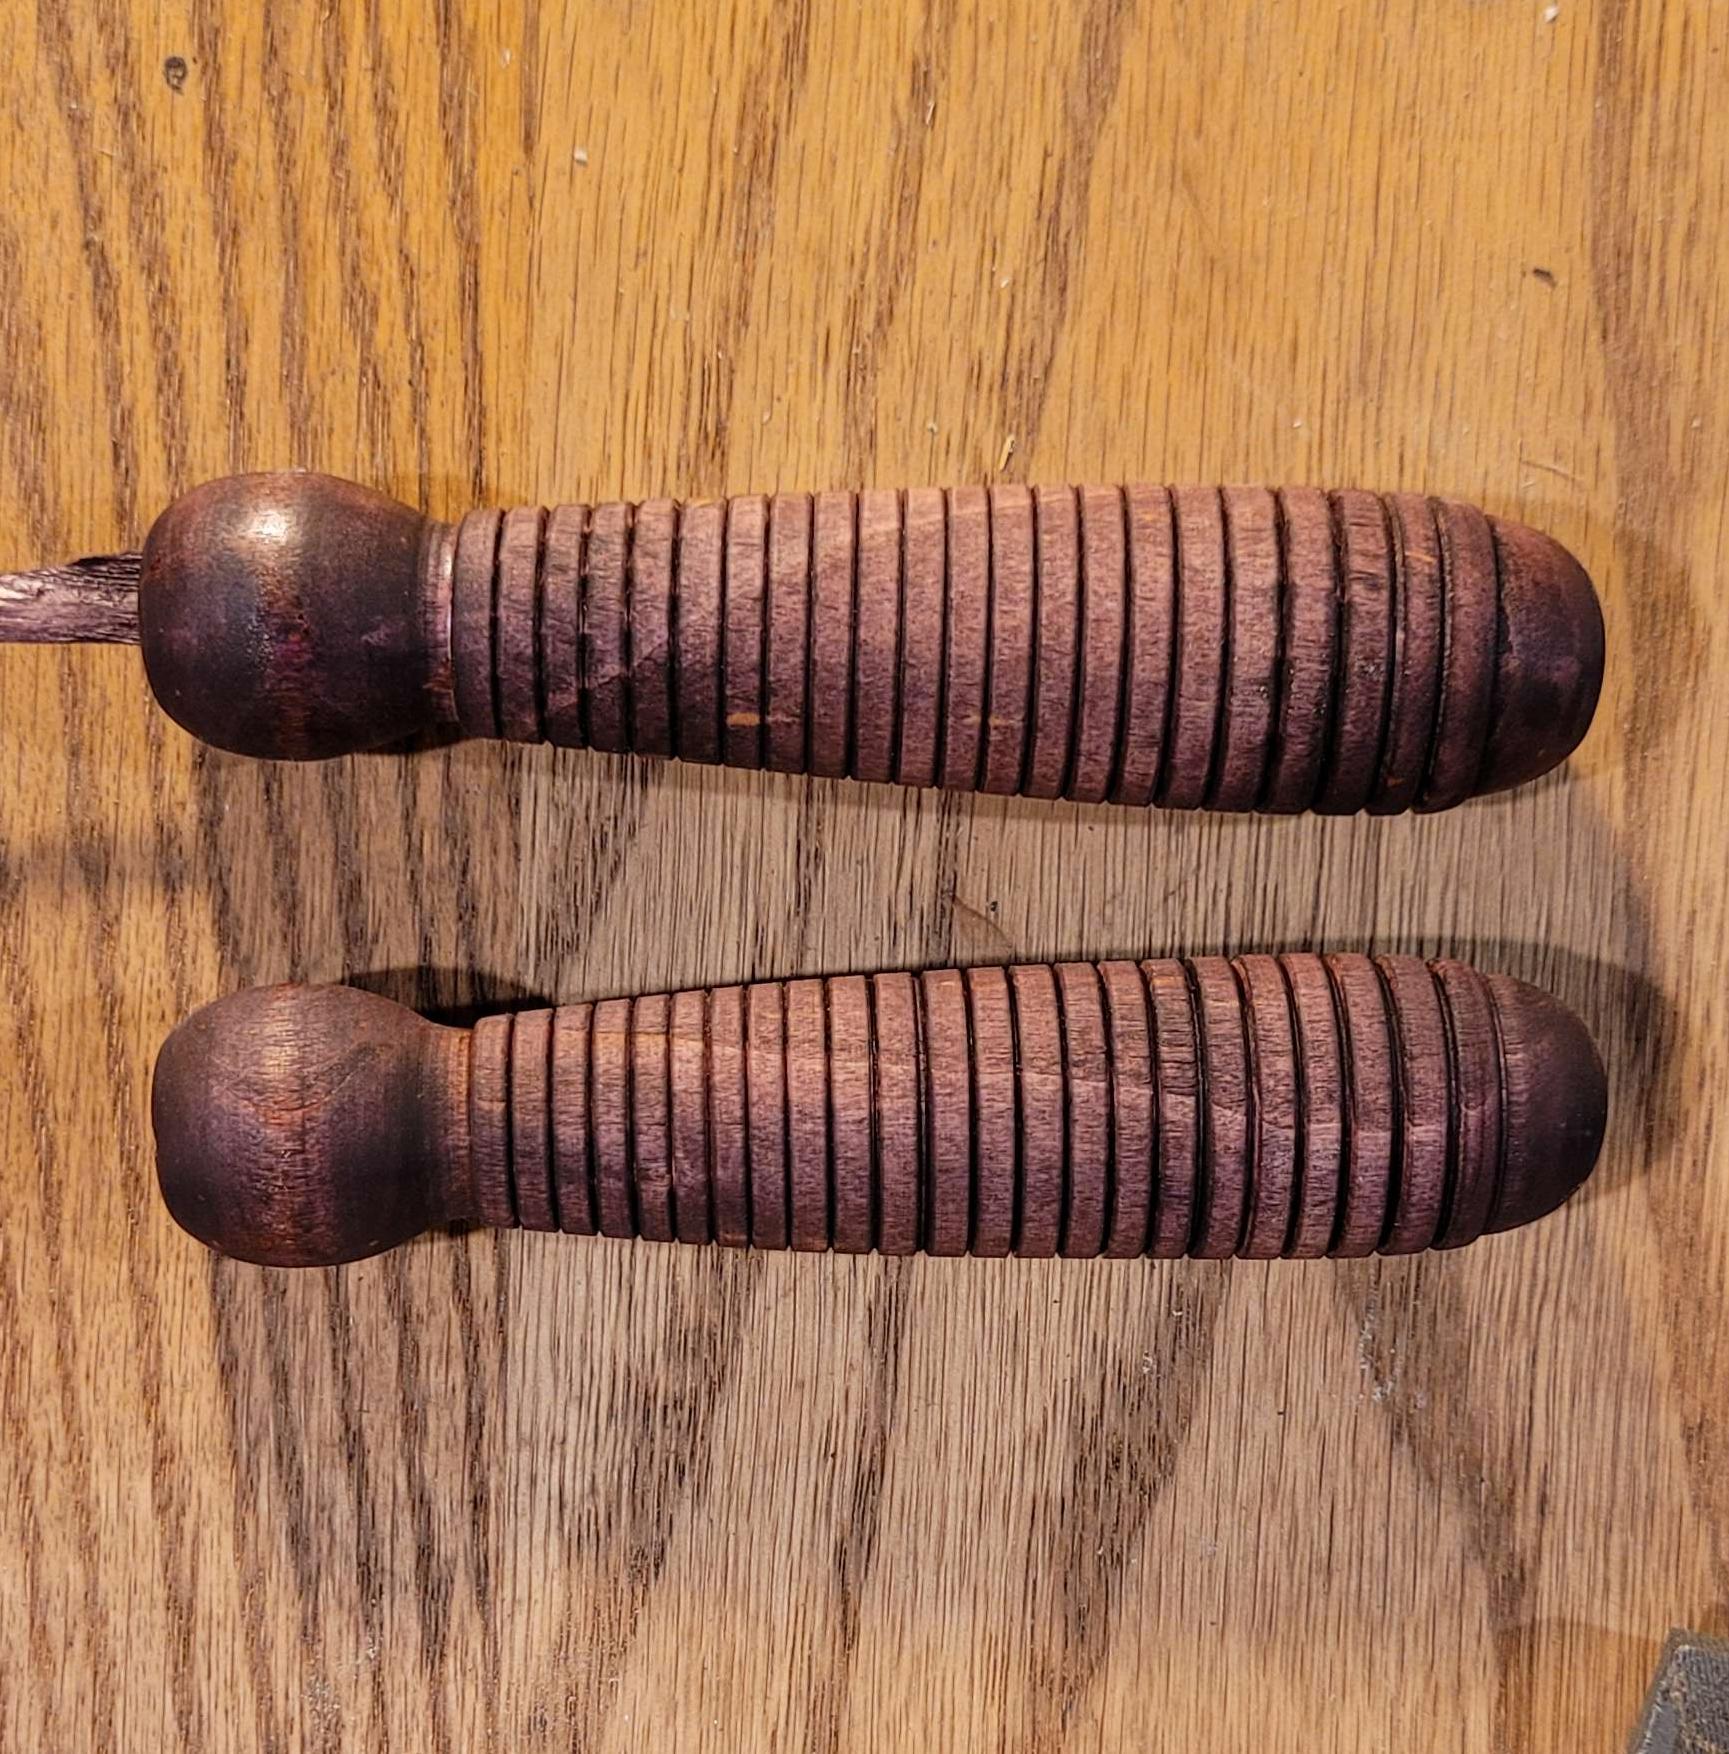
    I went for something a little different this time (this picture doesn't capture it too well). I coated both with rustoleum black cherry stain I found on trash day, and noticed that certain parts of the wood came through much more red than the purple-brown color of the stain elsewhere. So when I did the second coat, I doubled down on that and daubed sedona red on the red parts and black cherry on the purple parts, all in the same coat, let them soak in, wiped them down, and let them dry.

    I then touched it up with dabs of Red Oak stain and two sharpies, purple and brown.

    the finished knives

    I finished both handles with two coats of high gloss polyurethane. Once they were dry, I scored each blade on the tang near the end (I wanted a way the glue could grip it better, but found I couldn't drill through these with my metal bits and only the cutting wheel on the dremel would mark them.) They were already a tight fit, but I wanted to be sure they wouldn't slip out. Then I glued the blades in place.

    I'm still very much an amateur at turning, and am learning as I go, but I've always preferred to learn by just doing a project, so getting these broken (fairly cheap) kitchen knives usable enough to return to the kitchen seemed like a good way to practice turning and finishing, and overall I'm pleased with the result.

    • Pictures 11 image

    • visibility
    • visibility
    • visibility
    • visibility
    • visibility
    • visibility
    • visibility
    • visibility
    • visibility
    • visibility
    • visibility
    • chevron_right

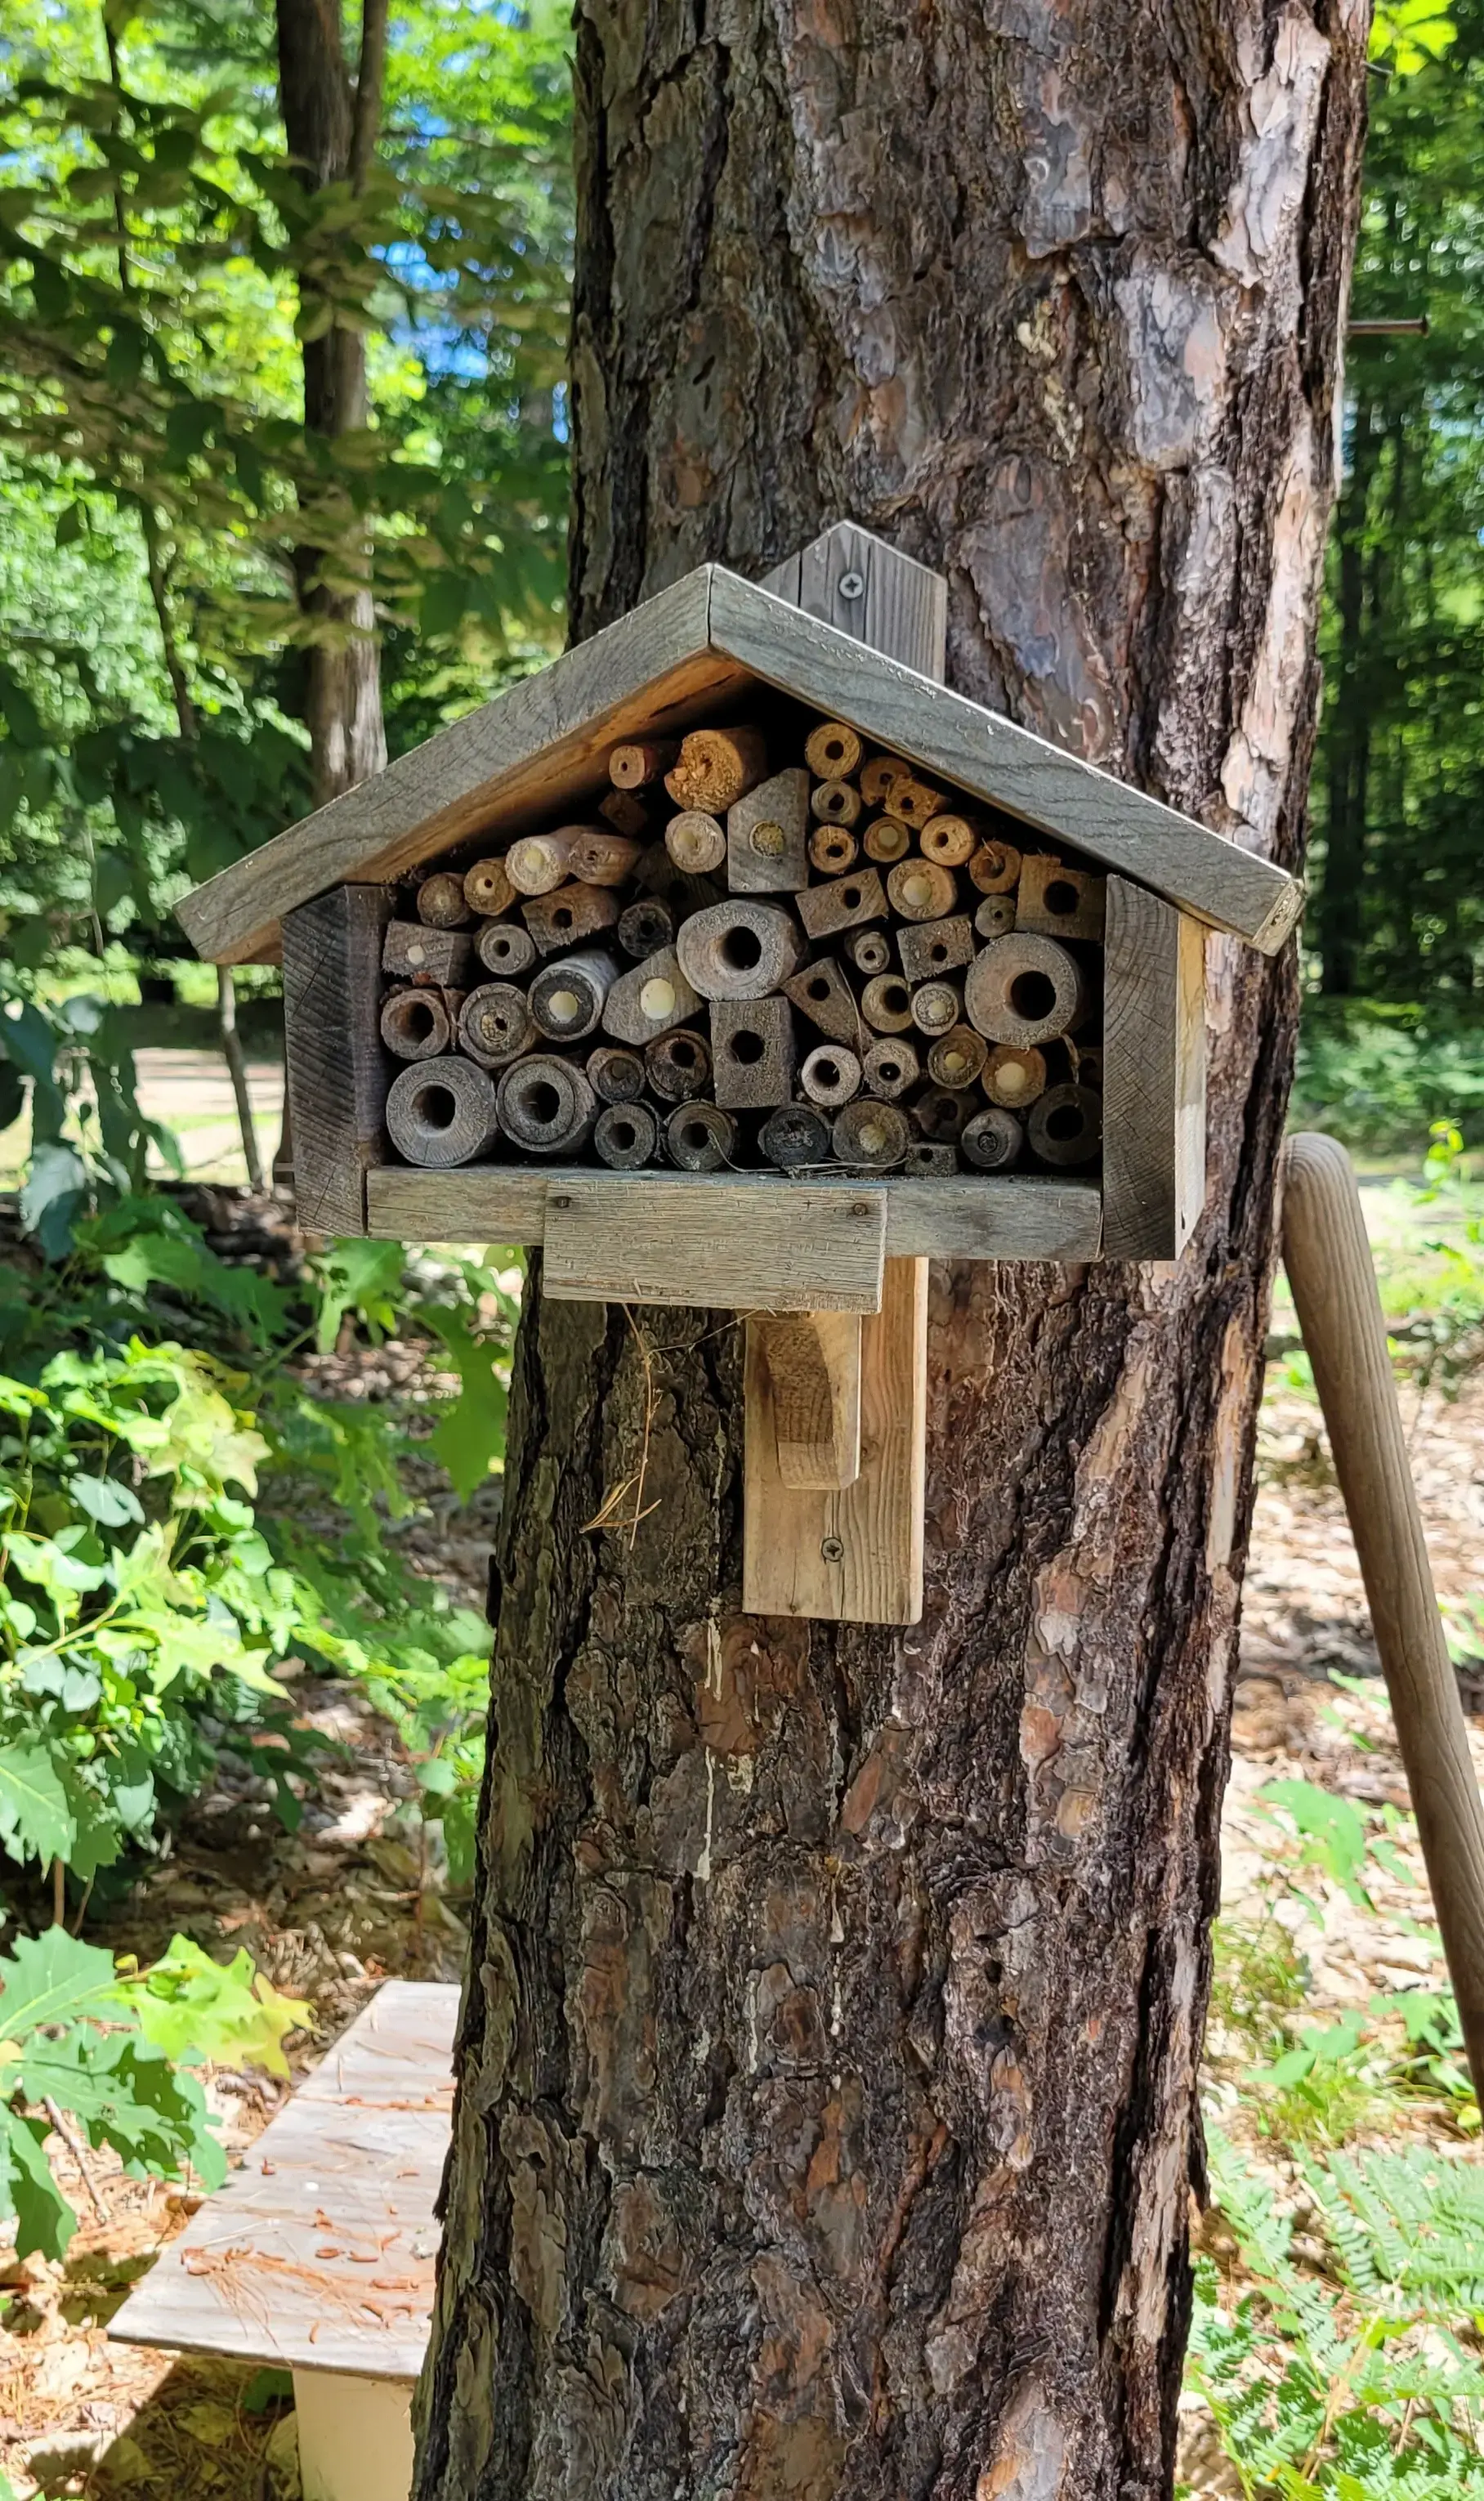
      I built this bee house for my folks, looks like it's getting some use

      JacobCoffinMakes · Friday, 2 February - 19:30 edit

    https://uploads.slrpnk.net/upload/099ea969b8b11f8f01bf401d7fc15101f571f842/E1xos10GjWQu59F8DVDOvjt7riQZVxMtkKGK1i9W/9c42fa1e-2aa3-4169-9c87-562ee820ef1a.webp

    I was surprised to see so many tubes sealed (it’s on its second year but it looks like we missed the window to swap in the replacement tubes I’d made).

    It was a quick project, and probably didn't hurt their gardens any. I think I followed an online guide local to my region, but I can't remember which one.

    • chevron_right

      Lathe Turning Projects - Rubber Scraper/Spatula Repair

      JacobCoffinMakes · Friday, 2 February - 19:21 · 2 minutes

    before and after

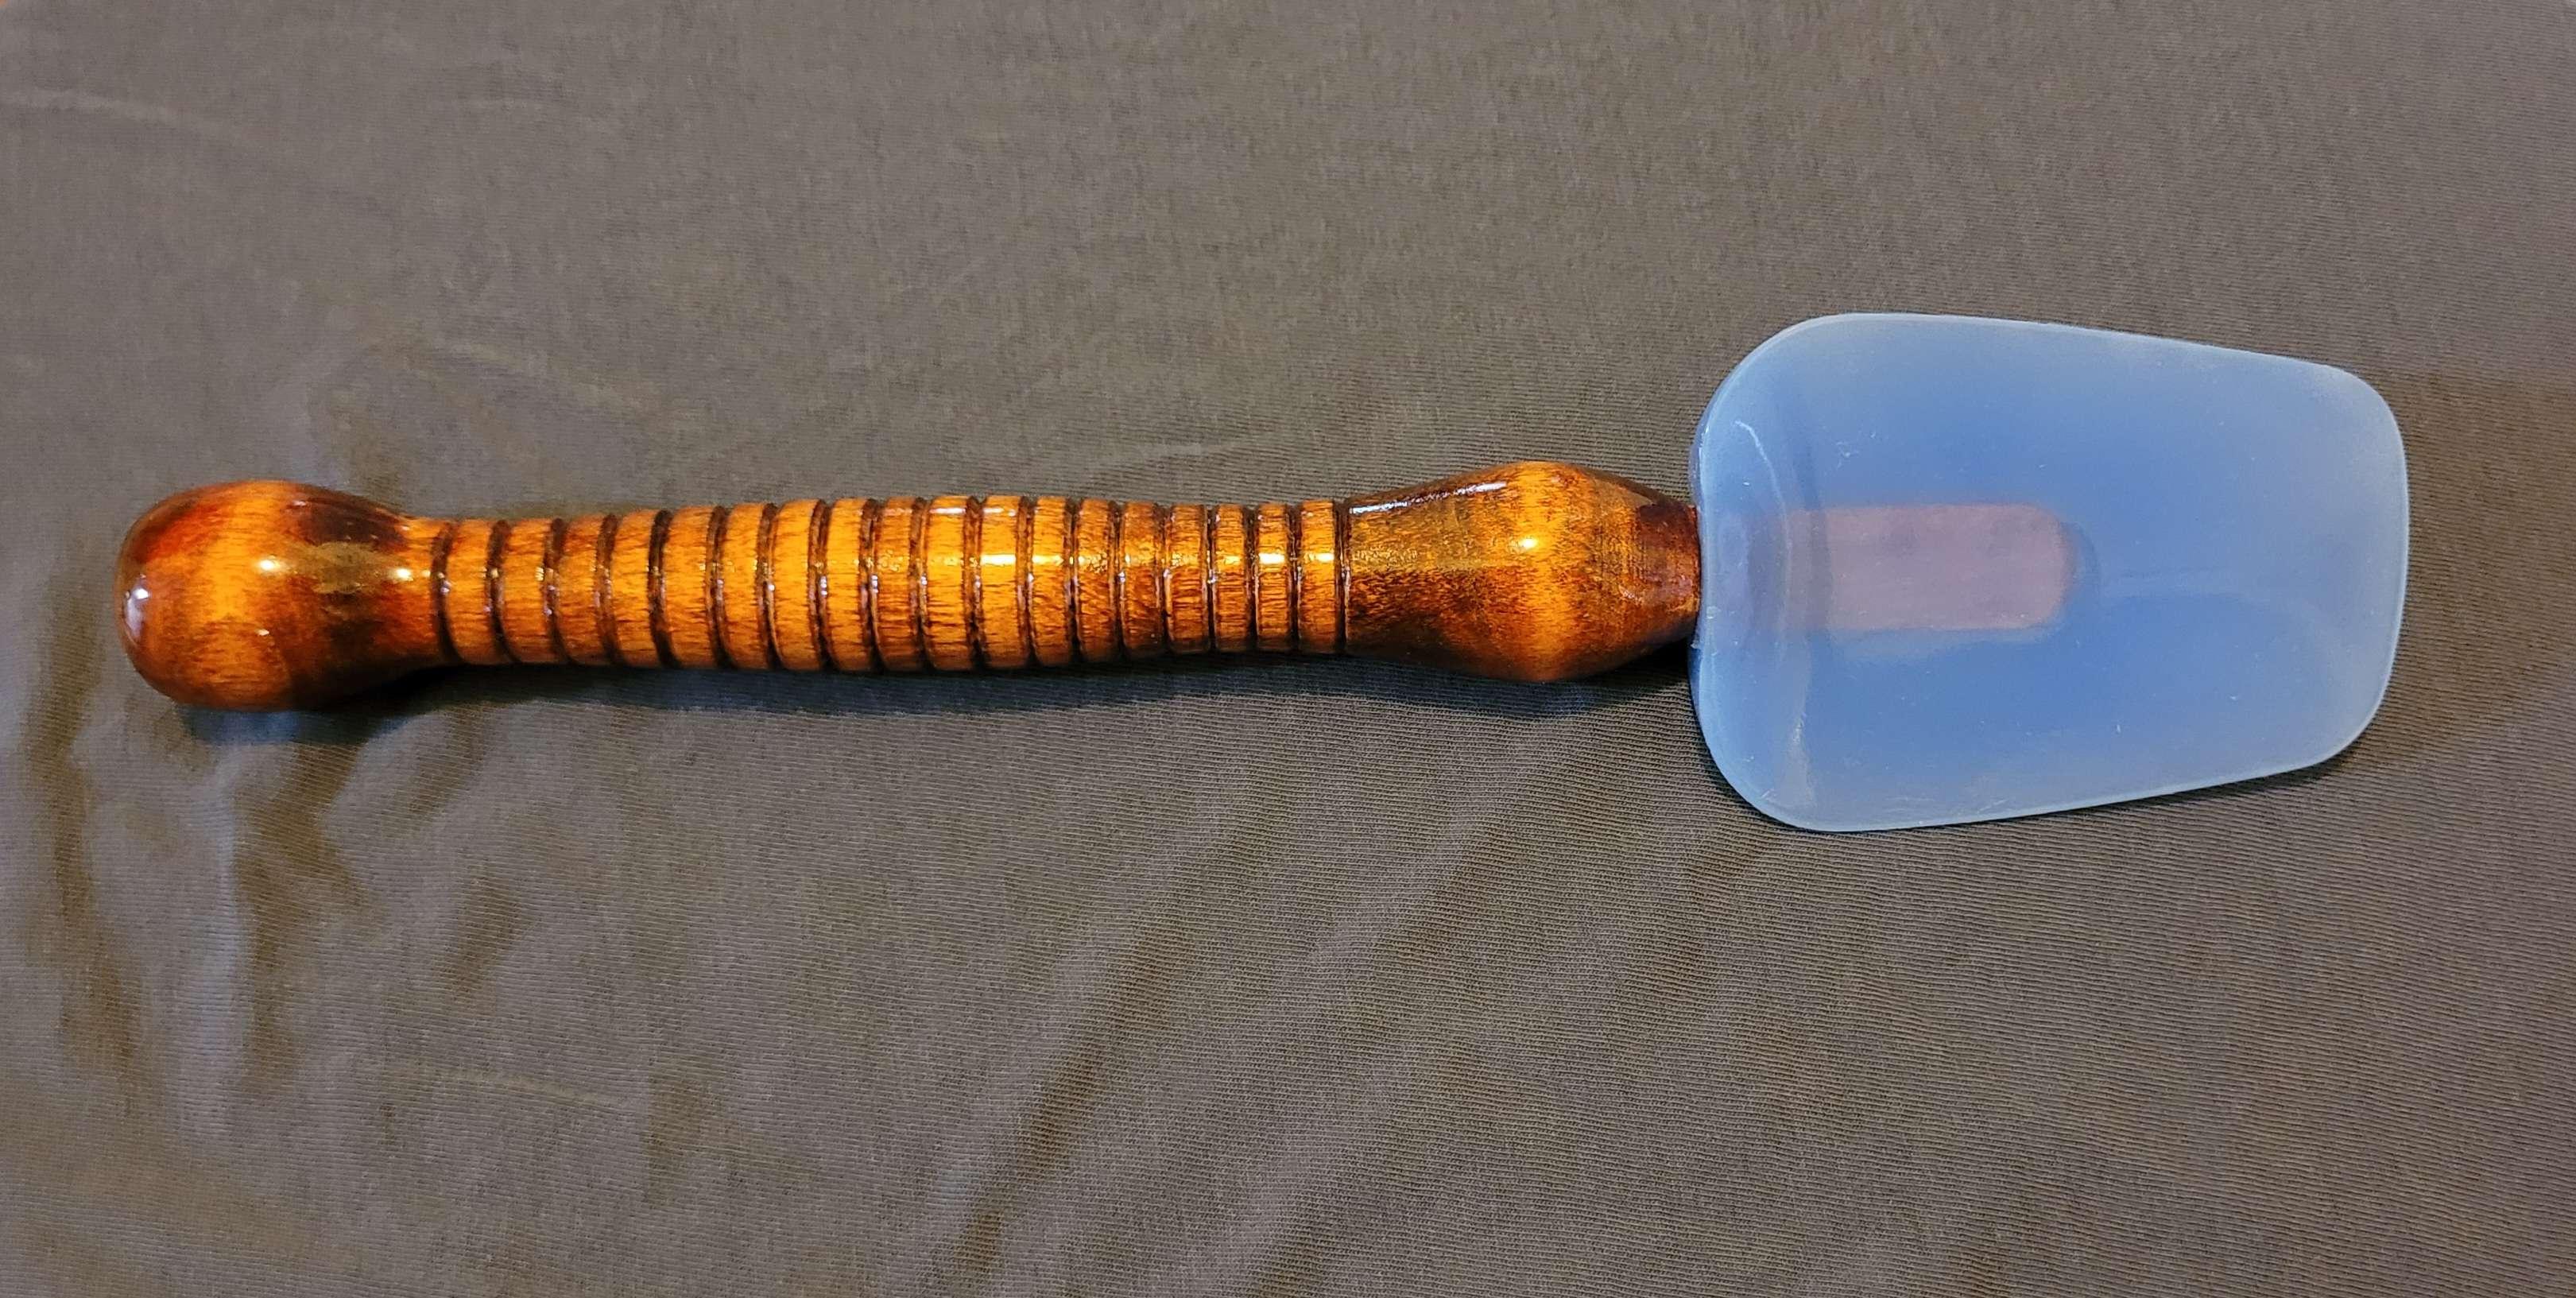
    I'm afraid I don't have a before picture of this one. For the last few years I've been keeping the parts of any tools or kitchen implements that break with the intent to fix them. We had a rubber scraper/rubber spatula that snapped where the plastic handle thinned to fit inside the rubber head. The actual silicone spatula part was still good, so I turned a new handle for it.

    this is the branch

    I started with a piece of an oak branch I collected after a storm broke it off a tree in a local park three years ago. Several large (up to 8" diameter) branches came down, and the city took their time in cleaning it up. It was good hardwood that would have just been chipped anyways, so we decided to save them some person-hours and gas and went down with a hand saw one night, cut the branches into manageable pieces, and carried most of it home.

    Once we got it home, I coated the ends in wax and stripped the bark with a draw knife so it could dry in the basement. The slow (1 year per inch of material is what I've read) drying process seemed impractical at the time but I barely noticed it, getting distracted with other projects.

    turning the branch into a handle

    I turned it on the lathe until it was similar to the original in dimensions (you can see part of the broken handle in the second-to-last picture). To be honest, it's a bit more chunky than I'd prefer, but considering that the original plastic handle broke, making the replacement sturdy is probably a good idea.

    fresh off the lathe

    I cut off the extra material on either end

    finishing up the woodworking

    and carved it down so it would fit the head of the rubber scraper. It's not centered vertically because the scraper was the same thickness as the end of the handle, but the rectangular hole was closer to the back than the front.

    This also lined that part up with the heartwood of the branch, which seems like it should help with reinforcing it.

    the test fit

    The test fit

    urethaning the handle

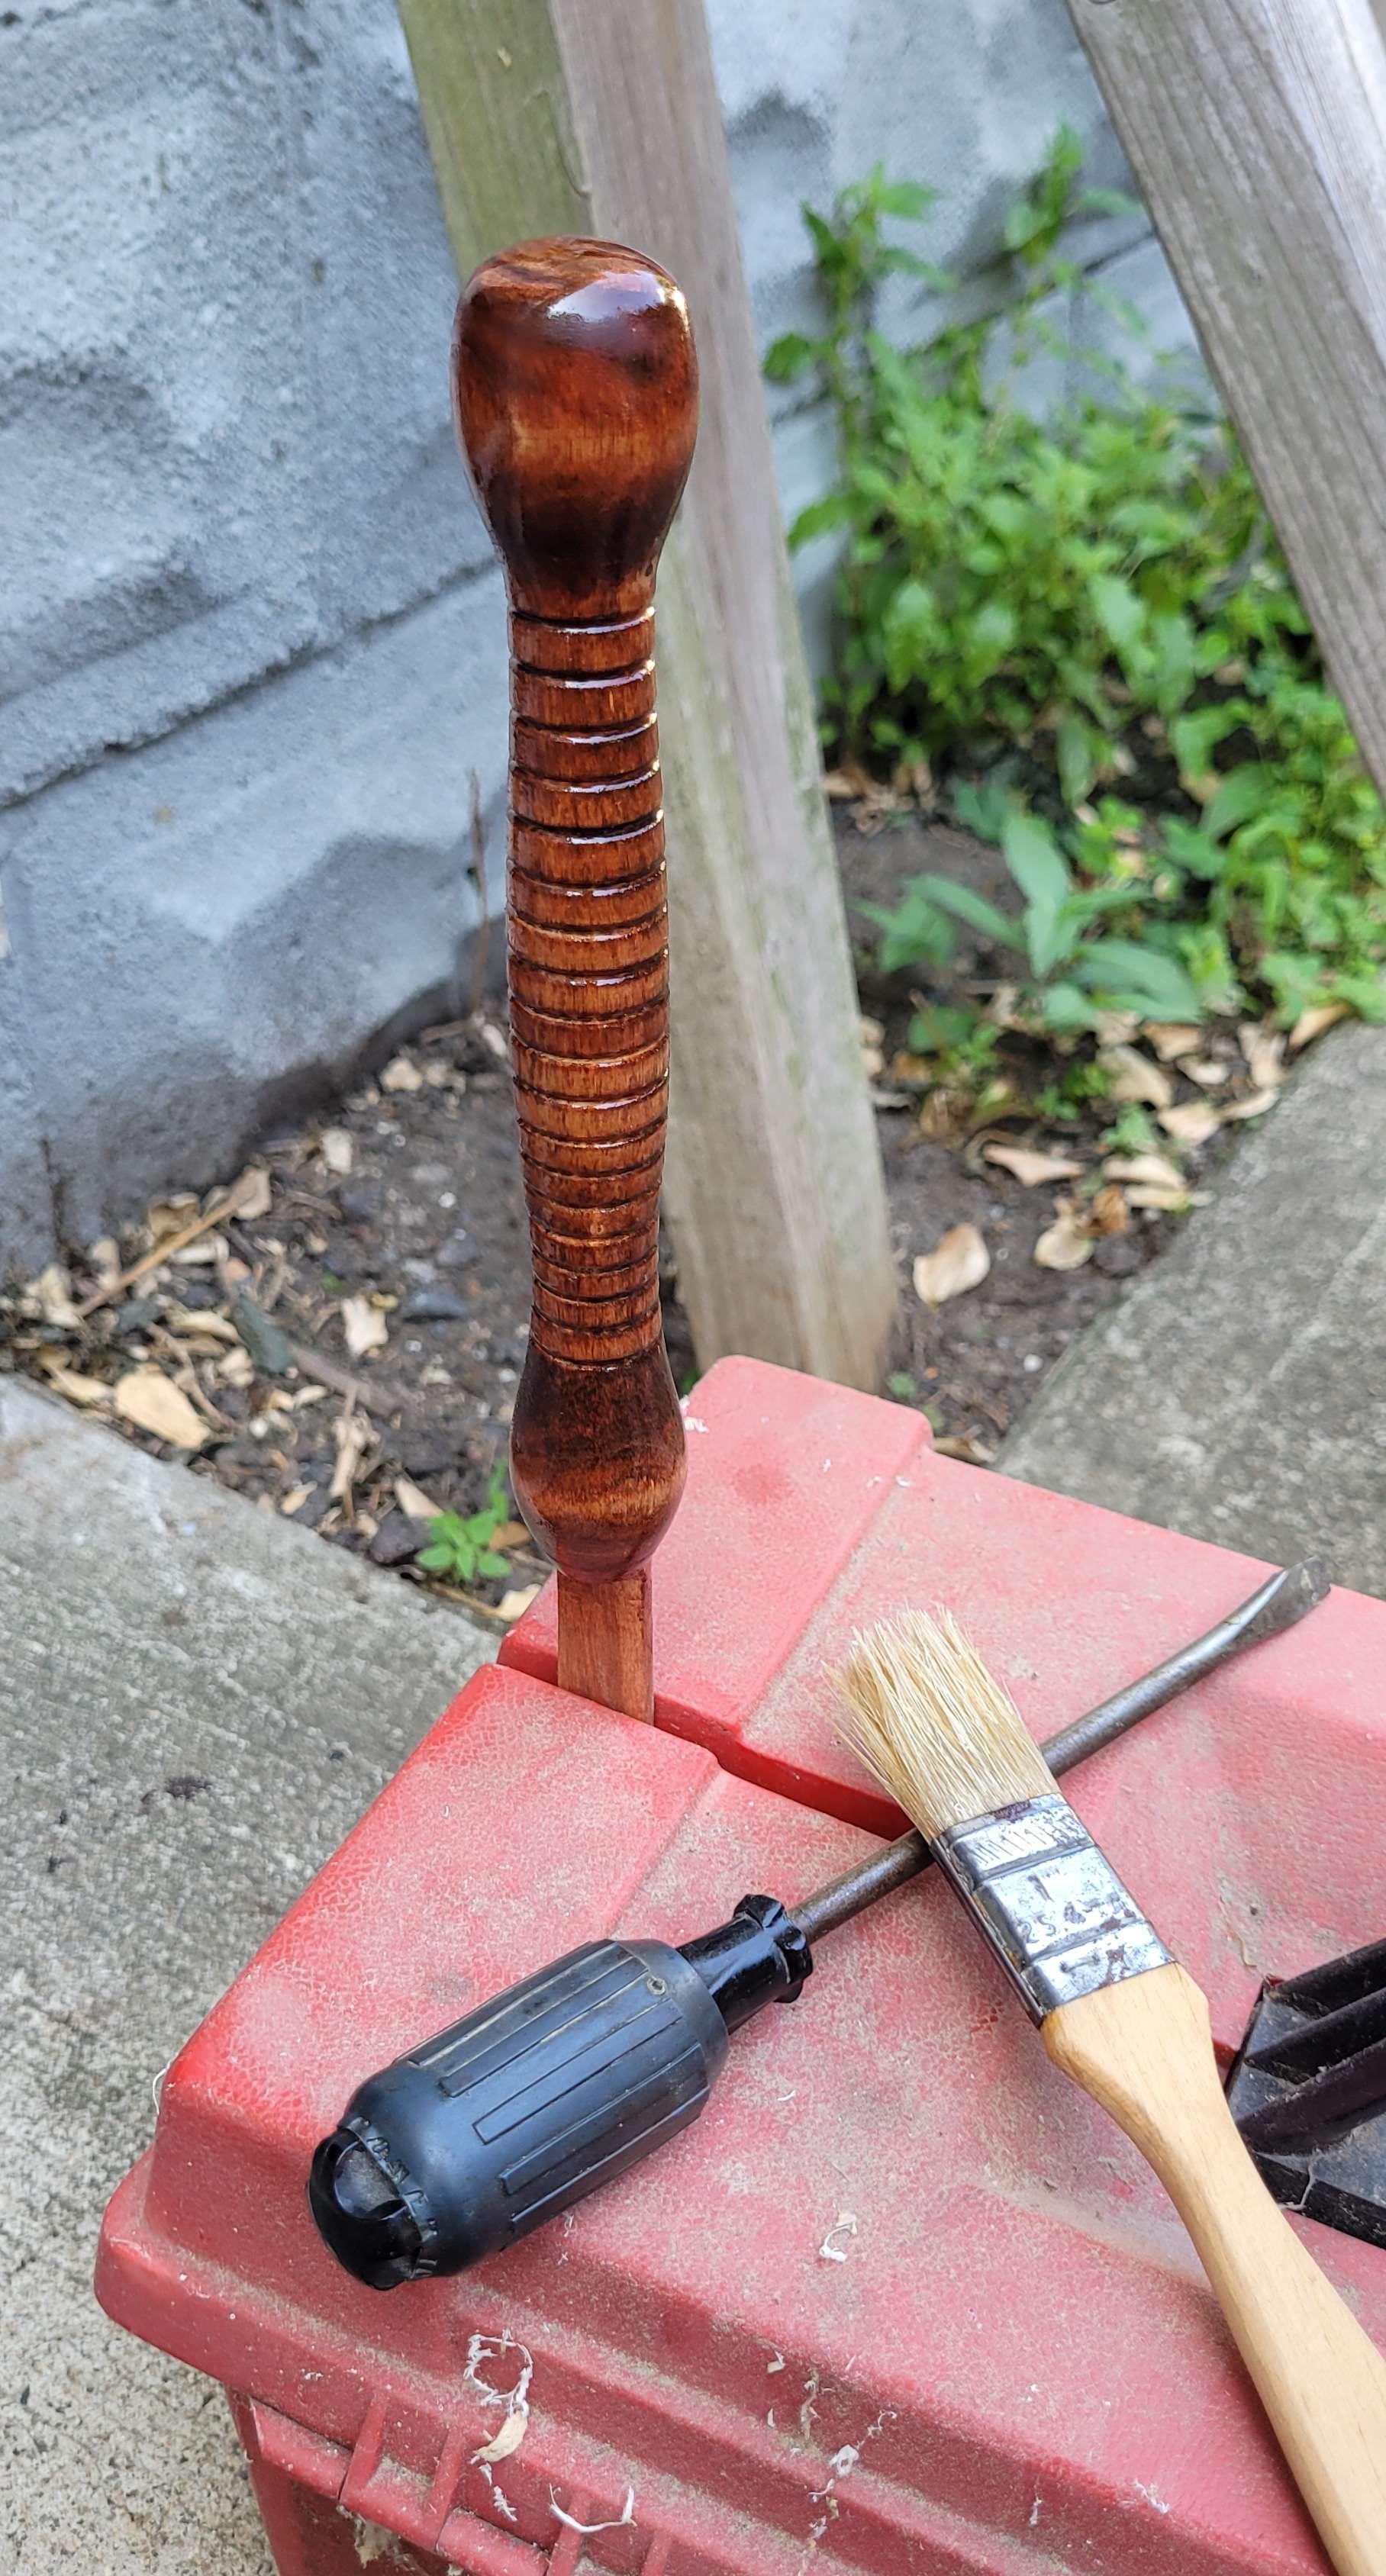
    I stained it with two coats of stain, applying the second one while the first was still wet then and rubbing it down so there was no extra left on the wood. The first coat was gunstock (a bright, orange stain) and the second coat was red oak (a darker brown). Then I applied high gloss polyurethane, sanded it lightly, and applied a second coat.

    the finished version

    The finished version. Doing it this way didn't prevent as much waste as I'd have liked - the original handle is still kicking around somewhere, waiting for a purpose. But it did get the rubber scraper back into service, and we're getting good use out of it.

    #woodturning #woodworking #fixing

    • chevron_right

      Lathe Turning Projects - Knife Repair 1

      JacobCoffinMakes · Friday, 2 February - 14:47 · 2 minutes

    before and after

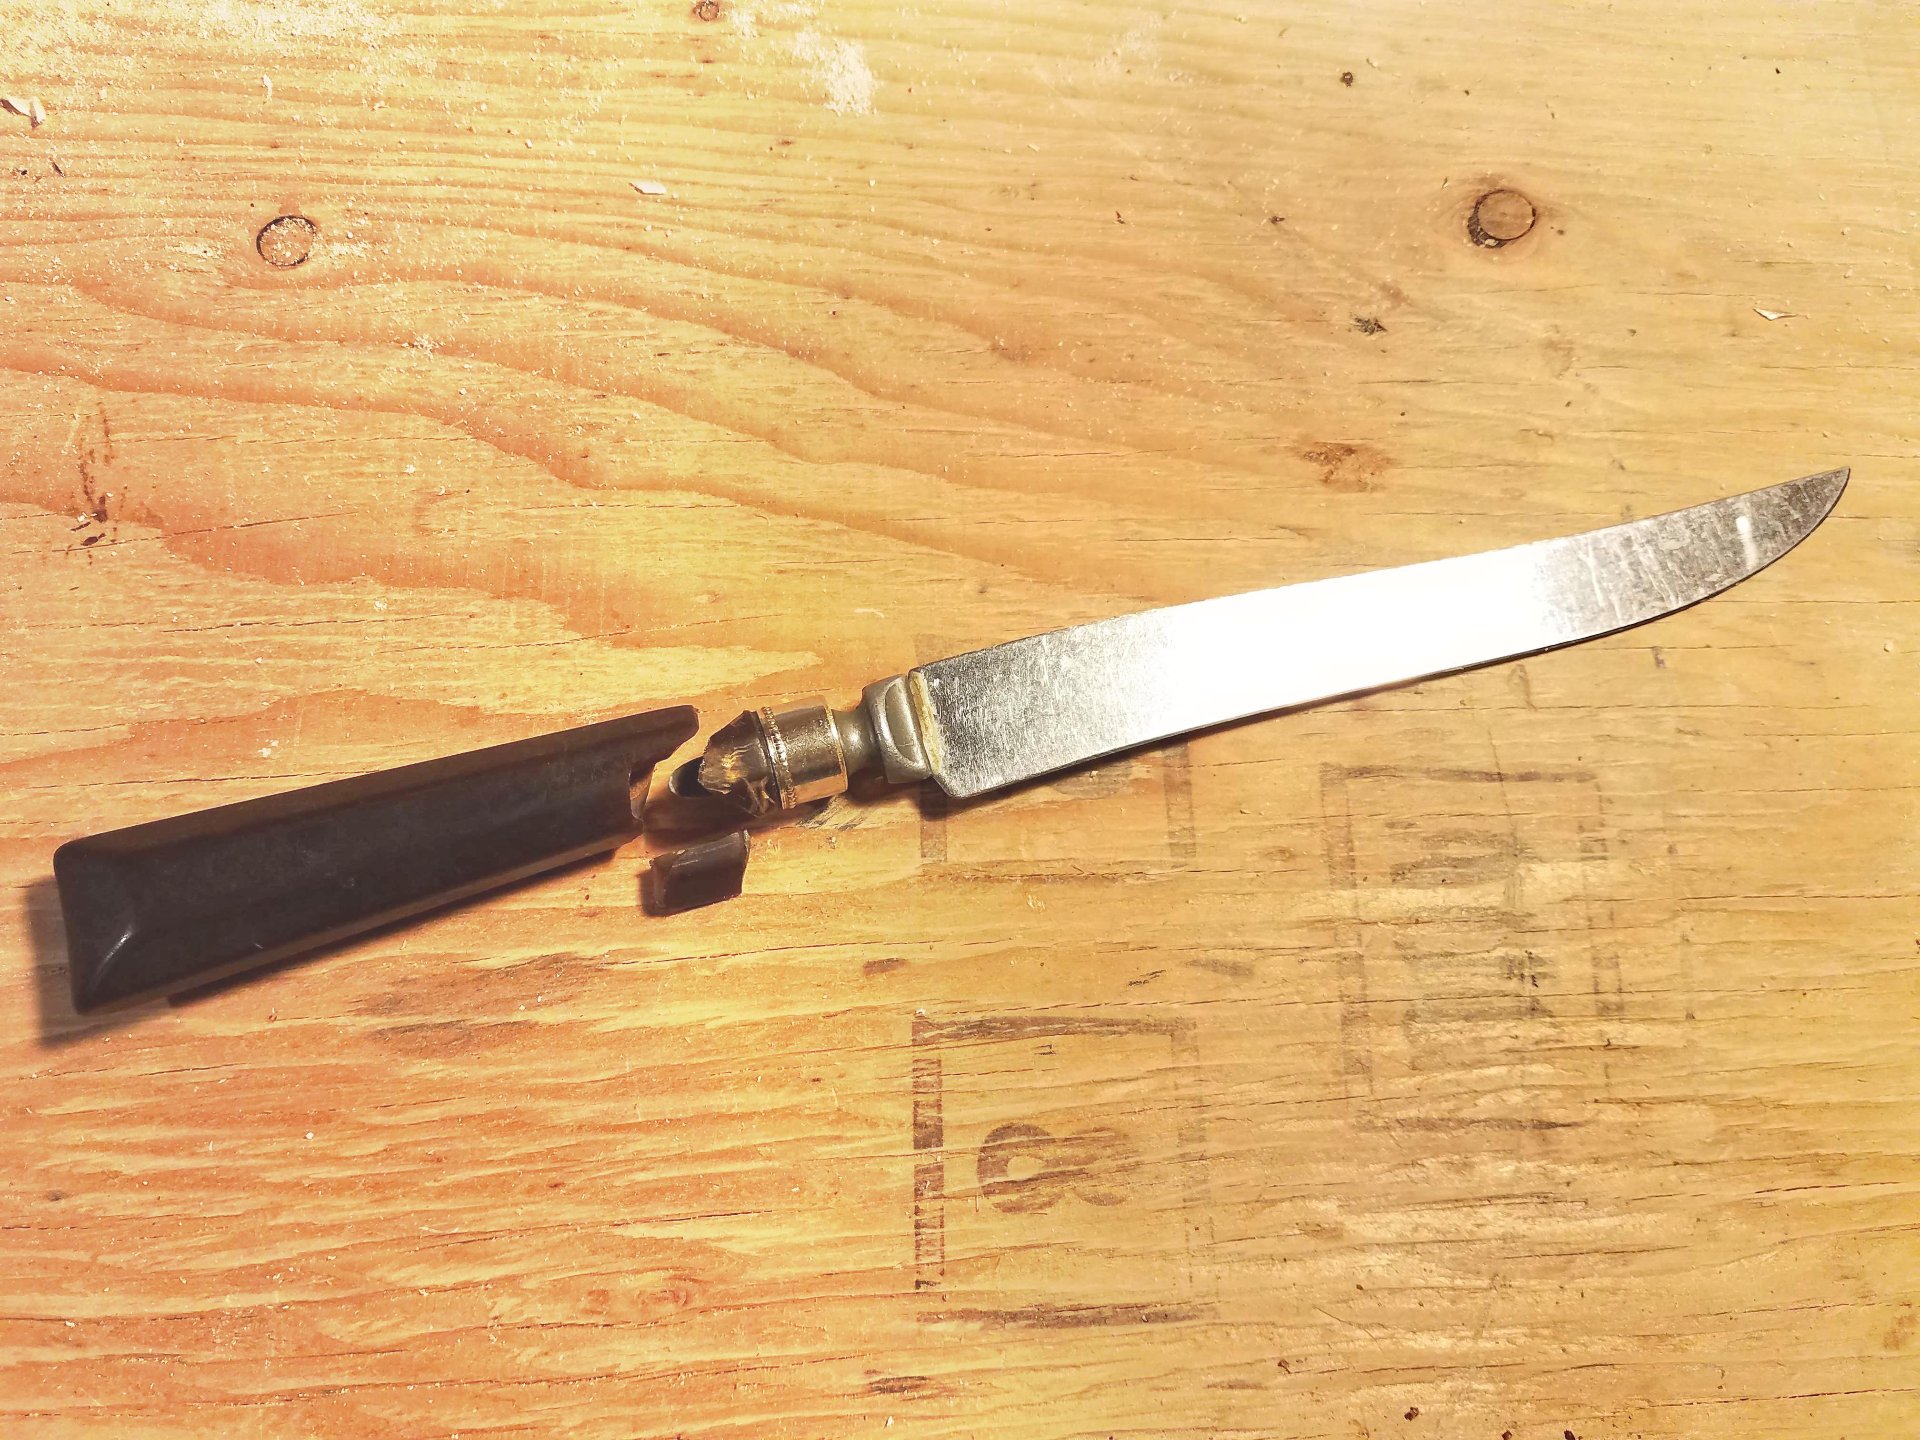
    This is something else I made from Christmas tree wood, more for sentimental reasons than for convenience. This was a gift/repair for my grandmother - a few years ago she threw a party, and someone dropped this knife on the floor. The bakelite handle shattered near the top. She was going to throw it away but I said I'd make a new handle for it, though I'll admit it took me a few years to get around to it.
    broken

    dissasembly

    Step 1 was to take the handle the rest of the way apart and get just the blade and it's decorations separated from the broken plastic.

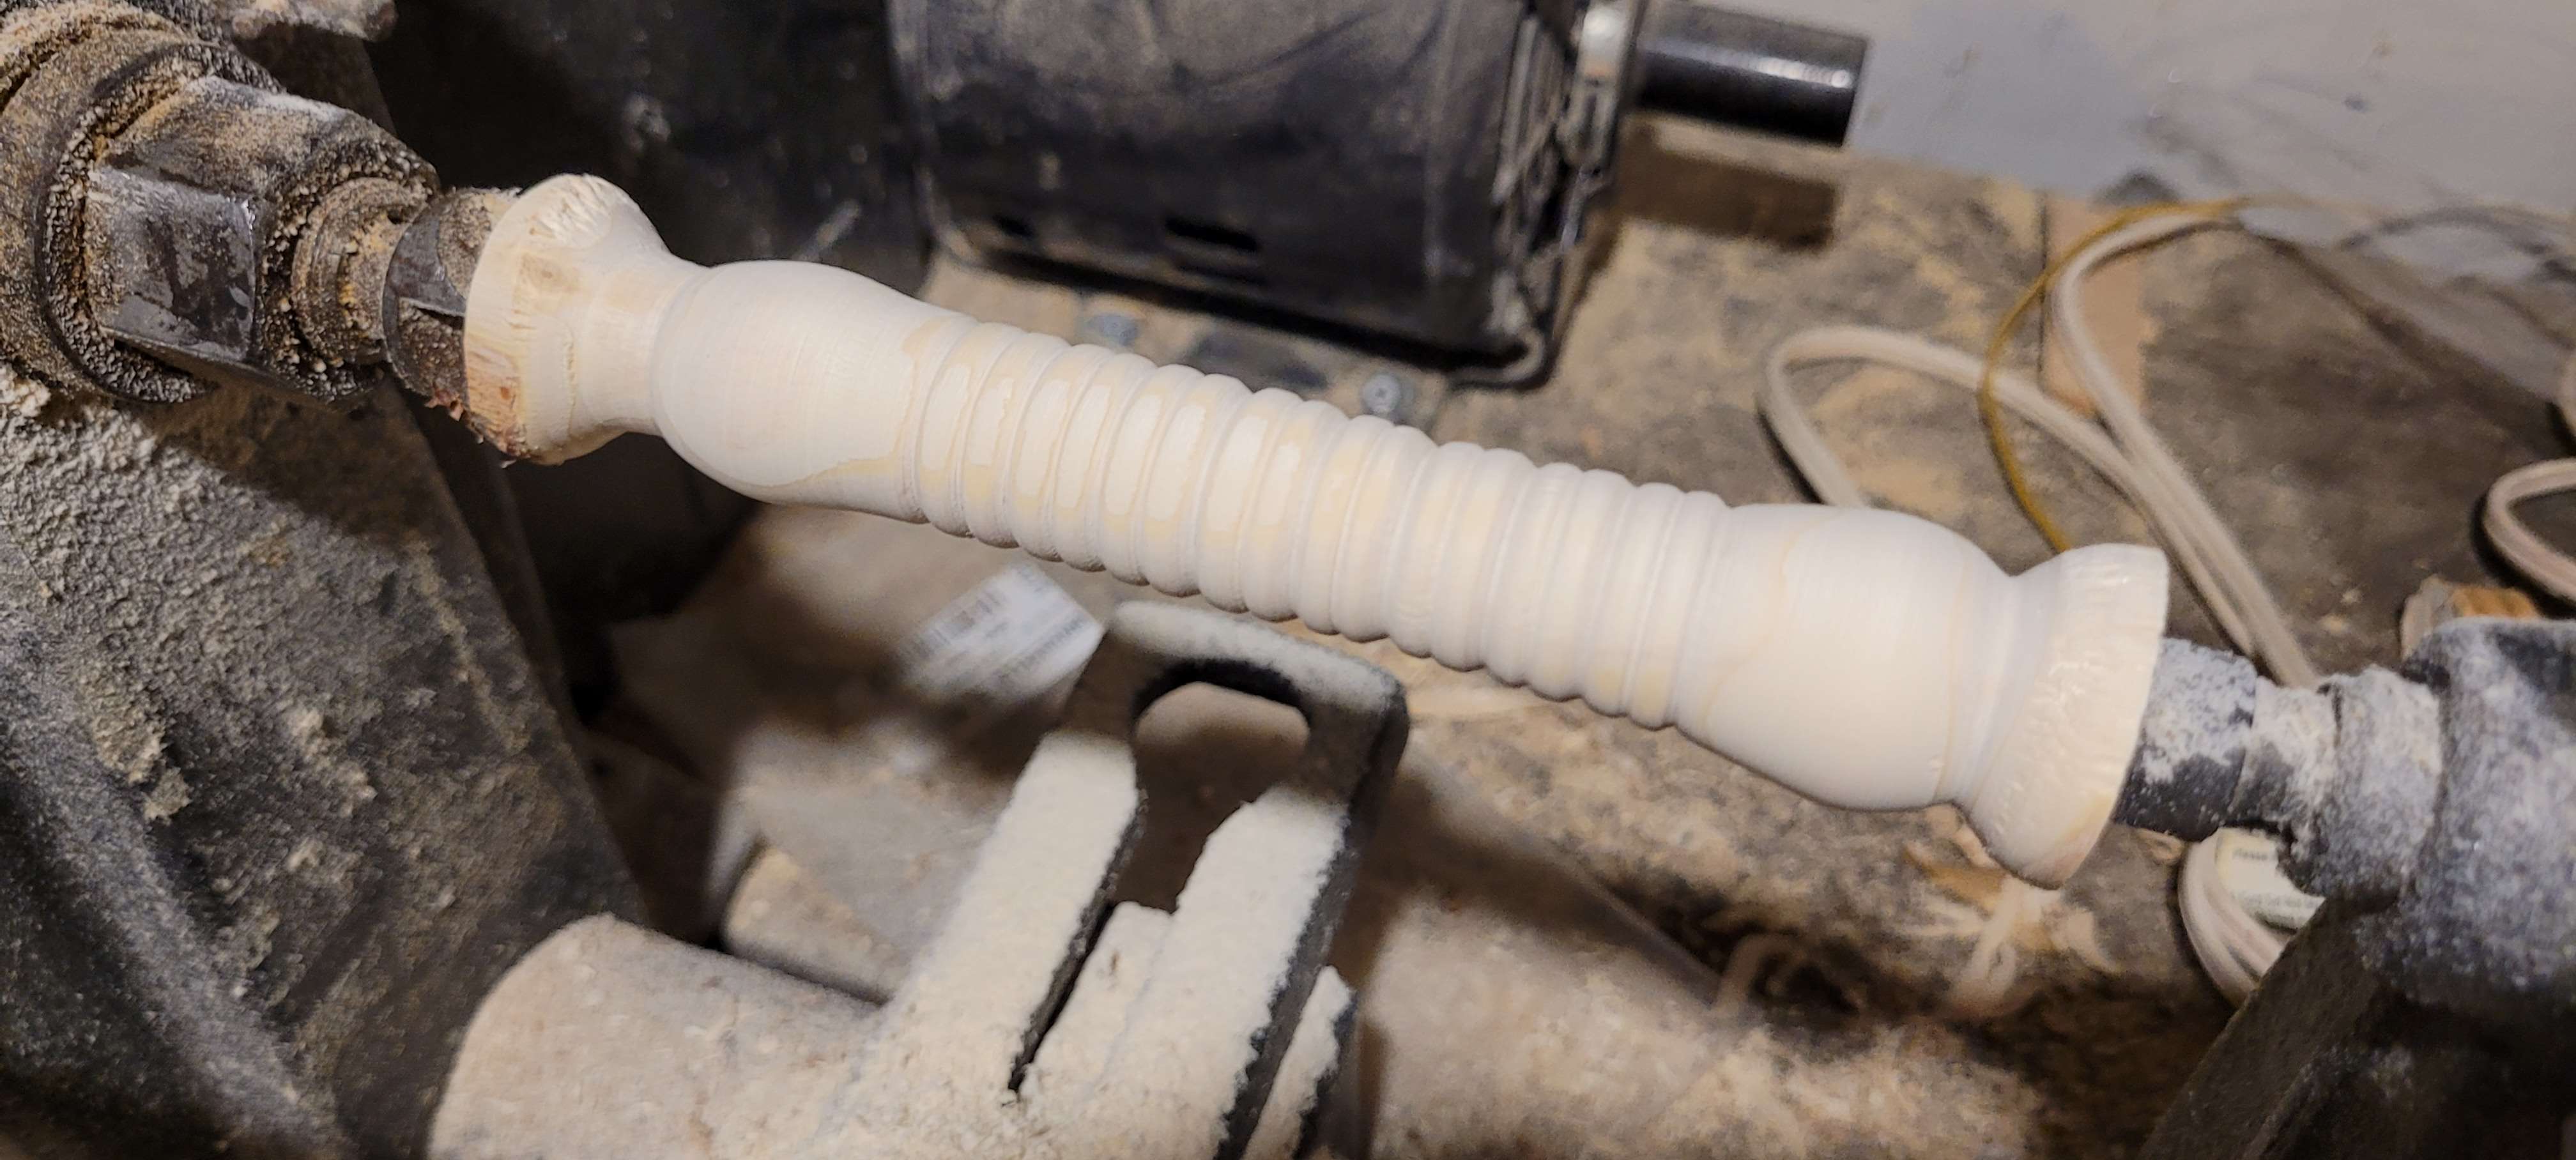
    turning the handle

    Step 2 was to put it off for five dang years during which time I acquired and restored a lathe.

    I cut this piece of pine from the trunk of our 2020 Christmas tree after it had had awhile to dry. It was the same piece I carved most of the koroks from though this piece was too skinny to fit koroks inside easily.

    I'm still very much an amateur at turning, and made some mistakes as I went, but I learned a lot on this one, and was able to get some results I was pleased with.

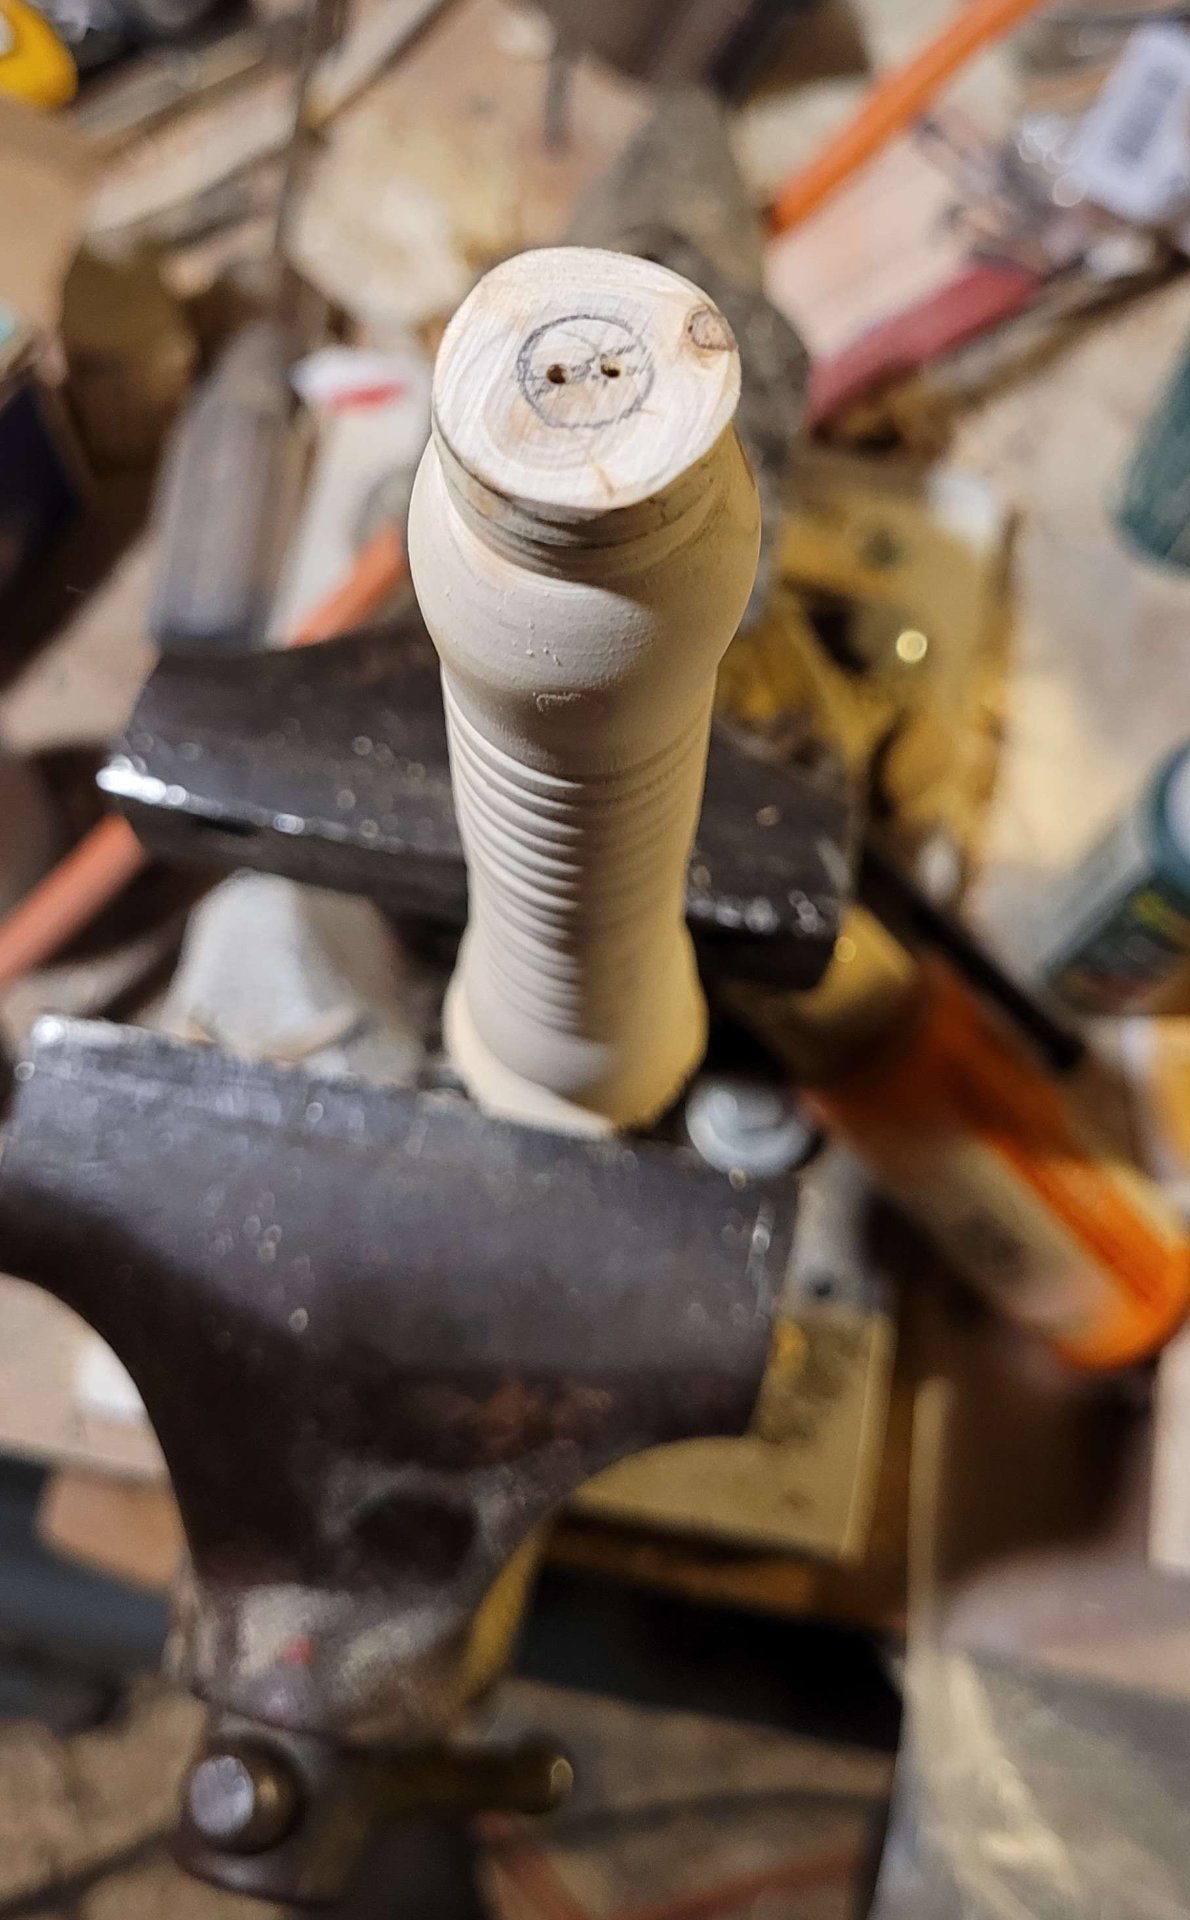
    drilling the knife tang

    I cut the top to fit the little decorative cap, drilled a line of holes for the tang of the blade, and did some test fits and adjustments.

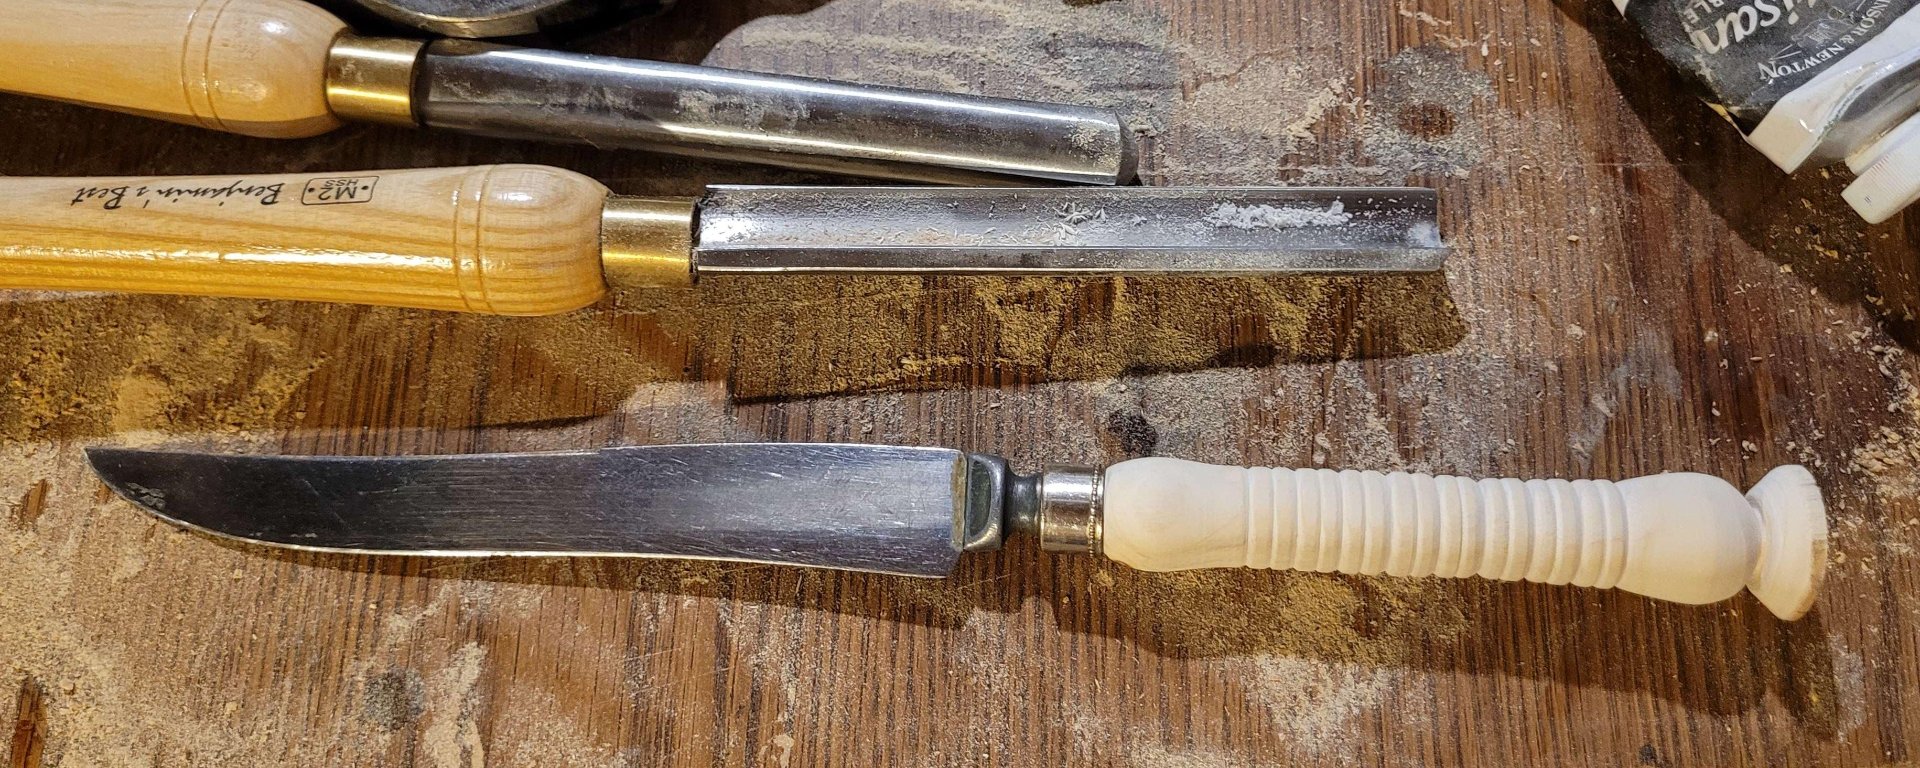
    test fit

    I took this pic before I cut off the bottom extra bit and sanded it. (I left it so I could clamp the piece in the vice while working on the slot for the blade)

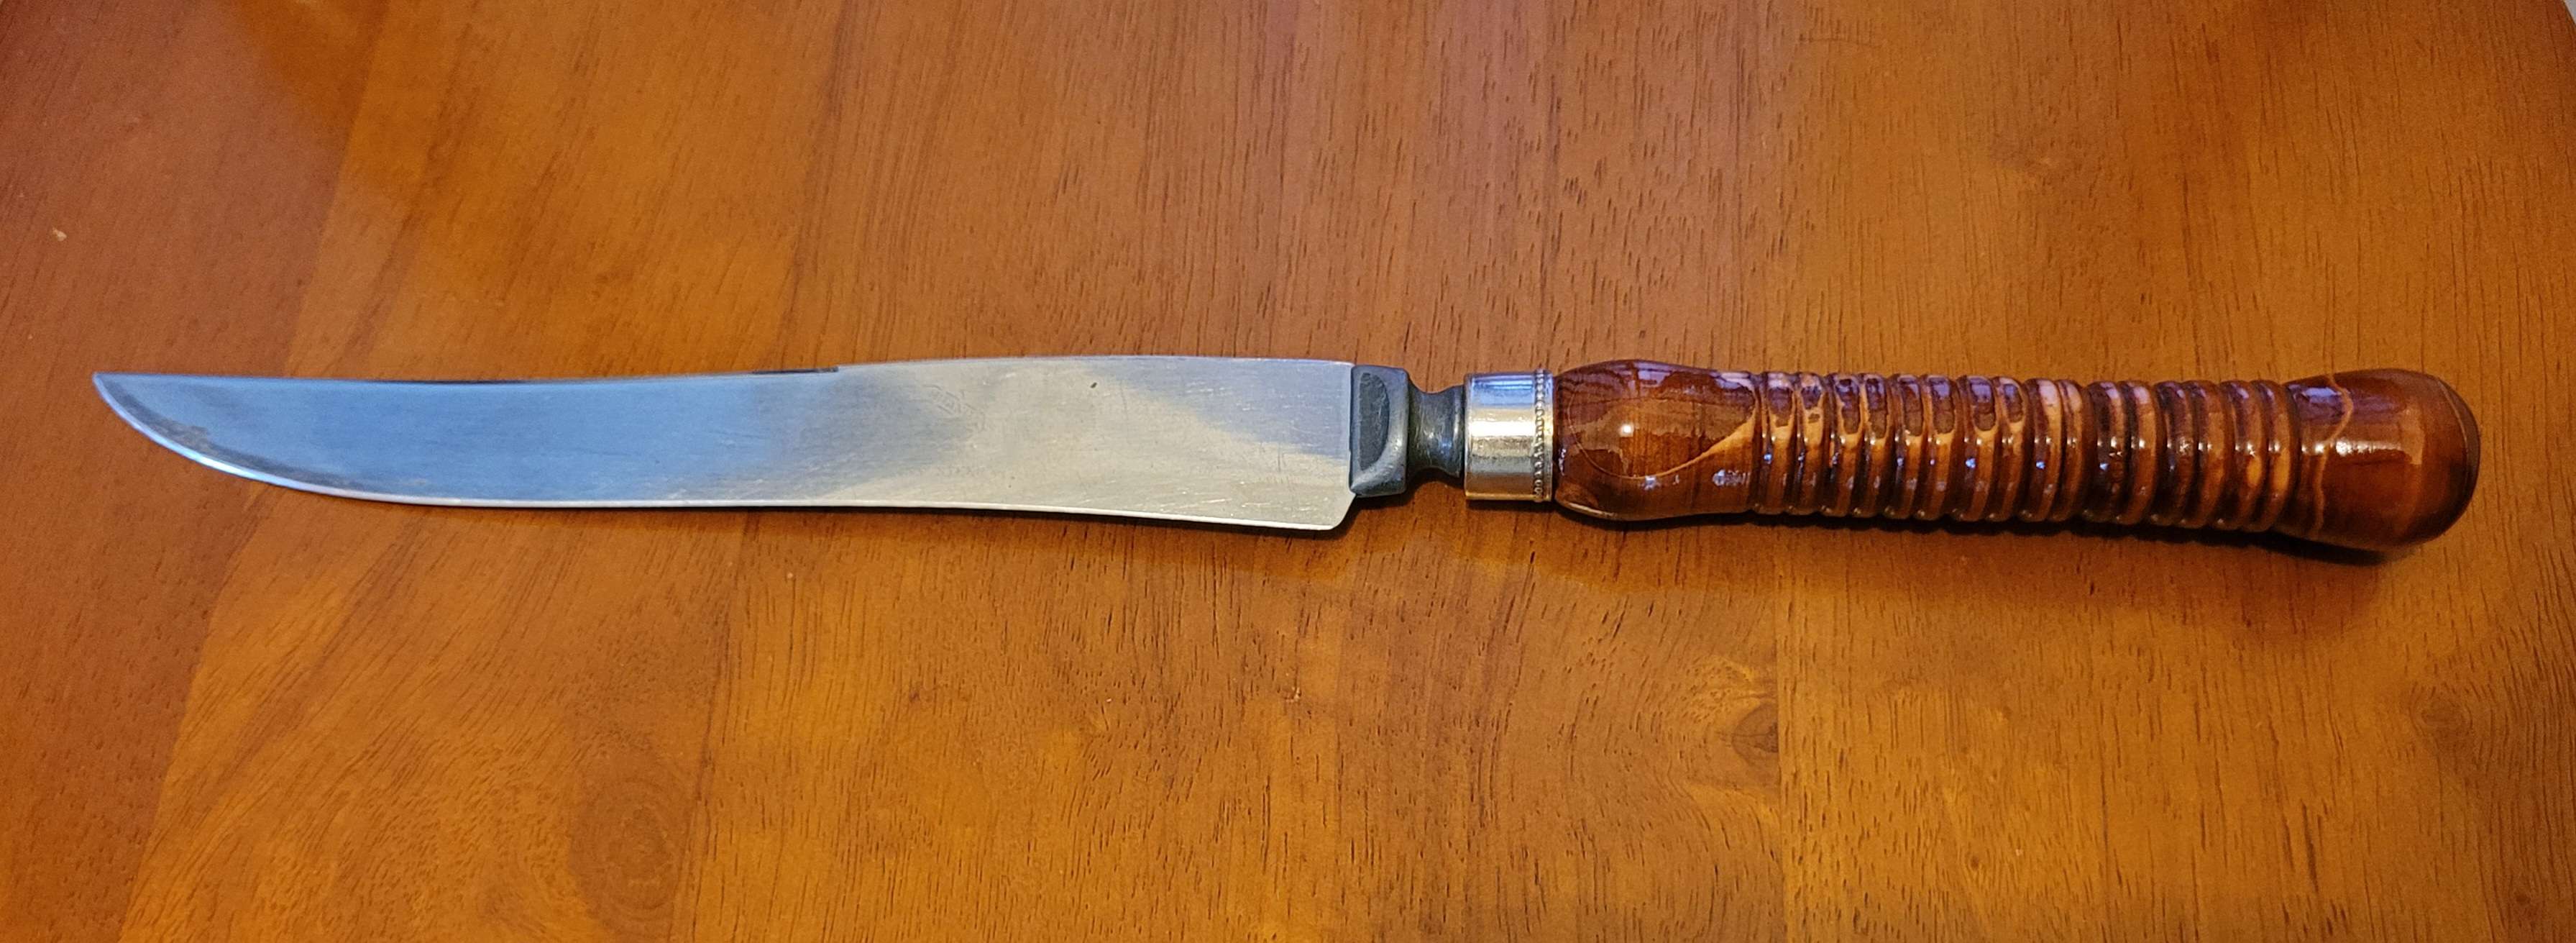
    finished!

    I wanted the stain to be a reminder of the original handle, so I started with gunstock (a very bright, orange-red color) and then while it was still wet, I worked in Red Oak, which is darker and more brown. This deepened it and brought out some nice detail in the grain. The red oak on its own turned the test pieces very dark brown, and it wasn't as visually interesting, so I'm glad I did it this way. All the stains were found on our local Everything is Free group, or left over from old projects. The urethane was also leftover.

    I followed that up with four coats of high-gloss polyurethane, with some light sanding in between. The pine was thirsty - drank up the urethane in some spots on the first coats so you wouldn't think any had even been applied. Eventually I got a nice, even finish.

    #woodturning #woodworking #zerowaste

    • chevron_right

      Sometimes I carve koroks and hide them in our house

      JacobCoffinMakes · Friday, 2 February - 13:10 edit · 3 minutes

    two finished, painted korok carvings on the workbench

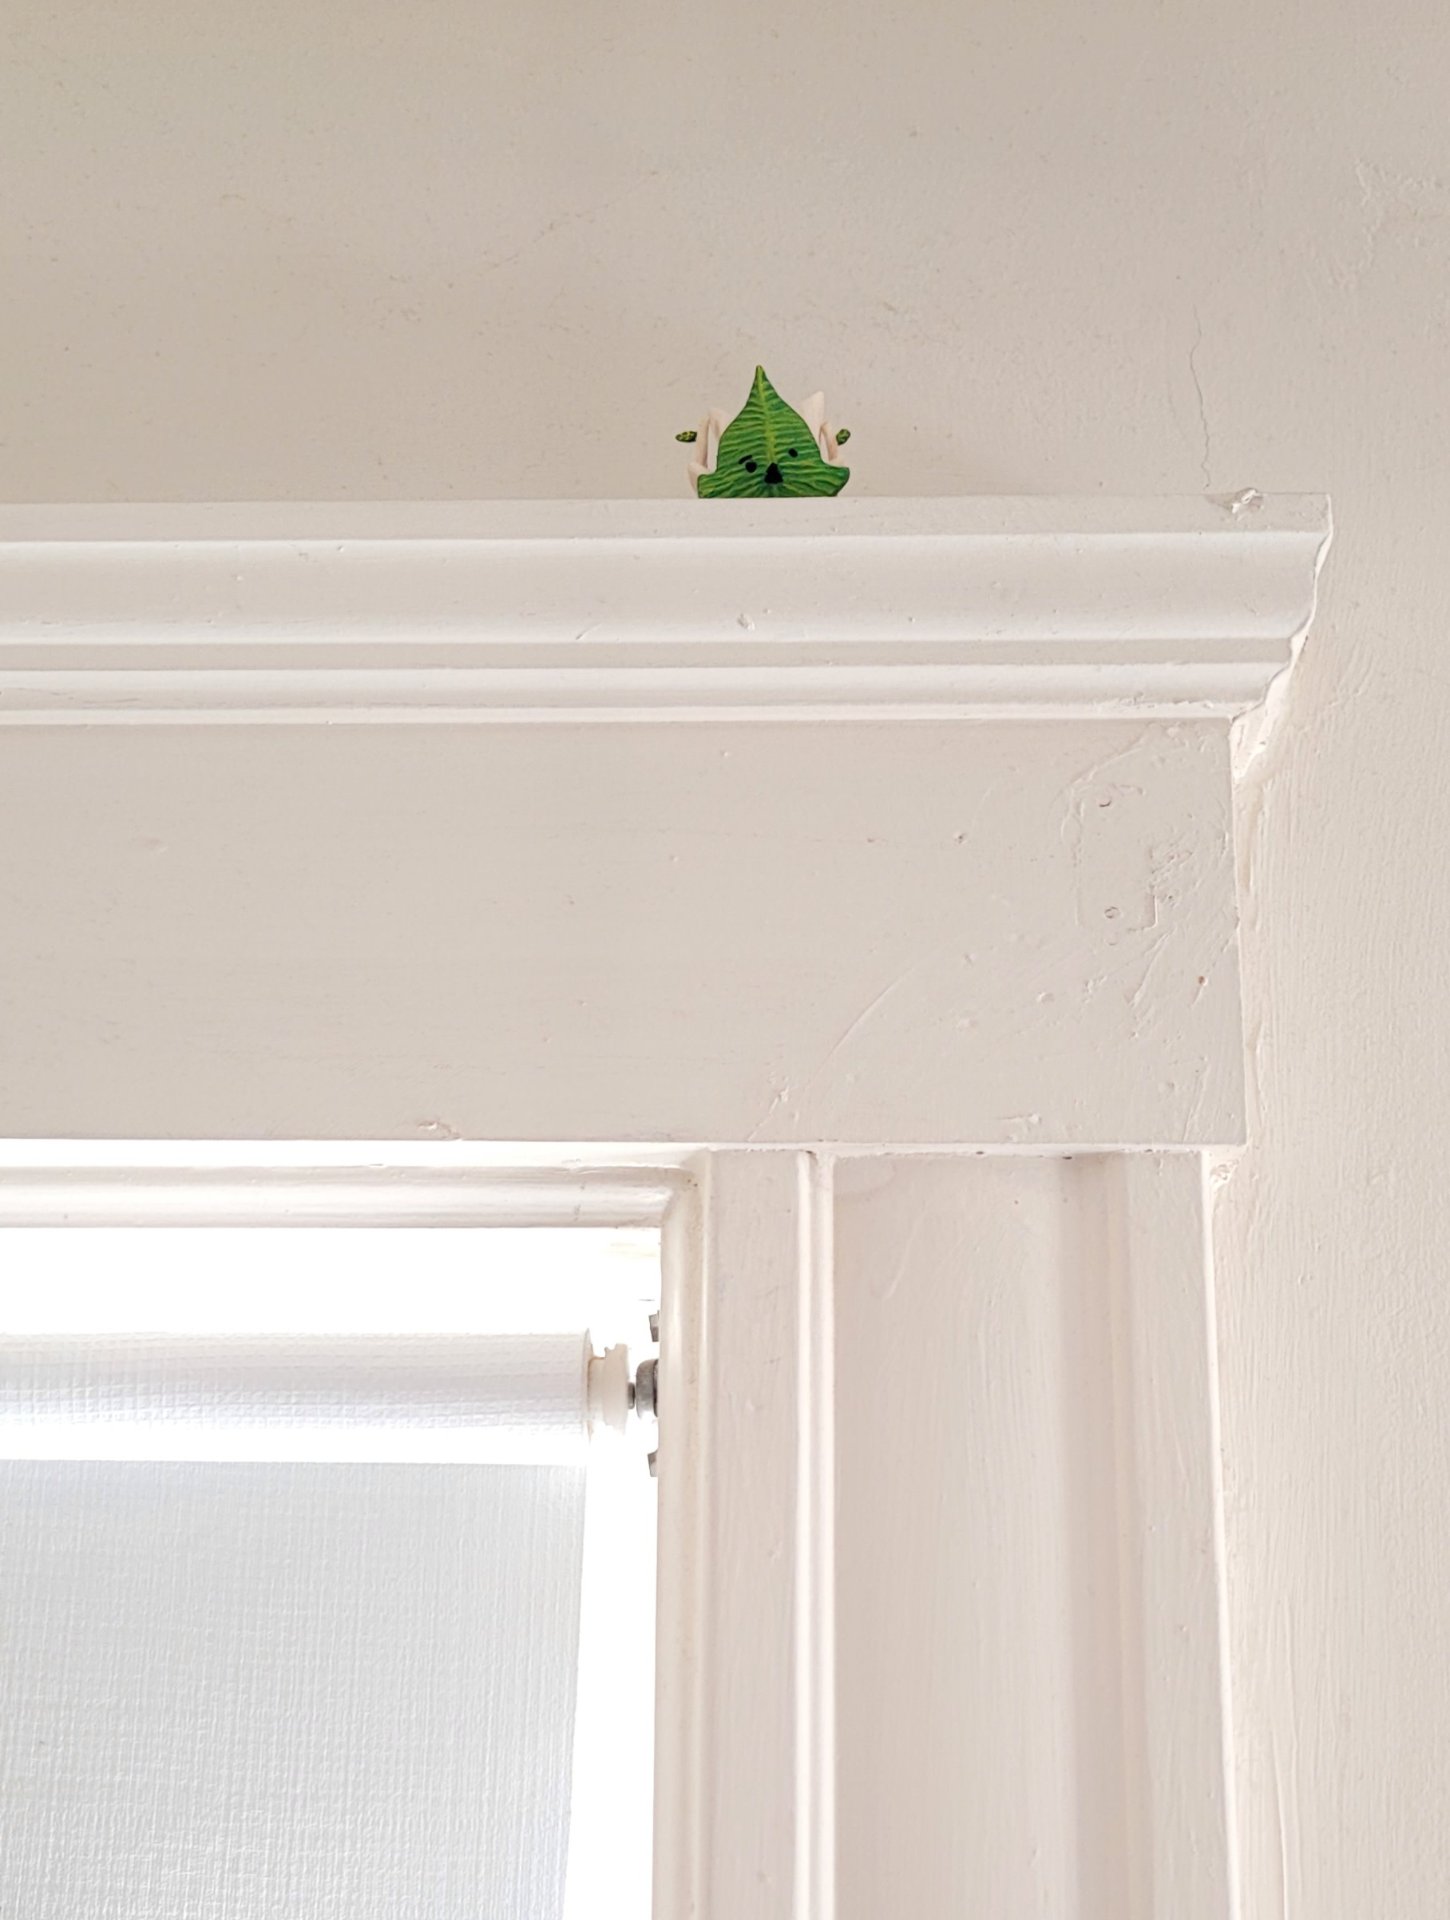
    My wife loves the zelda games, especially searching for koroks. She shares the switch with my brother- and sister-in-law though, so I hide these little guys around our apartment for her to find when she can't play.

    I carve them from pieces I've saved from our Christmas trees and paint their leaves with old acrylic paints from back when I played warhammer.

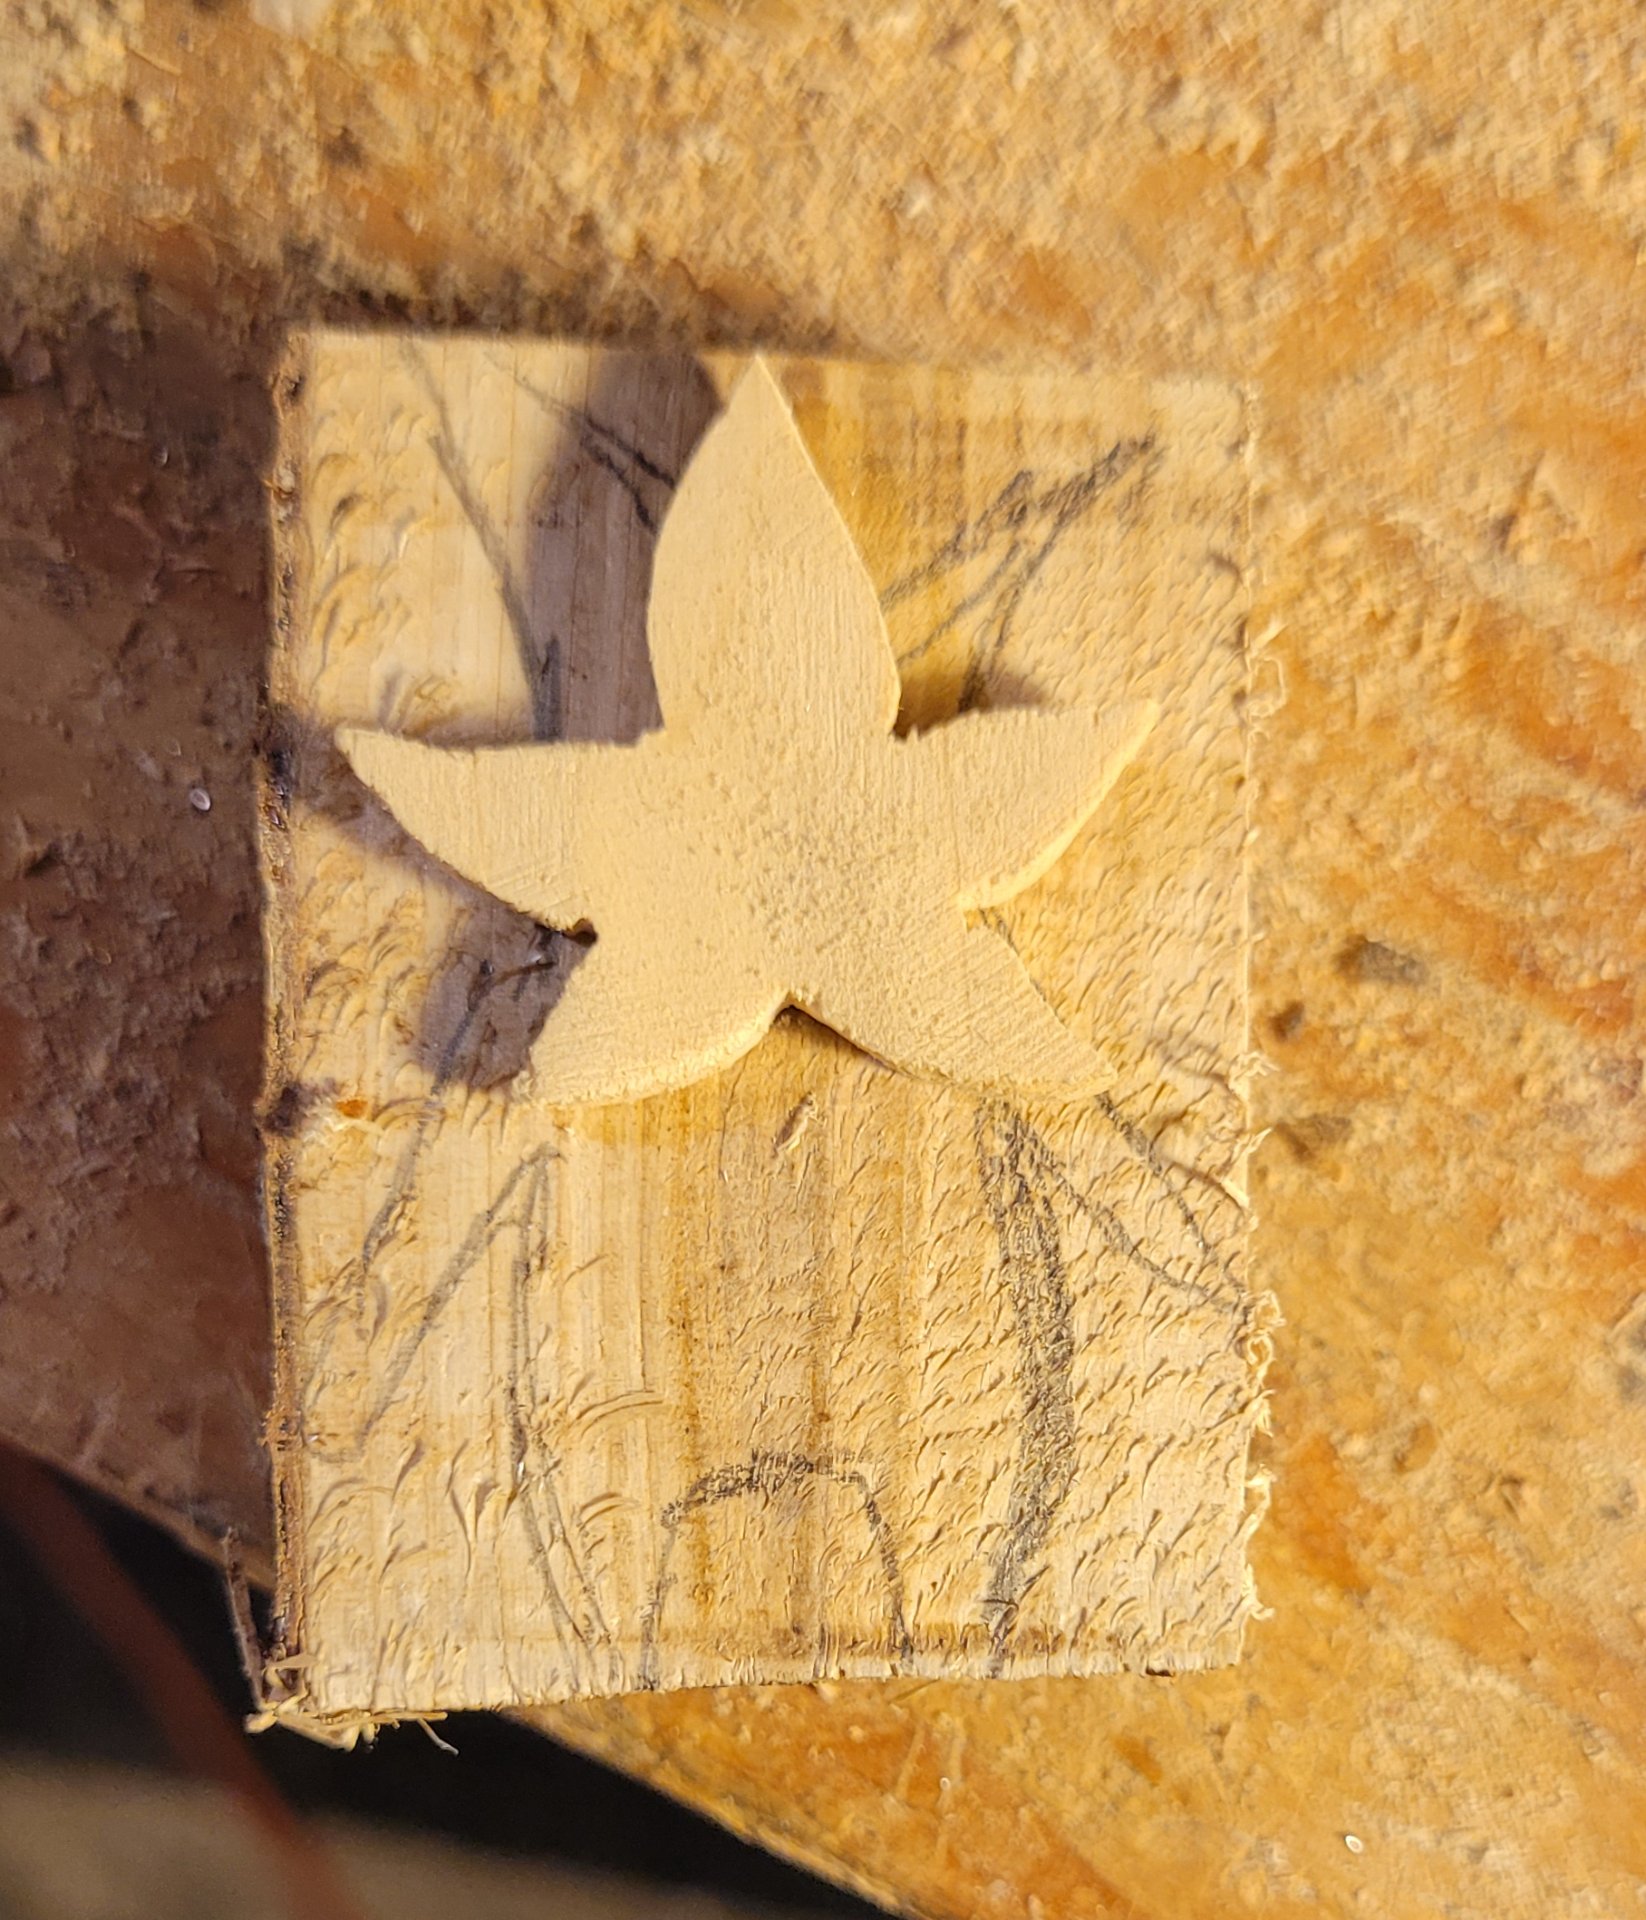
    early version of the korok with the five pointed leaf

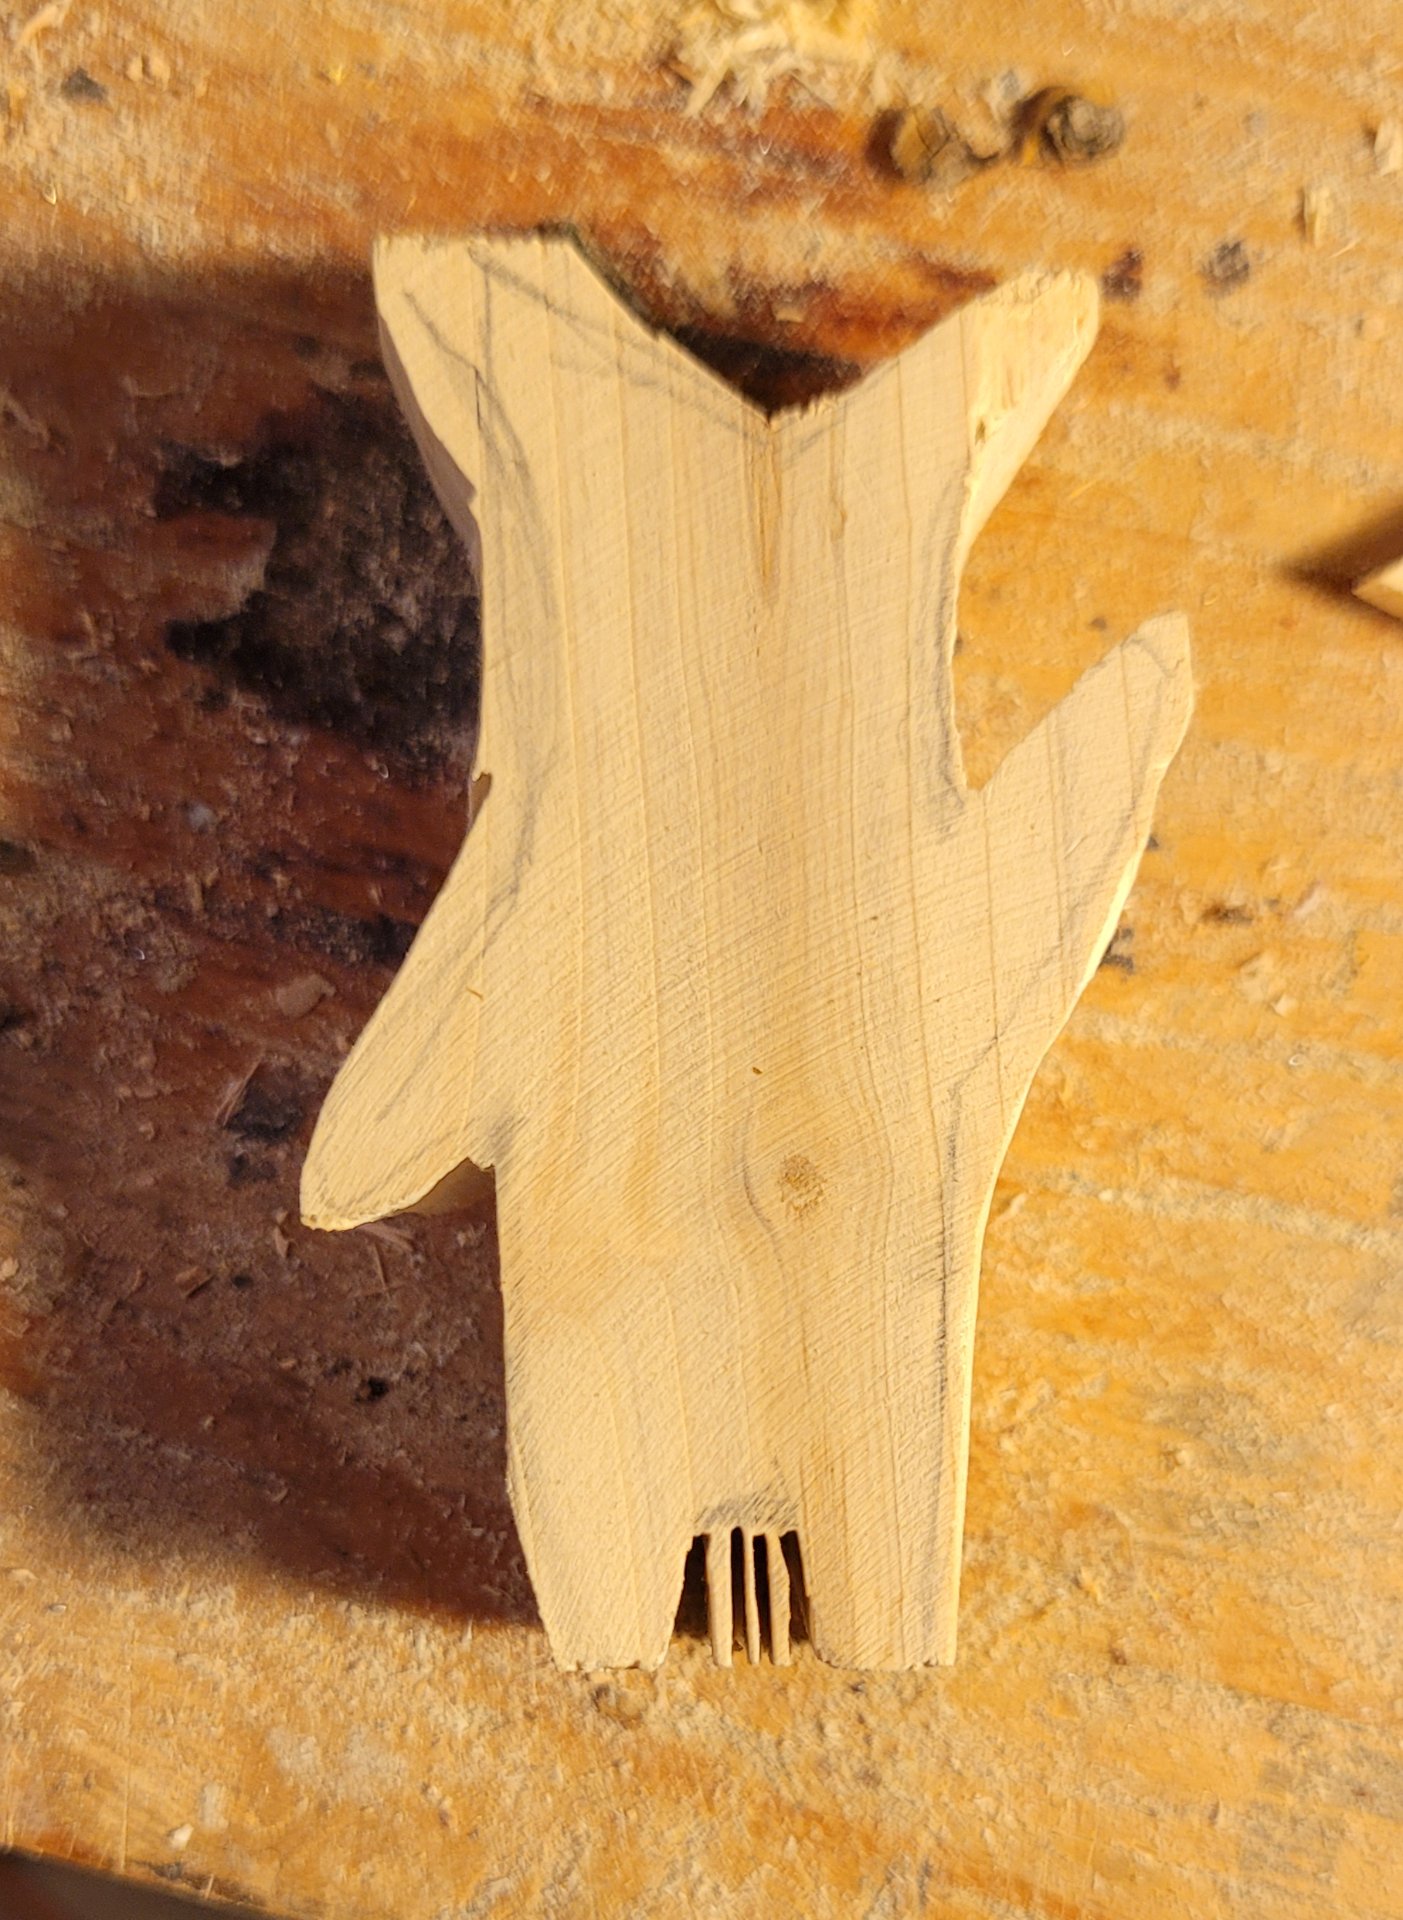
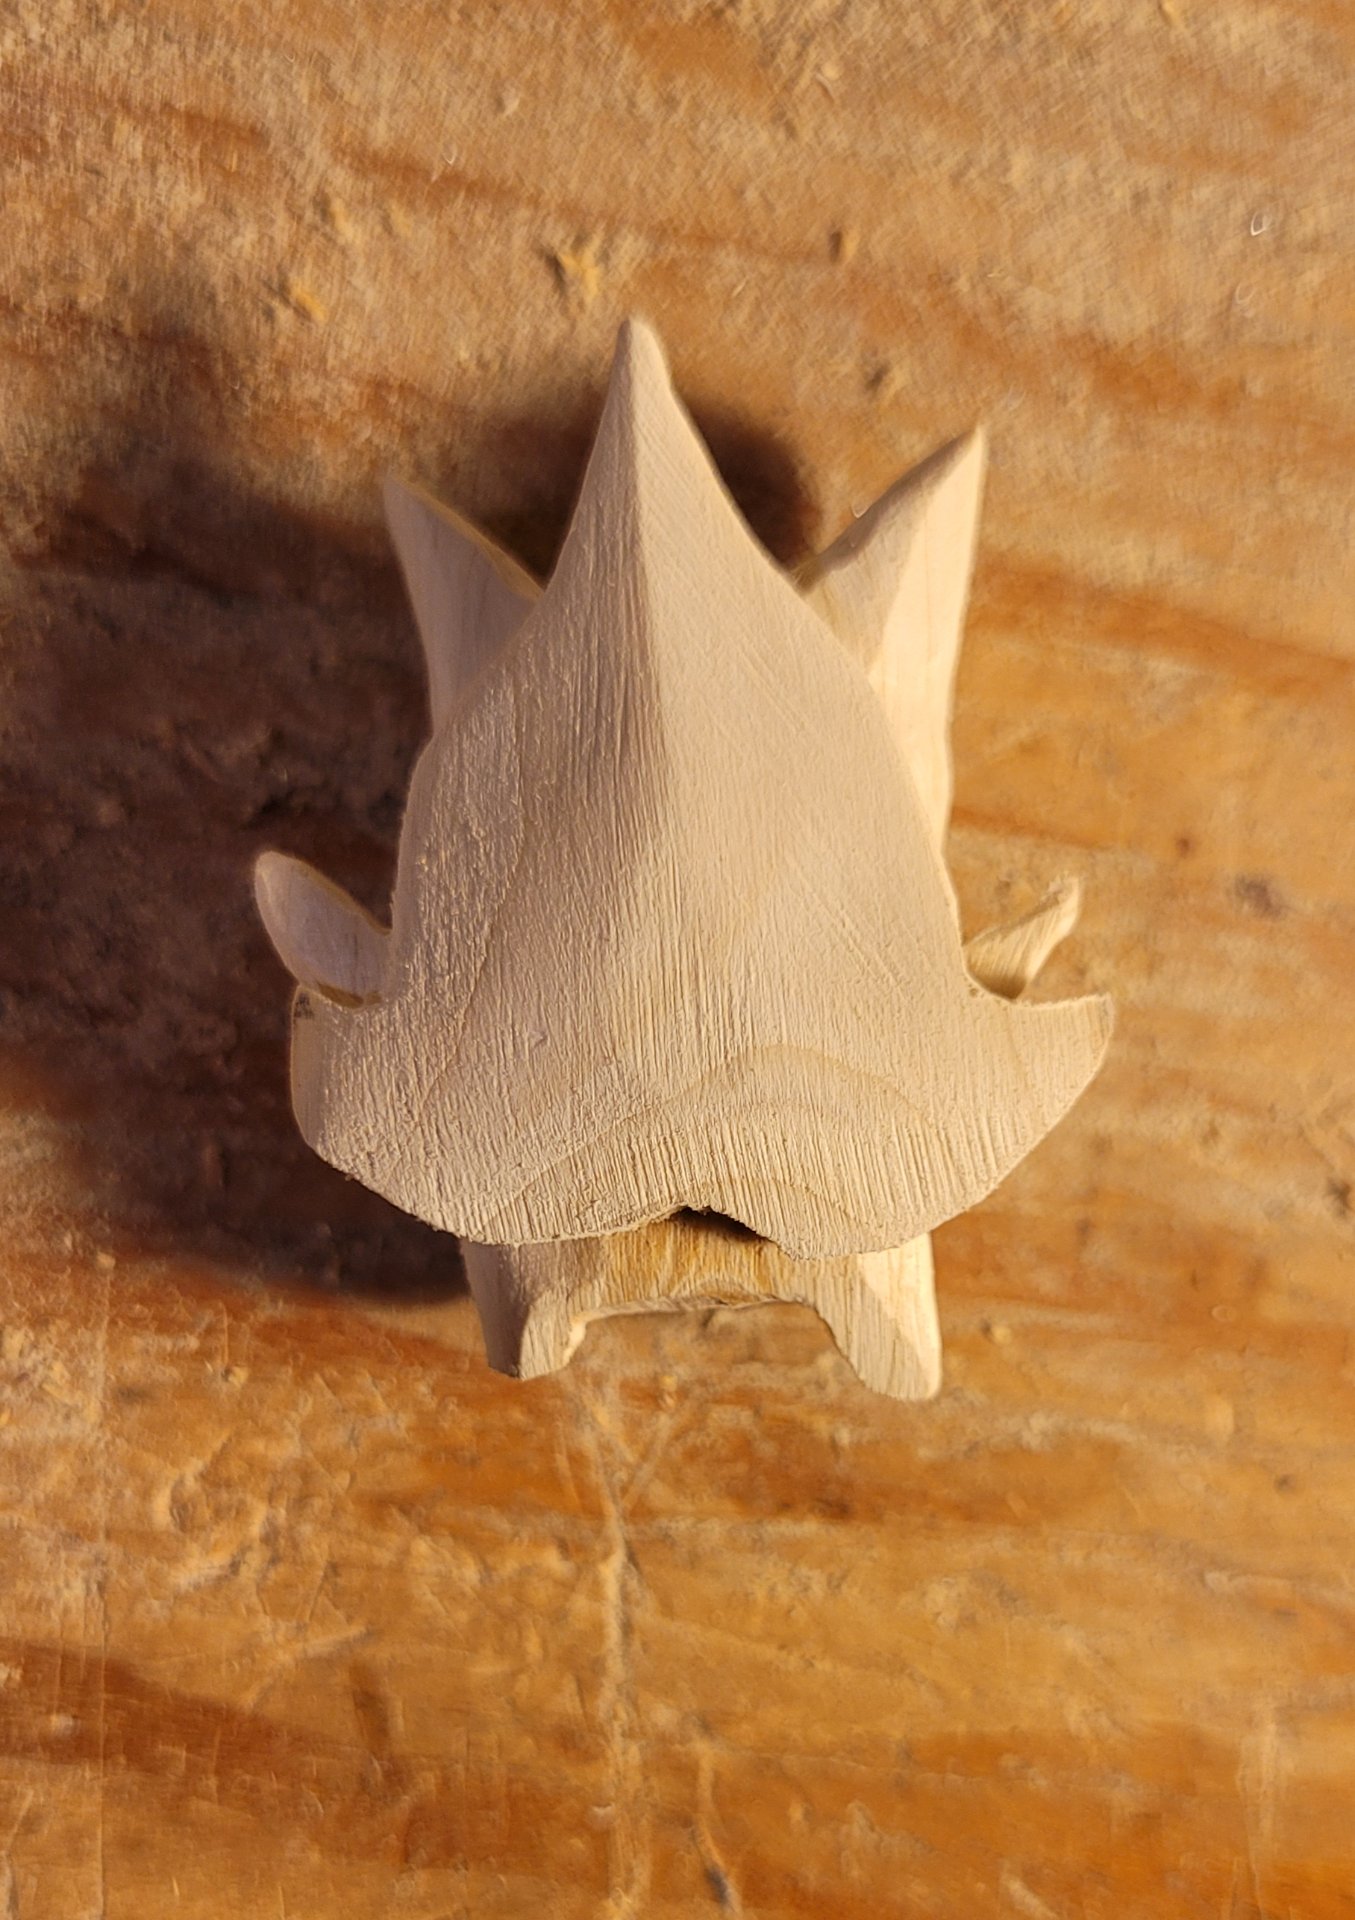
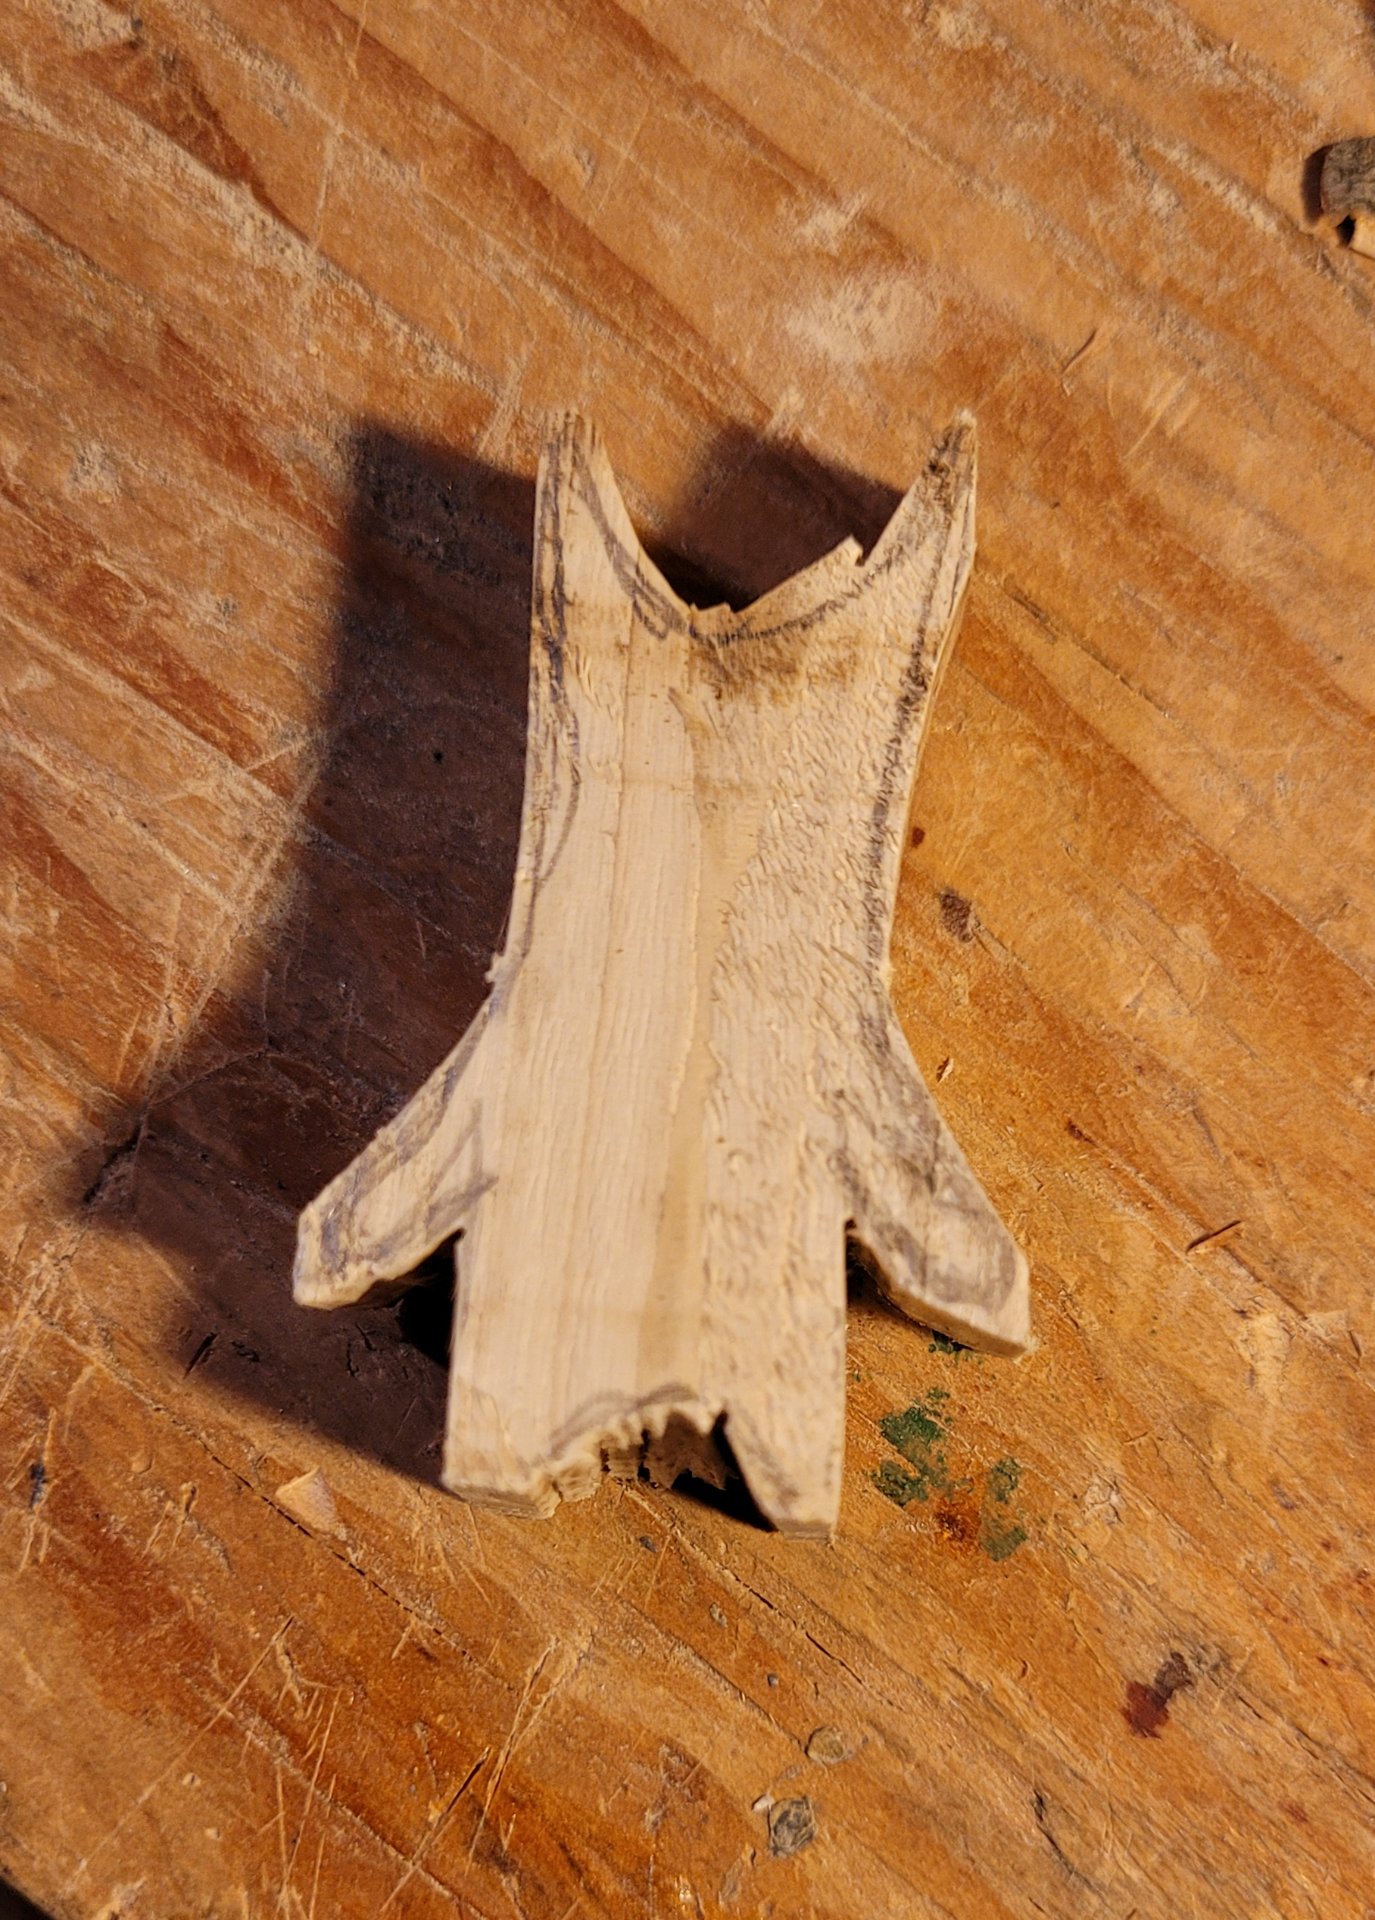
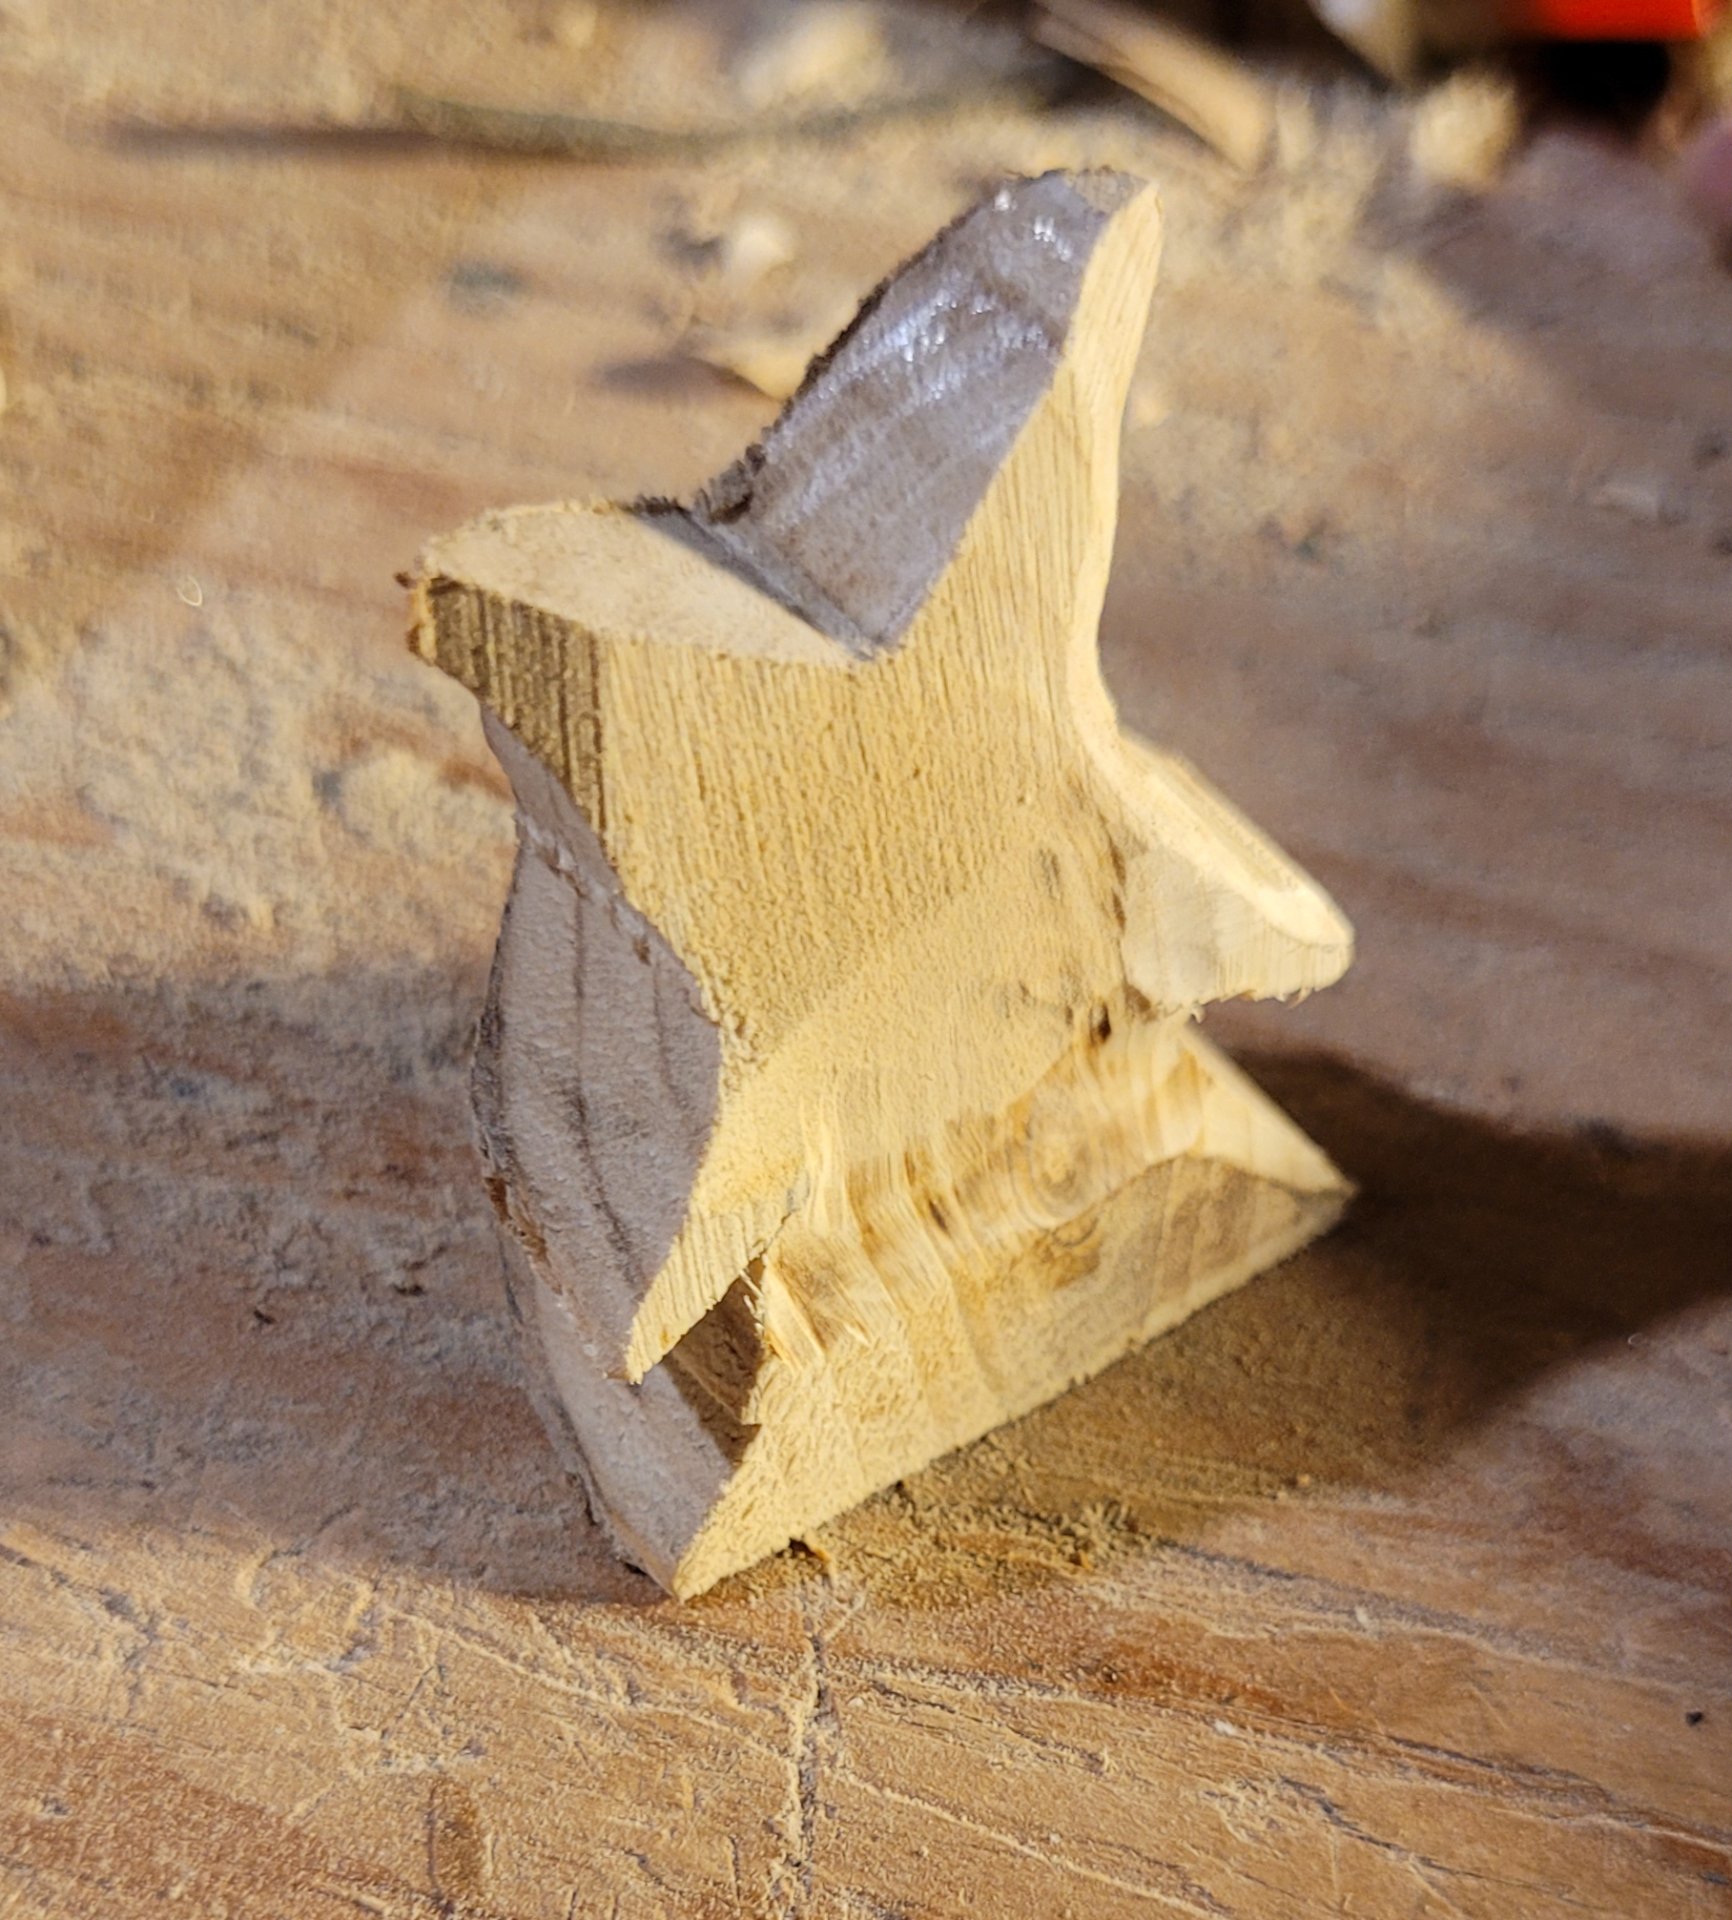
    I start by using the bandsaw to cut a section of tree trunk from the Christmas tree. I use the belt sander to flatten one side, then use the band saw to square it up a bit (I don't like to lose too much material, but you need at least a couple flat sides to safely rip the piece lengthwise and so you can draw on one side and still lay it flat while you cut it out.

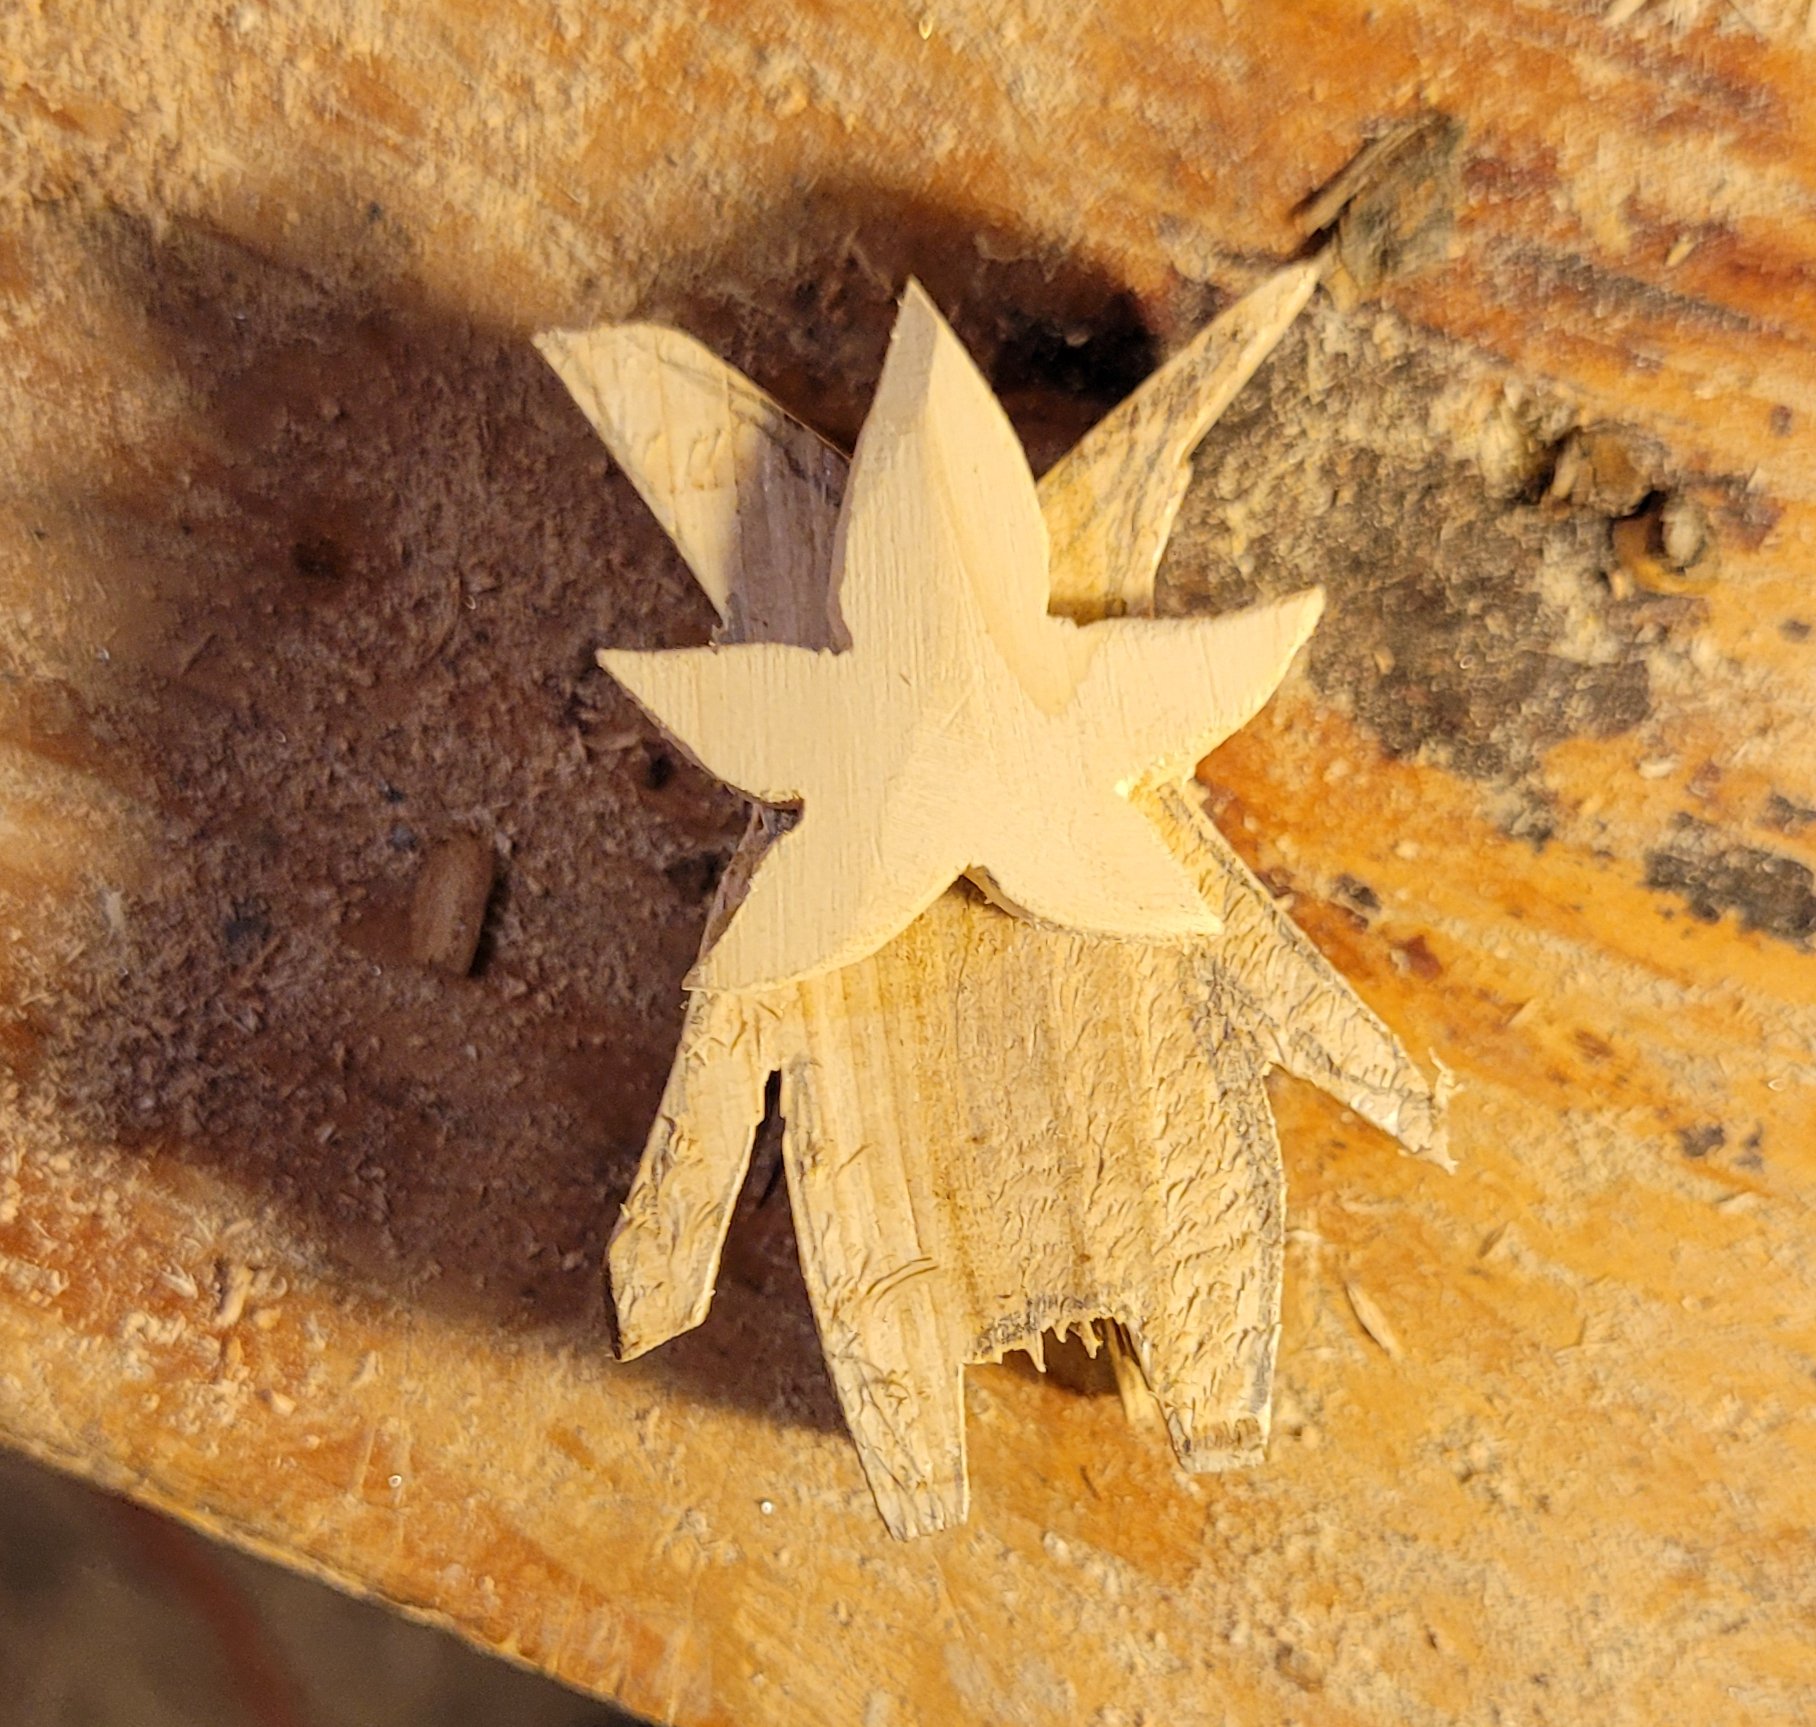
    the same korok but cut out flat with a band saw, not carved down to his final shape

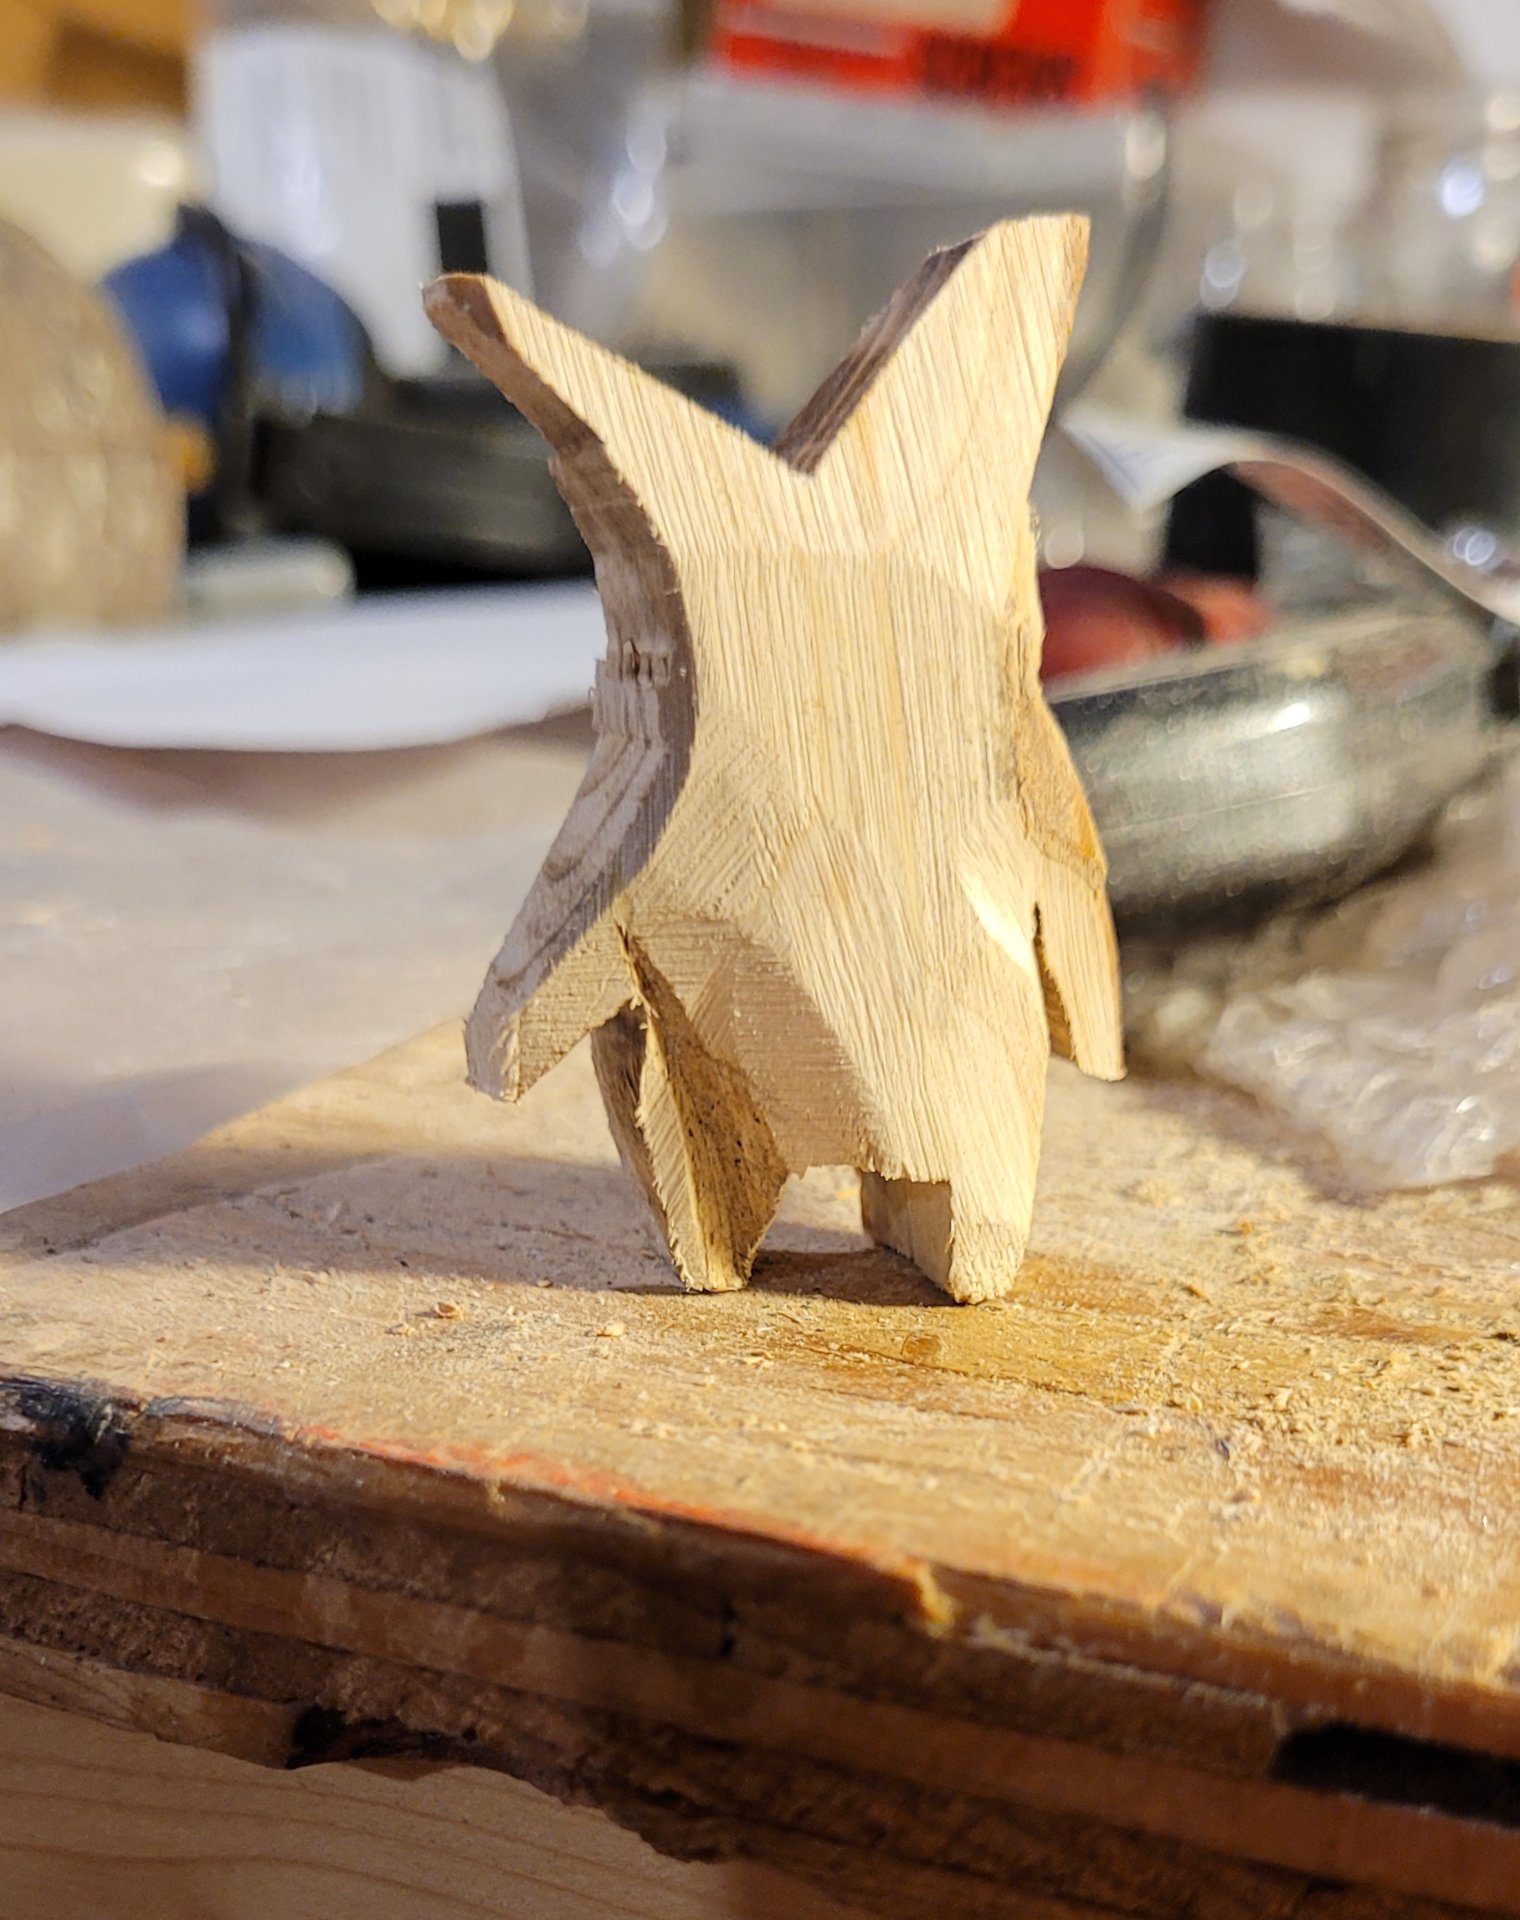
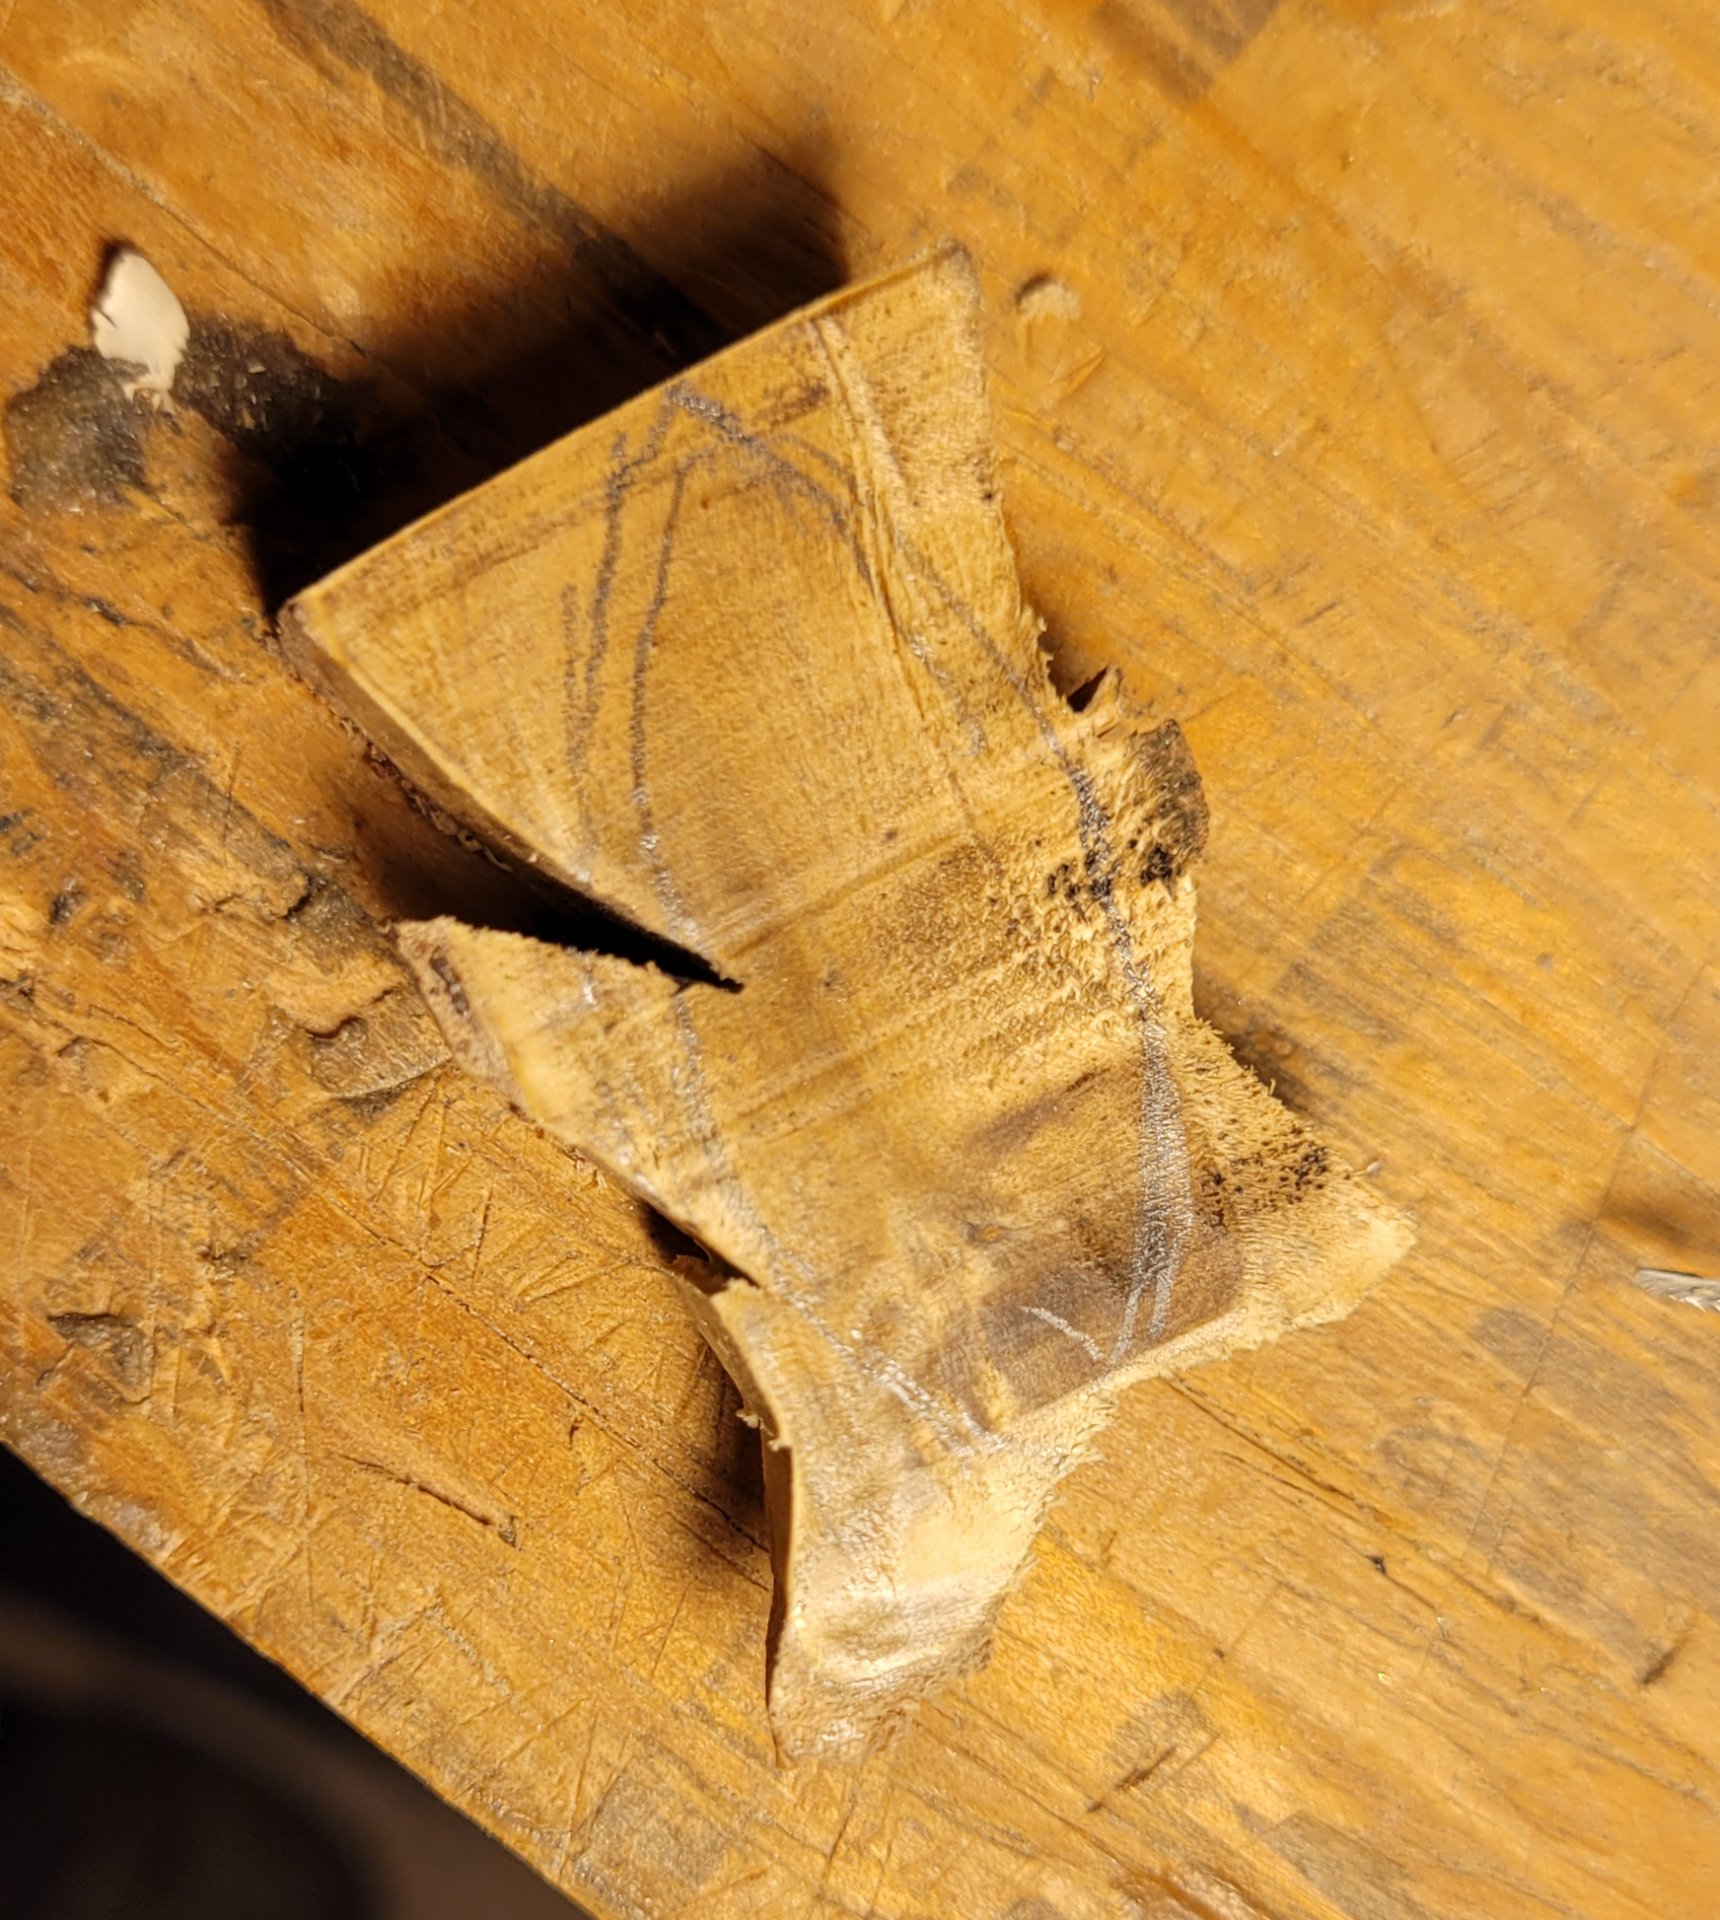
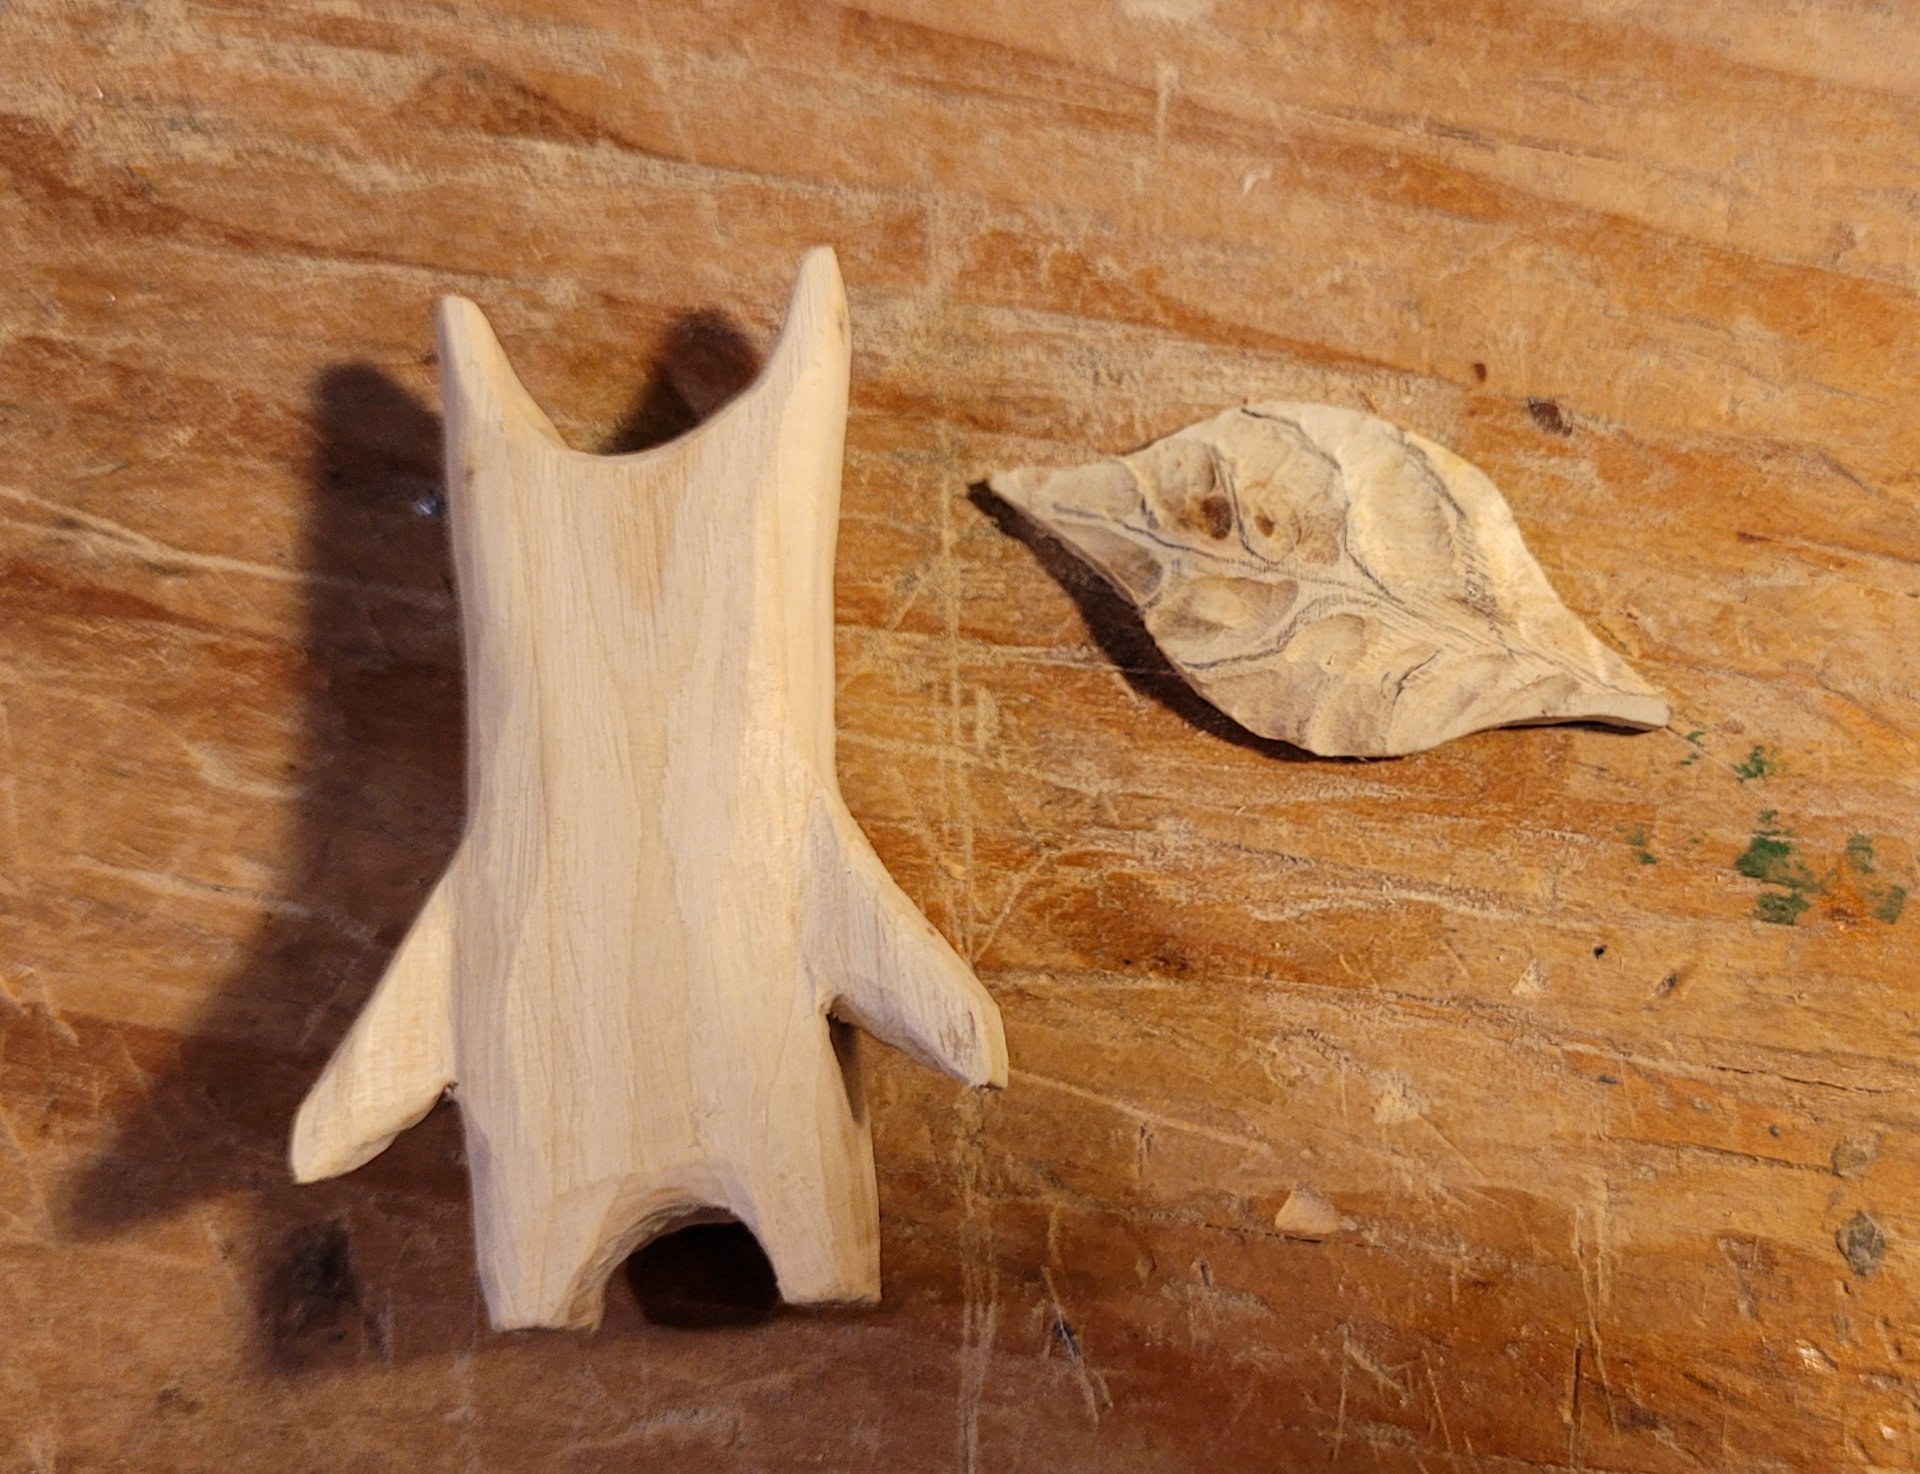
    the same korok, but roughed into the rounder shape

    After I cut them out, I rough them into shape with the belt sander and a boxcutter.

    This one had a deep gouge in the wood from the bottom of the trunk, where it had split or been cut by the tree-seller. I worked that side as far back as I could and tried to shape him like he was walking. One of the really fun things about carving is the way the wood comes with constraints that can shape the final piece. You have to adjust your plans as you find quirks and irregularities in the material.

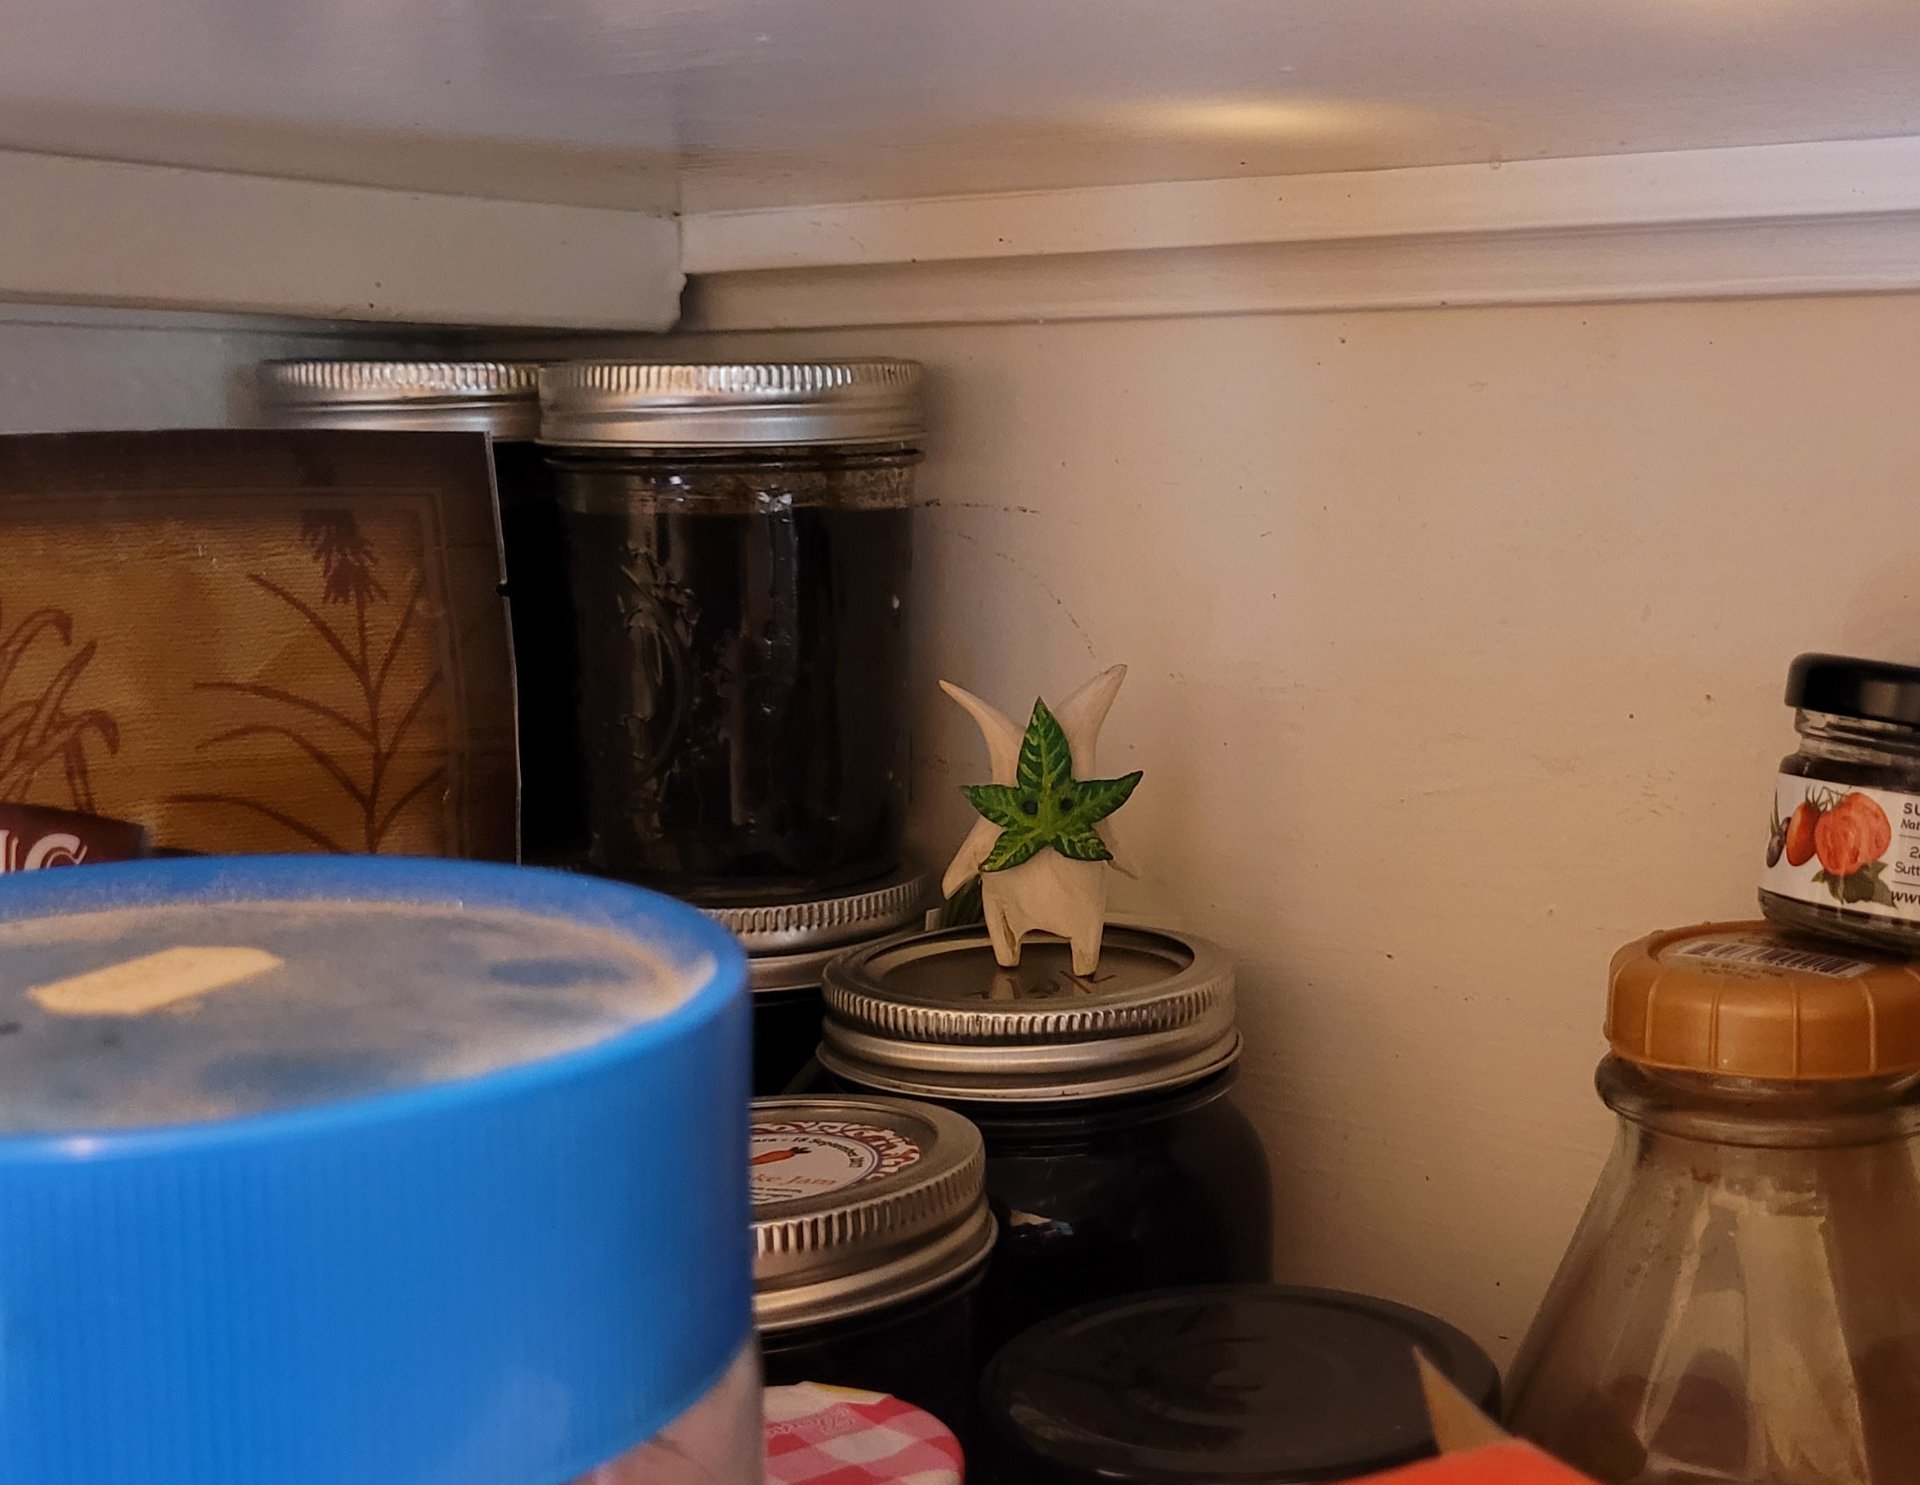
    the finished korok hiding in the pantry on top of a jar of jam

    These are quick to make - at this point, they usually go from a chunk of tree to a finished korok in about 4 hours. I could probably take more time and put more detail into them, but to be honest, making sure there's a lot of them to find is a higher priority for me than sanding out every blemish or making the leaf as thin as possible in pine.

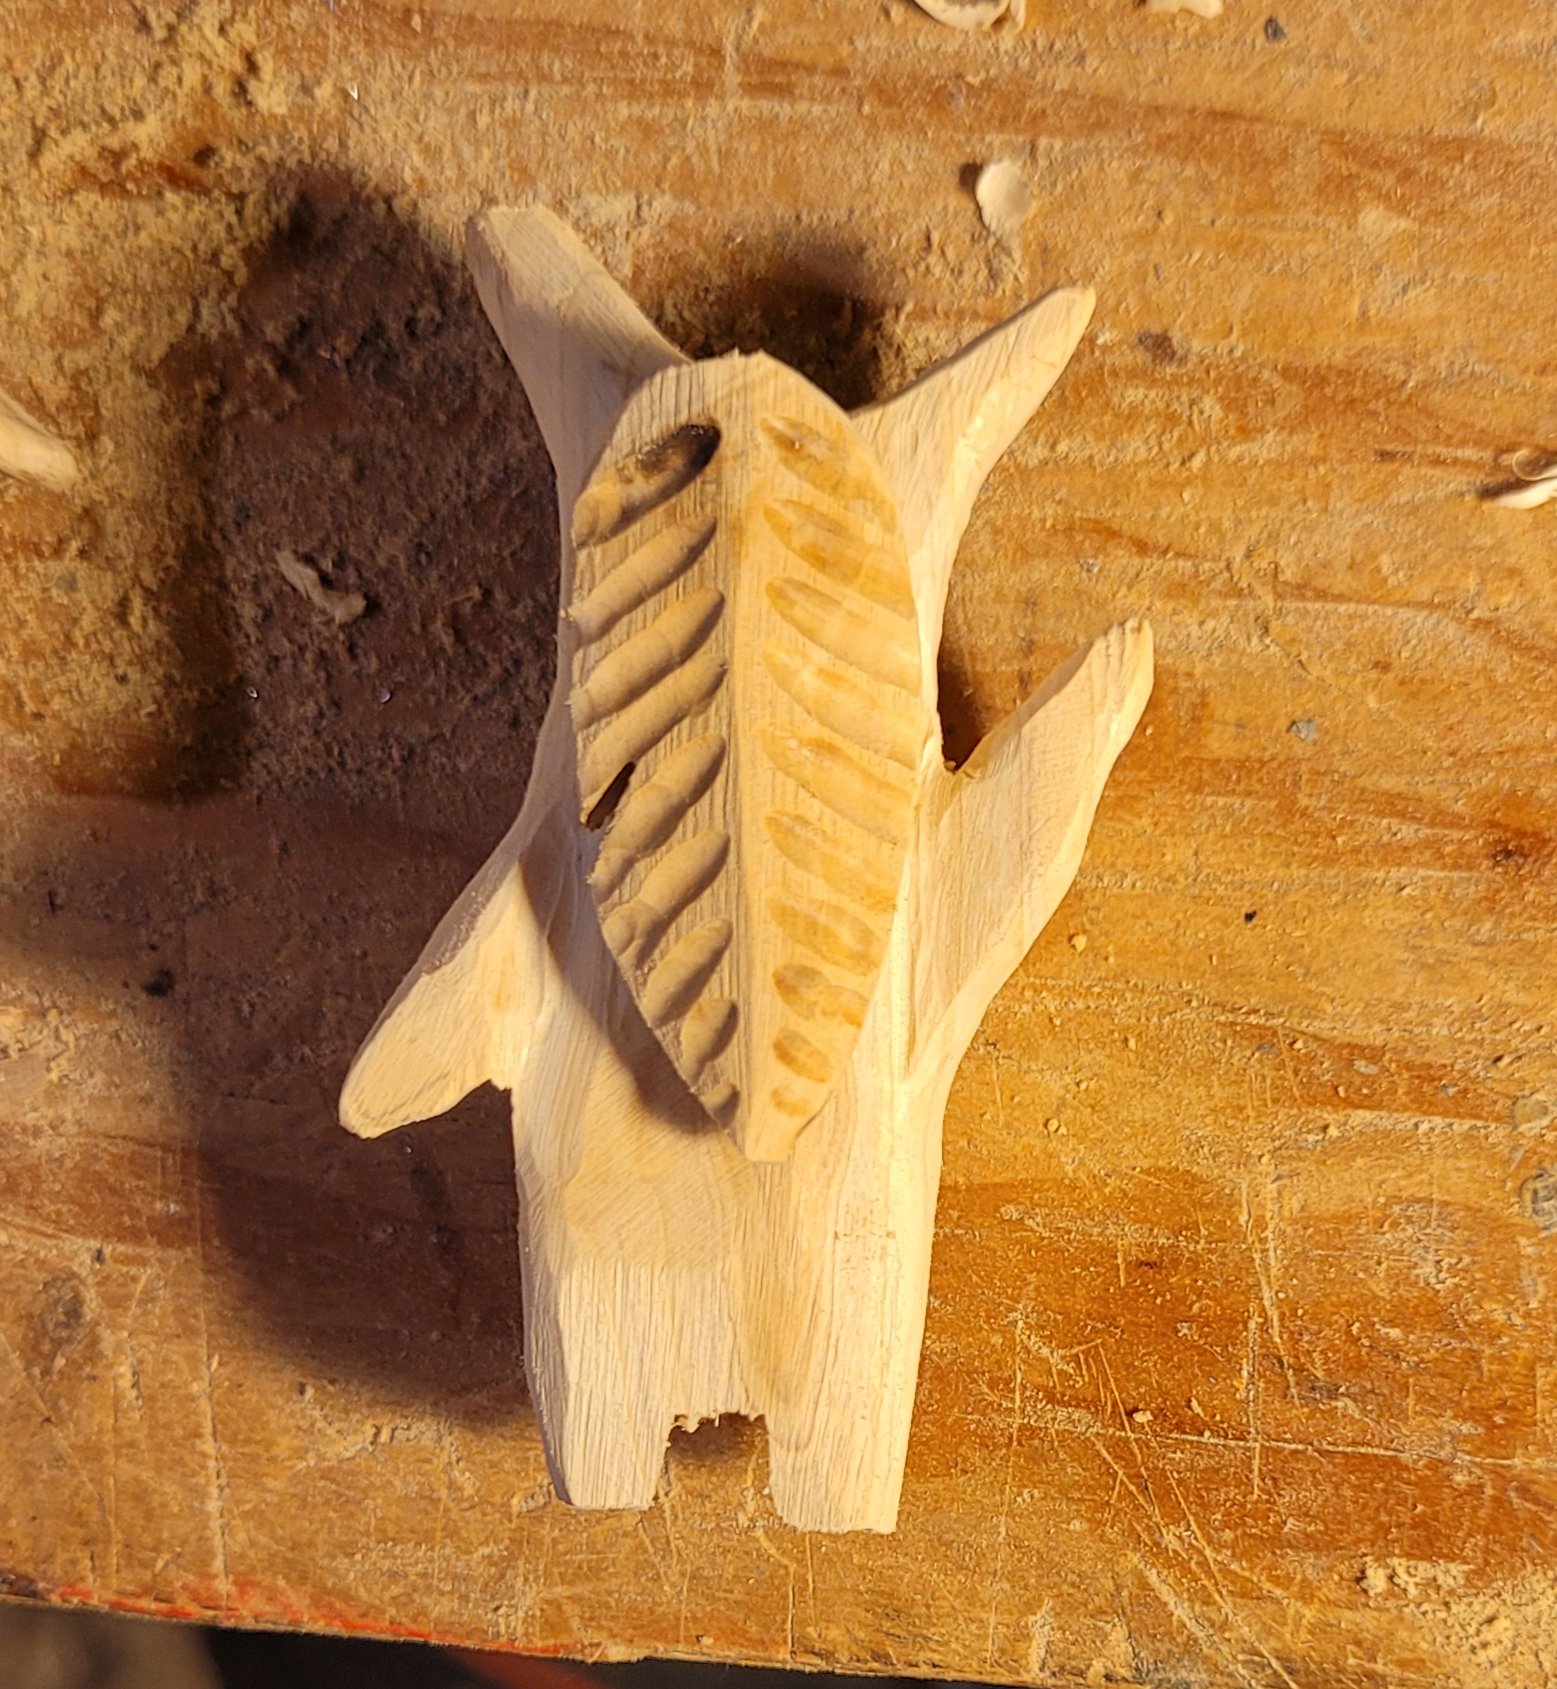
    the tall korok roughed out

    Generally you can find two koroks in each three-inch piece of tree trunk, but it depends on the size of the koroks you're looking for.

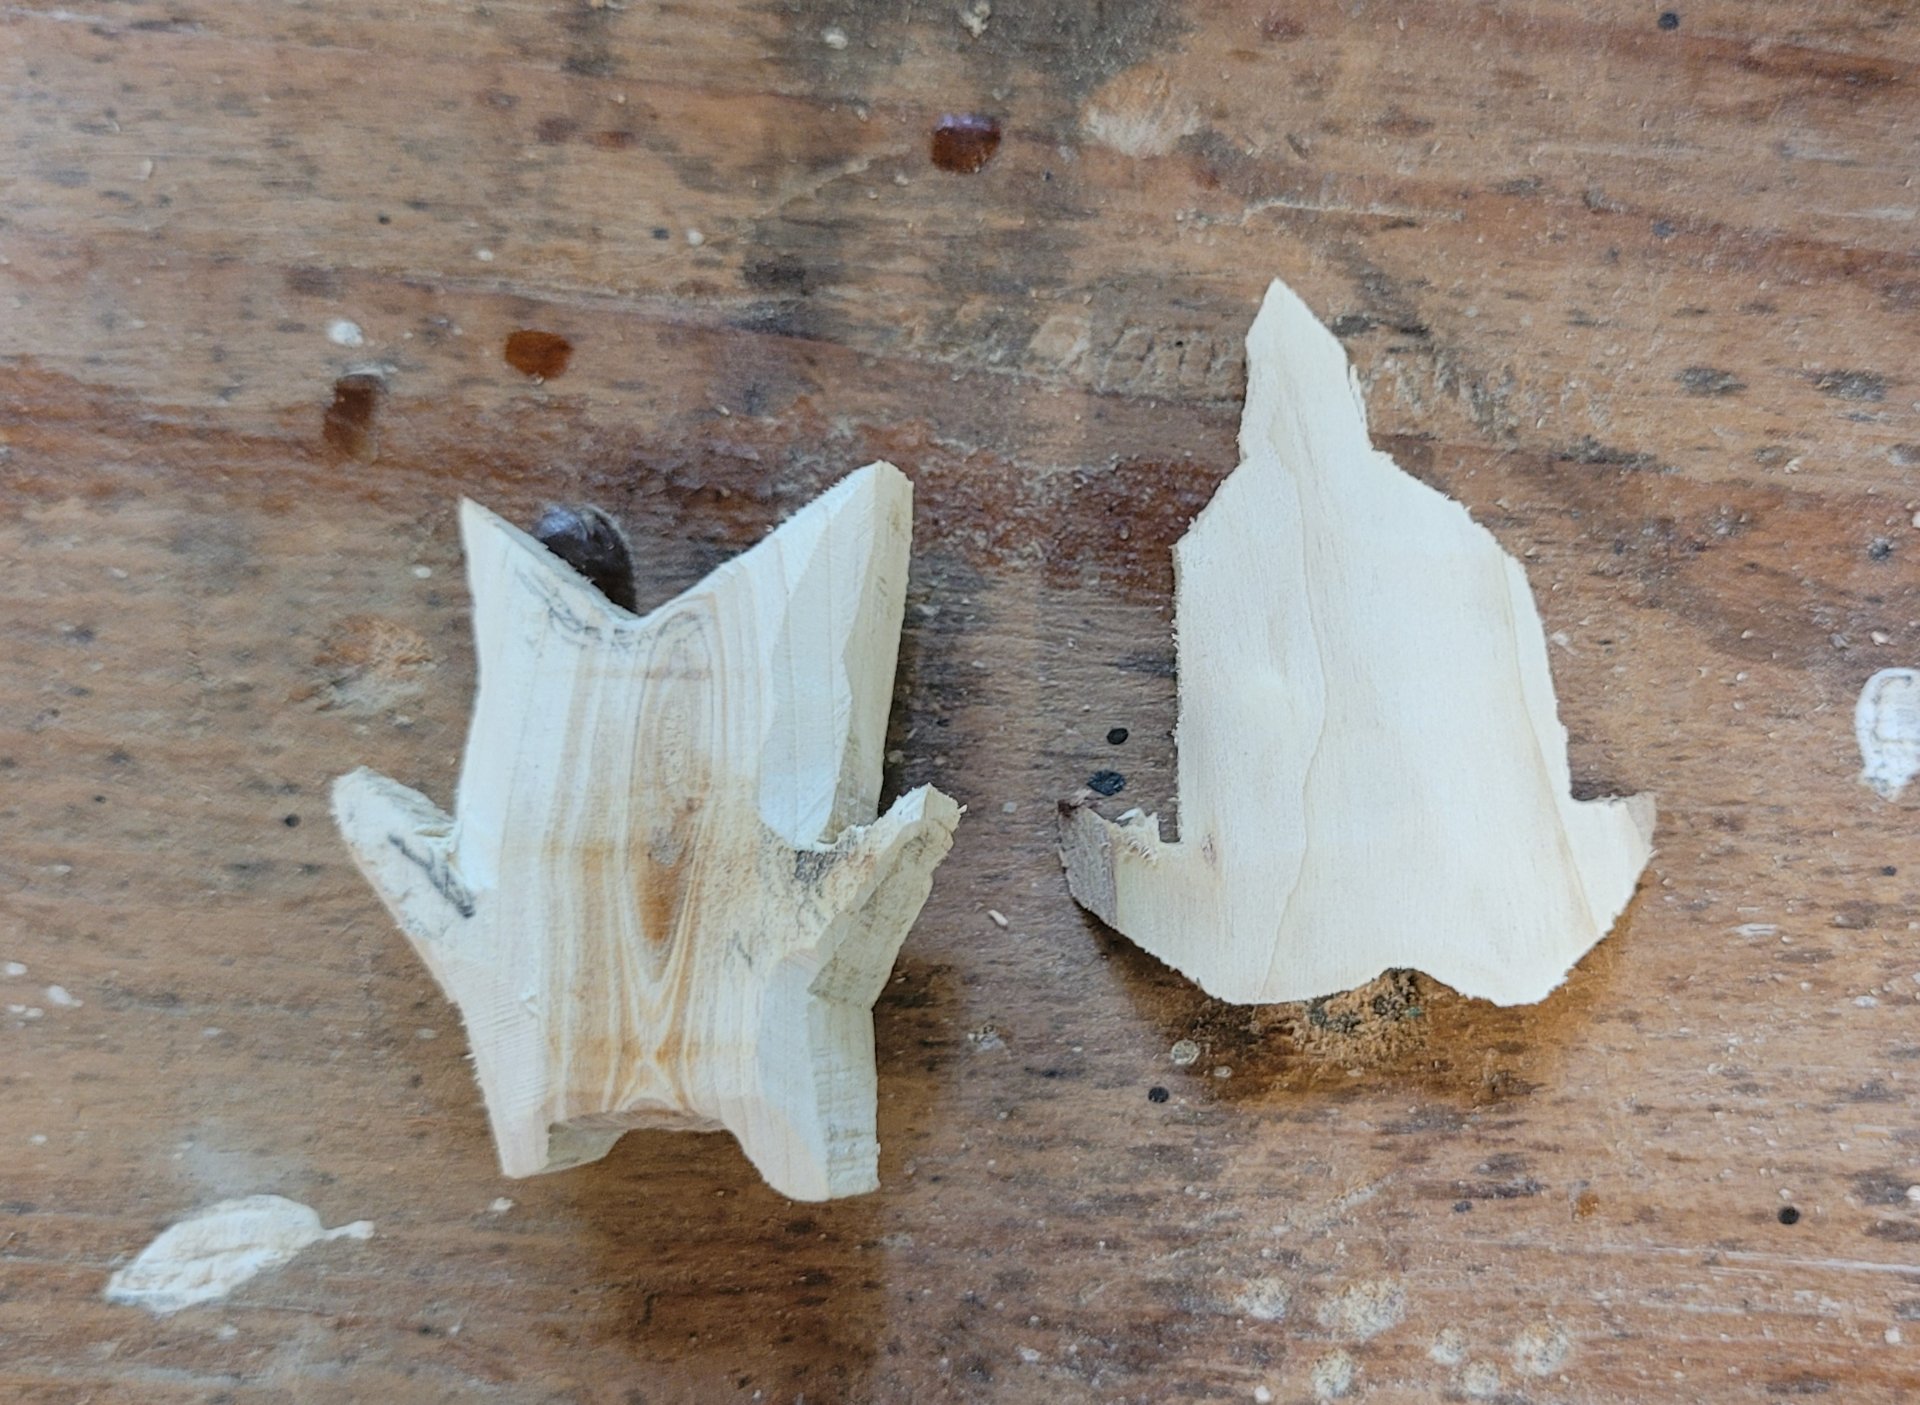
    a failed korok carving redrawn with a leaf for a korok

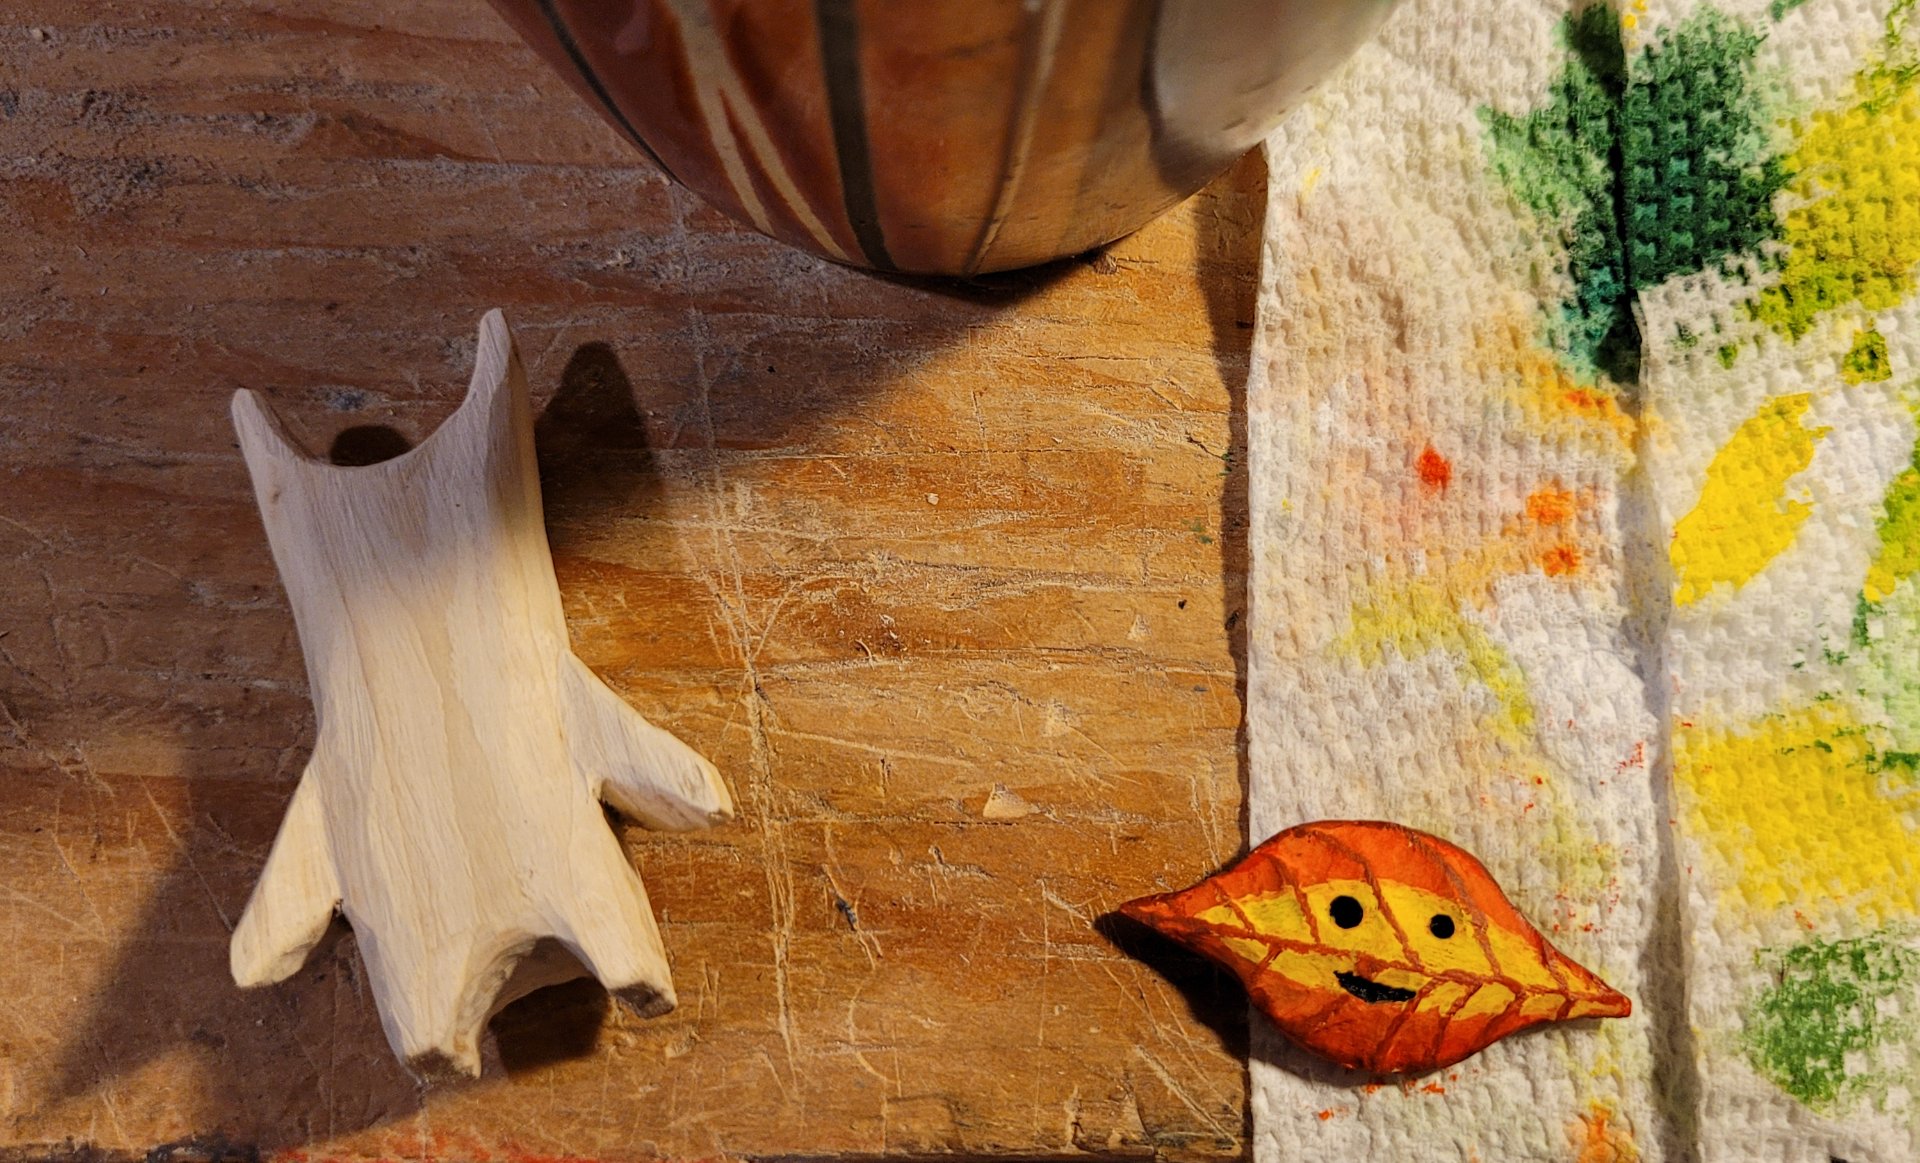
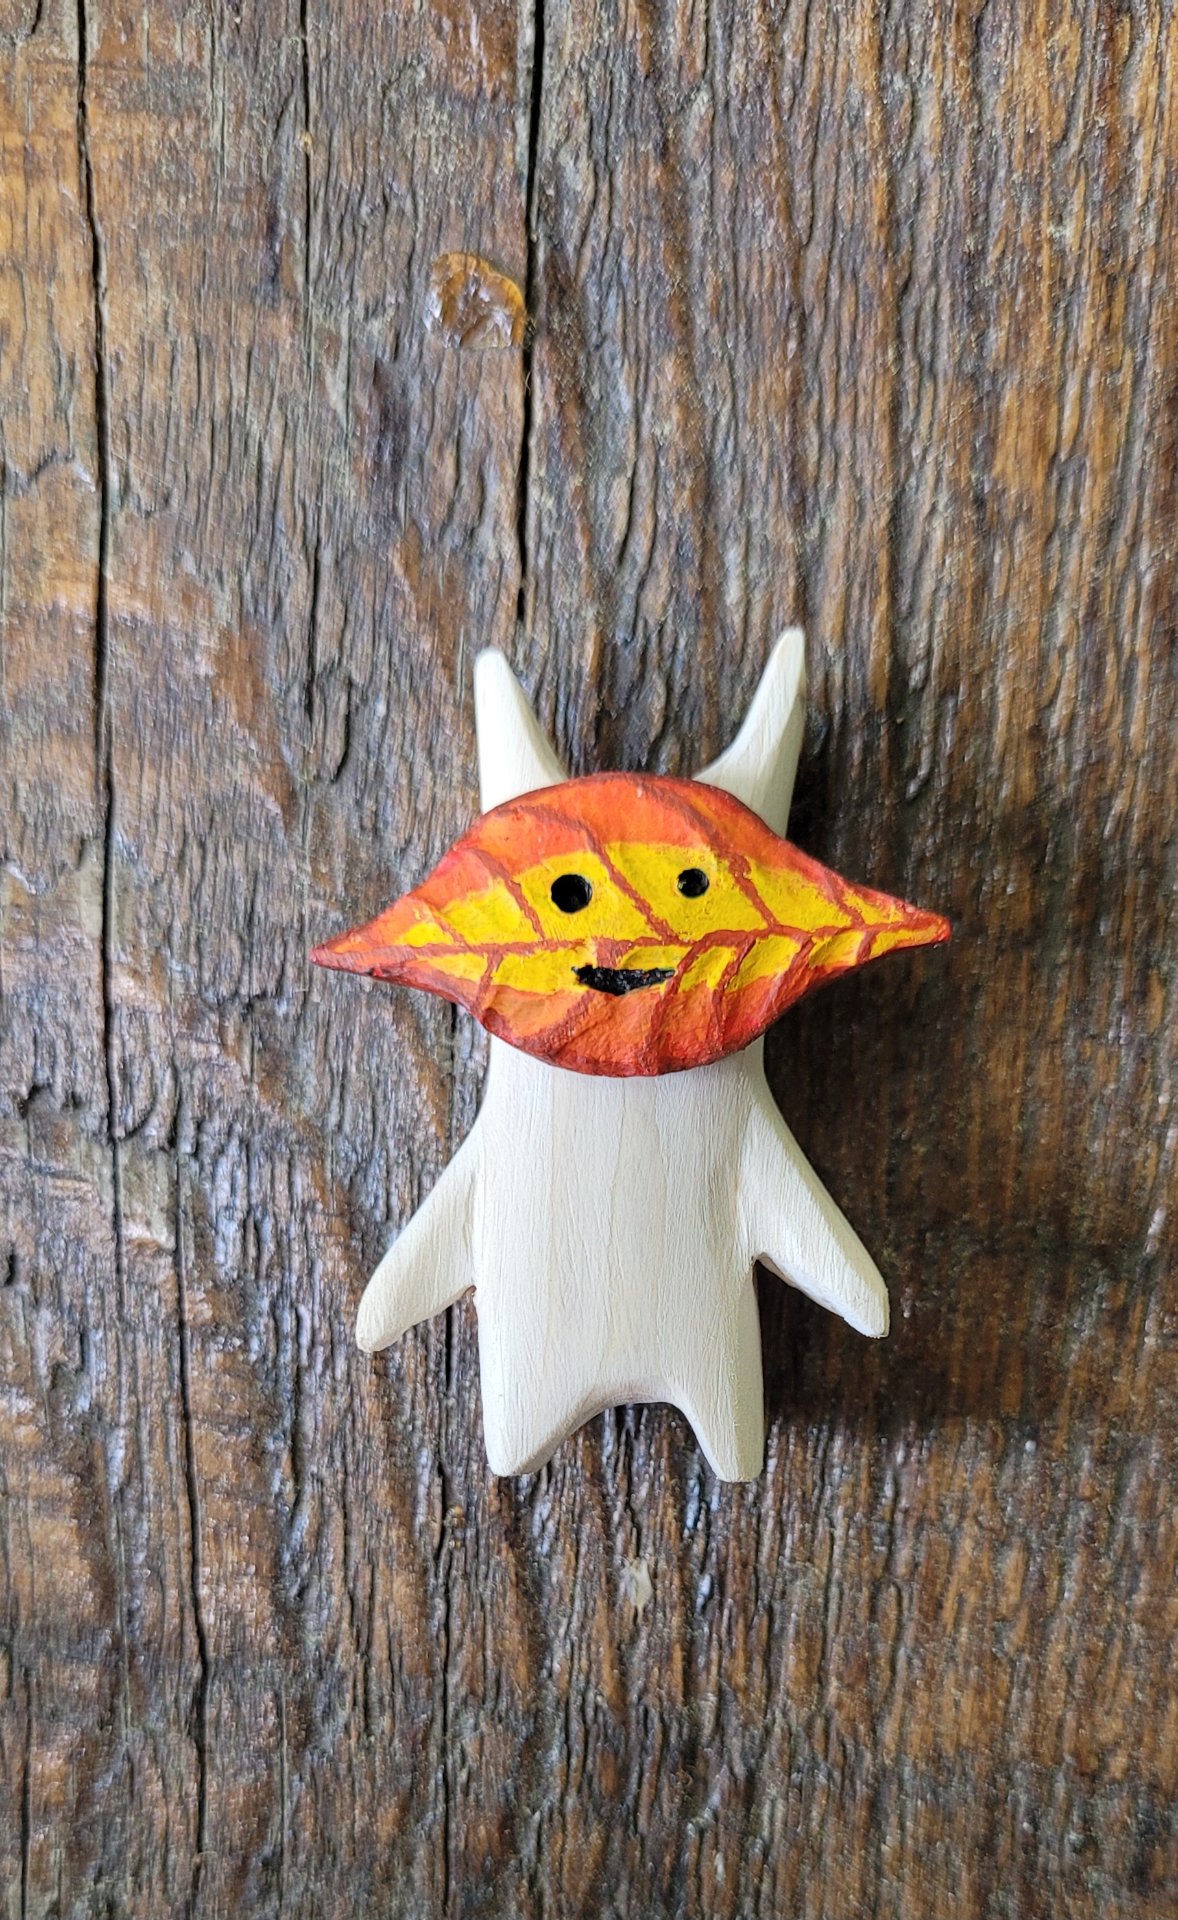
    Sometimes it turns out there isn't a korok in a piece of wood. Sometimes there's just a mask.

    the tall korok roughed into shape with the mask

    After the belt sander, I mostly use a knife and a dremel to shape them. Then a lot of sanding with sandpaper.

    the tall korok hiding in a bookshelf

    This was one of the best hiders out of the batch - unfound for months!

    a tiny korok beside a giant leaf mask, both roughcut

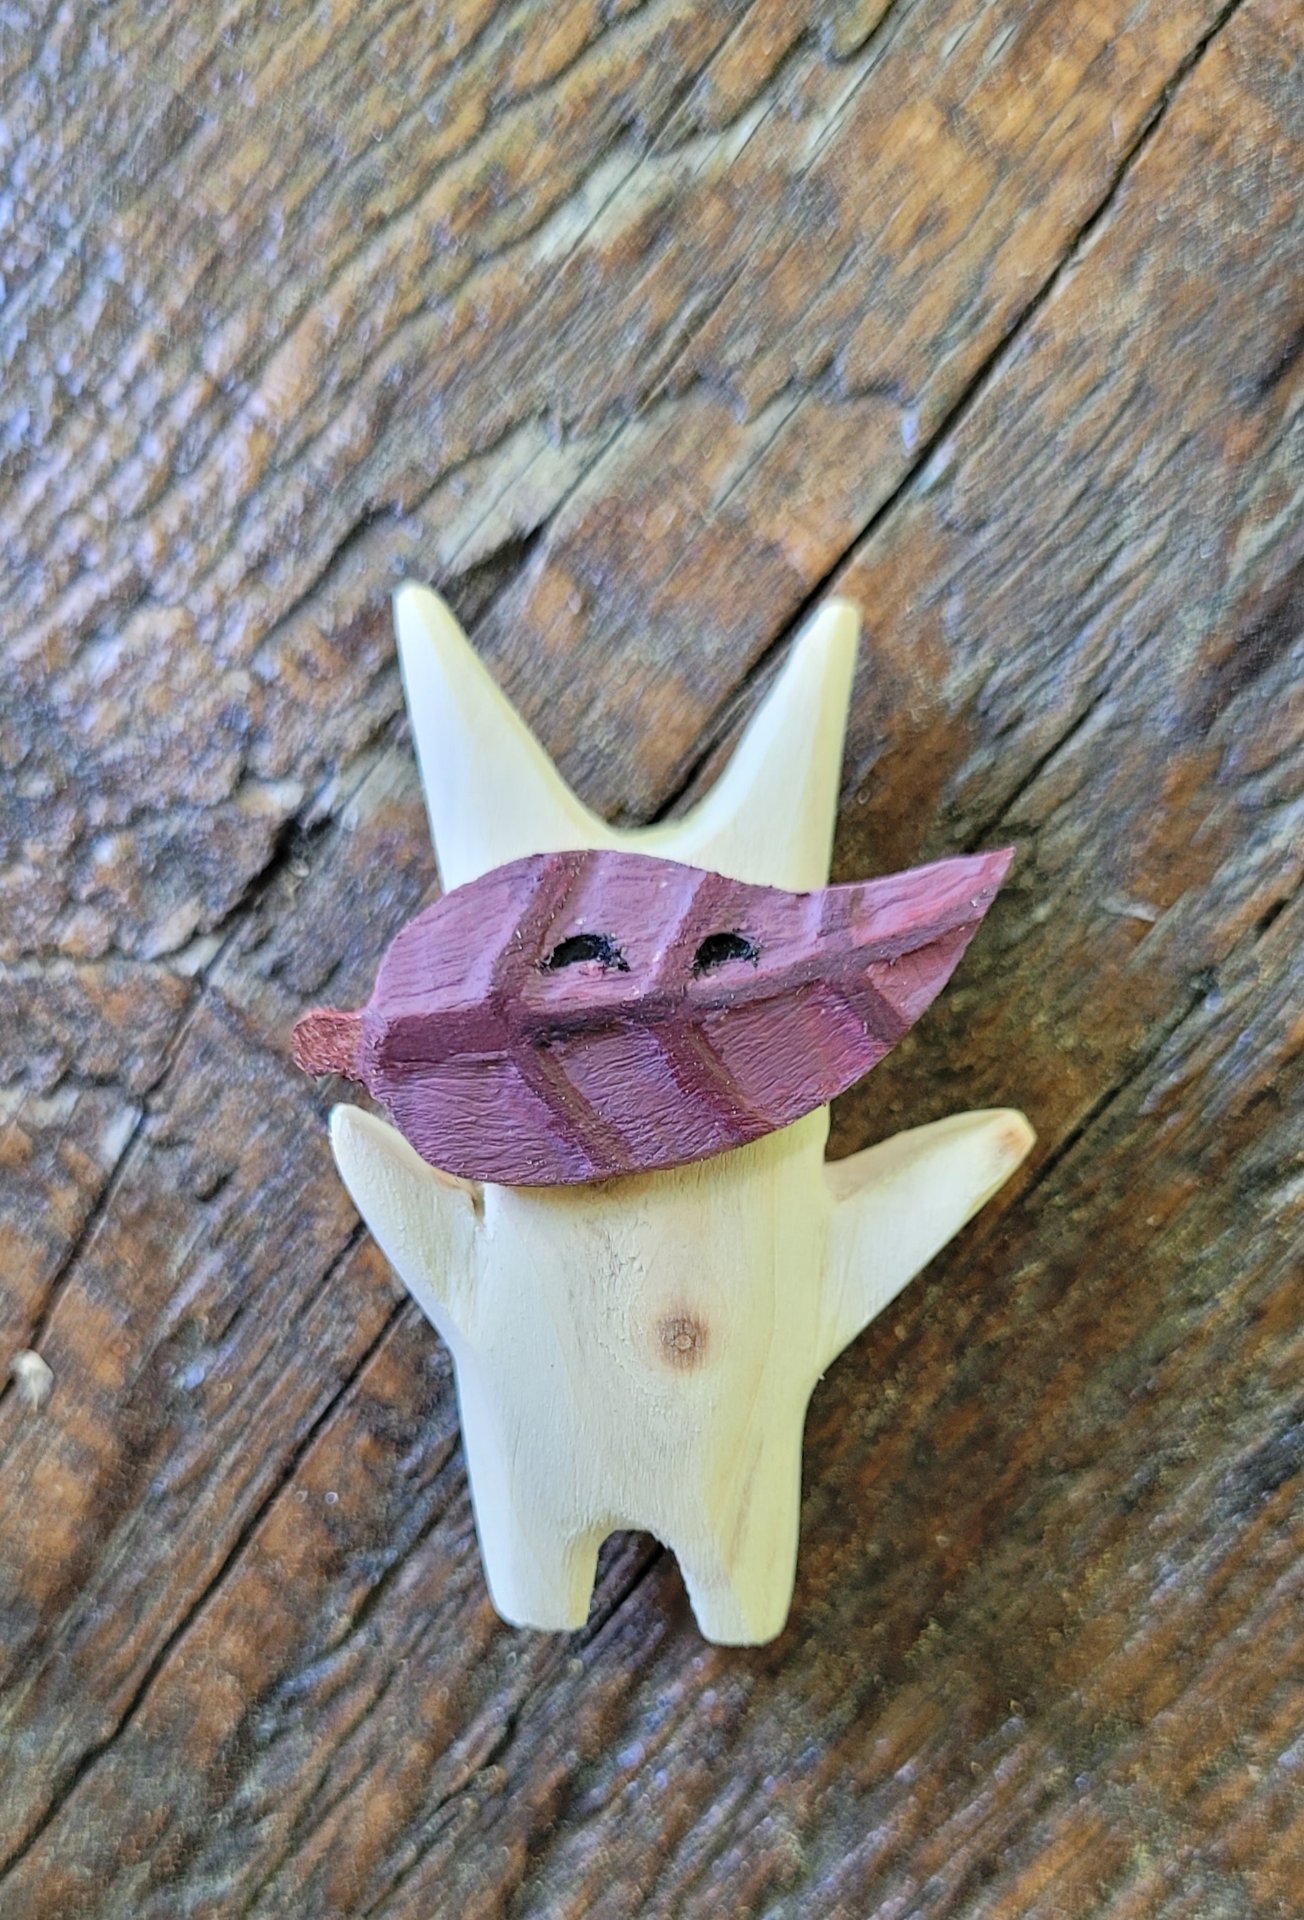
    The masks and detail work are my favorite. I love trying to get them to look like real leaves

    the tiny korok wearing his roughcut mask, which has been shaped down a bit

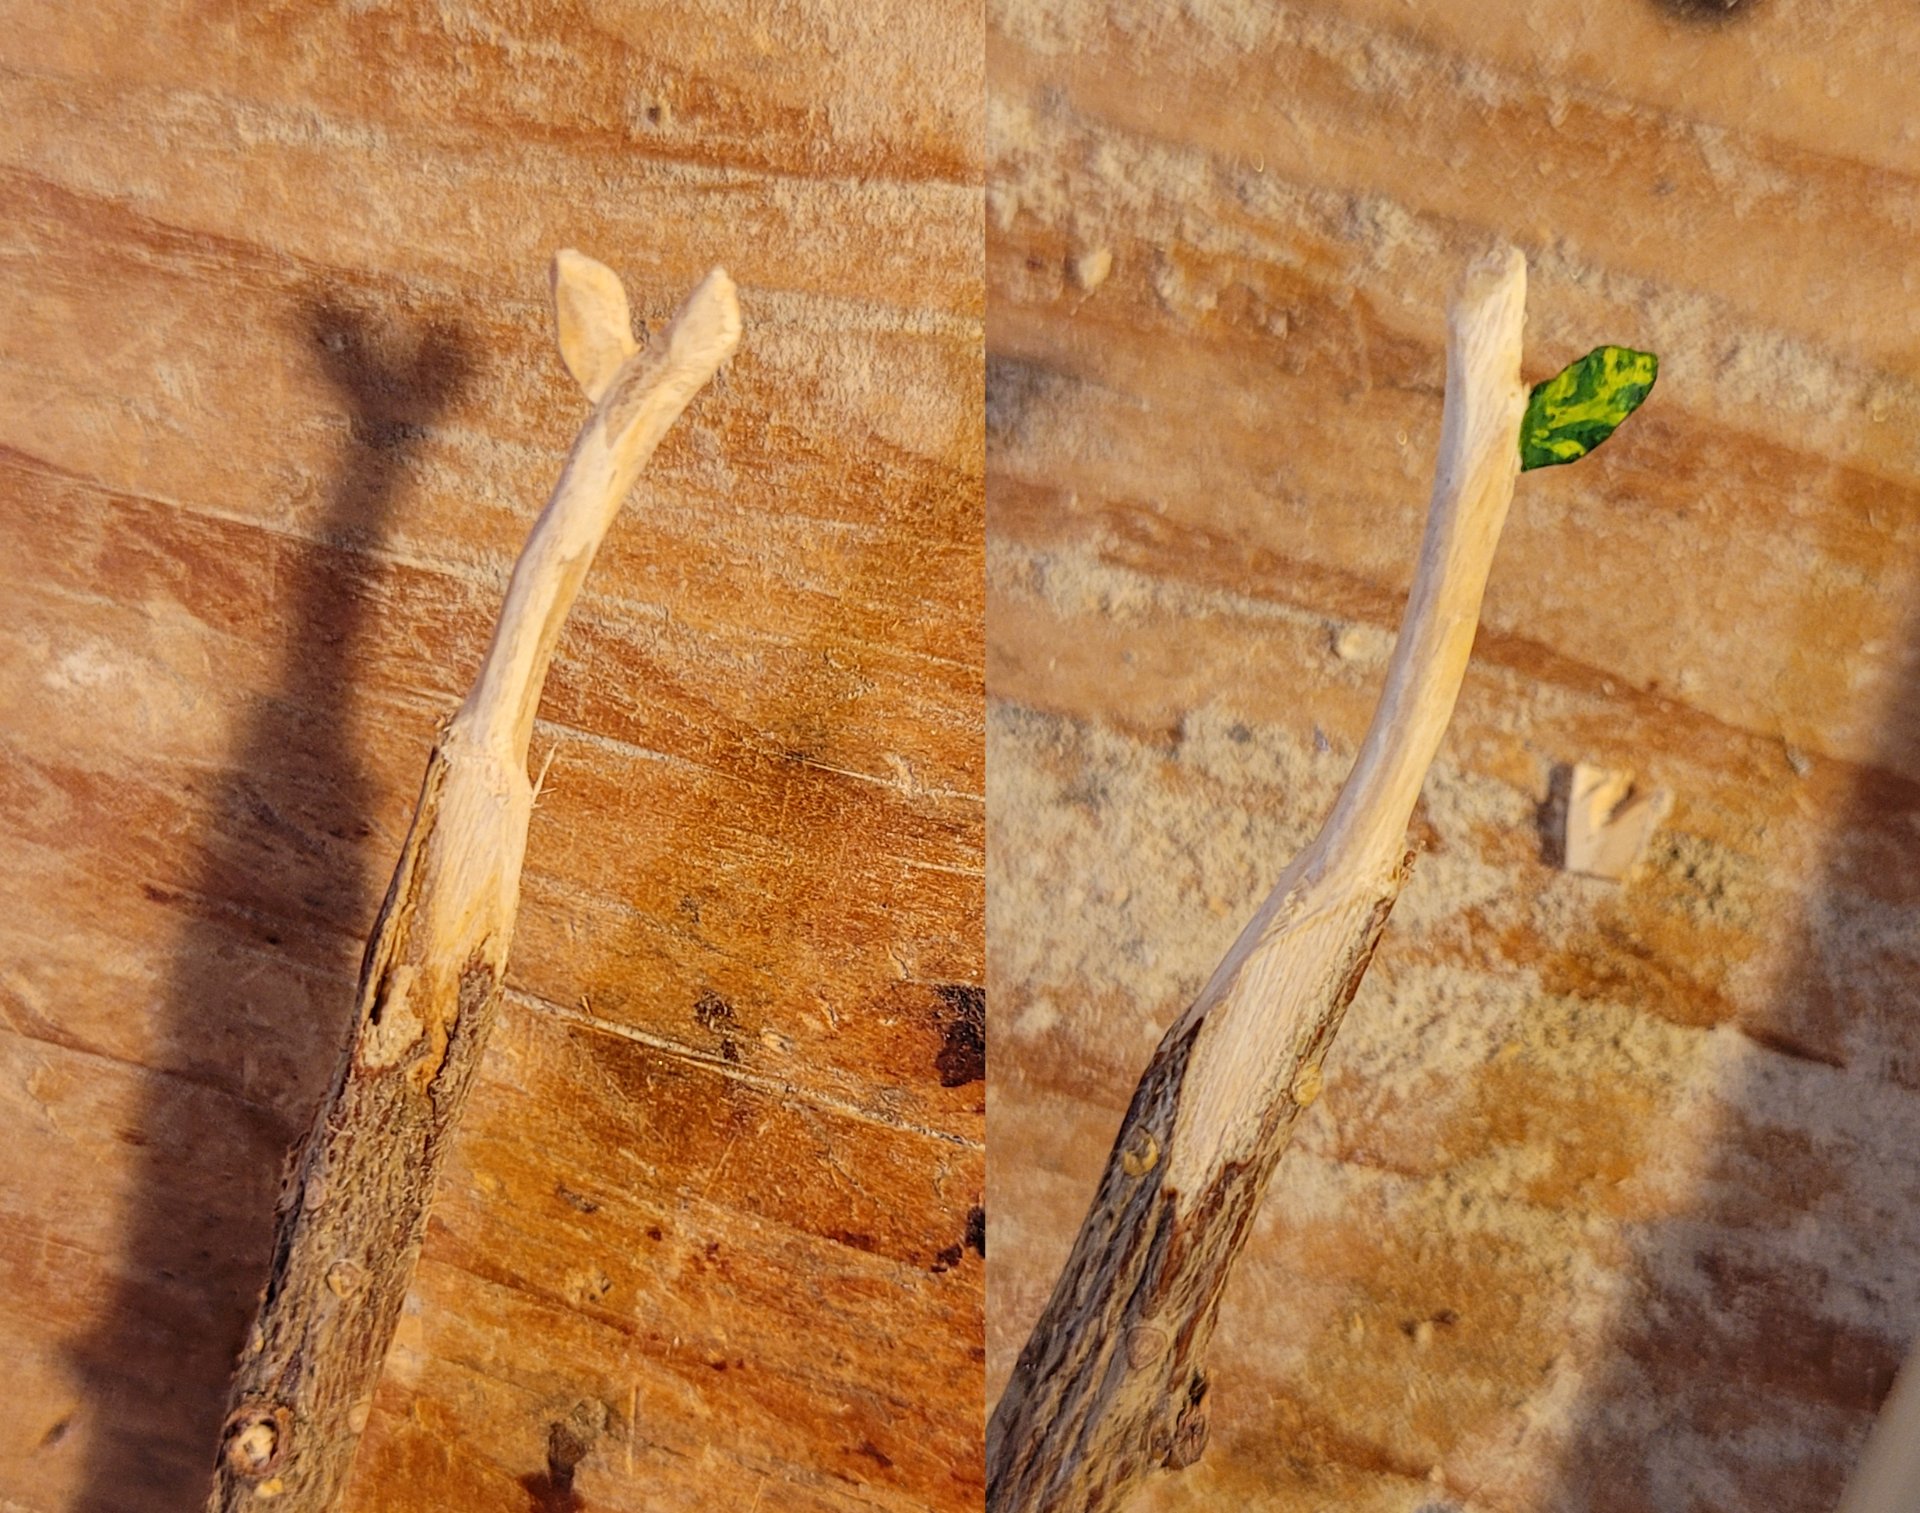
    a branch from the christmas tree being carved down to look like a stick with a leaf at the end

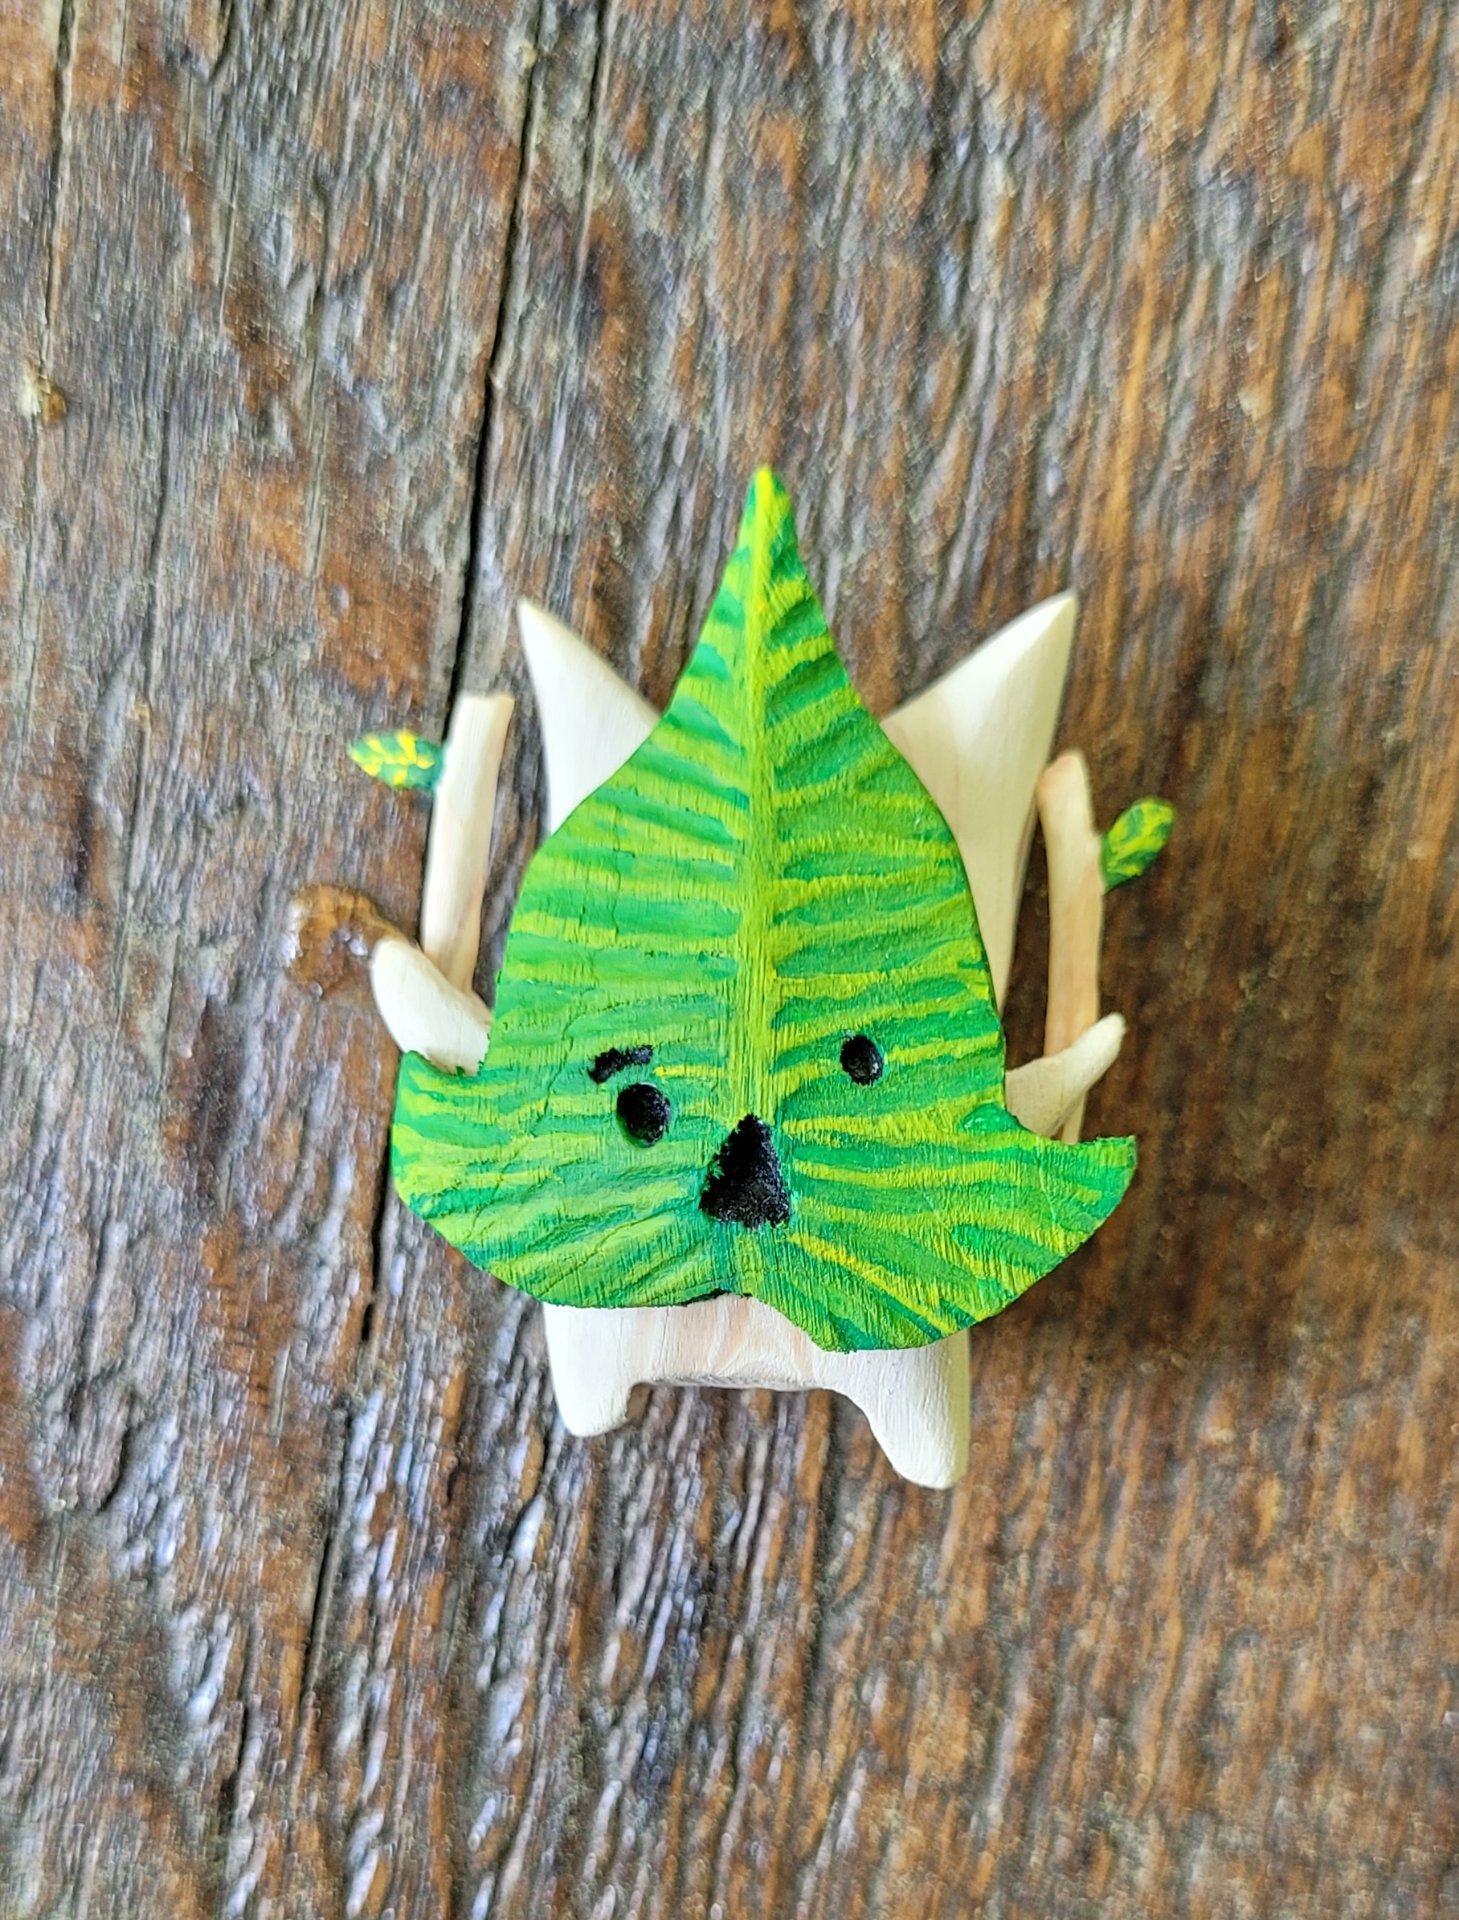
    I'm not as good at painting as I was when I was a kid, but I can still do a bit of detail work when I have to.

    the finished korok all painted up and ready to hide

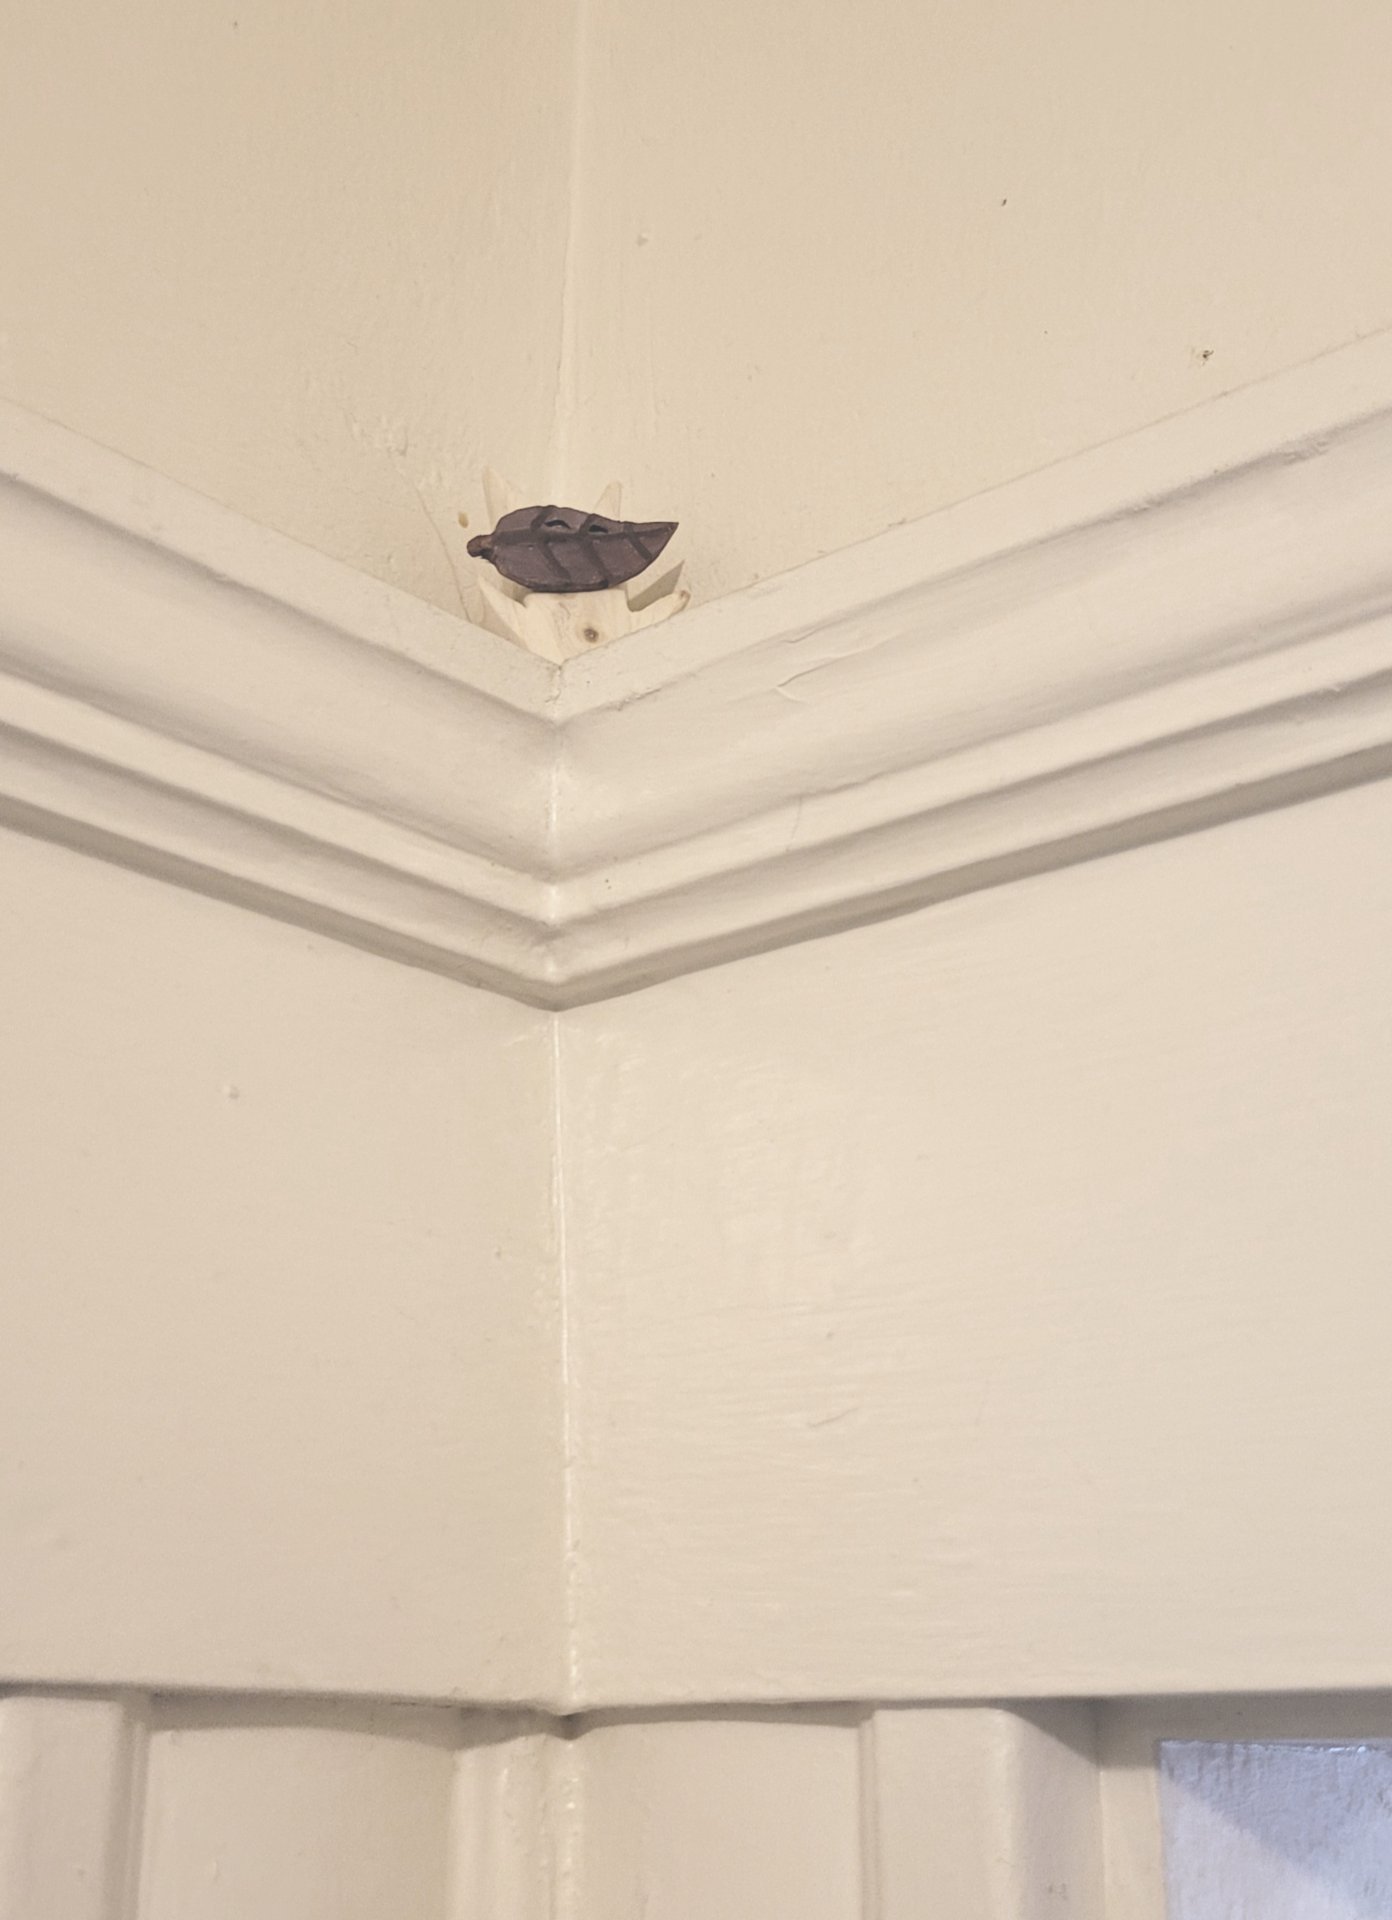
    the finished korok hiding on top of a window frame

    roughcut

    carved and sanded down

    with the mask painted

    assembled

    After I glue the mask on, I set them on a bench outside to dry - I remember super glue fogging my warhammer miniatures, and airflow is supposed to help.
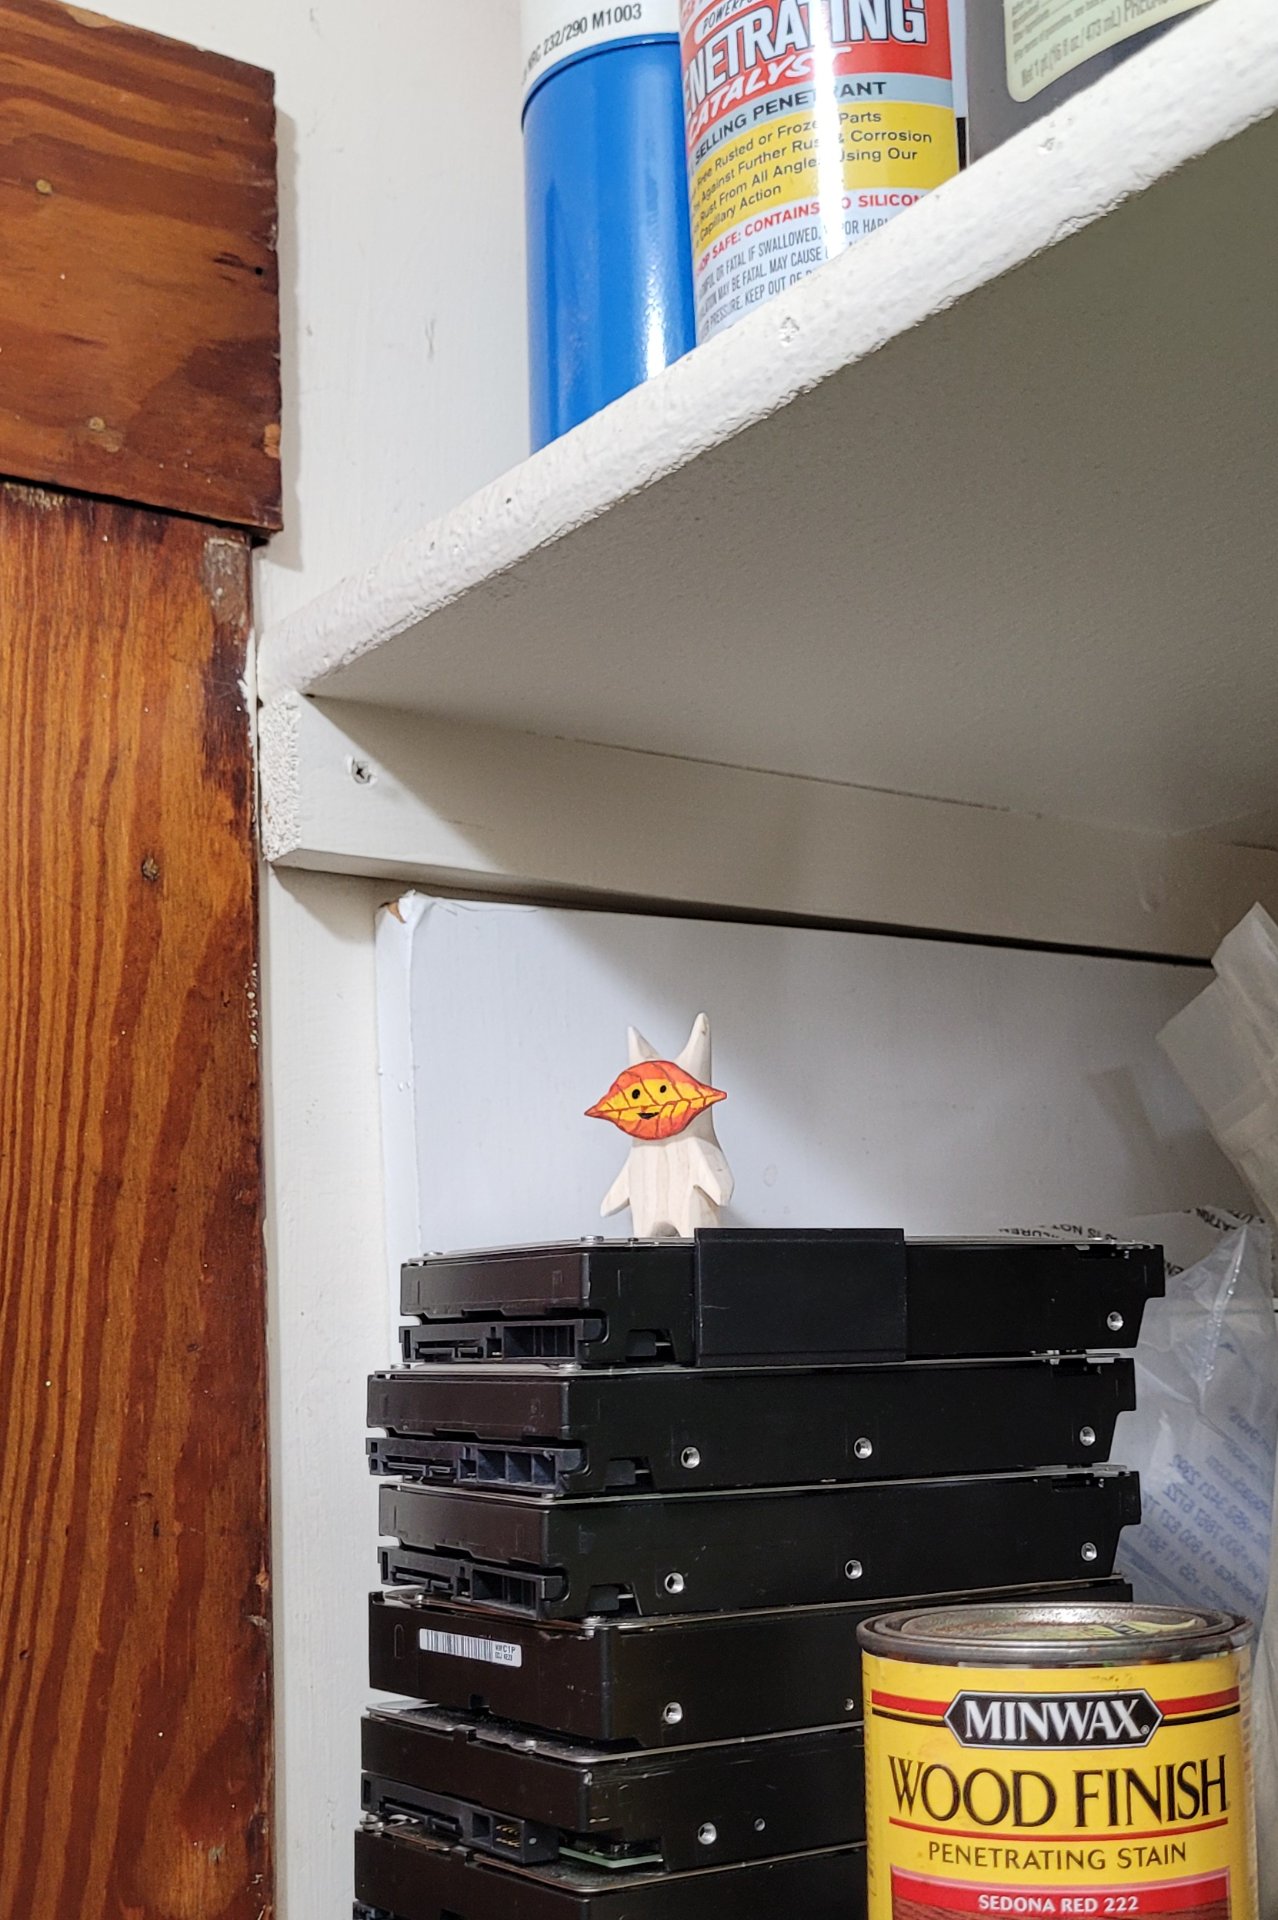
    the finished korok hiding on top of a pile of hard drives on a shelf

    I think this one was her favorite so far

    roughcut

    A little variety goes a long way - so I tried a sitting korok

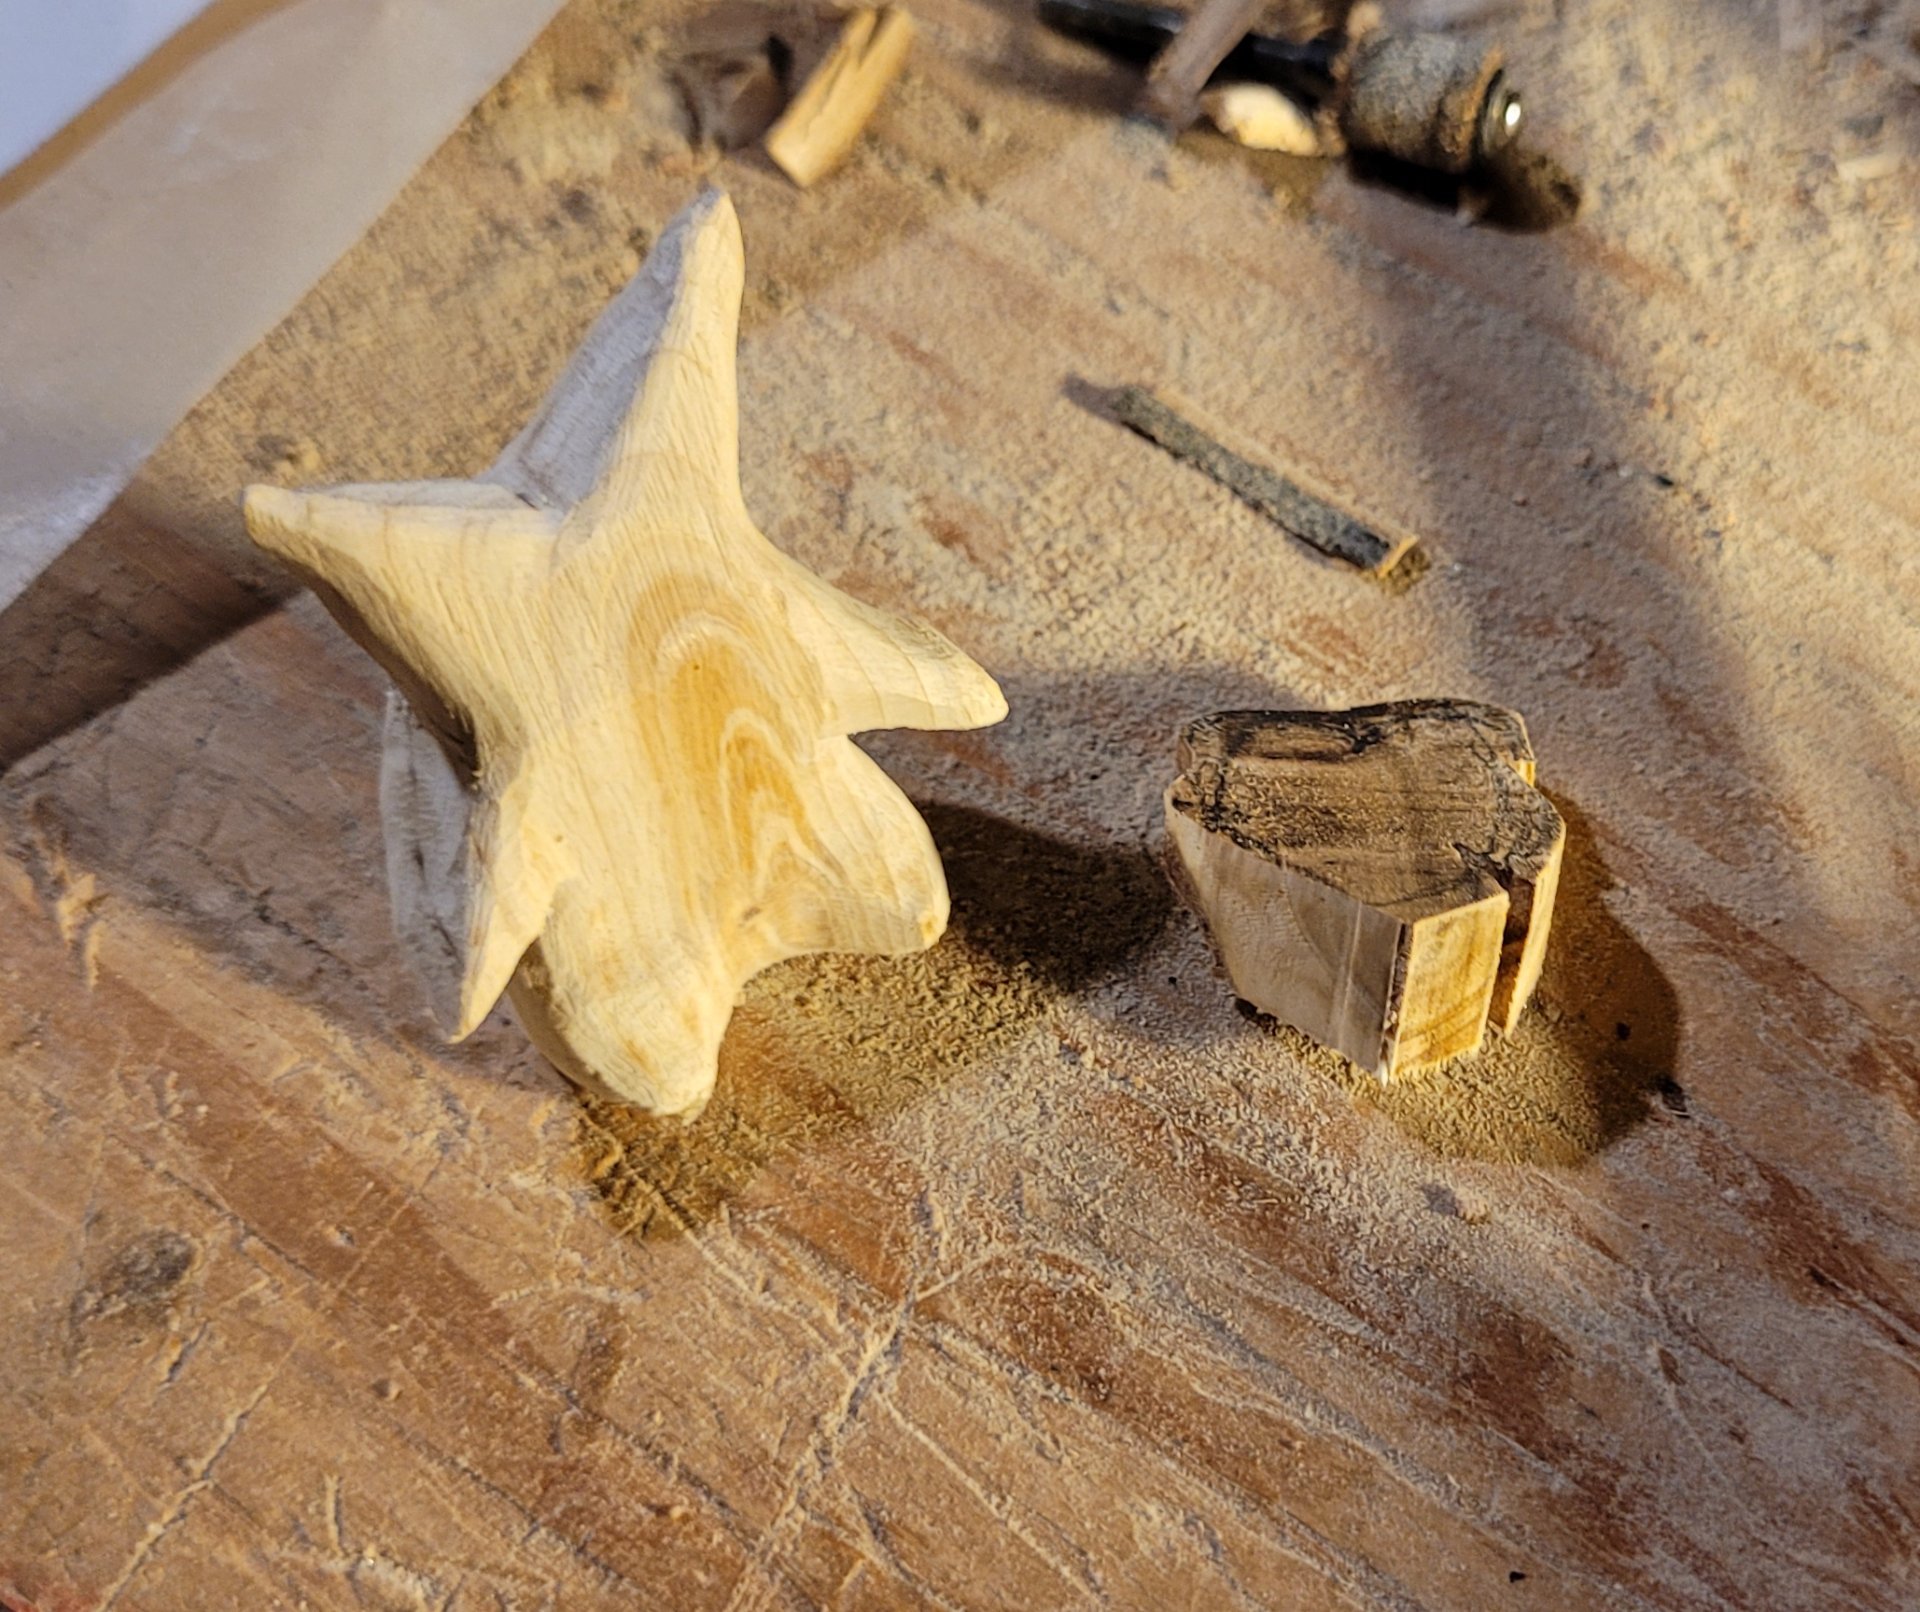
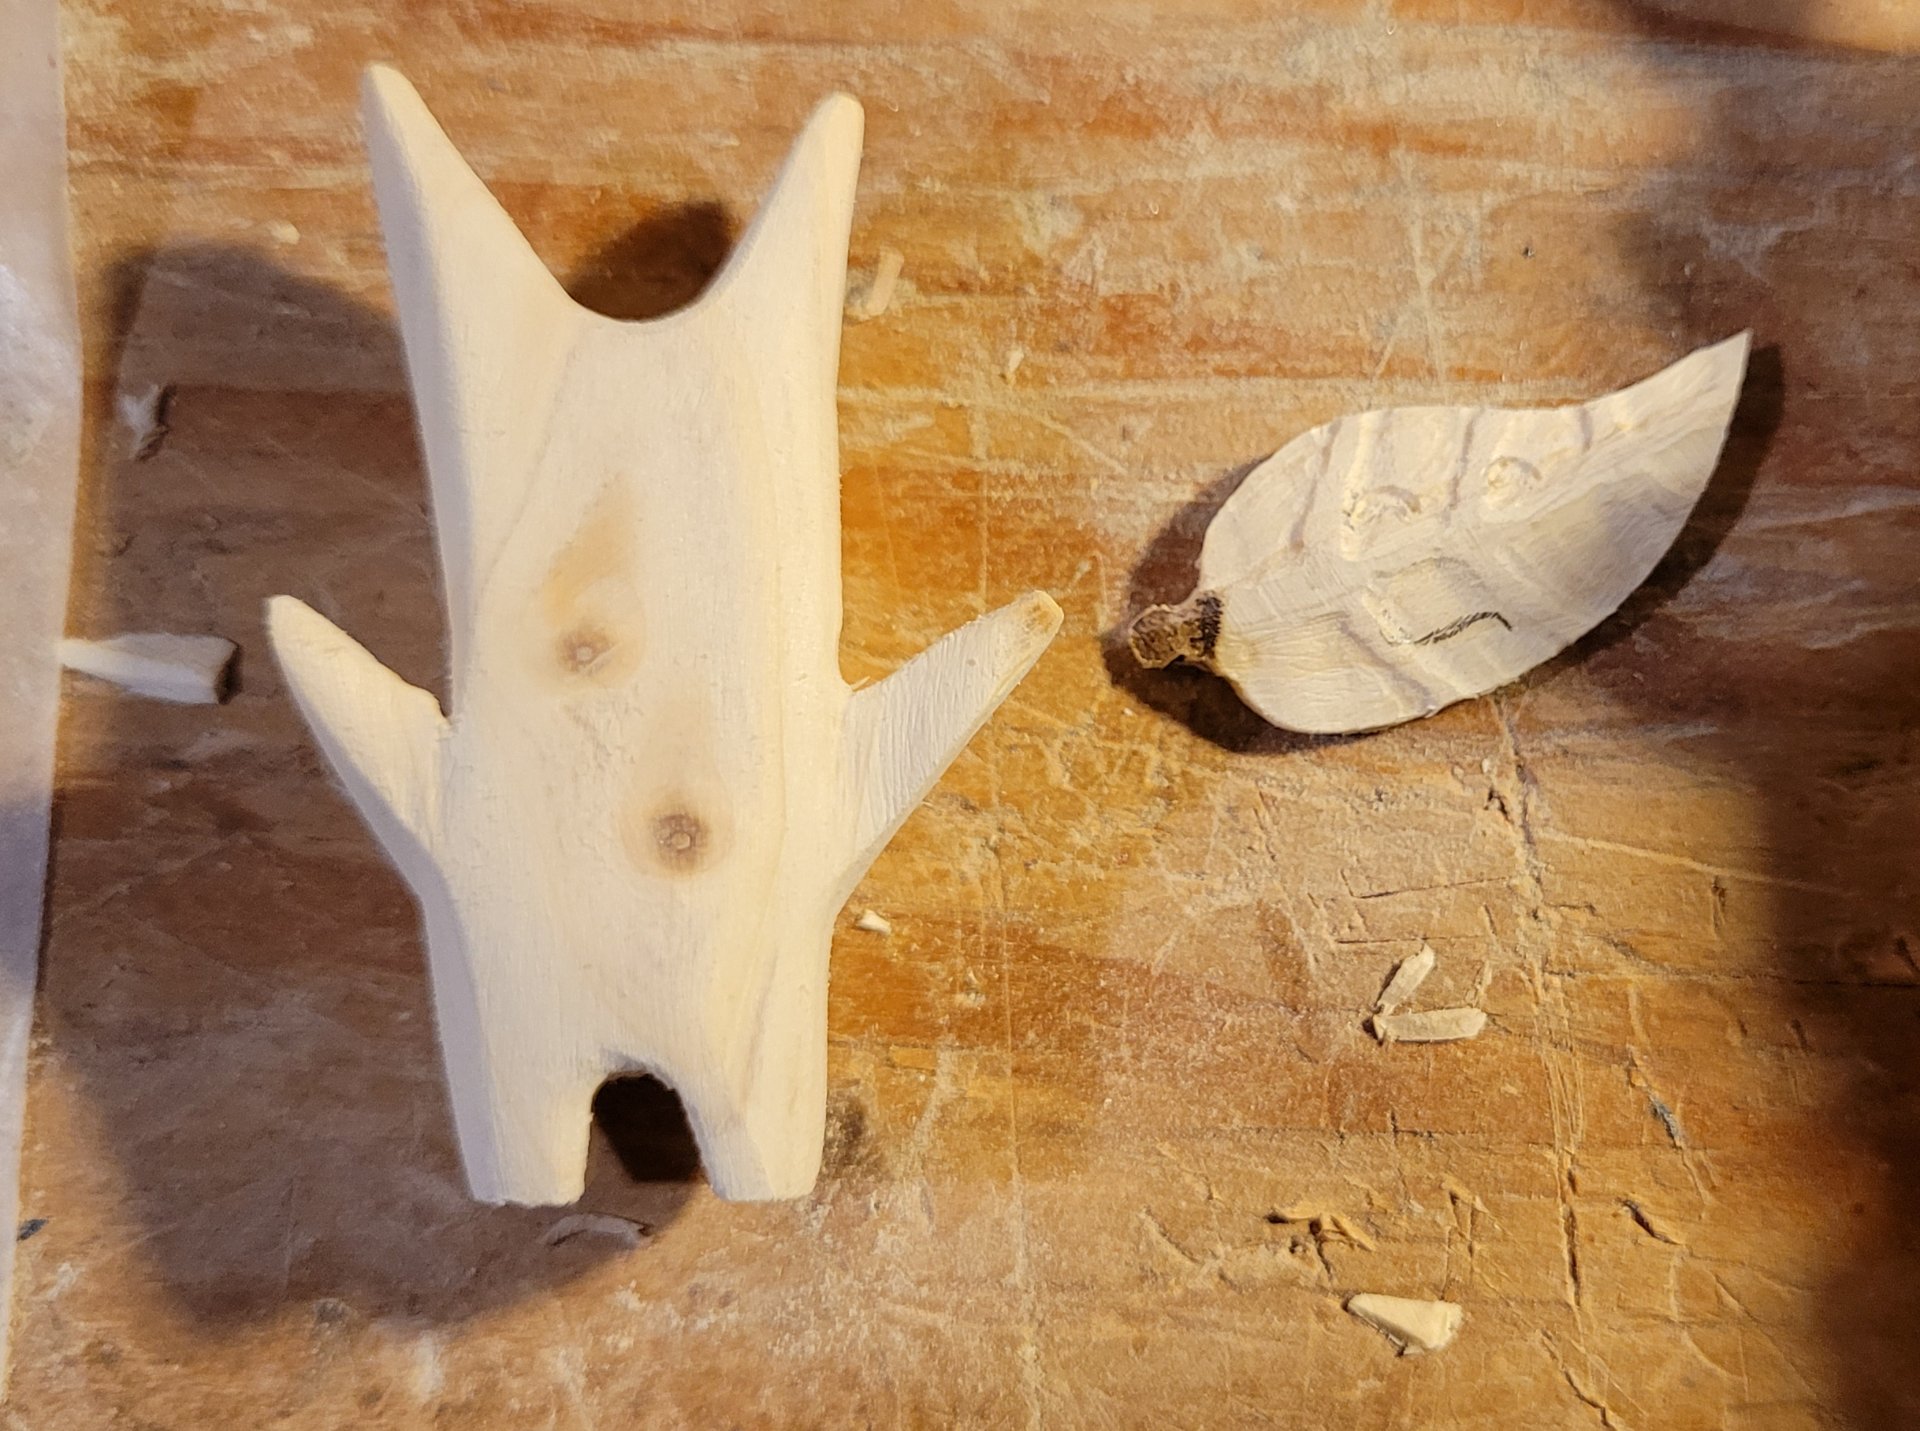
    the korok carved down, with its mask nearby

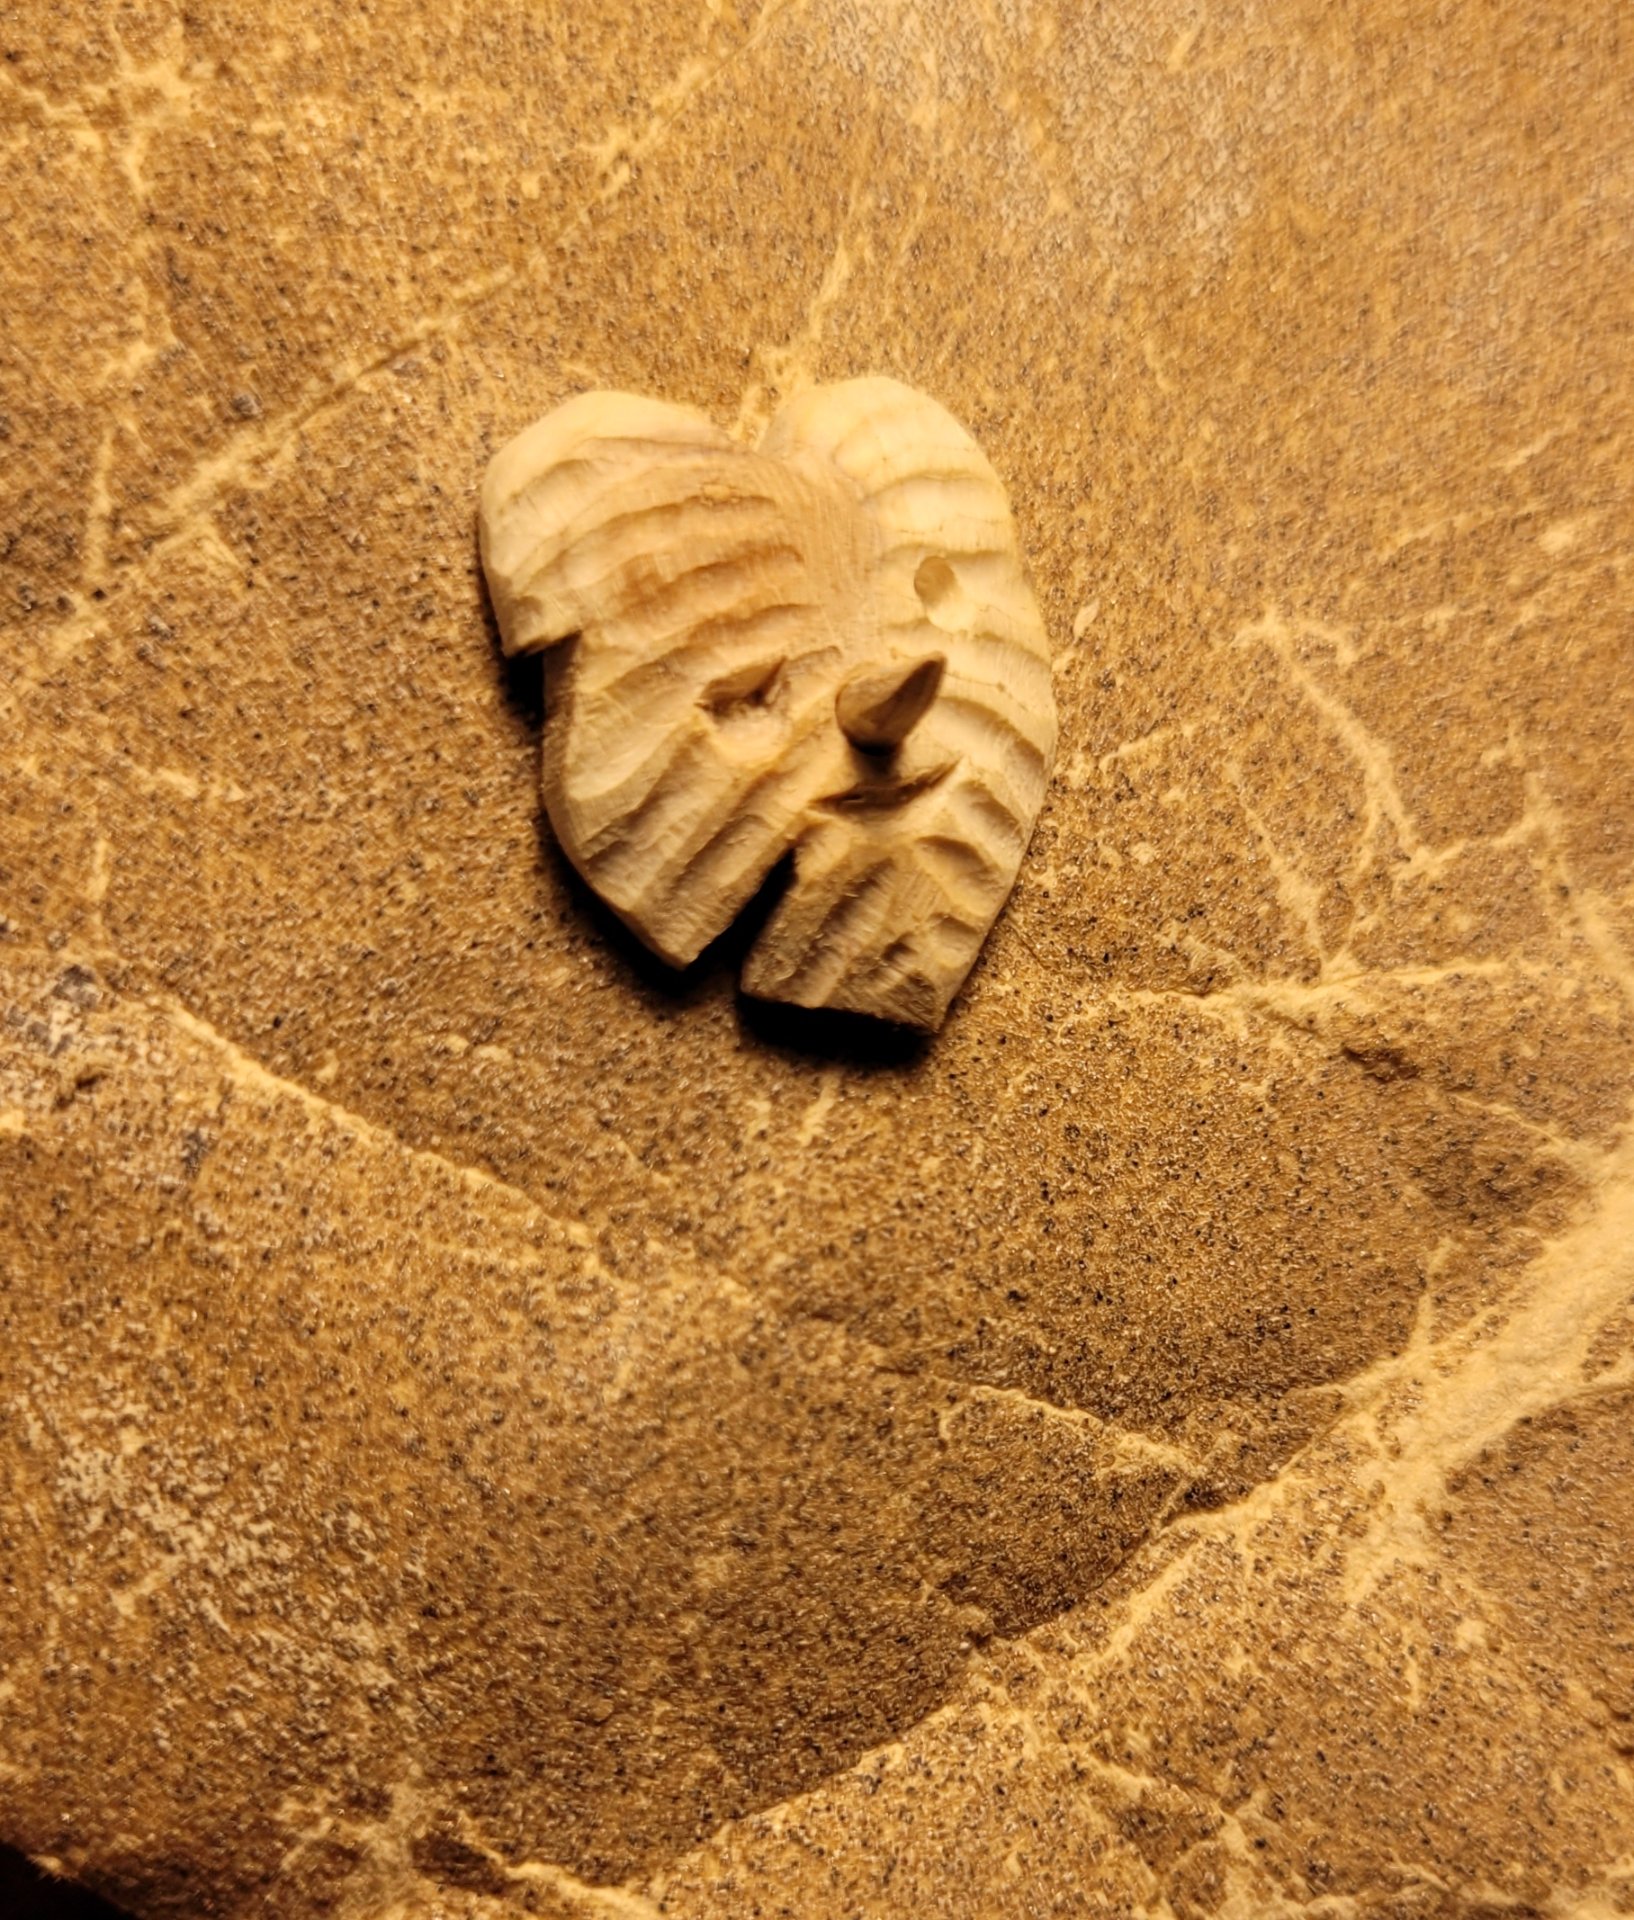
    the carved mask, with a stick nose glued into a hole in the front

    I think this was the first time I tried adding a nose/branch to the mask too

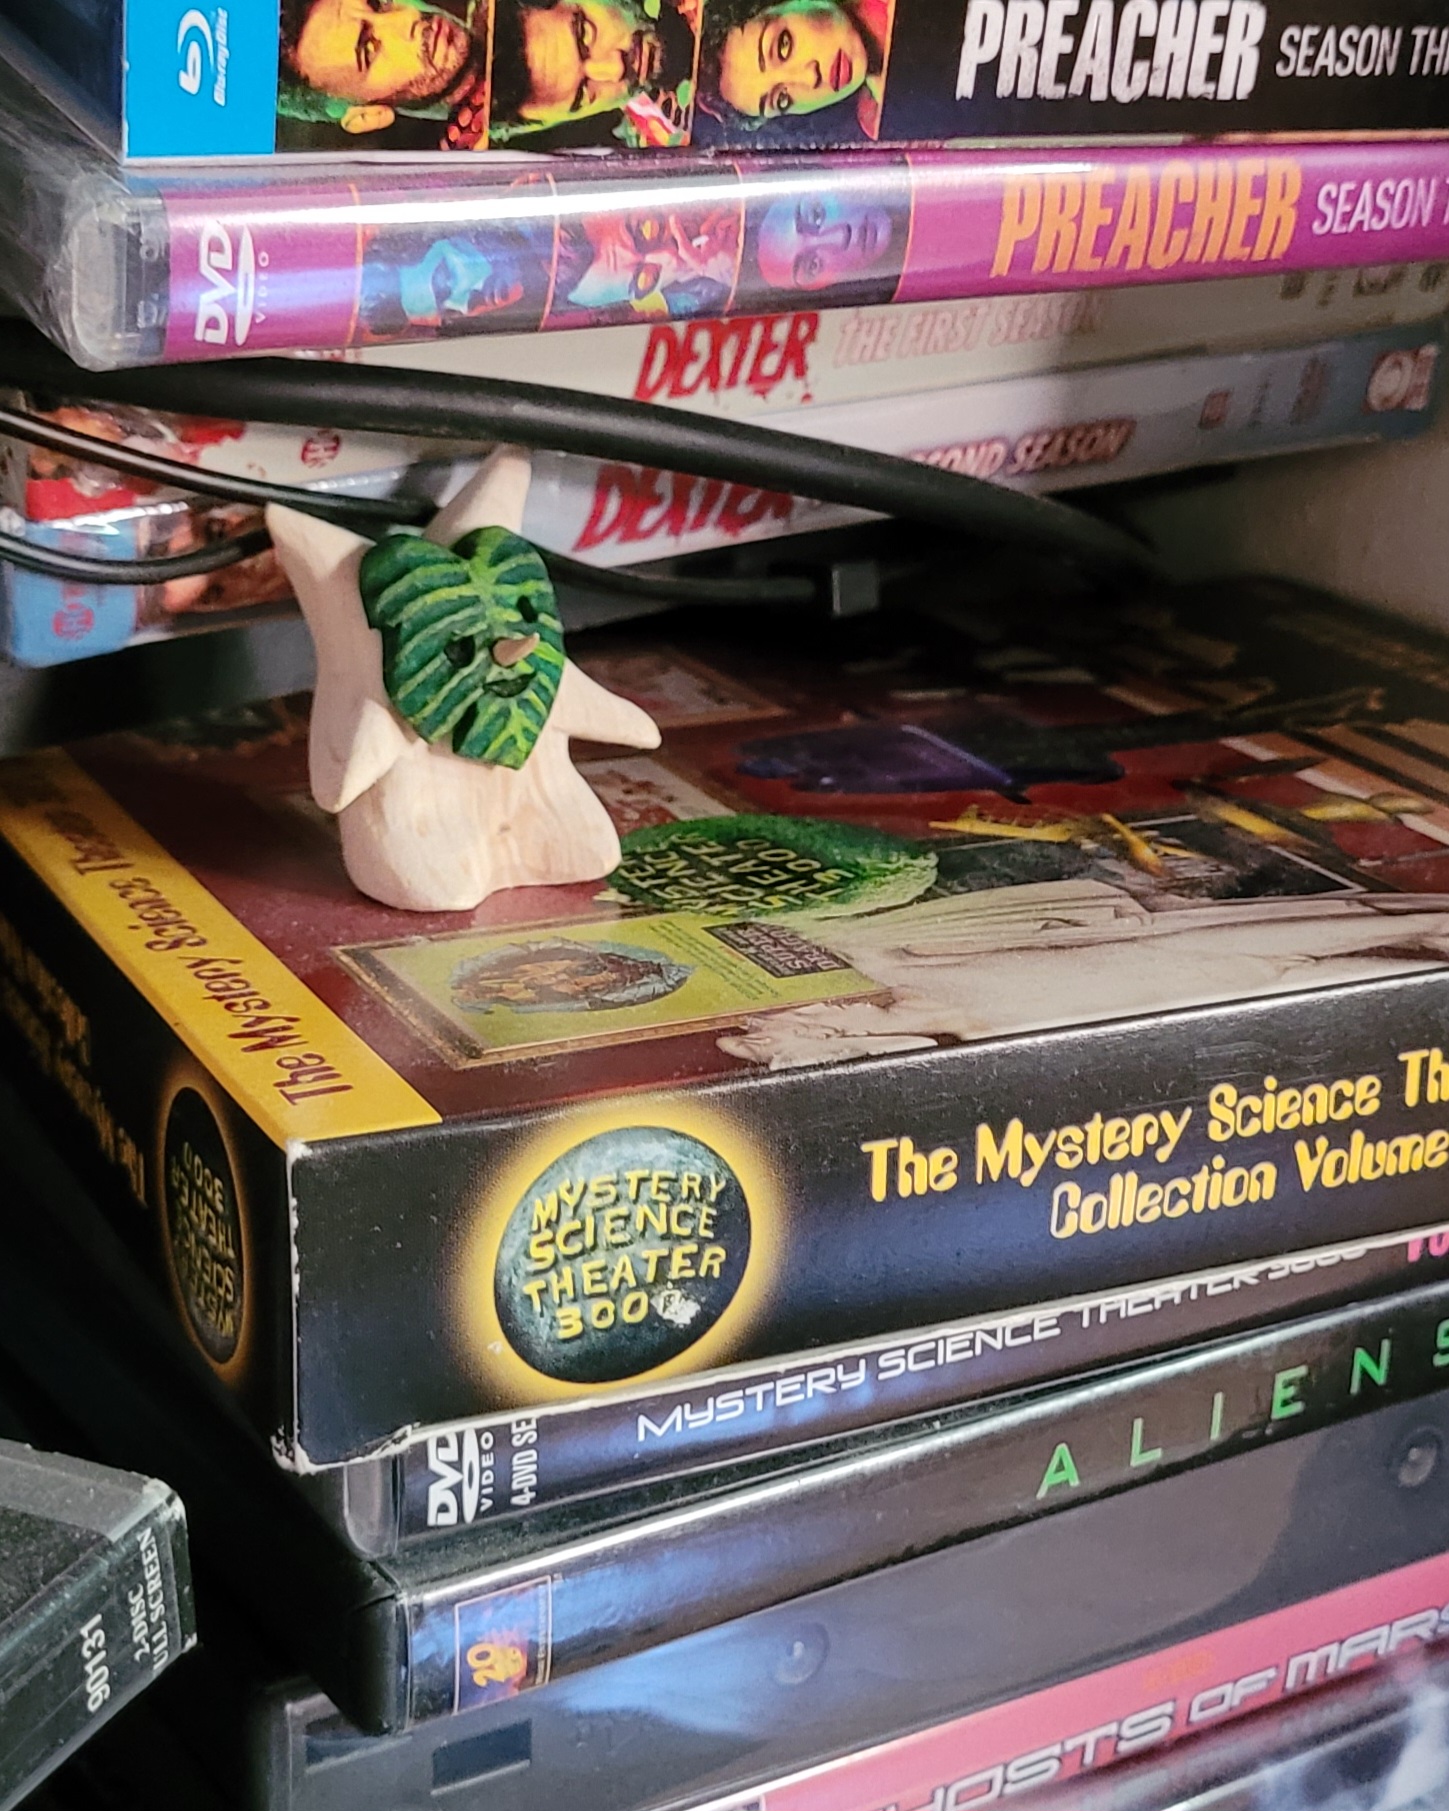
    the finished korok sitting on a pile of DVDs

    I drill through the mask for the branch/nose, and use the same dab of glue to attach the nose as to fasten it to the korok, after the mask is painted.

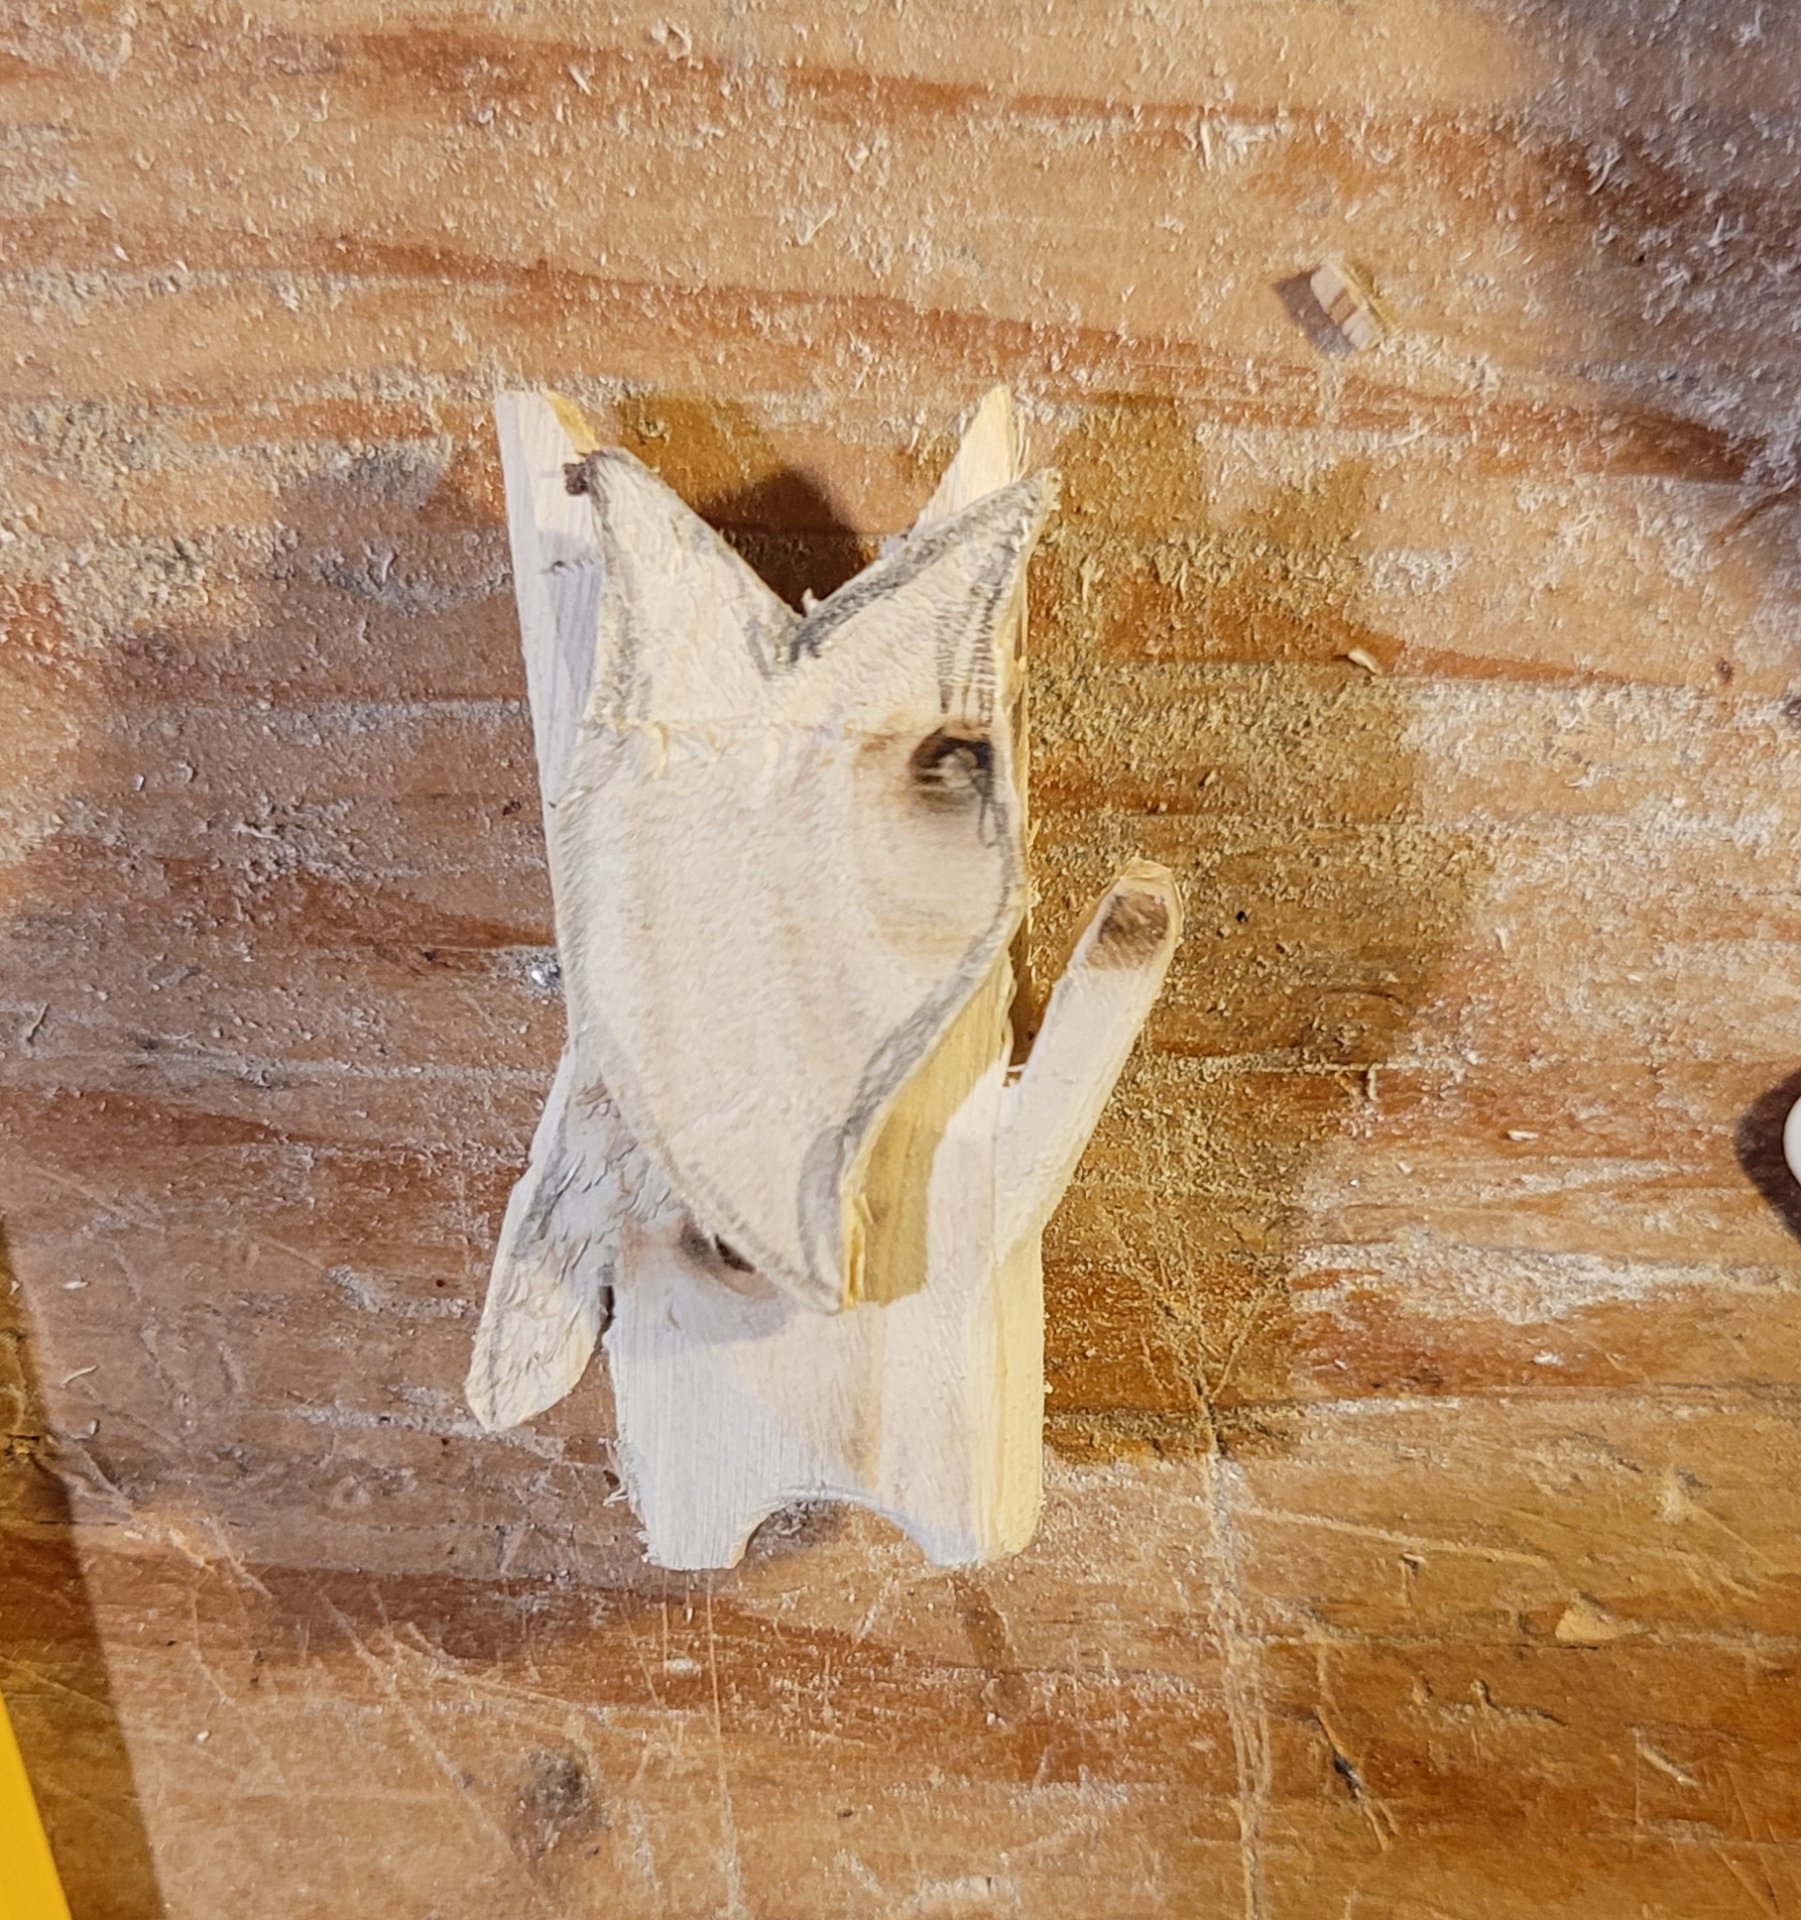
    roughcut waving korok with pointy mask

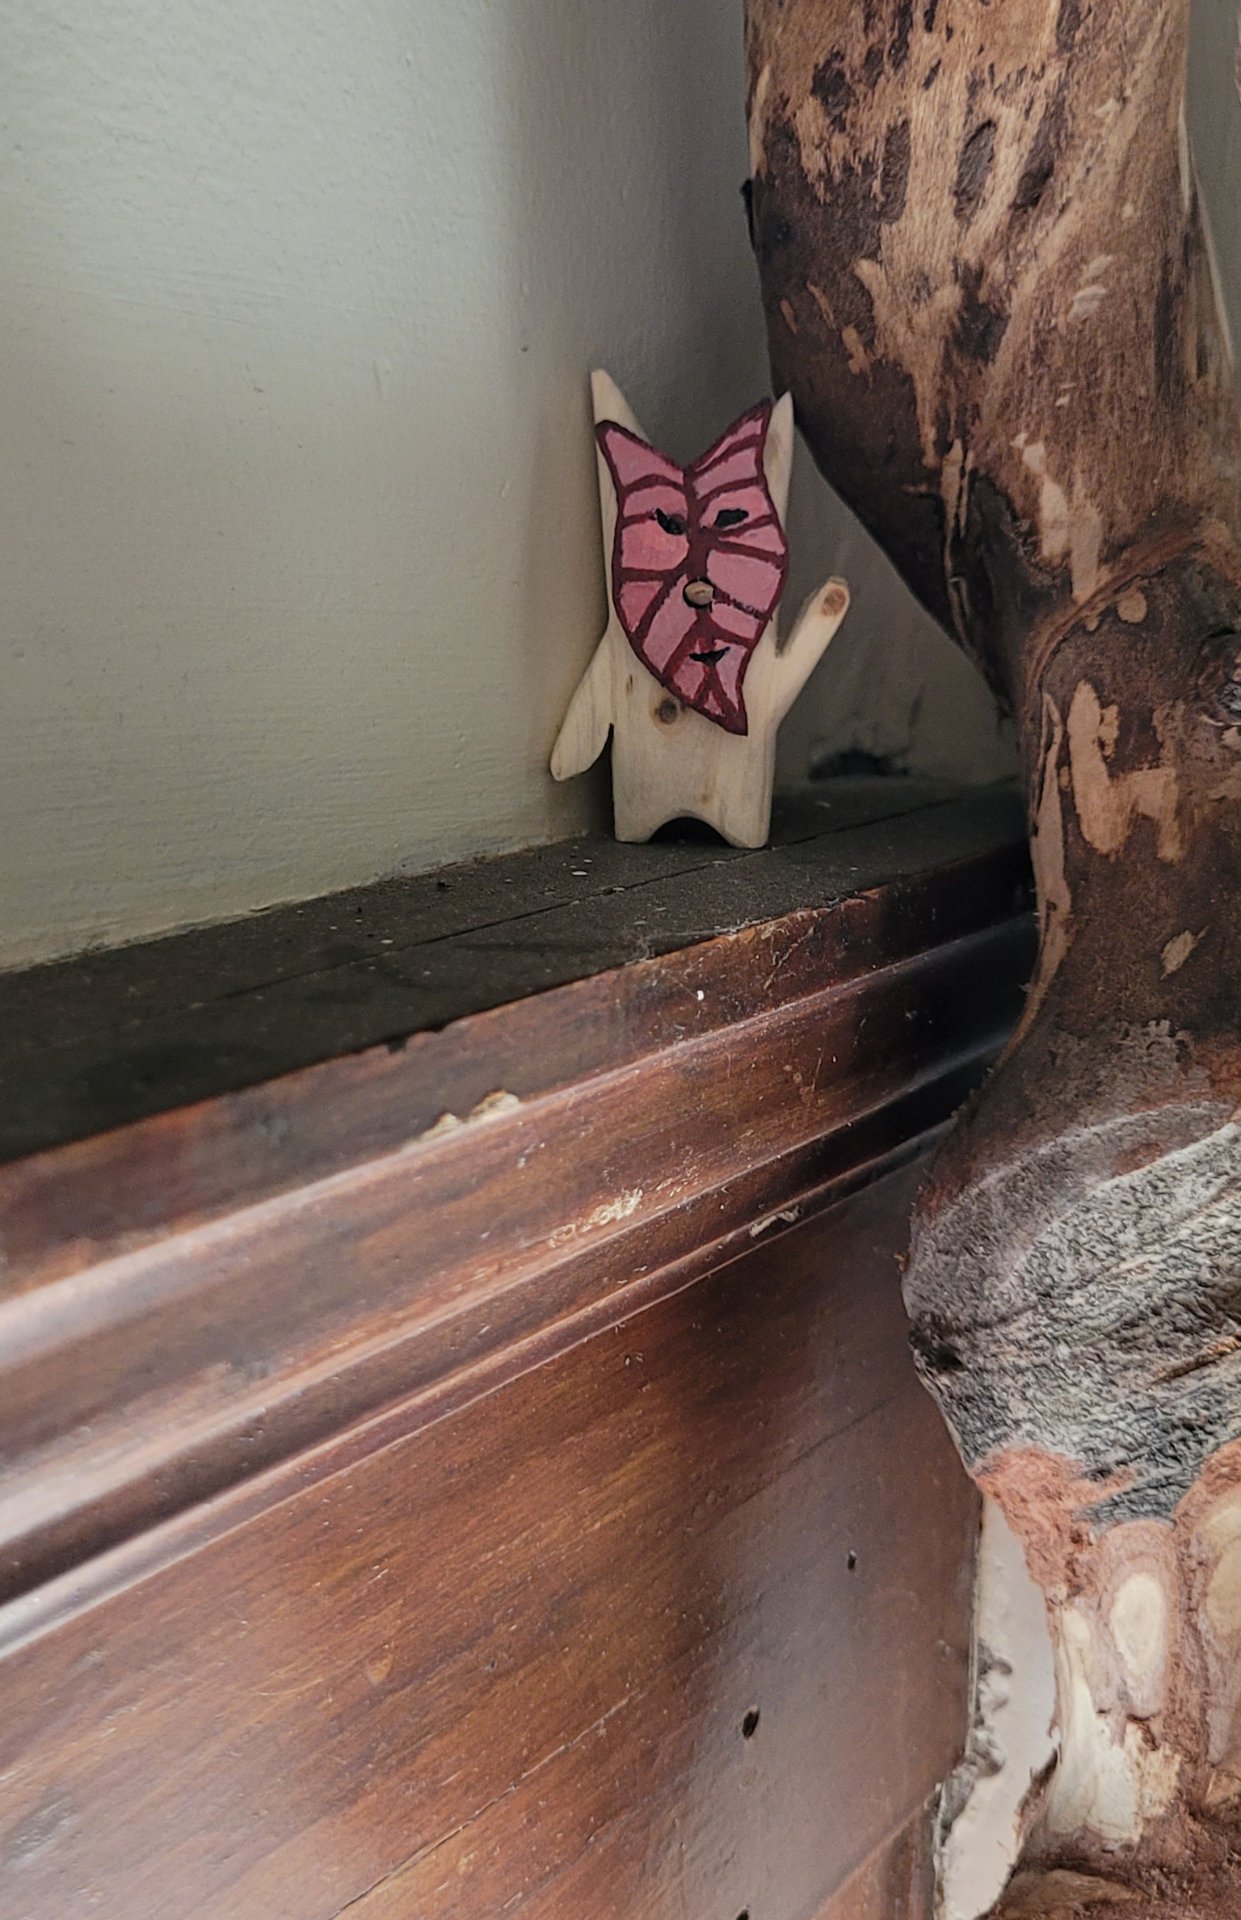
    the finished waving korok, hiding behind a walking stick

    a small, excited korok almost finished

    This was my fastest, I think a bit over two hours?

    the painted, assembled version

    hiding

    She spotted this guy instantly. That was how she found out I'd been doing this for over a week. To be fair, our house is cluttered and we're both pretty busy.

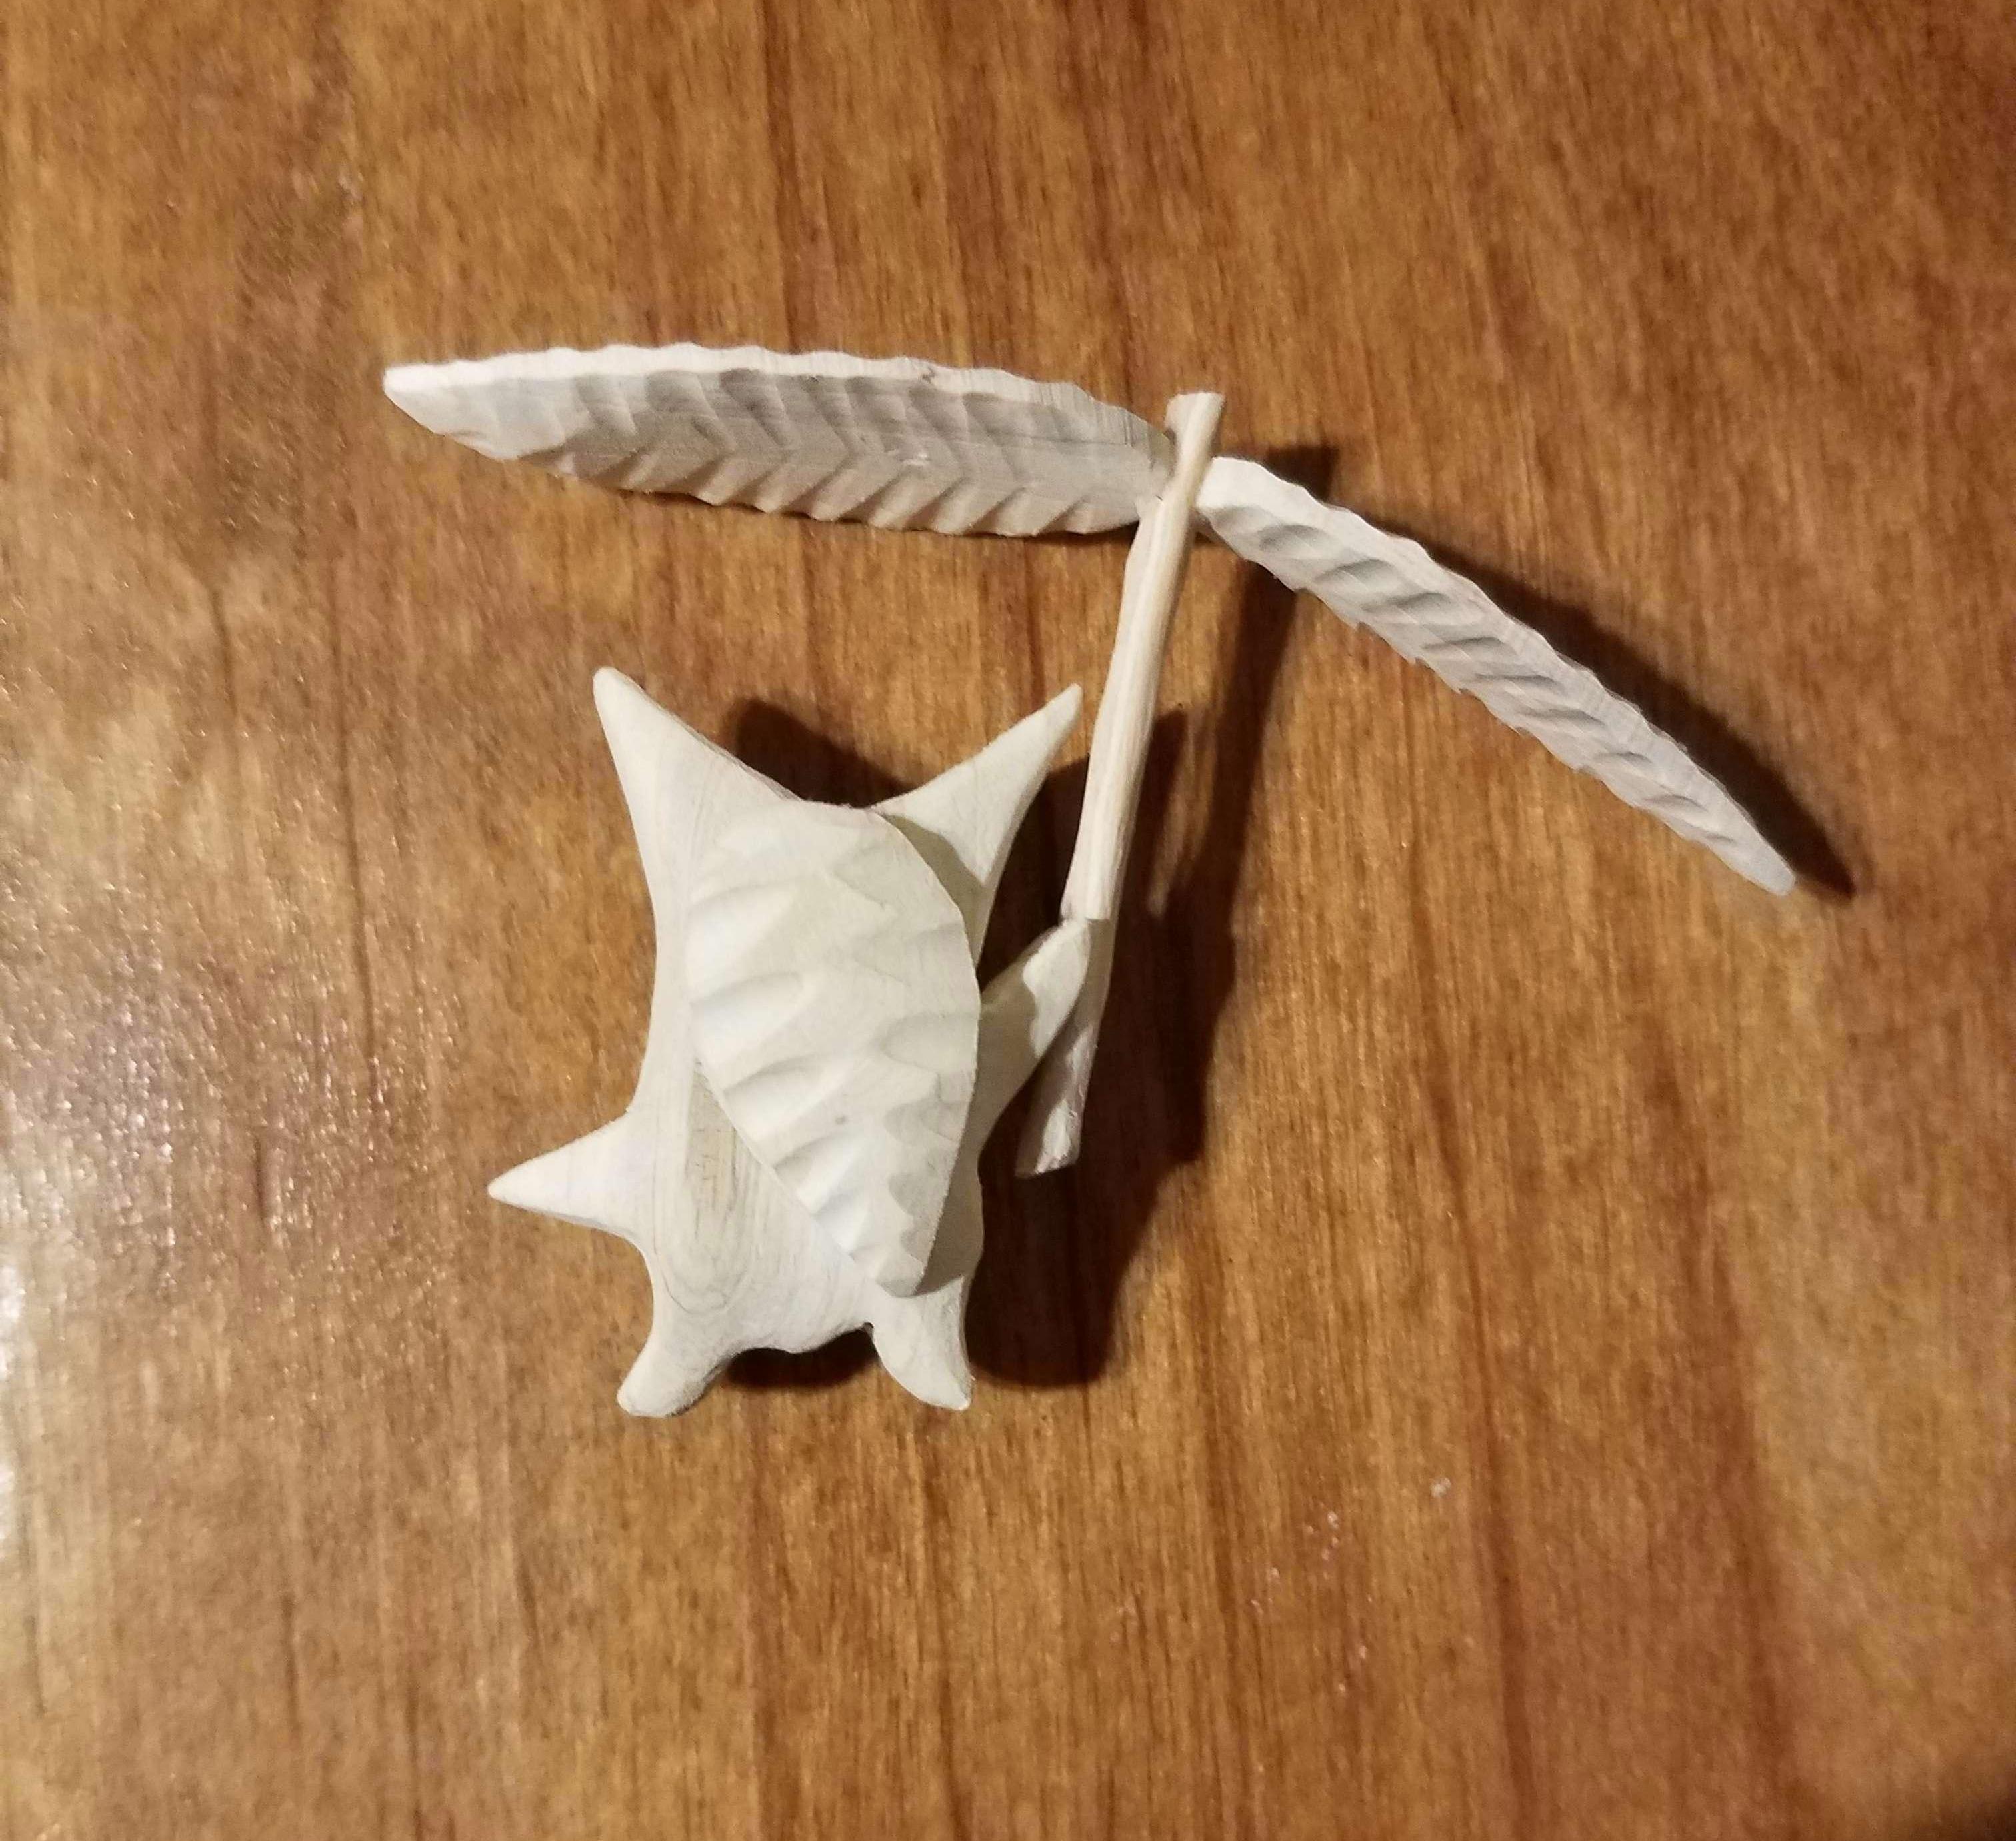
    the unpainted korok with a propeller leaf

    The ones holding things take a bit longer to make, but a little variety helps a lot with keeping the carving interesting.

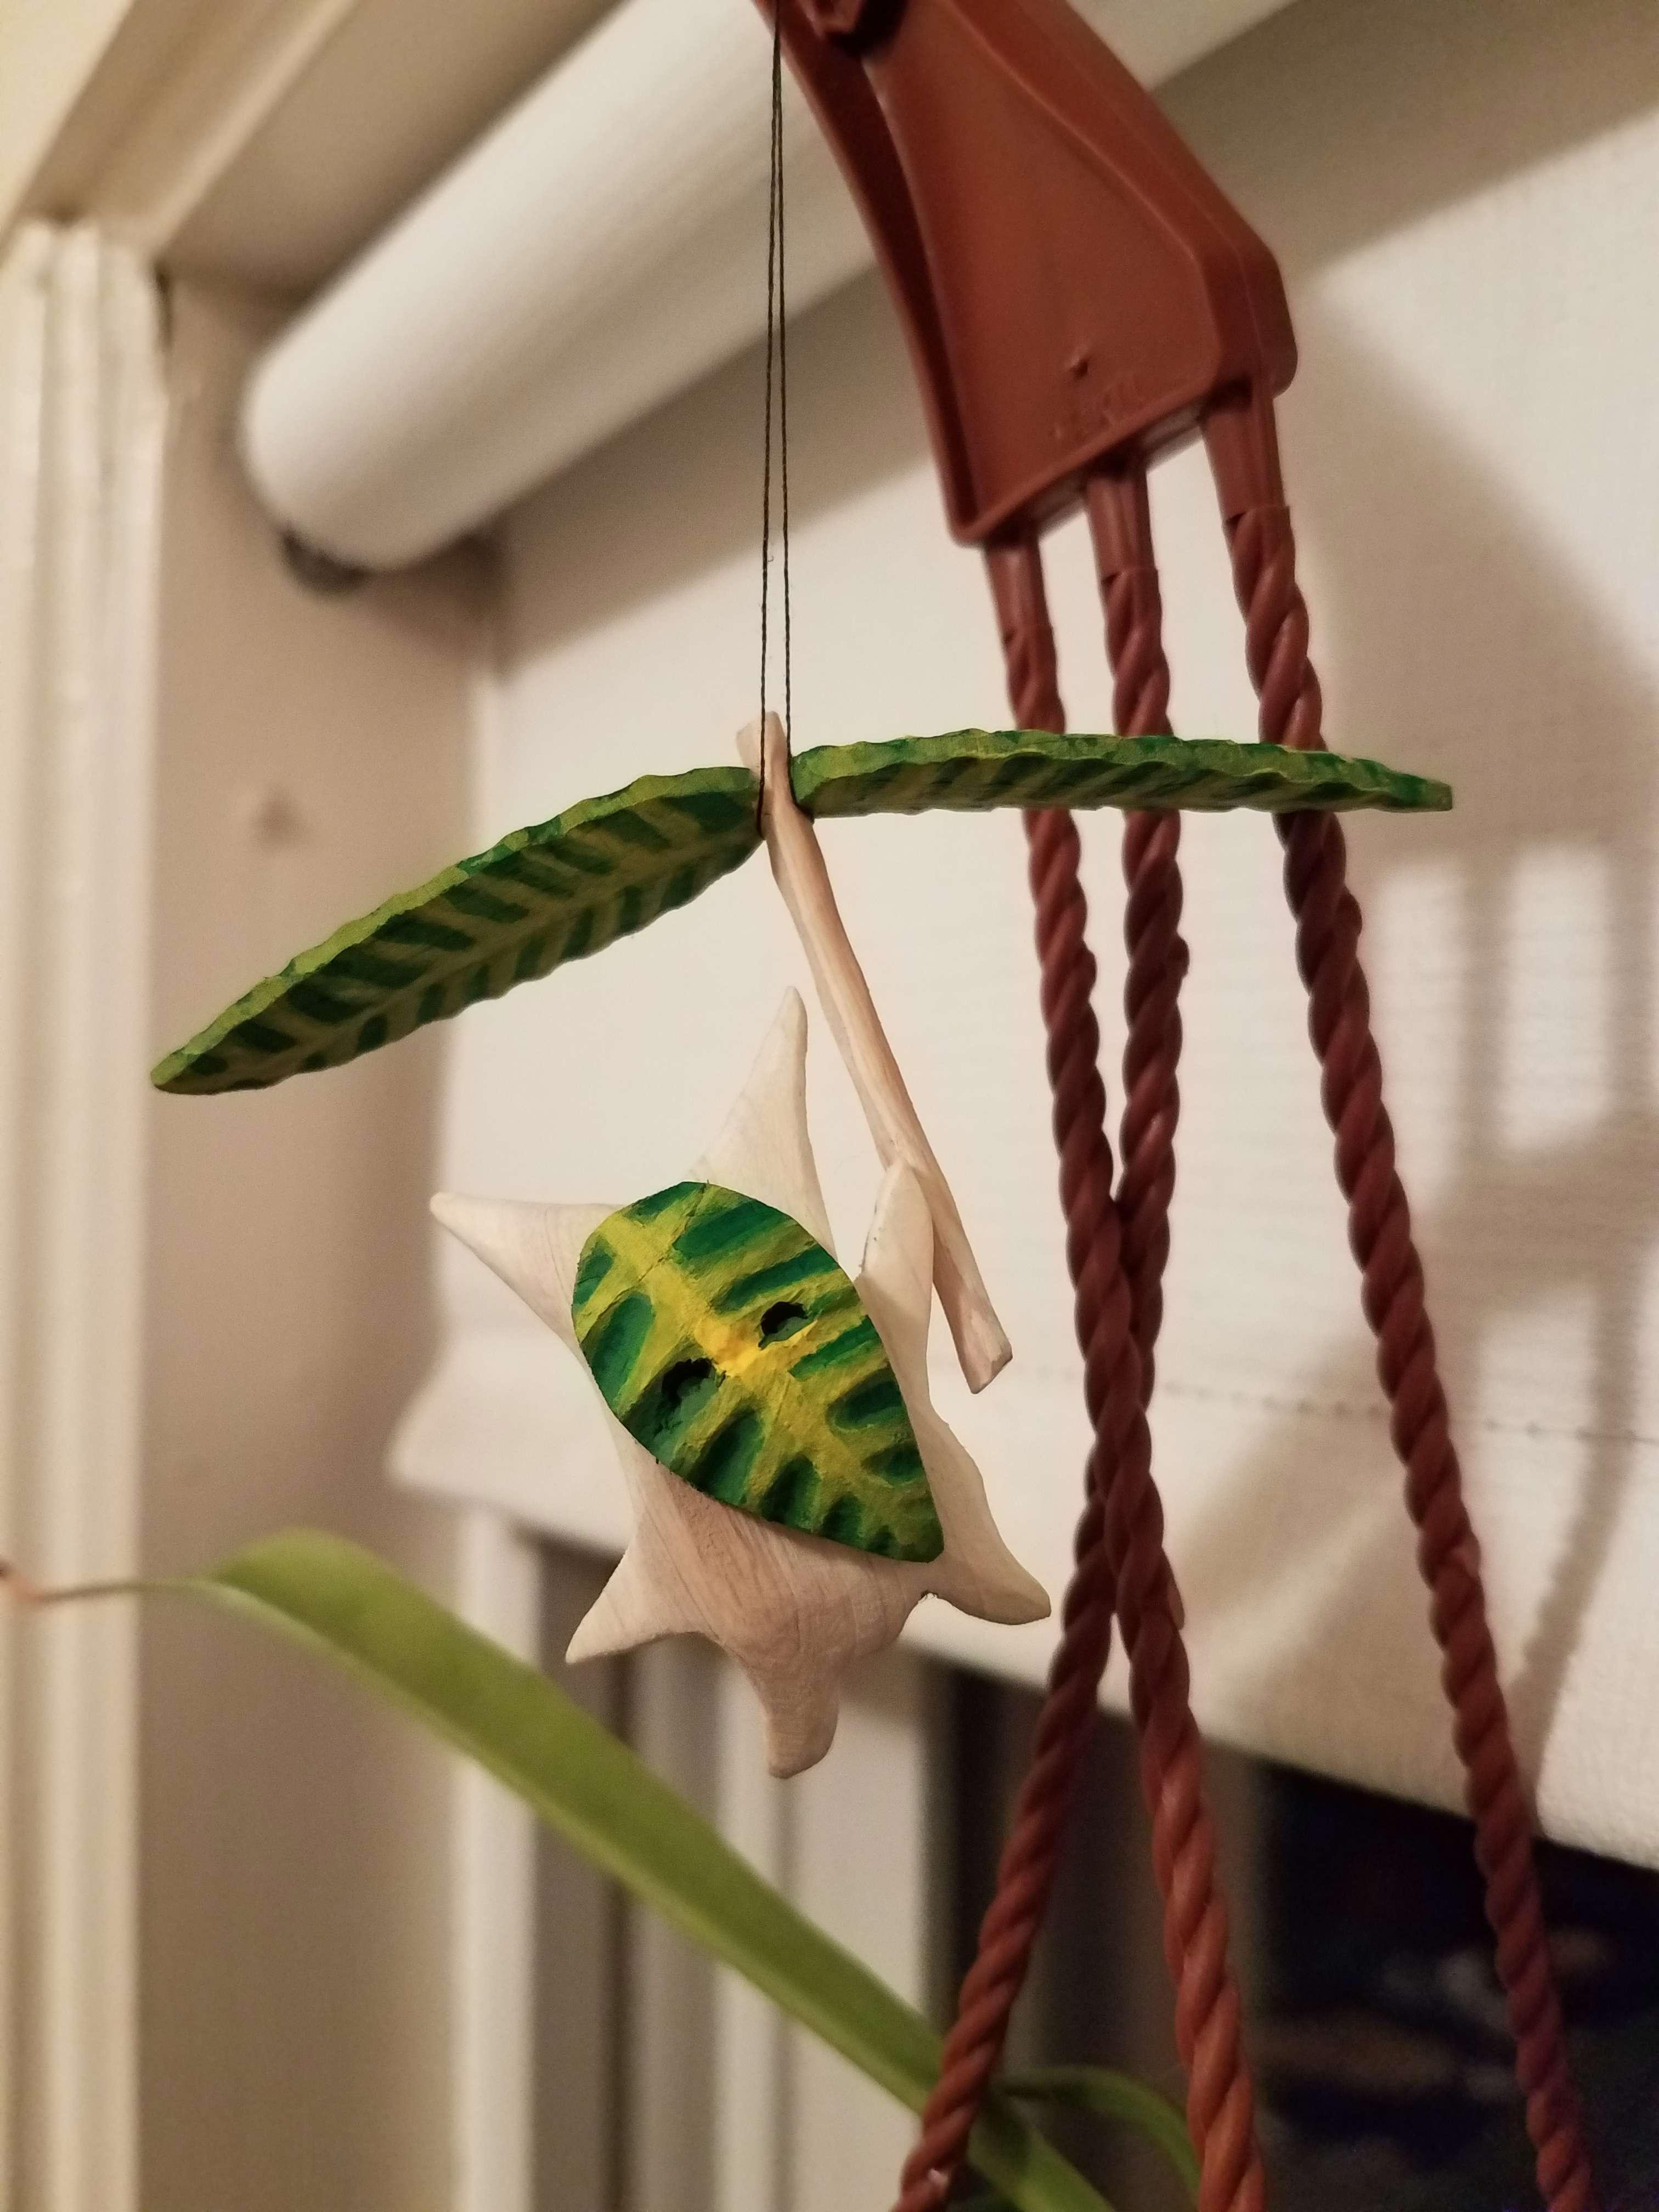
    the flying propeller korok dangling from a thread over a hanging, potted spiderplant

    yahaha!

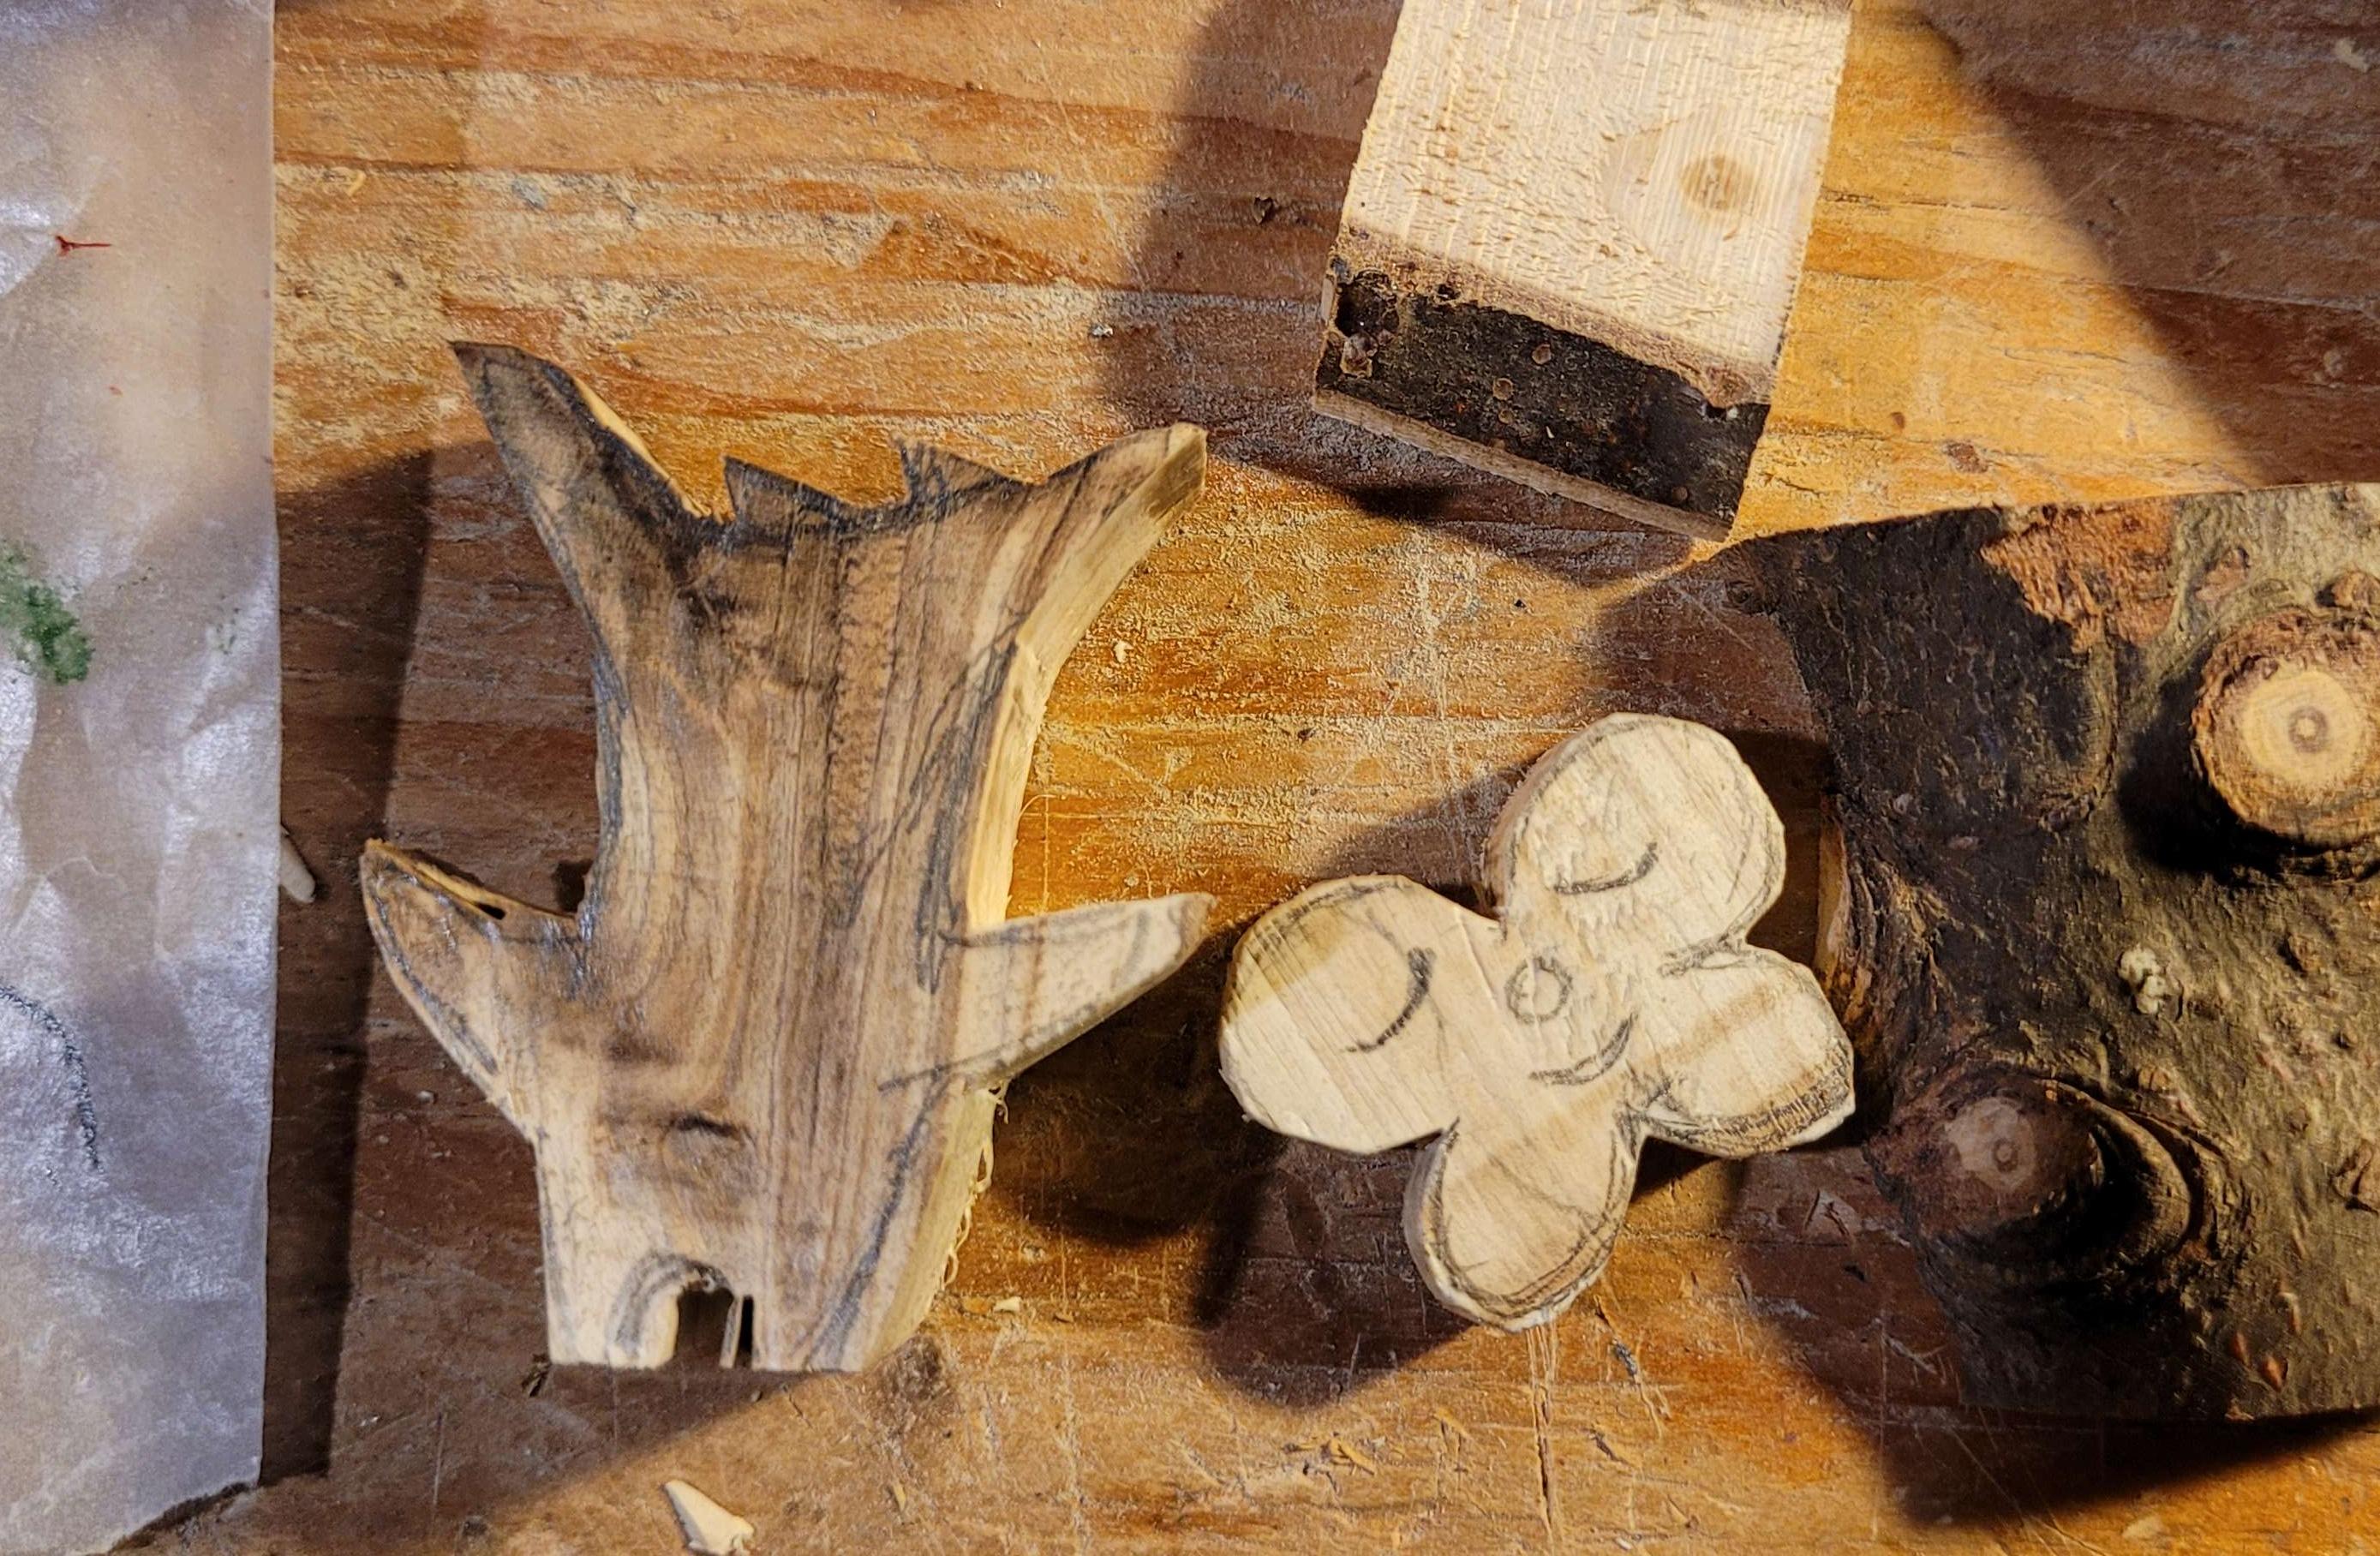
    the clover mask korok roughcut

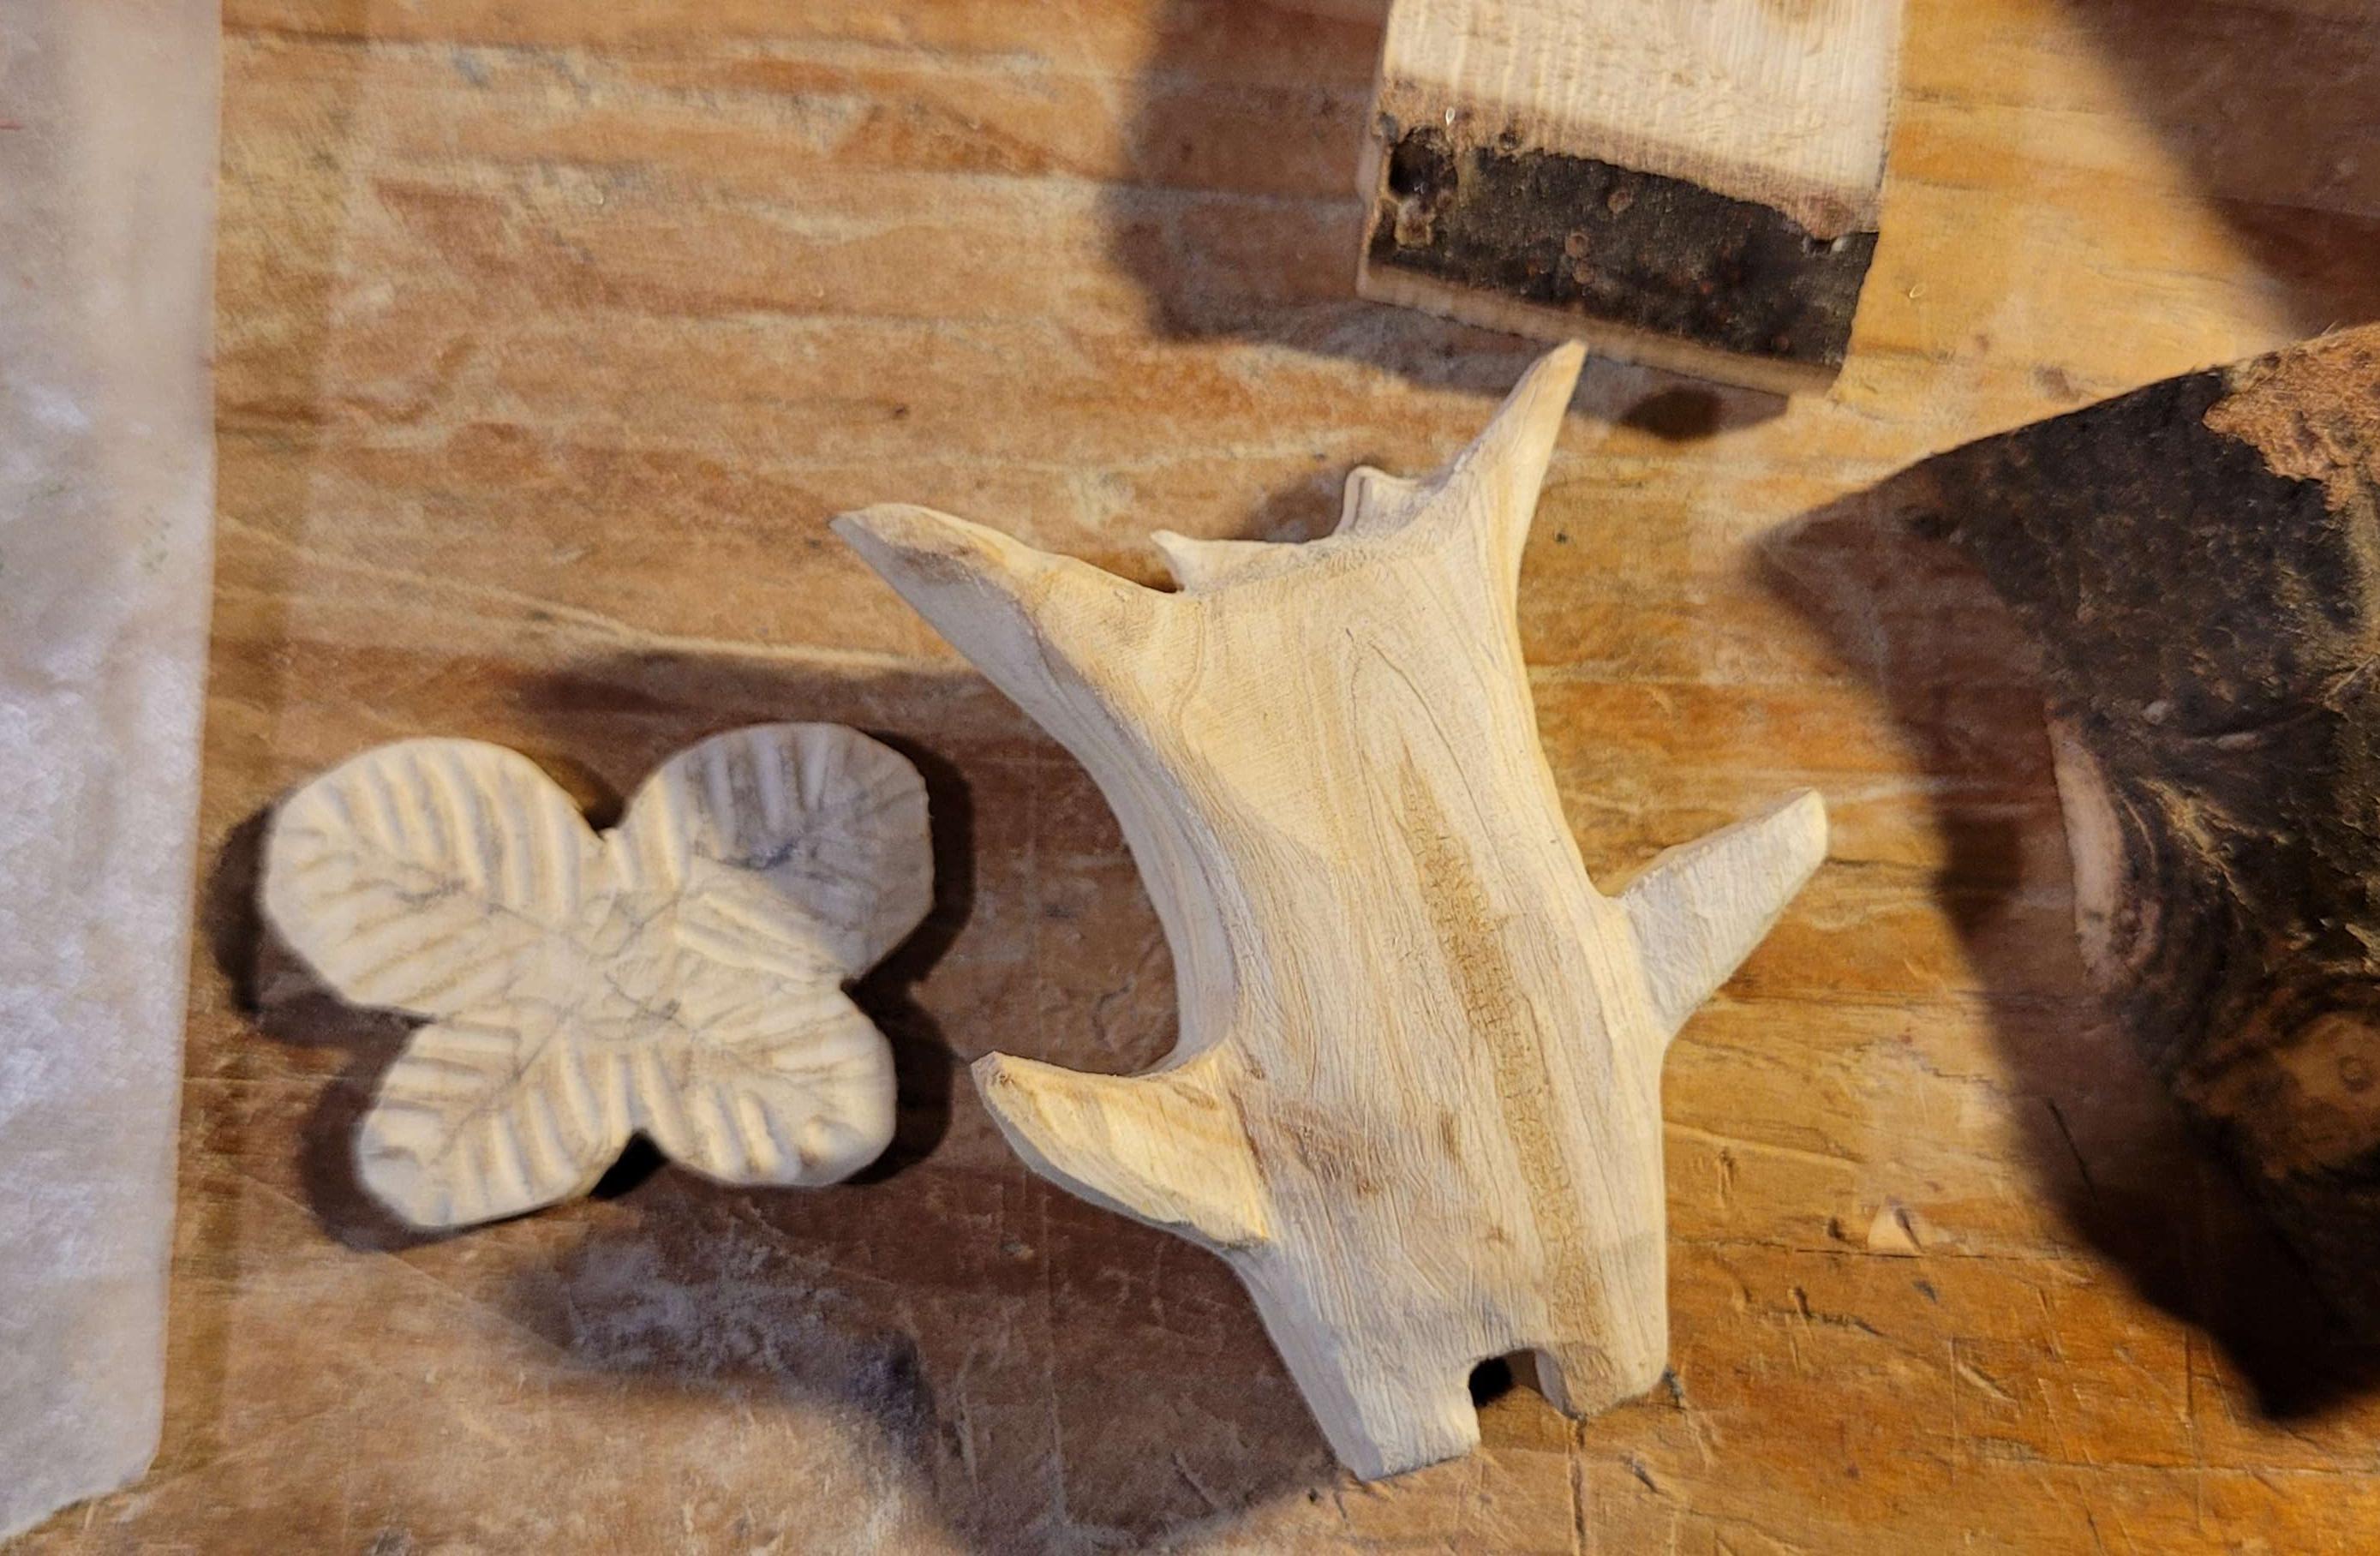
    carved down

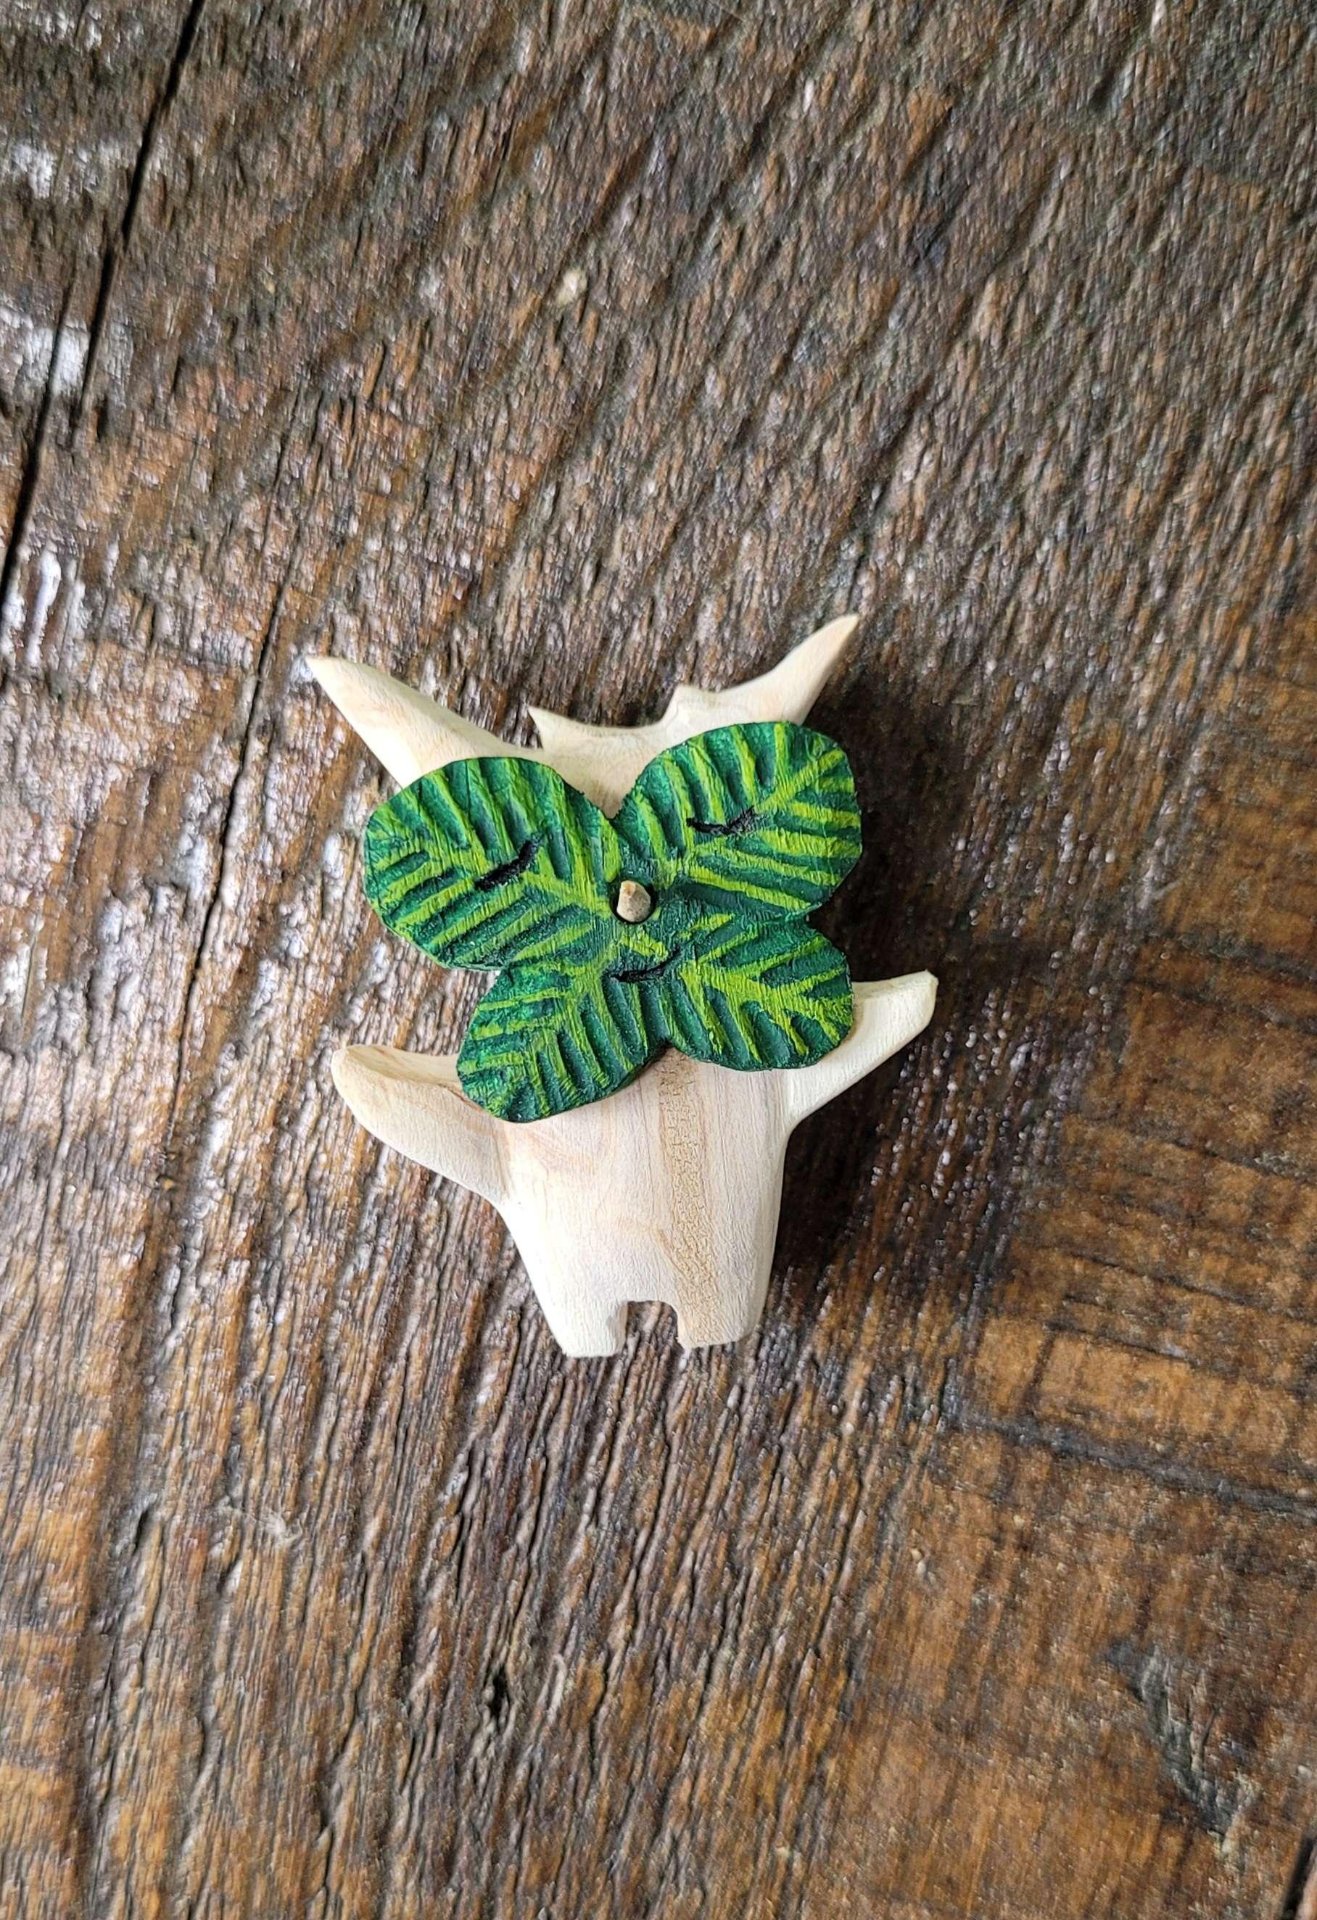
    painted

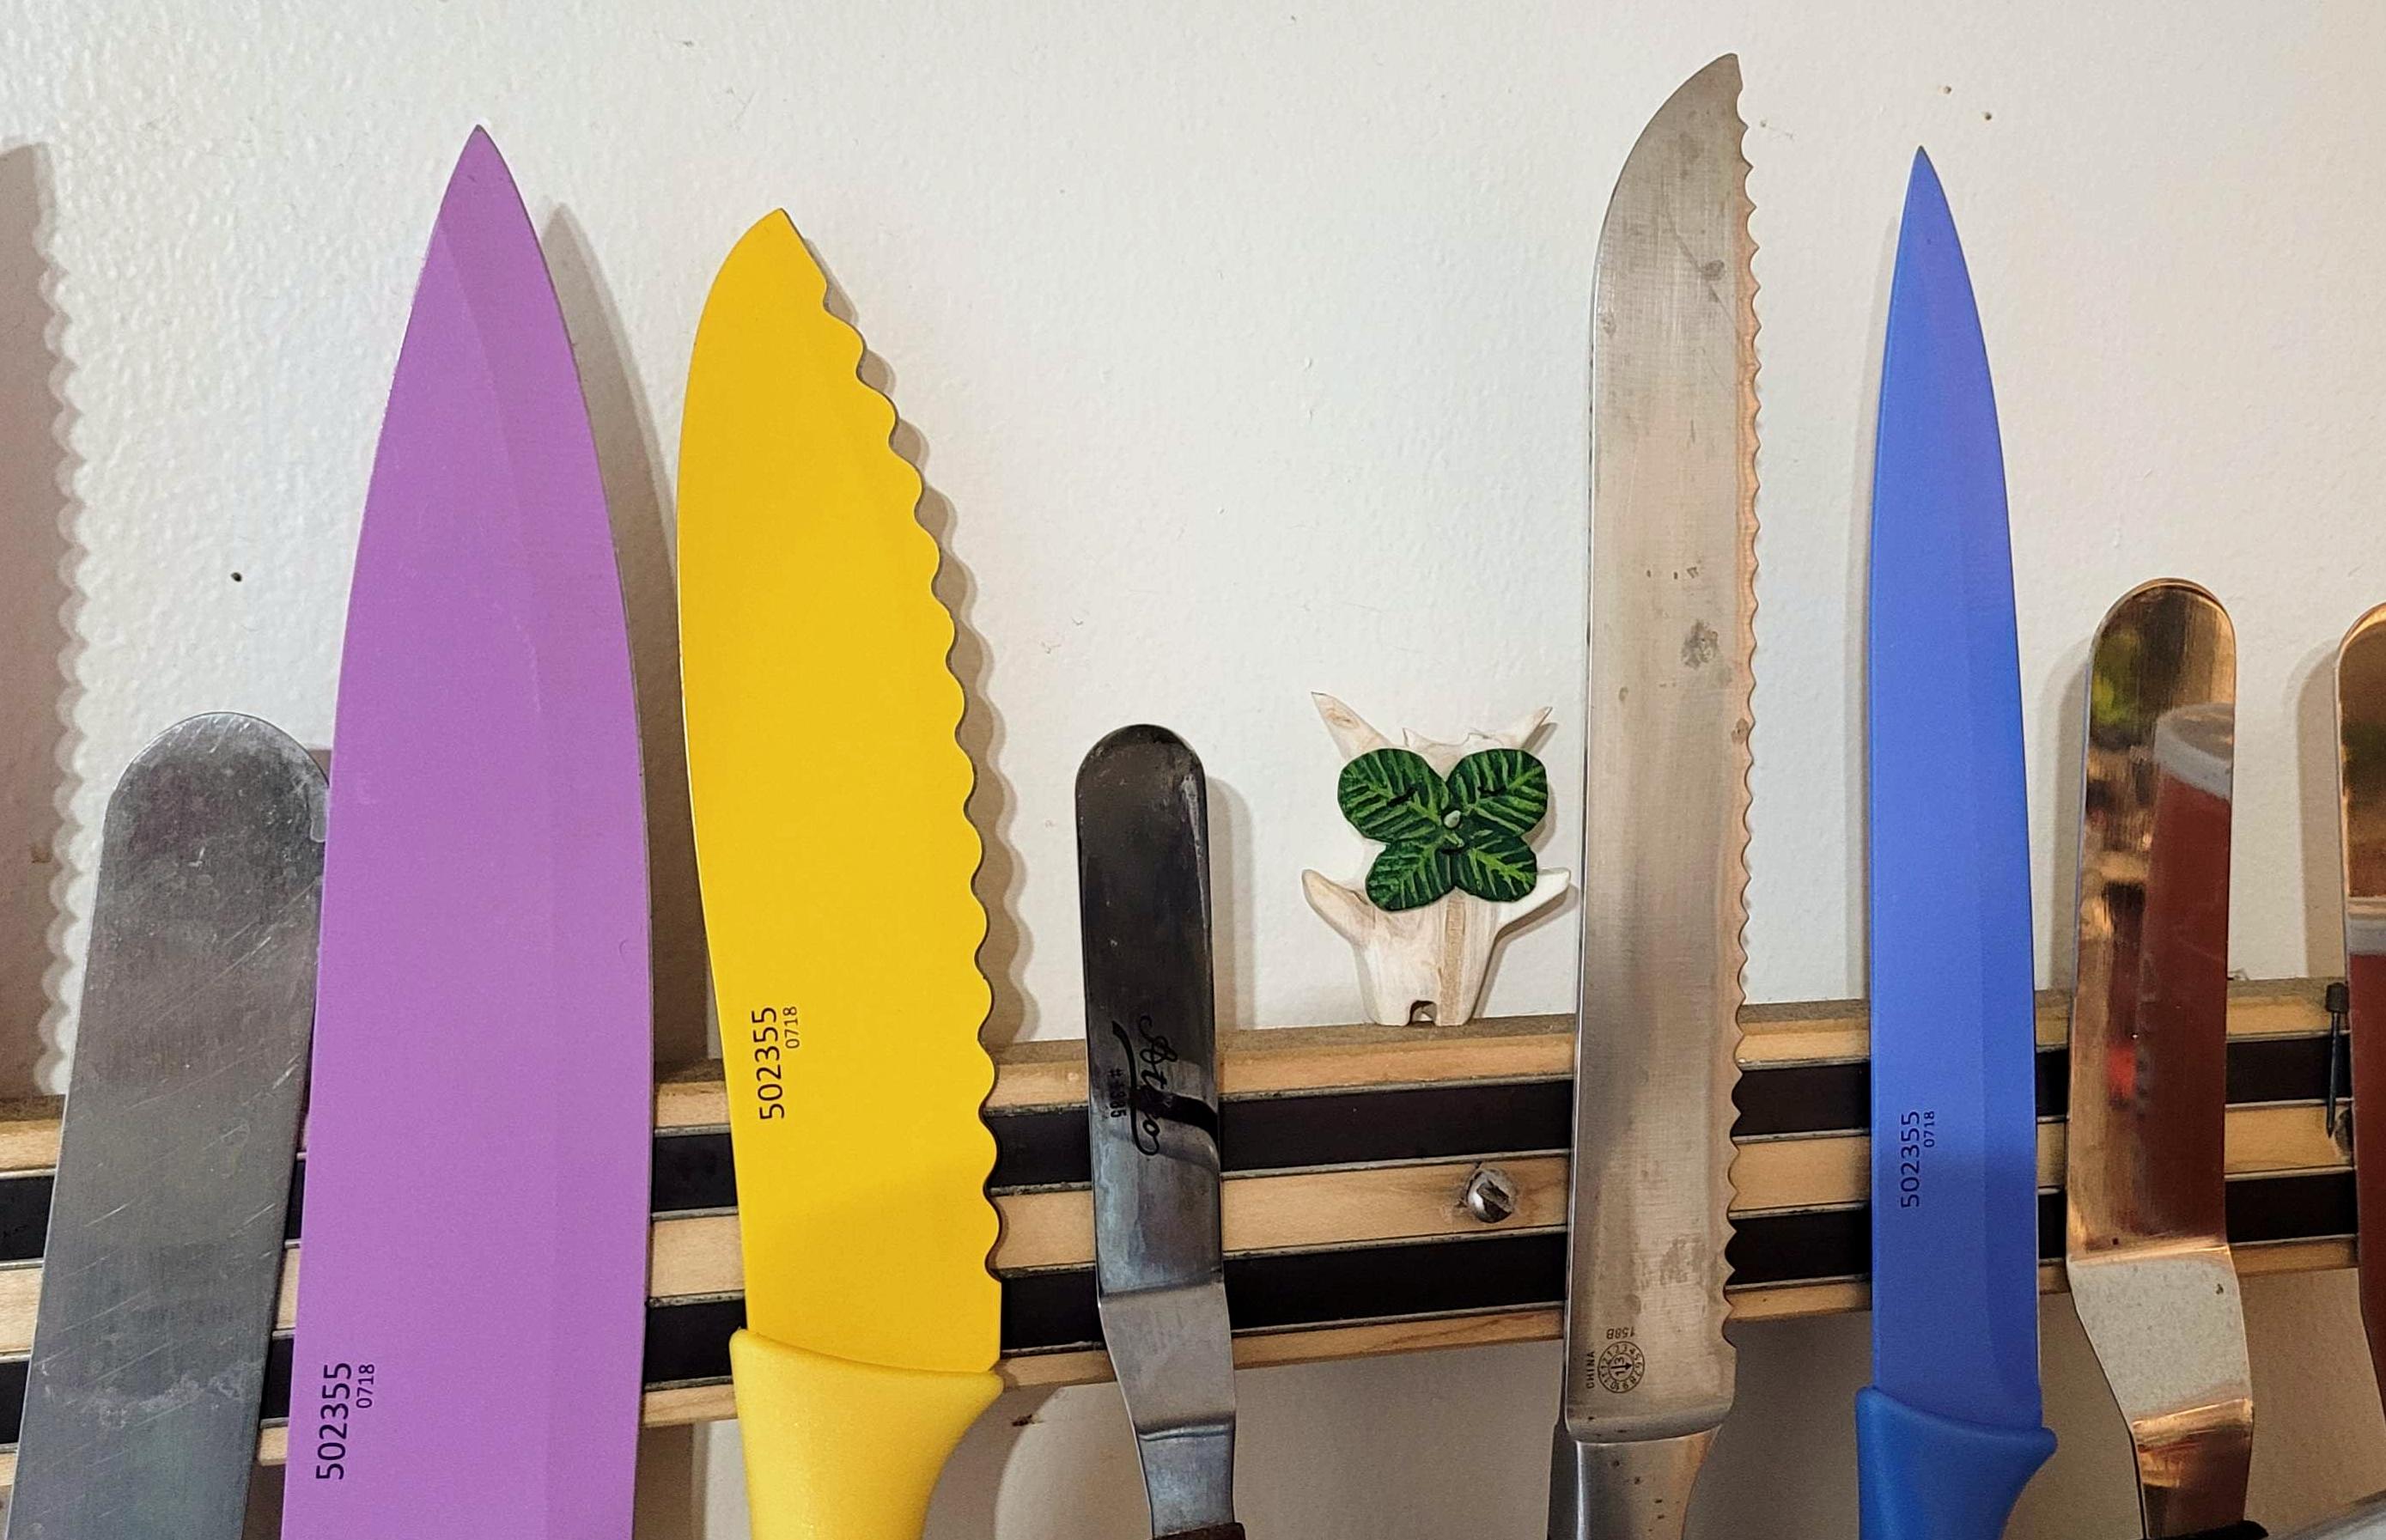
    the finished korok hiding in the knife rack

    Actually I think this was her favorite. She stopped mid-word and just pointed when she saw it.

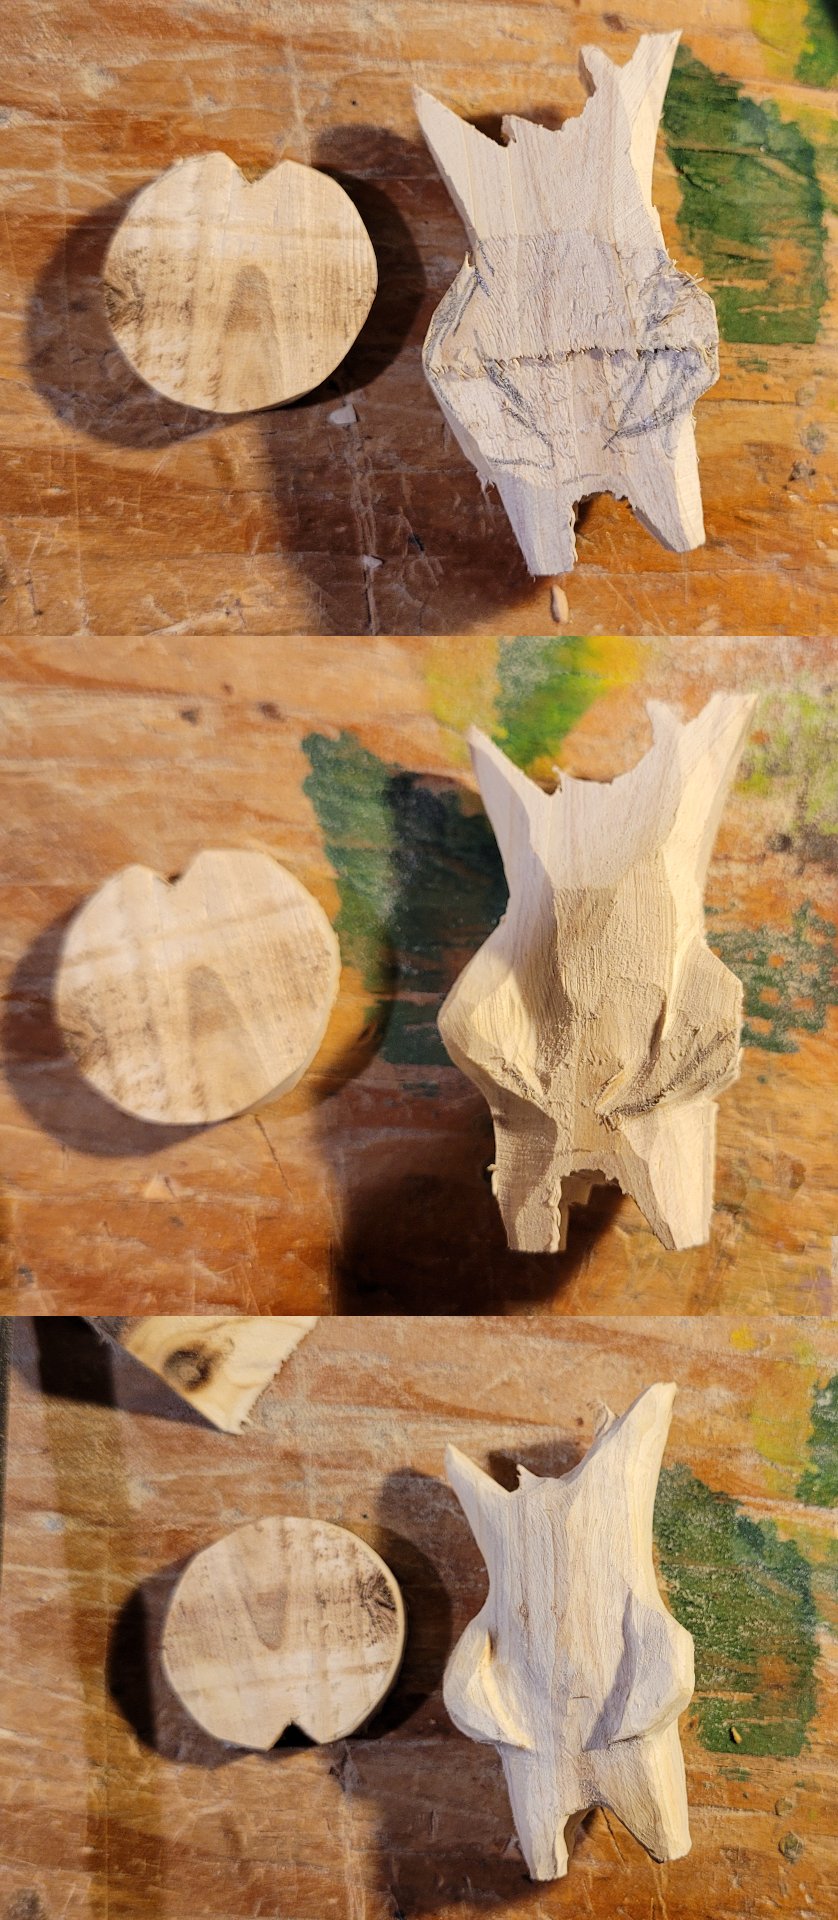
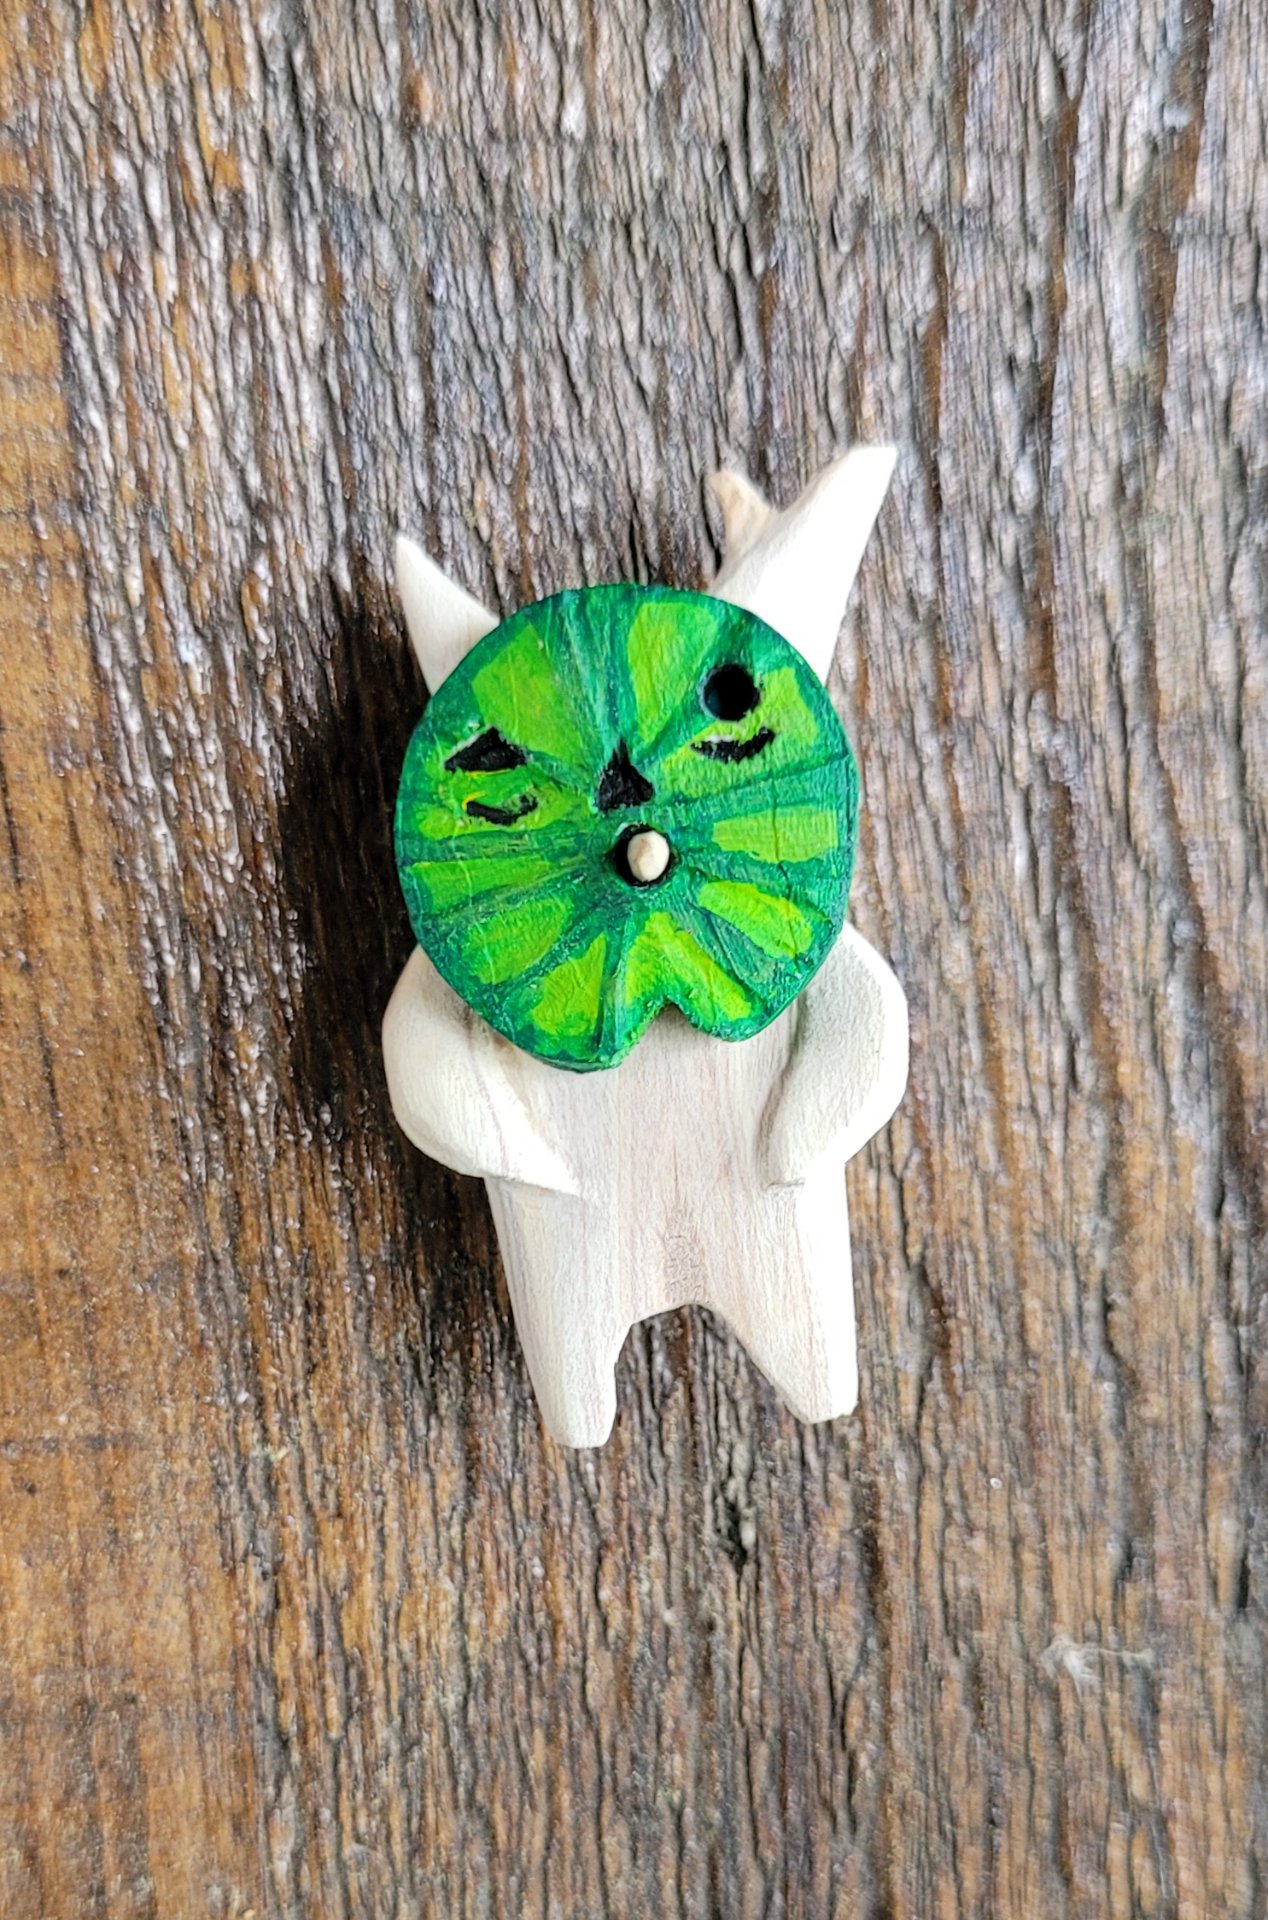
    a korok with a lillypad mask

    Once i got to the thinner area near the top of the tree, I had to change designs a little. Between these and a couple lathe projects, I've almost used up our 2020 tree.

    painted

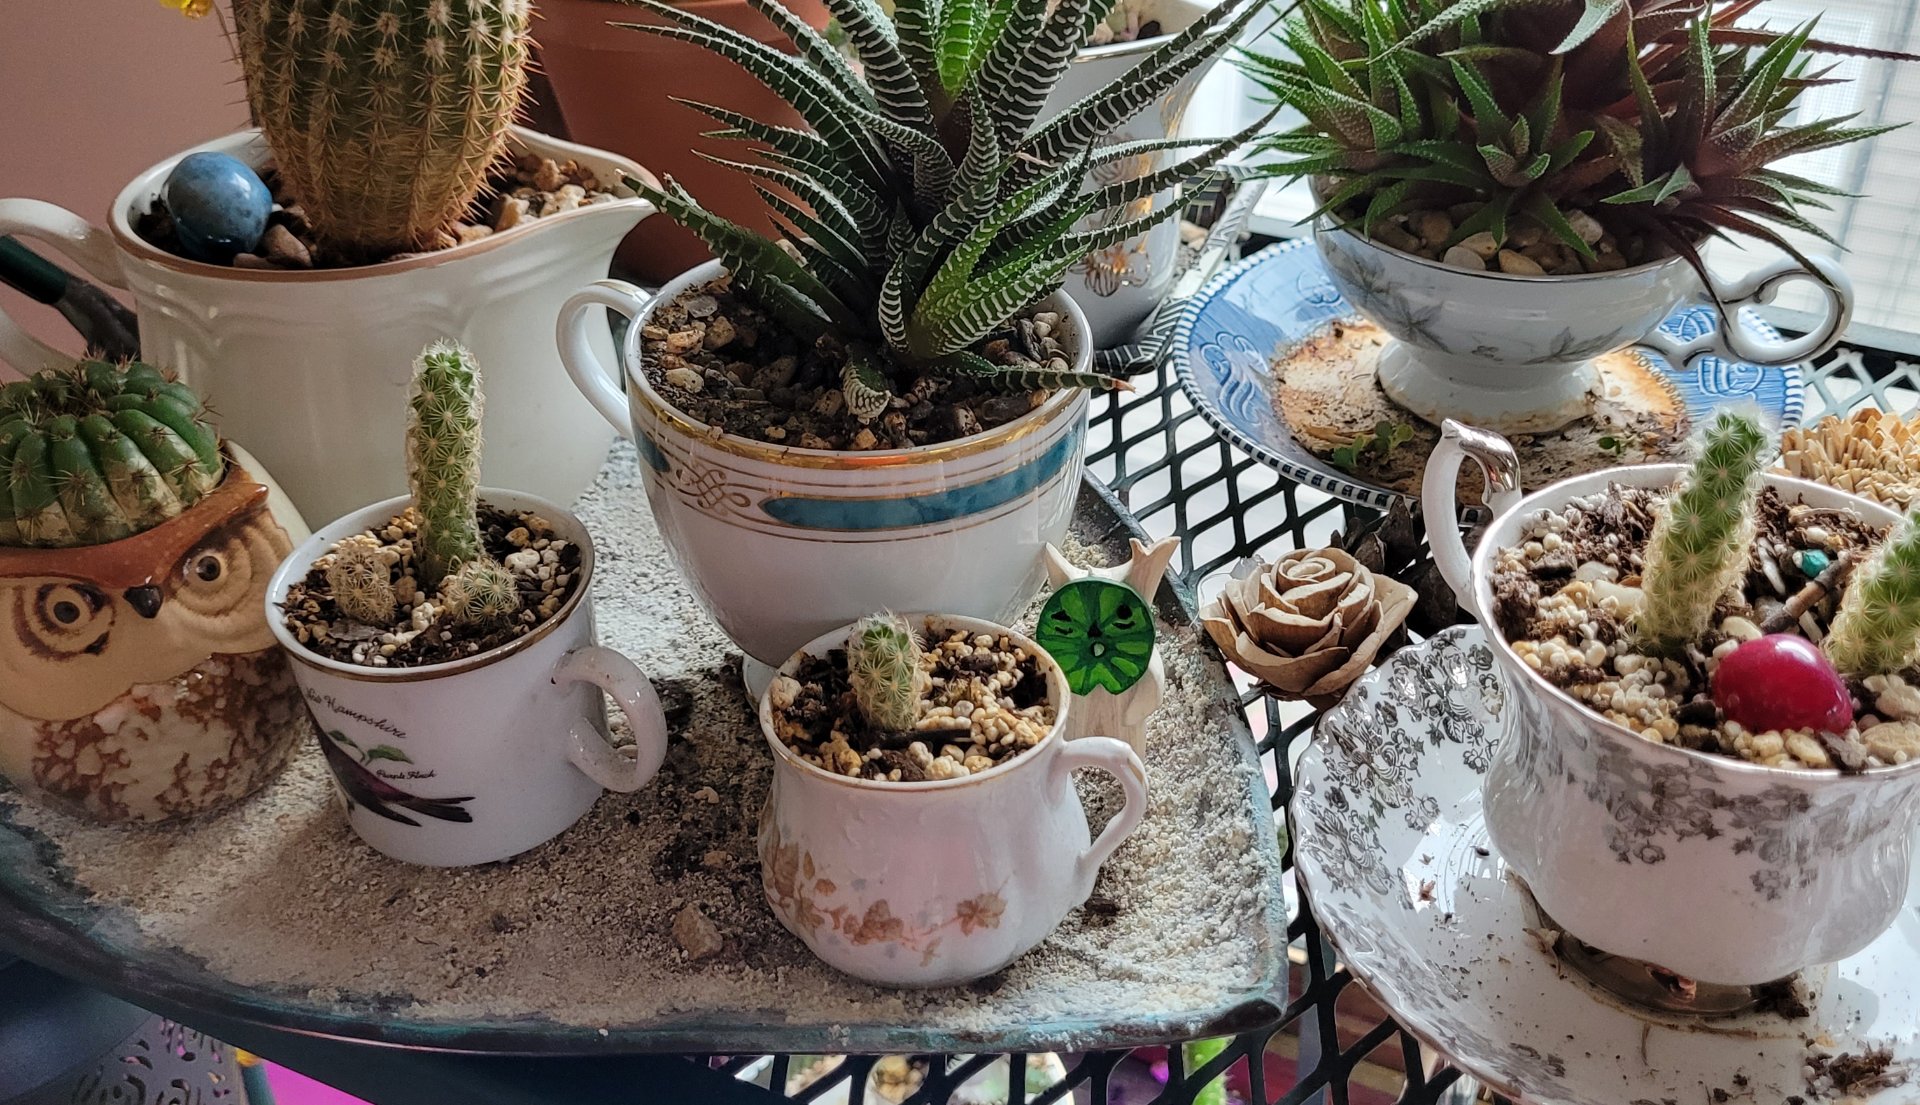
    the lillypad korok hiding behind a teacup plant pot

    This guy won't stay hidden long

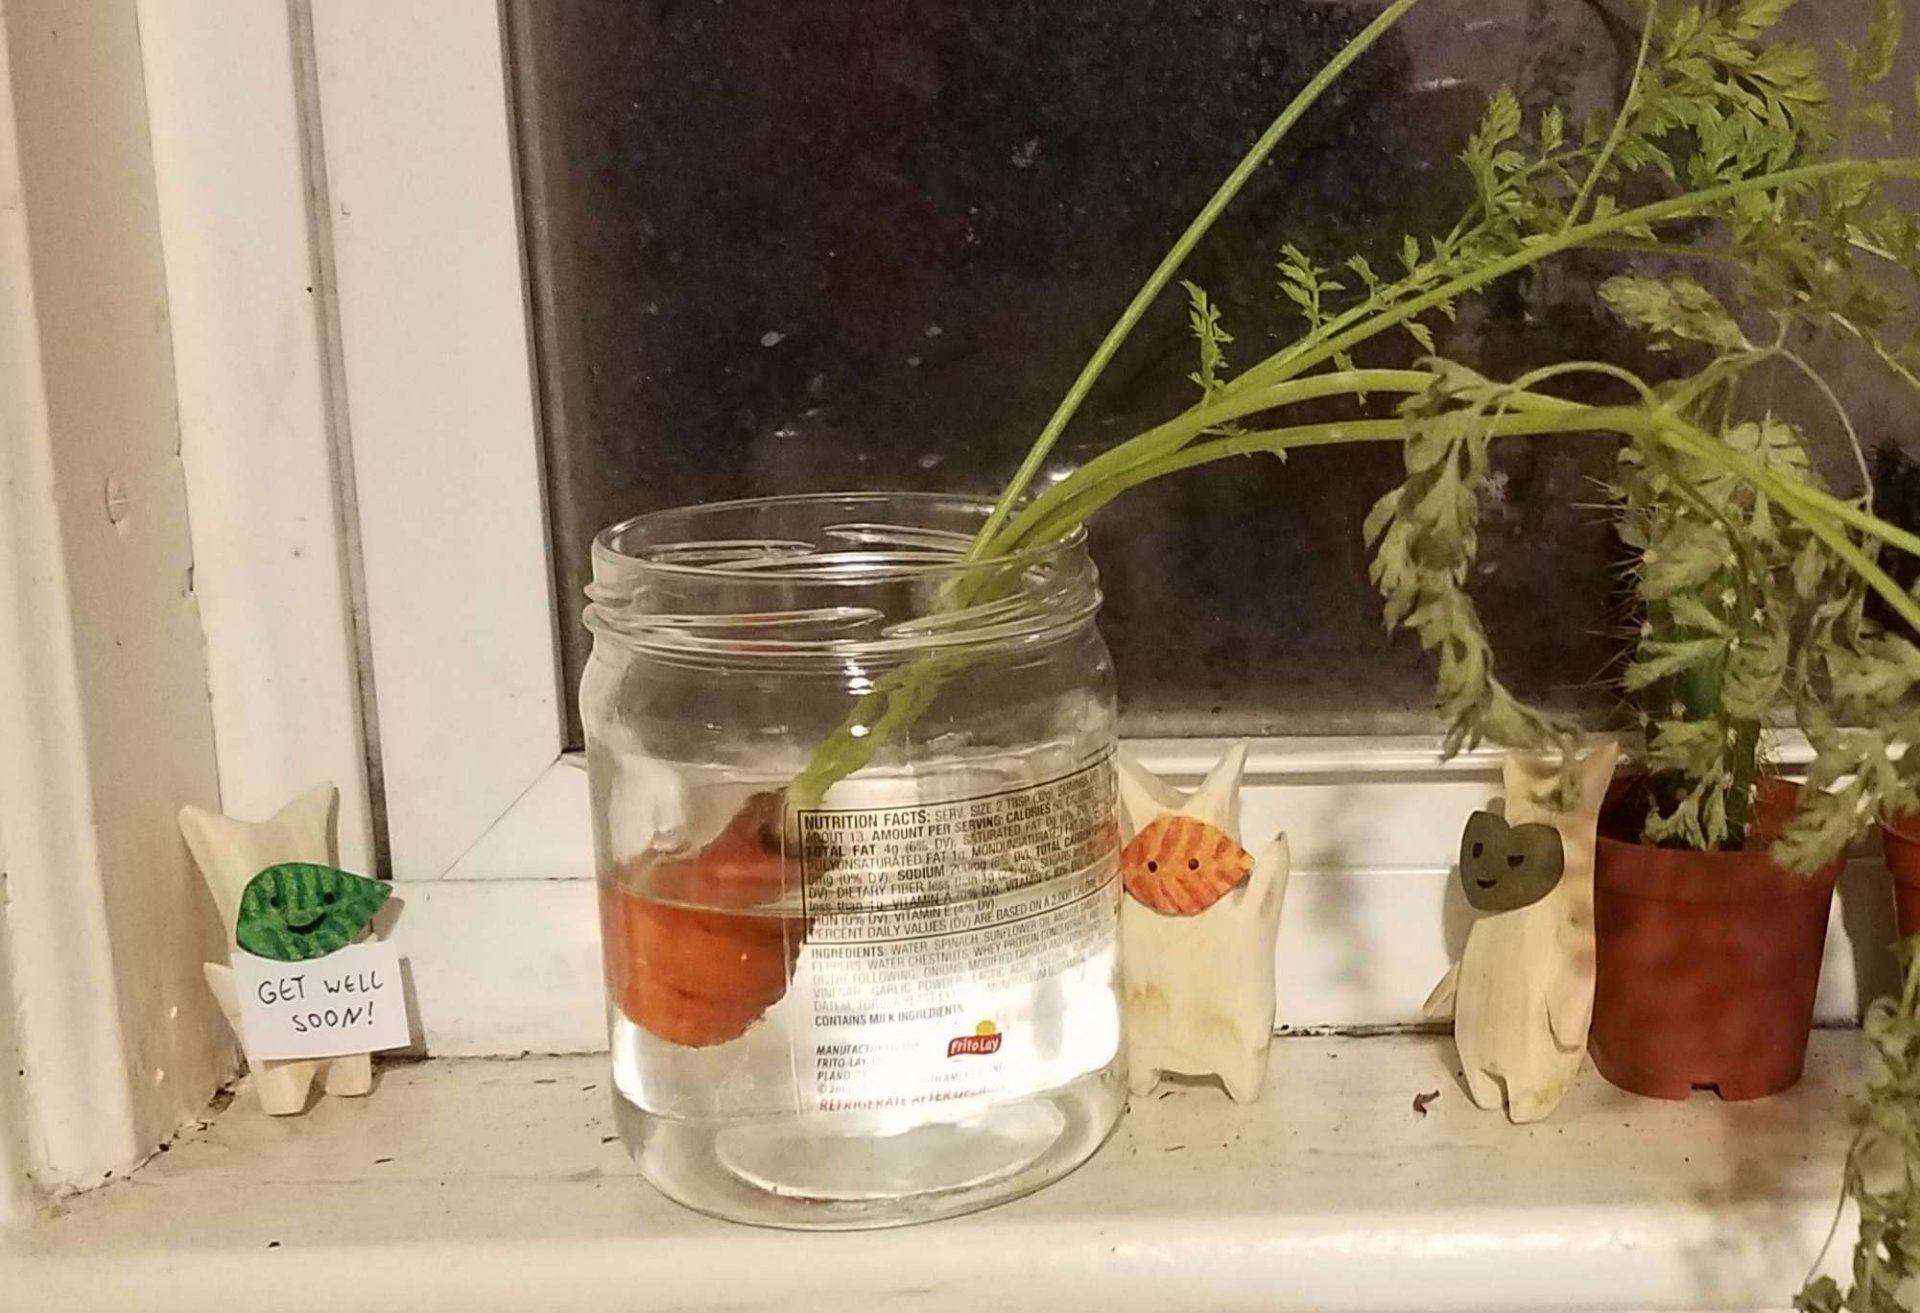
    plant hospital

    A few koroks after they were found (she sometimes puts them to work encouraging our plants). I think this was part of a plan to grow infinite carrots?

    a collection of the finished photos

    a bunch of them gathered for a party in the pantry

    #woodworking #carving #koroks #zerowaste

    • Pictures 40 image

    • visibility
    • visibility
    • visibility
    • visibility
    • visibility
    • visibility
    • visibility
    • visibility
    • visibility
    • visibility
    • visibility
    • visibility
    • visibility
    • visibility
    • visibility
    • visibility
    • visibility
    • visibility
    • visibility
    • visibility
    • visibility
    • visibility
    • visibility
    • visibility
    • visibility
    • visibility
    • visibility
    • visibility
    • visibility
    • visibility
    • visibility
    • visibility
    • visibility
    • visibility
    • visibility
    • visibility
    • visibility
    • visibility
    • visibility
    • visibility
    • favorite

      1 Like

      poVoq